How to install SOPlanning on Ubuntu 18.04 LTS
SOPlanning is a free, open source and easy to use Online Planning tool specially designed to efficiently organize projects and tasks. You can assign work to each member of your team, regardless of your activity. SoPlanning also offers email notification, synchronization with Google Calendar and Outlook for greater efficiency. SoPlanning is an open source tool, so you can customize the logo and the colors correspond to your company. SoPlanning mostly used in the production plant, material reservation, online booking system, IT project management, Industrial production, Sales team and much more.
In this tutorial, I am going to explain how to install SOPlanning with Apache, MariaDB and PHP on Ubuntu 18.04 LTS server.
Requirements
- A server running Ubuntu 18.04 LTS.
- A non-root user with sudo privileges.
Install LAMP Server
Before starting, you will need to install Apache web server, MariaDB and PHP to your system. First, install Apache and MariaDB with the following command:
sudo apt-get install apache2 mariadb-server -y
Once the installation has been completed, you will need to add Ondrej PHP repository to your system. SoPlanning does not support PHP 7.2 yet, so we will install PHP 7.1 from Ondrej repository. You can add it with the following command:
sudo add-apt-repository ppa:ondrej/php
Press <ENTER>, when the PPA installer asks for confirmation. Next, install PHP with all the required dependencies by running the following command:
sudo apt-get install php7.1 php7.1-mysql php7.1-curl php7.1-json php7.1-cgi php7.1-recode php7.1-sq php7.1-intl libapache2-mod-php7.1 php7.1-mcrypt php7.1-xmlrpc php7.1-gd php7.1-mbstring php7.1 php7.1-common php7.1-xmlrpc php7.1-soap php7.1-xml php7.1-intl php7.1-cli php7.1-ldap php7.1-zip php7.1-readline php7.1-imap php7.1-tidy -y
Once all the packages are installed, start Apache and MariaDB service and enable them to start on boot time with the following command:
sudo systemctl start apache2
sudo systemctl enable apache2
sudo systemctl start mariadb
sudo systemctl enable mariadb
Create a database user and database for SoPlanning. Log in to MariaDB as root user:
mysql -u root -p
and create a new database and database user named 'soplanning' with password 'soplanning-pass'.
CREATE DATABASE soplanning;
GRANT ALL PRIVILEGES ON soplanning.* TO 'soplanning'@'localhost' IDENTIFIED BY 'soplanning-pass';
FLUSH PRIVILEGES;
quit
Install SoPlanning
First, download the latest version of SoPlanning from Source Forge using the following command:
cd /tmp
wget https://excellmedia.dl.sourceforge.net/project/soplanning/soplanning/v1.42/soplanning-1-42.zip
Next, unzip the downloaded file:
unzip soplanning-1-42.zip
Next, copy extracted directory to the Apache web root directory:
sudo cp -r soplanning /var/www/html/soplanning
Next, give proper ownership and permission with the following command:
sudo chown -R www-data.www-data /var/www/html/soplanning
sudo chmod -R 775 /var/www/html/soplanning
Configure Apache for SoPlanning
Next, you will need to create an Apache virtual host for SoPlanning. You can do this with the following command:
sudo nano /etc/apache2/sites-available/soplanning.conf
Add the following lines:
<VirtualHost *:80>
ServerName example.com
ServerAdmin [email protected]
DocumentRoot /var/www/html/soplanning/

<Directory /var/www/html/soplanning/>
AllowOverride All
Order allow,deny
allow from all
</Directory>

ErrorLog /var/log/apache2/soplanning_error.log
CustomLog /var/log/apache2/soplanning_custom.log combined

</VirtualHost>
Save and close the file, then enable Apache virtual host file and Apache rewrite module with the following command:
sudo a2ensite soplanning.conf
sudo a2enmod rewrite
Finally, restart Apache web service to apply the changes:
sudo systemctl restart apache2
Access SoPlanning
Now, open your web browser and type the URL http://example.com. You will be redirected to the following page:
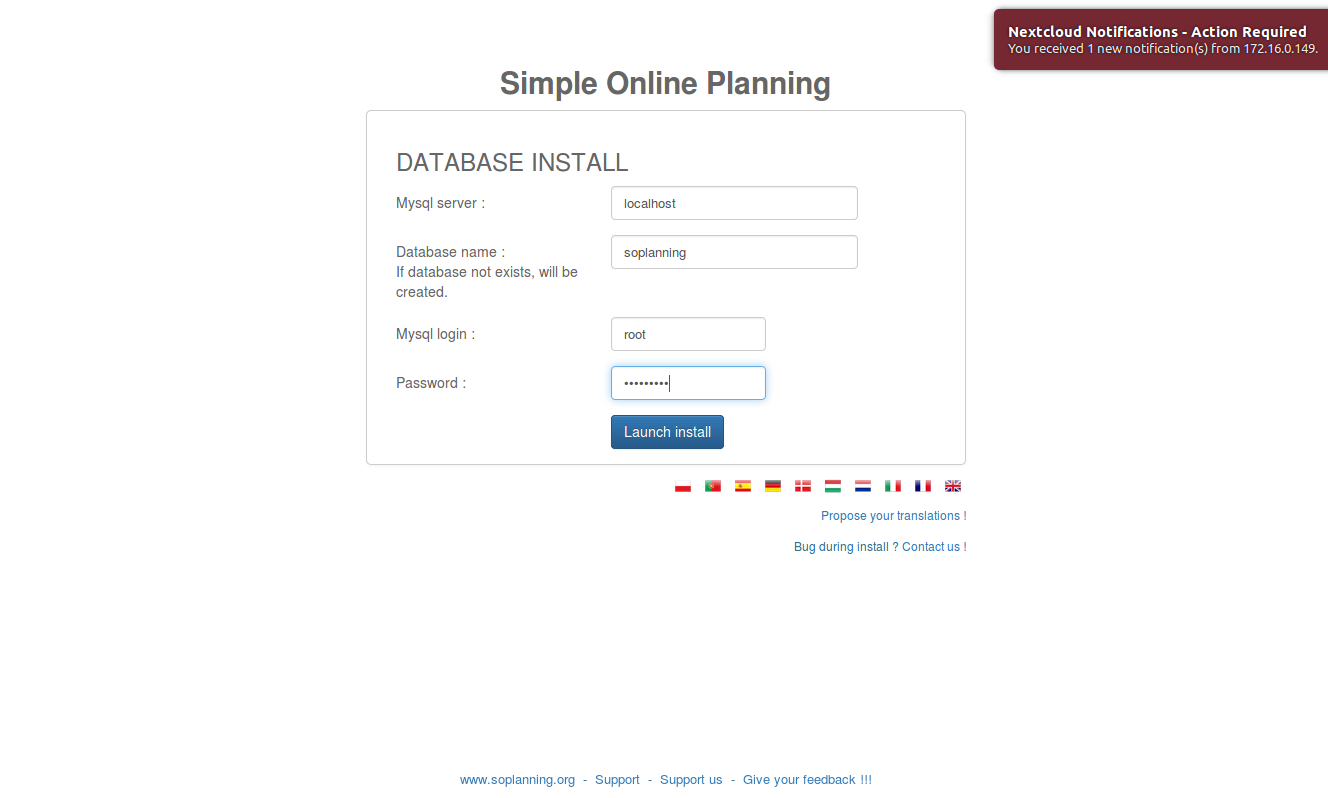
Here, provide the database name, your root user and root password, then click on the Launch install button. You should see the following page:
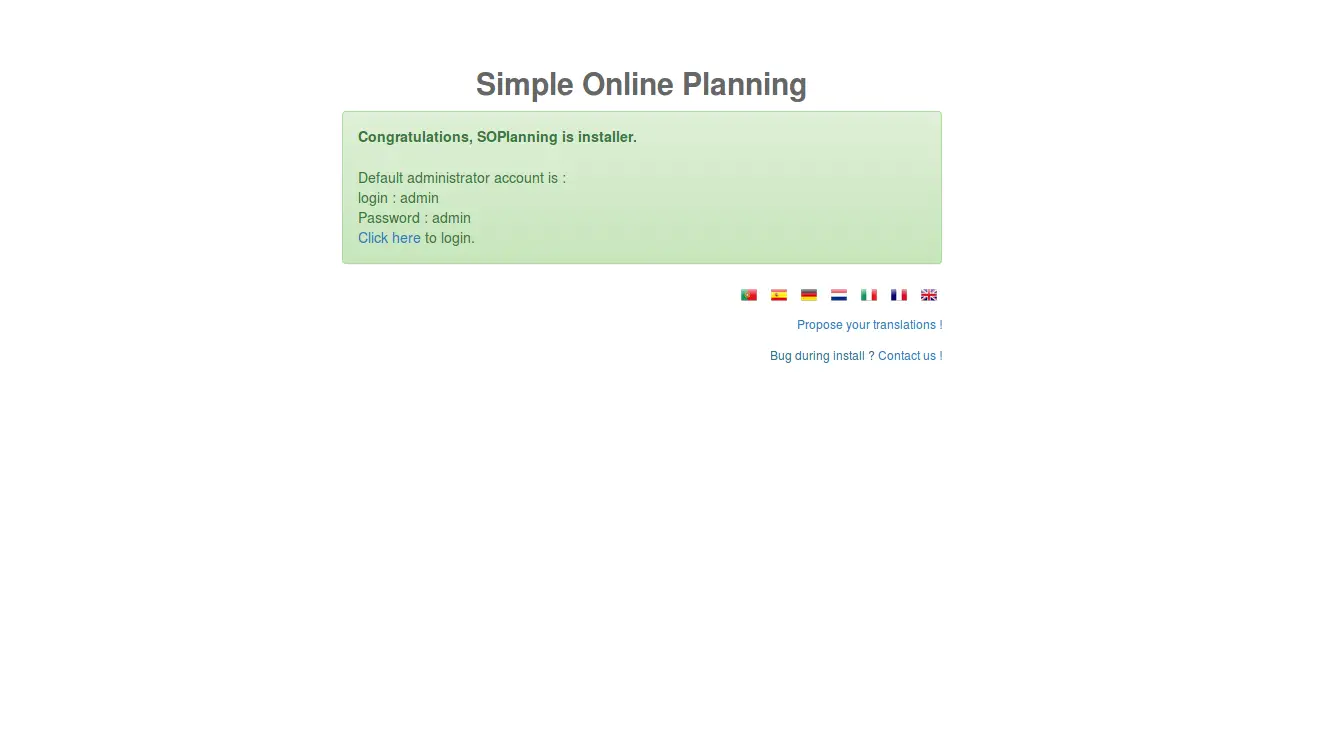
Now, click on the Click here button. You will be redirected to the SoPlanning login page:
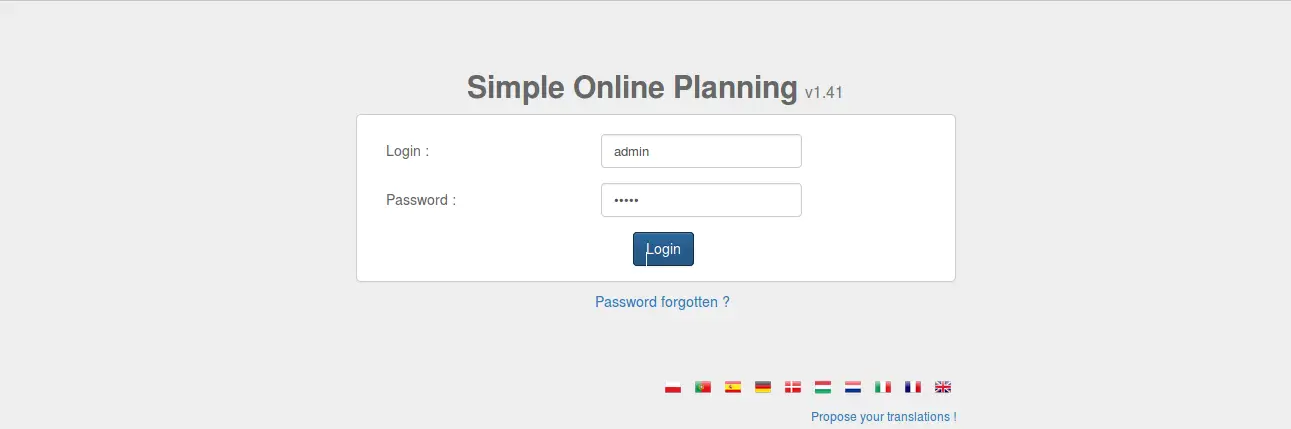
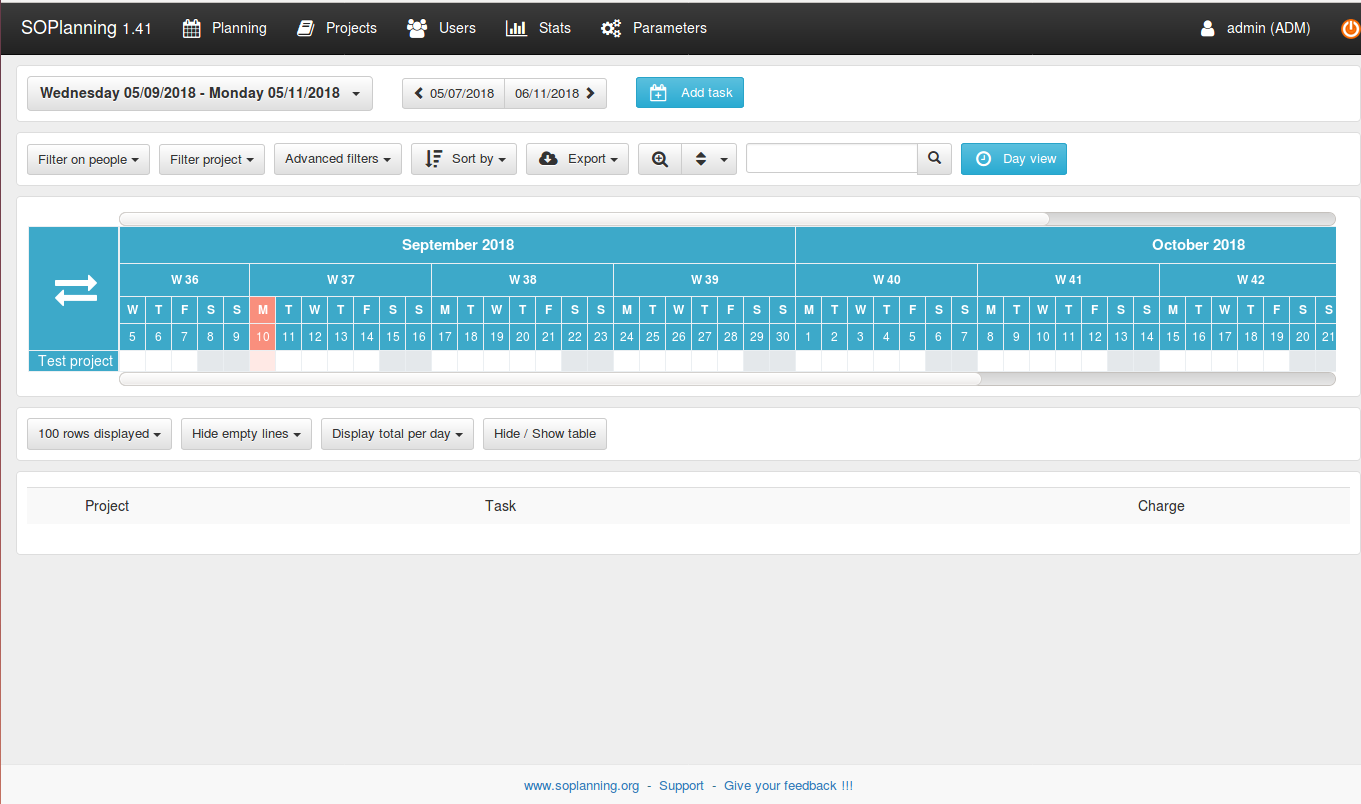
Here, provide your admin username and password, then click on the Login button. You should see the SoPlanning dashboard in the following screen:
Virtual machine image download of this tutorial
This tutorial is available as ready to use virtual machine image in ovf/ova format that is compatible with VMWare and Virtualbox. The virtual machine image uses the following login details:
SSH / Shell Login
Username: administrator
Password: howtoforge
This user has sudo rights.
SoPlanning Login
Username: admin
Password: admin
MySQL Login
Username: root
Password: howtoforge
The IP of the VM is 192.168.1.100, it can be changed in the file /etc/netplan/01-netcfg.yaml. Please change all the above passwords to secure the virtual machine.
Links
- Download SoPlanning

