
We have reached a point in time where most every computer user depends upon the cloud … even if only as a storage solution. What makes the cloud really important to users, is when it’s employed as a backup. Why is that such a game changer? By backing up to the cloud, you have access to those files, from any computer you have associated with your cloud account. And because Linux powers the cloud, many services offer Linux tools.
Let’s take a look at five such tools. I will focus on GUI tools, because they offer a much lower barrier to entry to many of the CLI tools. I’ll also be focusing on various, consumer-grade cloud services (e.g., Google Drive, Dropbox, Wasabi, and pCloud). And, I will be demonstrating on the Elementary OS platform, but all of the tools listed will function on most Linux desktop distributions.
Note: Of the following backup solutions, only Duplicati is licensed as open source. With that said, let’s see what’s available.
Insync
I must confess, Insync has been my cloud backup of choice for a very long time. Since Google refuses to release a Linux desktop client for Google Drive (and I depend upon Google Drive daily), I had to turn to a third-party solution. Said solution is Insync. This particular take on syncing the desktop to Drive has not only been seamless, but faultless since I began using the tool.
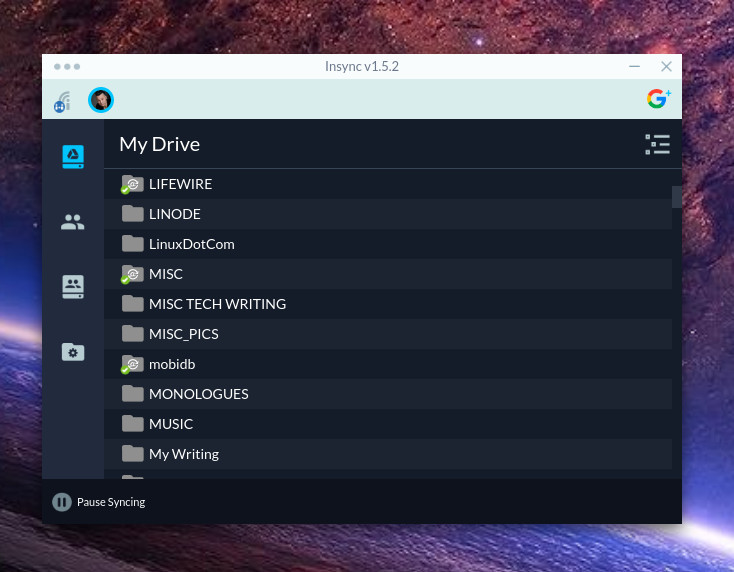
The cost of Insync is a one-time $29.99 fee (per Google account). Trust me when I say this tool is worth the price of entry. With Insync you not only get an easy-to-use GUI for managing your Google Drive backup and sync, you get a tool (Figure 1) that gives you complete control over what is backed up and how it is backed up. Not only that, but you can also install Nautilus integration (which also allows you to easy add folders outside of the configured Drive sync destination).
You can download Insync for Ubuntu (or its derivatives), Linux Mint, Debian, and Fedora from the Insync download page. Once you’ve installed Insync (and associated it with your account), you can then install Nautilus integration with these steps (demonstrating on Elementary OS):
-
Open a terminal window and issue the command sudo nano /etc/apt/sources.list.d/insync.list.
-
Paste the following into the new file: deb http://apt.insynchq.com/ubuntu precise non-free contrib.
-
Save and close the file.
-
Update apt with the command sudo apt-get update.
-
Install the necessary package with the command sudo apt-get install insync-nautilus.
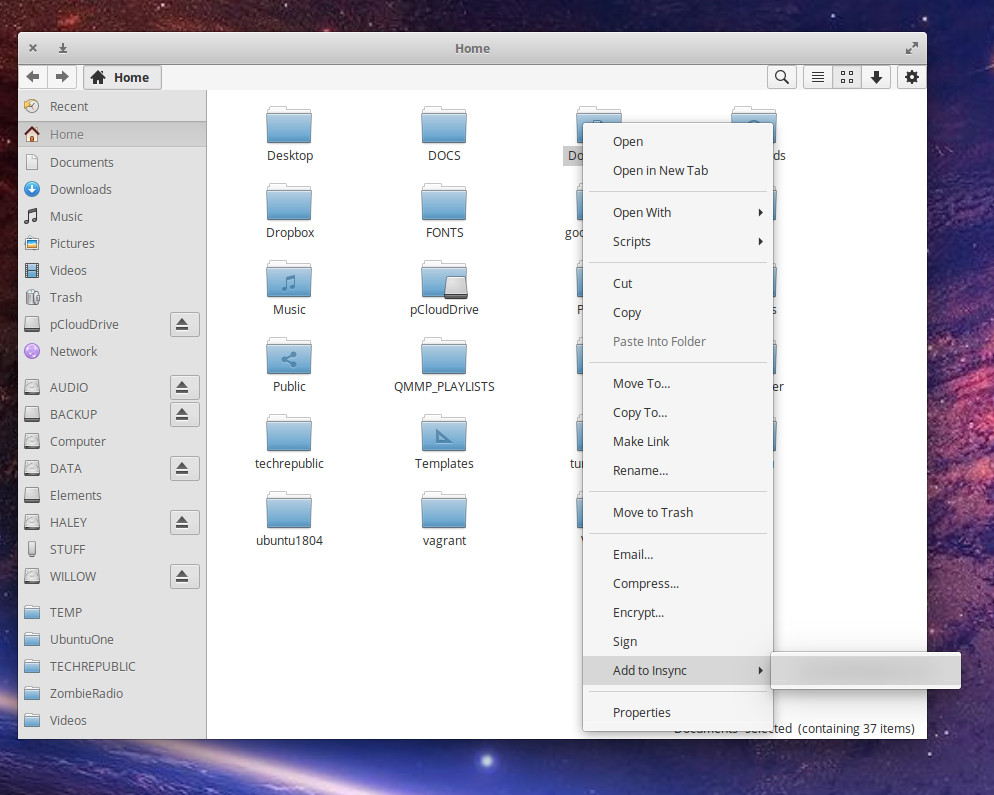
Allow the installation to complete. Once finished, restart Nautilus with the command nautilus -q (or log out and back into the desktop). You should now see an Insync entry in the Nautilus right-click context menu (Figure 2).
Dropbox
Although Dropbox drew the ire of many in the Linux community (by dropping support for all filesystems but unencrypted ext4), it still supports a great deal of Linux desktop deployments. In other words, if your distribution still uses the ext4 file system (and you do not opt to encrypt your full drive), you’re good to go.
The good news is the Dropbox Linux desktop client is quite good. The tool offers a system tray icon that allows you to easily interact with your cloud syncing. Dropbox also includes CLI tools and a Nautilus integration (by way of an additional addon found here).
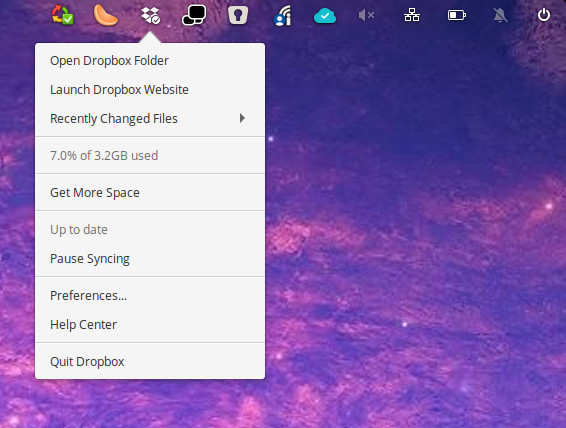
The Linux Dropbox desktop sync tool works exactly as you’d expect. From the Dropbox system tray drop-down (Figure 3) you can open the Dropbox folder, launch the Dropbox website, view recently changed files, get more space, pause syncing, open the preferences window, find help, and quite Dropbox.
The Dropbox/Nautilus integration is an important component, as it makes quickly adding to your cloud backup seamless and fast. From the Nautilus file manager, locate and right-click the folder to bad added, and select Dropbox > Move to Dropbox (Figure 4).
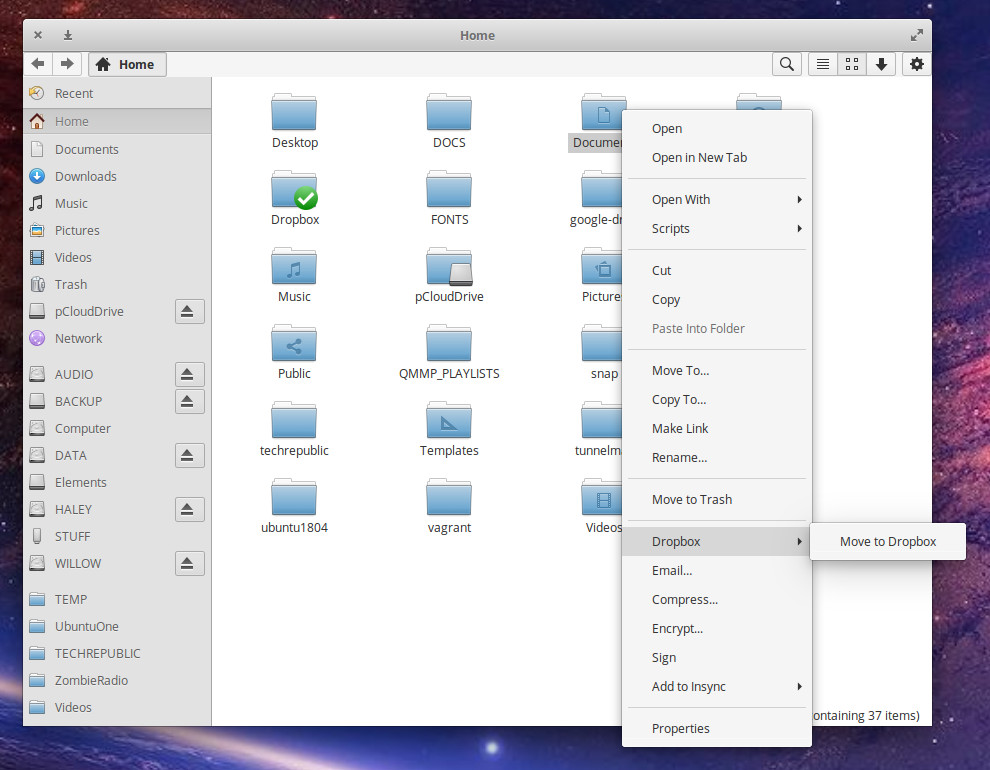
The only caveat to the Dropbox/Nautilus integration is that the only option is to move a folder to Dropbox. To some this might not be an option. The developers of this package would be wise to instead have the action create a link (instead of actually moving the folder).
Outside of that one issue, the Dropbox cloud sync/backup solution for Linux is a great route to go.
pCloud
pCloud might well be one of the finest cloud backup solutions you’ve never heard of. This take on cloud storage/backup includes features like:
-
Encryption (subscription service required for this feature);
-
Mobile apps for Android and iOS;
-
Linux, Mac, and Windows desktop clients;
-
Easy file/folder sharing;
-
Built-in audio/video players;
-
No file size limitation;
-
Sync any folder from the desktop;
-
Panel integration for most desktops; and
-
Automatic file manager integration.
pCloud offers both Linux desktop and CLI tools that function quite well. pCloud offers both a free plan (with 10GB of storage), a Premium Plan (with 500GB of storage for a one-time fee of $175.00), and a Premium Plus Plan (with 2TB of storage for a one-time fee of $350.00). Both non-free plans can also be paid on a yearly basis (instead of the one-time fee).
The pCloud desktop client is quite user-friendly. Once installed, you have access to your account information (Figure 5), the ability to create sync pairs, create shares, enable crypto (which requires an added subscription), and general settings.
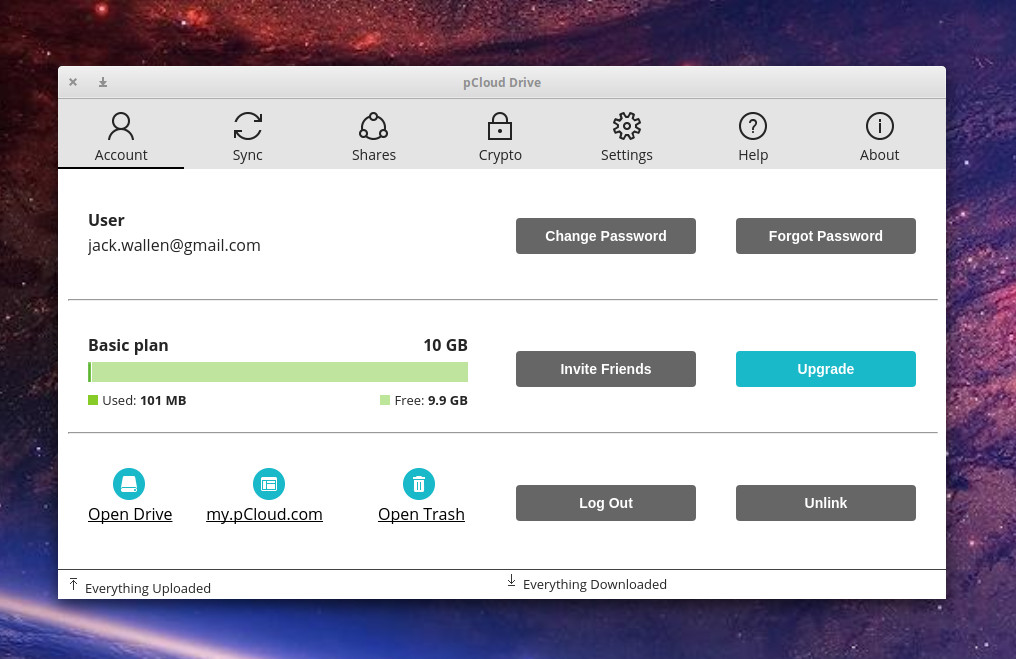
The one caveat to pCloud is there’s no file manager integration for Linux. That’s overcome by the Sync folder in the pCloud client.
CloudBerry
The primary focus for CloudBerry is for Managed Service Providers. The business side of CloudBerry does have an associated cost (one that is probably well out of the price range for the average user looking for a simple cloud backup solution). However, for home usage, CloudBerry is free.
What makes CloudBerry different than the other tools is that it’s not a backup/storage solution in and of itself. Instead, CloudBerry serves as a link between your desktop and the likes of:
-
AWS
-
Microsoft Azure
-
Google Cloud
-
BackBlaze
-
OpenStack
-
Wasabi
-
Local storage
-
External drives
-
Network Attached Storage
-
Network Shares
-
And more
In other words, you use CloudBerry as the interface between the files/folders you want to share and the destination with which you want send them. This also means you must have an account with one of the many supported solutions.
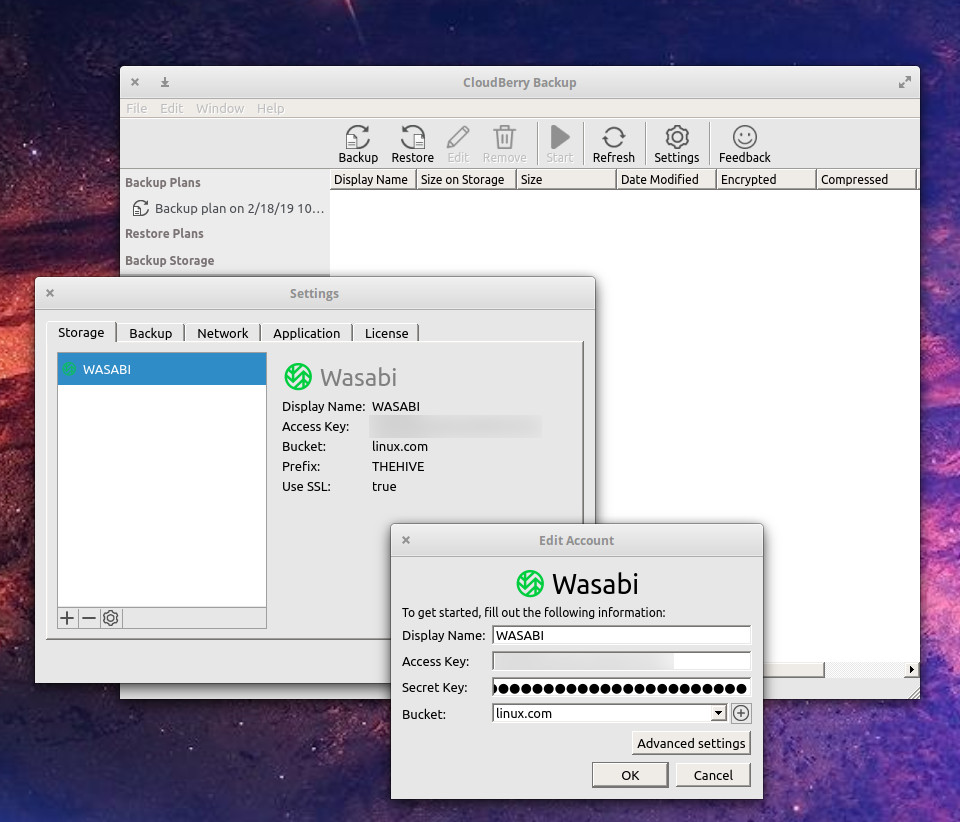
Once you’ve installed CloudBerry, you create a new Backup plan for the target storage solution. For that configuration, you’ll need such information as:
-
Access Key
-
Secret Key
-
Bucket
What you’ll need for the configuration will depend on the account you’re connecting to (Figure 6).
The one caveat to CloudBerry is that it does not integrate with any file manager, nor does it include a system tray icon for interaction with the service.
Duplicati
Duplicati is another option that allows you to sync your local directories with either locally attached drives, network attached storage, or a number of cloud services. The options supported include:
-
Local folders
-
Attached drives
-
FTP/SFTP
-
OpenStack
-
WebDAV
-
Amazon Cloud Drive
-
Amazon S3
-
Azure Blob
-
Box.com
-
Dropbox
-
Google Cloud Storage
-
Google Drive
-
Microsoft OneDrive
-
And many more
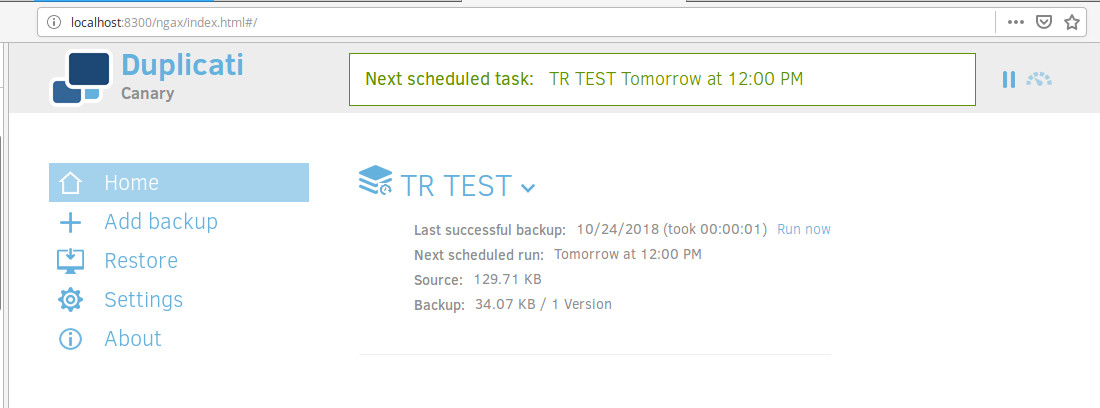
Once you install Duplicati (download the installer for Debian, Ubuntu, Fedora, or RedHat from the Duplicati downloads page), click on the entry in your desktop menu, which will open a web page to the tool (Figure 7), where you can configure the app settings, create a new backup, restore from a backup, and more.
To create a backup, click Add backup and walk through the easy-to-use wizard (Figure 8). The backup service you choose will dictate what you need for a successful configuration.
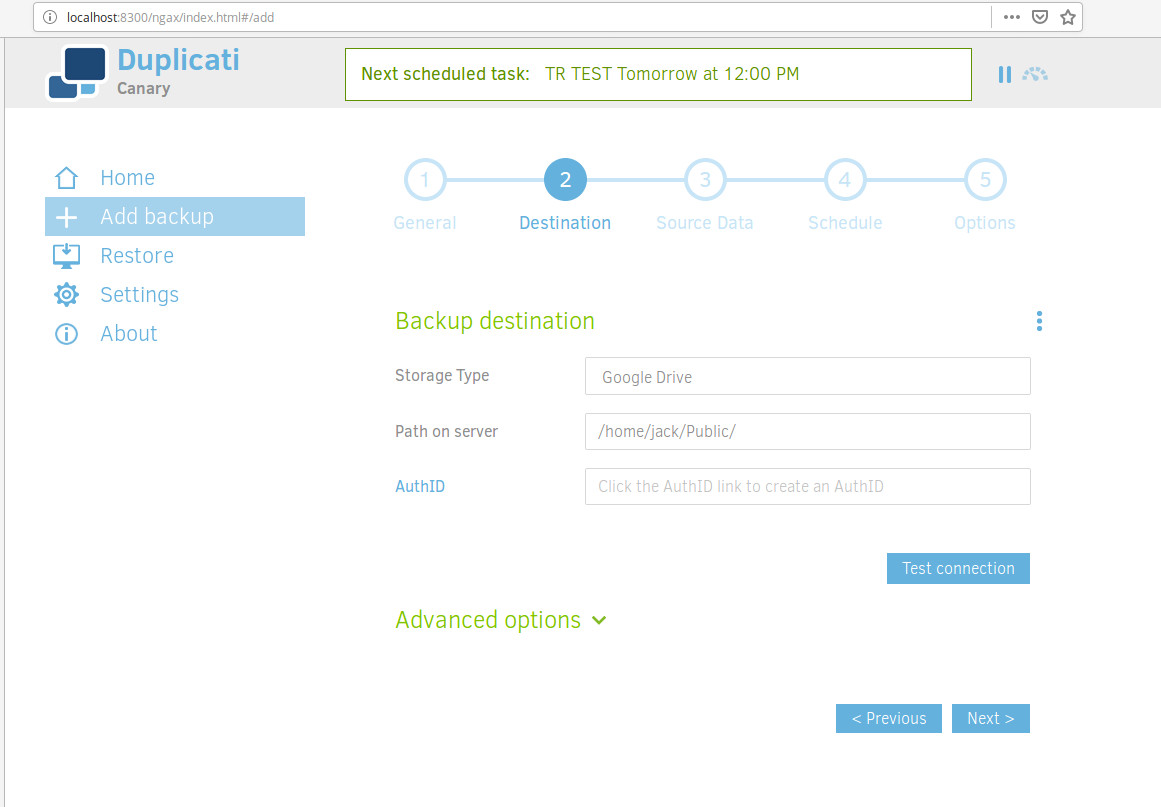
For example, in order to create a backup to Google Drive, you’ll need an AuthID. For that, click the AuthID link in the Destination section of the setup, where you’ll be directed to select the Google Account to associate with the backup. Once you’ve allowed Duplicati access to the account, the AuthID will fill in and you’re ready to continue. Click Test connection and you’ll be asked to okay the creation of a new folder (if necessary). Click Next to complete the setup of the backup.
More Where That Came From
These five cloud backup tools aren’t the end of this particular rainbow. There are plenty more options where these came from (including CLI-only tools). But any of these backup clients will do a great job of serving your Linux desktop-to-cloud backup needs.


