Learning Kubernetes Locally via Minikube on Manjaro/Archlinux
Minikube is a tool that allows you to run Kubernetes on your local computer system. Minikube will create a single-node Kubernetes cluster inside the VM depending on the vm-driver you use. Minikube is good for learning about Kubernetes, including testing, developing, or training purposes.
In this tutorial, we will show you step-by-step how to create a single-node Kubernetes cluster locally using Minikube on Manjaro/ArchLinux. This guide will implement the Kubernetes cluster locally with the KVM2 driver, and cover an example of Nginx service deployment.
What we will do:
- Install Packages Dependencies
- Install Docker-machine and KVM2 Driver
- Install Minikube and Kubectl
- Kubernetes Initialization with Minikube
- Testing Deployment
- Access the Kubernetes Dashboard
Step 1 - Install Packages Dependencies
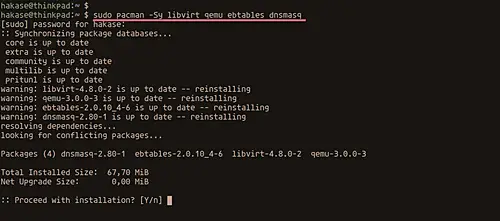
The first step we will do is to install all packages dependencies including qemu KVM and dnsmasq.
Install qemu and dnsmasq using pacman command below.
sudo pacman -Sy libvirt qemu ebtables dnsmasq
When the installation is complete, add the user to the 'libvirt' group and reload.
sudo usermod -a -G libvirt $(whoami)
newgrp libvirt
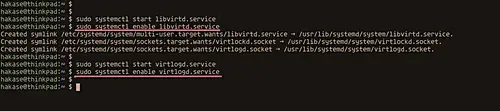
Now start libvirtd and virtlogd services, and add those services to the boot time.
sudo systemctl start libvirtd.service
sudo systemctl enable libvirtd.service

sudo systemctl start virtlogd.service
sudo systemctl enable virtlogd.service
The qemu KVM packages and dependencies have been installed on the system.
Step 2 - Install Docker-Machine and KVM2 Driver
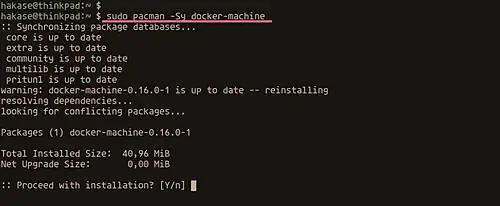
Minikube uses the docker-machine to manage the Kubernetes VM, and we need to install the 'docker-machine-driver-kvm2' for it.
Install docker machine using pacman command below.
sudo pacman -Sy docker-machine
Now install the 'docker-machine-driver-kvm2' from the AUR repository using yaourt command.
yaourt -Sy docker-machine-driver-kvm2
Wait for the installation.
Step 3 - Install Minikube and Kubectl
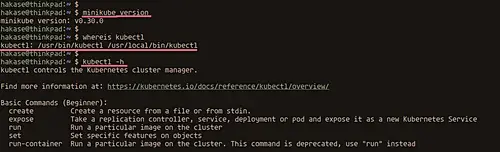
For this guide, we will be installing the Minikube and kubectl from the AUR repository.
Run the yaourt command below.
yaourt -Sy minikube-bin kubectl-bin
When the installation is complete, check the Minikube version and the kubectl command.
minikube version
whereis kubectl
kubectl -h
Step 4 - Kubernetes Initialization with Minikube
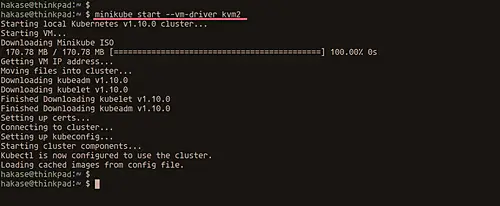
Initialize the single-node Kubernetes cluster using the Minikube command below.
minikube start --vm-driver kvm2
The command will download the Minikube ISO file and create the KVM virtual machine on the system.
When it's complete, you will get the result as below.
Kubernetes has been installed on the local computer using Minikube, check by running all commands below.
minikube status
kubectl cluster-info
kubectl get nodes
Now you will see the result below.
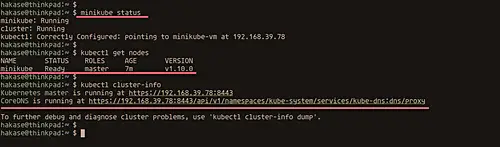
The Kubernetes cluster is up and running on a local computer with IP address '192.168.39.78', using Kubernetes v1.10, and a single-node named minikube as master of the cluster.
Step 5 - Testing Deployments
In this step, we will test the kubernetes by creating a new deployment for Nginx web server.
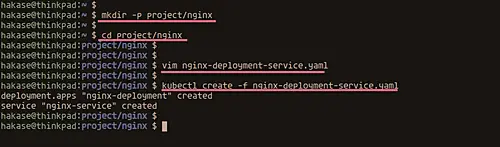
Create a new directory named 'project/nginx/' and go to it.
mkdir -p projects/nginx/
cd projects/nginx/
Now create a new yaml file for our deployment configuration.
vim nginx-deployment-service.yaml
And paste configurations below.
apiVersion: apps/v1
kind: Deployment
metadata:
  name: nginx-deployment
  labels:
    app: nginx
spec:
  selector:
    matchLabels:
      app: nginx
  template:
    metadata:
      labels:
        app: nginx
    spec:
      containers:
      - name: nginx
        image: nginx:1.14
        ports:
        - containerPort: 80
---
apiVersion: v1
kind: Service
metadata:
  name: nginx-service
  labels:
    run: nginx-service
spec:
  type: NodePort
  ports:
  - port: 80
    protocol: TCP
  selector:
    app: nginx
Save and exit.
Now create the deployment by running the kubectl command below.
kubectl create -f nginx-deployment.yaml
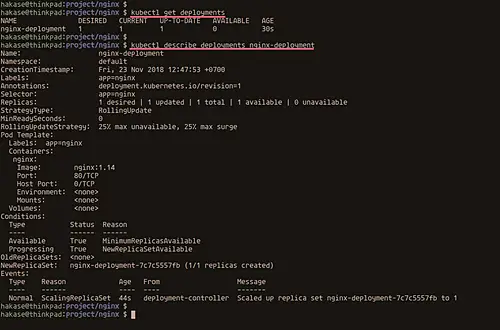
When it's complete, check the Kubernetes deployment.
kubectl get deployments
kubectl describe deployments nginx-deployment
And you will get the 'nginx-deployment' on the list.
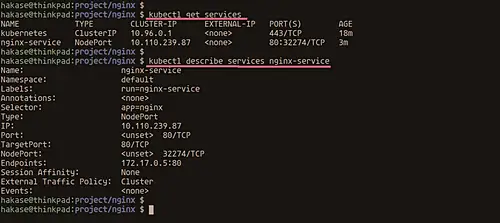
Now check the Kubernetes service.
kubectl get services
kubectl describe services nginx-service
And you will see the NodePort 'nginx-service' is running on port '32274'.
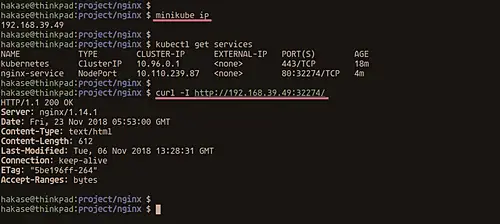
Check the Kubernetes cluster IP and access it using curl command.
minikube ip
curl -I http://192.168.39.49:32274/
And you will get the response from the Nginx web server.
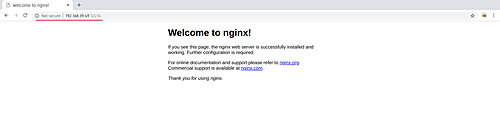
Below is the result when we access from the web browser.
http://192.168.39.49:32274/
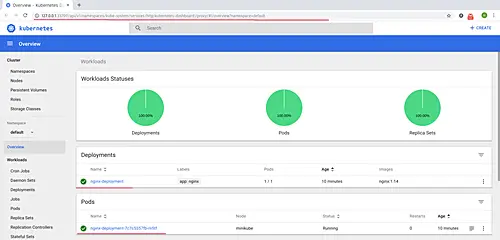
Step 6 - Access Kubernetes Dashboard
Minikube provides a command for accessing the Kubernetes dashboard running within the Minikube cluster.
Run the command below.
minikube dashboard
The command will open the Kubernetes dashboard using the default web browser on the system.
Below is the Kubernetes dashboard.
The Kubenrnetes installation on local computer Manjaro/Archlinux using Minikube has been completed successfully.

