How to Install Craft CMS on Debian 9
This tutorial exists for these OS versions
- Debian 11 (Bullseye)
- Debian 9 (Stretch)
On this page
- Requirements
- Prerequisites
- Initial steps
- Step 1 - Install PHP and required PHP extensions
- Step 2- Install MySQL/MariaDB and create a database
- Step 3 - Install acme.sh client and obtain Let's Encrypt certificate (optional)
- Step 4 - Install and Configure Nginx
- Step 5 - Install Composer
- Step 6 - Install Craft CMS
- Step 7 - Complete the Craft CMS setup
- Links
Craft is an open source CMS written in PHP. Craft allows you to easily create and manage great-looking content, and to design and build exactly what you need. It's secure and scalable CMS with a big plugin ecosystem and the Craft source code is hosted on GitHub. This tutorial will walk you through the Craft CMS installation procedure on a fresh Debian 9 server using Nginx as the web server and we will secure the website with a Let's encrypt SSL certificate.
Requirements
Craft CMS requires the following:
- PHP version 7.0 or greater with the following PHP extensions: (ctype, cURL, GD or ImageMagick, iconv, JSON, Multibyte String, OpenSSL, PCRE, PDO MySQL Driver or PDO PostgreSQL Driver, PDO, Reflection, SPL, Zip, Intl, DOM)
- MySQL 5.5+ with InnoDB, MariaDB 5.5+, or PostgreSQL 9.5+
- At least 256MB of memory allocated to PHP
- At least 200MB of free disk space
Prerequisites
- An operating system running Debian 9.
- A non-root user with sudo privileges.
Initial steps
Check your Debian version:
lsb_release -ds
# Debian GNU/Linux 9.8 (stretch)
Set up the timezone:
sudo dpkg-reconfigure tzdata
Update your operating system packages (software). This is an important first step because it ensures you have the latest updates and security fixes for your operating system's default software packages:
sudo apt update && sudo apt upgrade -y
Install some essential packages that are necessary for basic administration of Debian operating system:
sudo apt install -y curl wget vim git unzip socat apt-transport-https
Step 1 - Install PHP and required PHP extensions
Install PHP, as well as the necessary PHP extensions:
sudo apt install -y php7.0 php7.0-cli php7.0-fpm php7.0-common php7.0-curl php7.0-gd php-imagick php7.0-json php7.0-mbstring php7.0-mysql php7.0-pgsql php7.0-zip php7.0-intl php7.0-xml
Check the PHP version:
php --version

# PHP 7.0.33-0+deb9u3 (cli) (built: Mar  8 2019 10:01:24) ( NTS )
# Copyright (c) 1997-2017 The PHP Group
# Zend Engine v3.0.0, Copyright (c) 1998-2017 Zend Technologies
#     with Zend OPcache v7.0.33-0+deb9u3, Copyright (c) 1999-2017, by Zend Technologies
Run sudo vim /etc/php/7.0/fpm/php.ini and set memory_limit to at least 256MB.
Also set max_execution_time to at least 120 seconds and reload PHP-FPM service.
memory_limit = 256M
max_execution_time = 120
PHP-FPM service is automatically started and enabled on reboot on Debian 9 system, so there is no need to start and enable it manually. We can move on to the next step, which is database installation and setup.
Step 2- Install MySQL/MariaDB and create a database
Craft CMS supports MySQL/MariaDB and PostgreSQL databases. In this tutorial, we will use MariaDB as a database server.
Install MariaDB database server:
sudo apt install -y mariadb-server
Check the MariaDB version:
mysql --version
# mysql  Ver 14.14 Distrib 5.7.24, for Linux (x86_64) using  EditLine wrapper
Run mysql_secure installation script to improve MariaDB security and set the password for MariaDB root user:
sudo mysql_secure_installation
Answer each of the questions:
Would you like to setup VALIDATE PASSWORD plugin? N
New password: your_secure_password
Re-enter new password: your_secure_password
Remove anonymous users? [Y/n] Y
Disallow root login remotely? [Y/n] Y
Remove test database and access to it? [Y/n] Y
Reload privilege tables now? [Y/n] Y
Connect to MariaDB shell as the root user:
sudo mysql -u root -p
# Enter password
Create an empty MariaDB database and user for Craft CMS and remember the credentials:
mysql> CREATE DATABASE dbname;
mysql> GRANT ALL ON dbname.* TO 'username' IDENTIFIED BY 'password';
mysql> FLUSH PRIVILEGES;
Exit from MariaDB:
mysql> exit
Replace dbname, username and password with your own names.
Step 3 - Install acme.sh client and obtain Let's Encrypt certificate (optional)
Securing your website with HTTPS is not necessary, but it is a good practice to secure your site traffic. In order to obtain TLS certificate from Let's Encrypt we will use Acme.sh client. Acme.sh is a pure Unix shell software for obtaining TLS certificates from Let's Encrypt with zero dependencies.
Download and install Acme.sh:
sudo mkdir /etc/letsencrypt
git clone https://github.com/Neilpang/acme.sh.git
cd acme.sh
sudo ./acme.sh --install --home /etc/letsencrypt --accountemail [email protected]
cd ~
Check Acme.sh version:
/etc/letsencrypt/acme.sh --version
# v2.8.0
Obtain RSA and ECC/ECDSA certificates for your domain/hostname:
# RSA 2048
sudo /etc/letsencrypt/acme.sh --issue --standalone --home /etc/letsencrypt -d example.com --keylength 2048
# ECDSA
sudo /etc/letsencrypt/acme.sh --issue --standalone --home /etc/letsencrypt -d example.com --keylength ec-256
After running the above commands, your certificates and keys will be in:
- For RSA:
/etc/letsencrypt/example.comdirectory. - For ECC/ECDSA:
/etc/letsencrypt/example.com_eccdirectory.
Step 4 - Install and Configure Nginx
Craft CMS can work fine with many popular web server software. In this tutorial, we selected Nginx.
Download and install the latest mainline release of Nginx from the official Nginx repository.
Start by download Nginx repository PGP key:
wget https://nginx.org/keys/nginx_signing.key
Add a key to apt program keyring:
sudo apt-key add nginx_signing.key
Add and set up Nginx mainline APT repository:
sudo -s
printf "deb https://nginx.org/packages/mainline/debian/ $(lsb_release -sc) nginx\ndeb-src https://nginx.org/packages/mainline/debian/ $(lsb_release -sc) nginx\n" >> /etc/apt/sources.list.d/nginx_mainline.list
exit
Update the repository list:
sudo apt update
Install the latest mainline Nginx packages:
sudo apt install -y nginx nginx-module-geoip nginx-module-image-filter nginx-module-njs nginx-module-perl nginx-module-xslt
Start and enable Nginx service:
sudo systemctl start nginx.service
sudo systemctl enable nginx.service
Check the Nginx version:
sudo nginx -v
# nginx version: nginx/1.15.10
Configure Nginx for Craft CMS by running:
sudo vim /etc/nginx/conf.d/craft.conf
And populate the file with the following configuration:
server {

  listen 80;
  listen [::]:80;
  listen 443 ssl;
  listen [::]:443 ssl;

  server_name example.com;

  root /var/www/craft/web;

  index index.php;

  ssl_certificate /etc/letsencrypt/example.com/fullchain.cer;
  ssl_certificate_key /etc/letsencrypt/example.com/example.com.key;
  ssl_certificate /etc/letsencrypt/example.com_ecc/fullchain.cer;
  ssl_certificate_key /etc/letsencrypt/example.com_ecc/example.com.key;

  location / {
    try_files $uri/index.html $uri $uri/ /index.php?$query_string;
  }

  location ~ [^/]\.php(/|$) {
    try_files $uri $uri/ /index.php?$query_string;
    fastcgi_split_path_info ^(.+\.php)(/.+)$;
    fastcgi_pass unix:/var/run/php/php7.0-fpm.sock;
    fastcgi_index index.php;
    include fastcgi_params;
    fastcgi_param SCRIPT_FILENAME $document_root$fastcgi_script_name;
    fastcgi_param PATH_INFO $fastcgi_path_info;
    fastcgi_param HTTP_PROXY "";
  }

}
NOTE: For complete and production ready Nginx config for Craft visit https://github.com/nystudio107/nginx-craft. The config is intentionally simplified to keep config dense and simple.
Open a file nginx.conf and set user to www-data.
sudo vim /etc/nginx/nginx.conf
user www-data www-data;Test Nginx configuration:
sudo nginx -t
Reload Nginx:
sudo systemctl reload nginx.service
Step 5 - Install Composer
Install Composer, the PHP dependency manager globally:
php -r "copy('https://getcomposer.org/installer', 'composer-setup.php');"

php -r "if (hash_file('sha384', 'composer-setup.php') === '48e3236262b34d30969dca3c37281b3b4bbe3221bda826ac6a9a62d6444cdb0dcd0615698a5cbe587c3f0fe57a54d8f5') { echo 'Installer verified'; } else { echo 'Installer corrupt'; unlink('composer-setup.php'); } echo PHP_EOL;"

php composer-setup.php

php -r "unlink('composer-setup.php');"

sudo mv composer.phar /usr/local/bin/composer
Check the Composer version:
composer --version
# Composer version 1.8.4 2019-02-11 10:52:10
NOTE: Composer installation commands will change in the future, so check https://getcomposer.org/download/ for the most up to date commands if the above commands don't work.
Step 6 - Install Craft CMS
Craft CMS can be downloaded with Composer or by manually downloading a .zip or tar.gz archive. In this tutorial, we will use Composer to download Craft CMS.
Create a document root directory where Craft CMS should reside in:
sudo mkdir -p /var/www/craft
Navigate to the document root directory:
cd /var/www/craft
Change ownership of the /var/www/craft directory to [jour_username]:
sudo chown -R [your_username]:[your_username] /var/www/craft
To create a new Craft project, run this command:
composer create-project craftcms/craft .
Change ownership of the /var/www/craft directory to www-data:
sudo chown -R www-data:www-data /var/www/craft
In your web browser, go to http://<Hostname>/index.php?p=admin/install (substituting <Hostname> with your web server’s hostname). If you’ve done everything right so far, you should be greeted by Craft’s Setup Wizard.
Step 7 - Complete the Craft CMS setup
After opening your installation URL the page like below should appear. Click "Install Craft" button:

Accept the license by clicking on the "Got it" button:

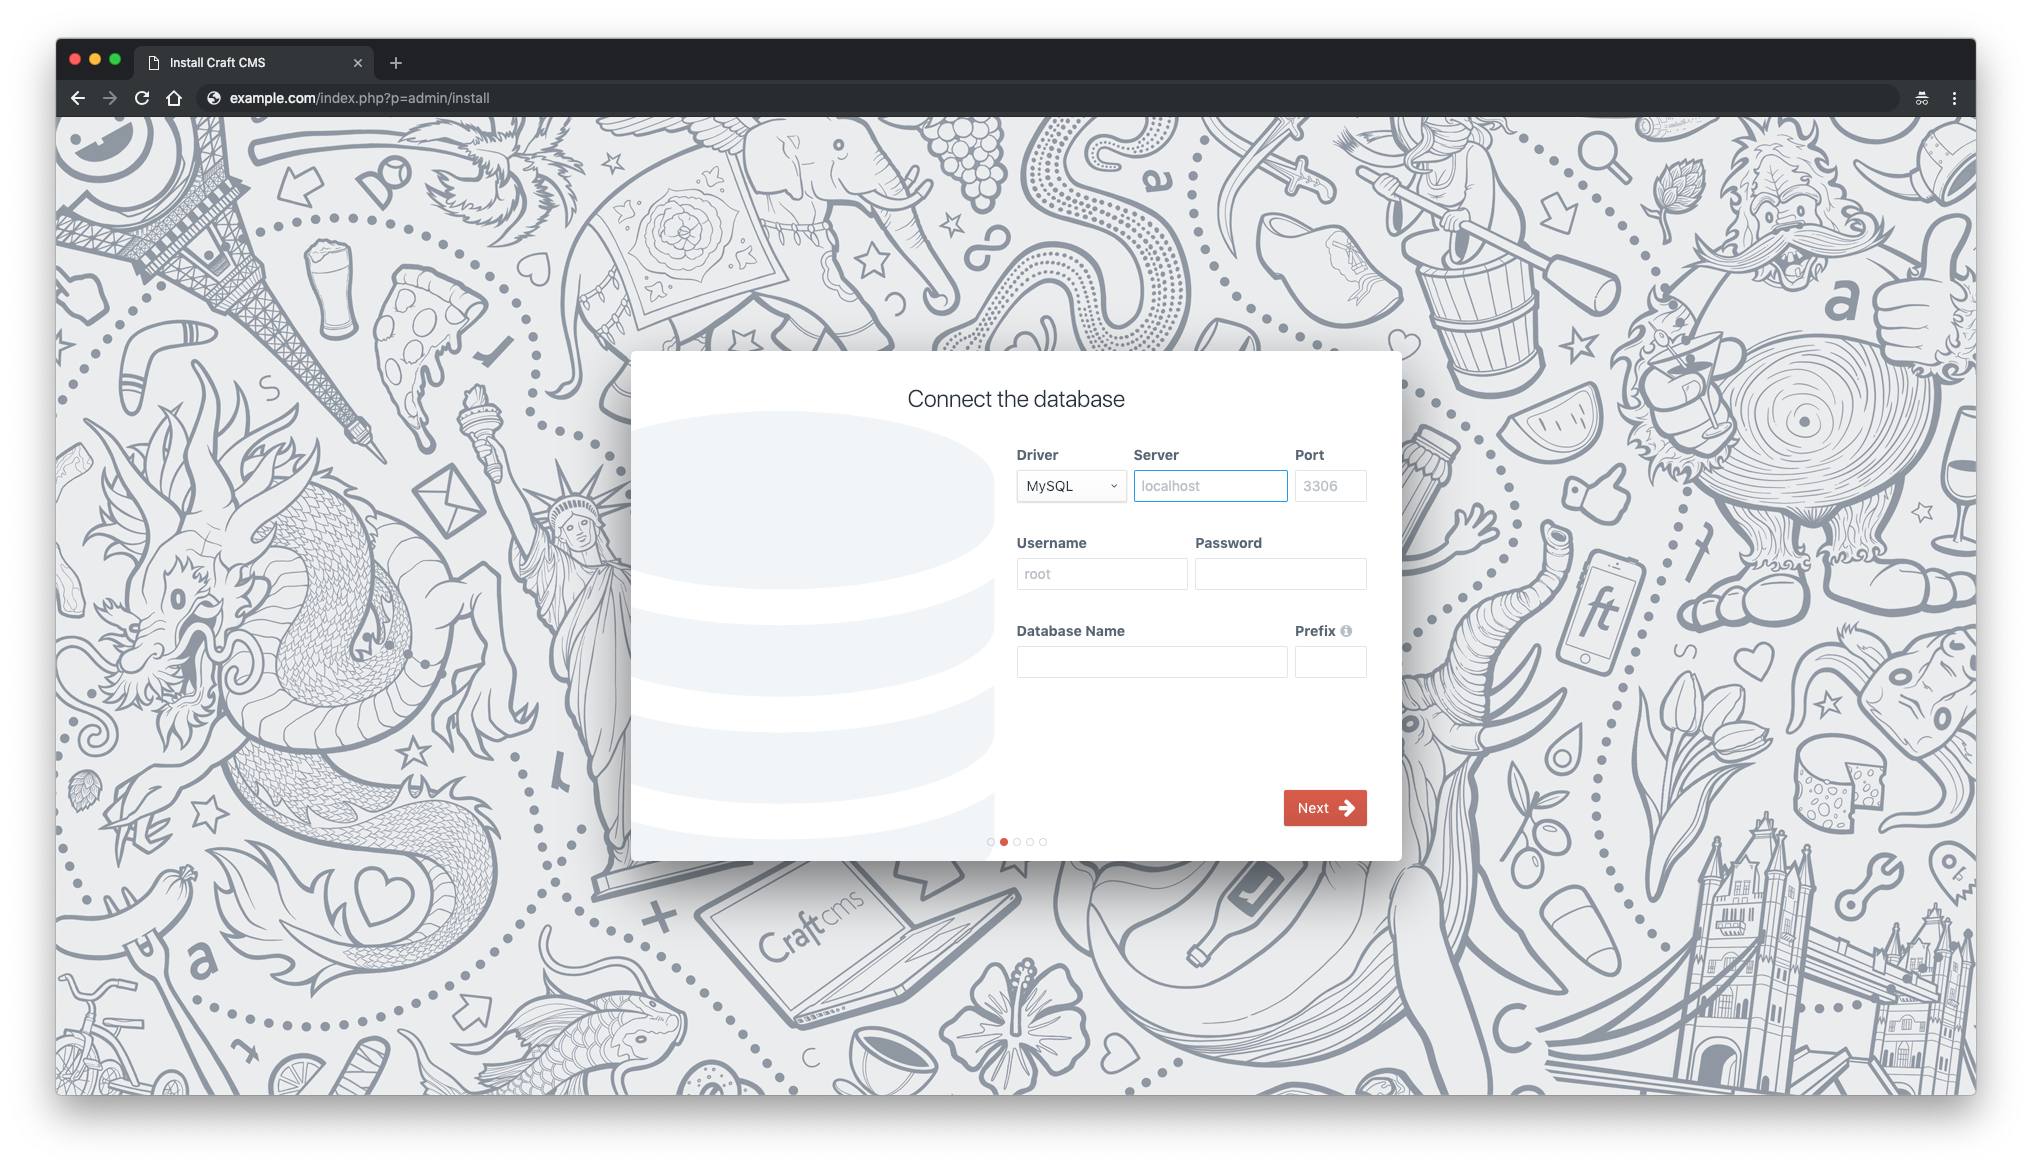
Fill in database details and click on the "Next" button:
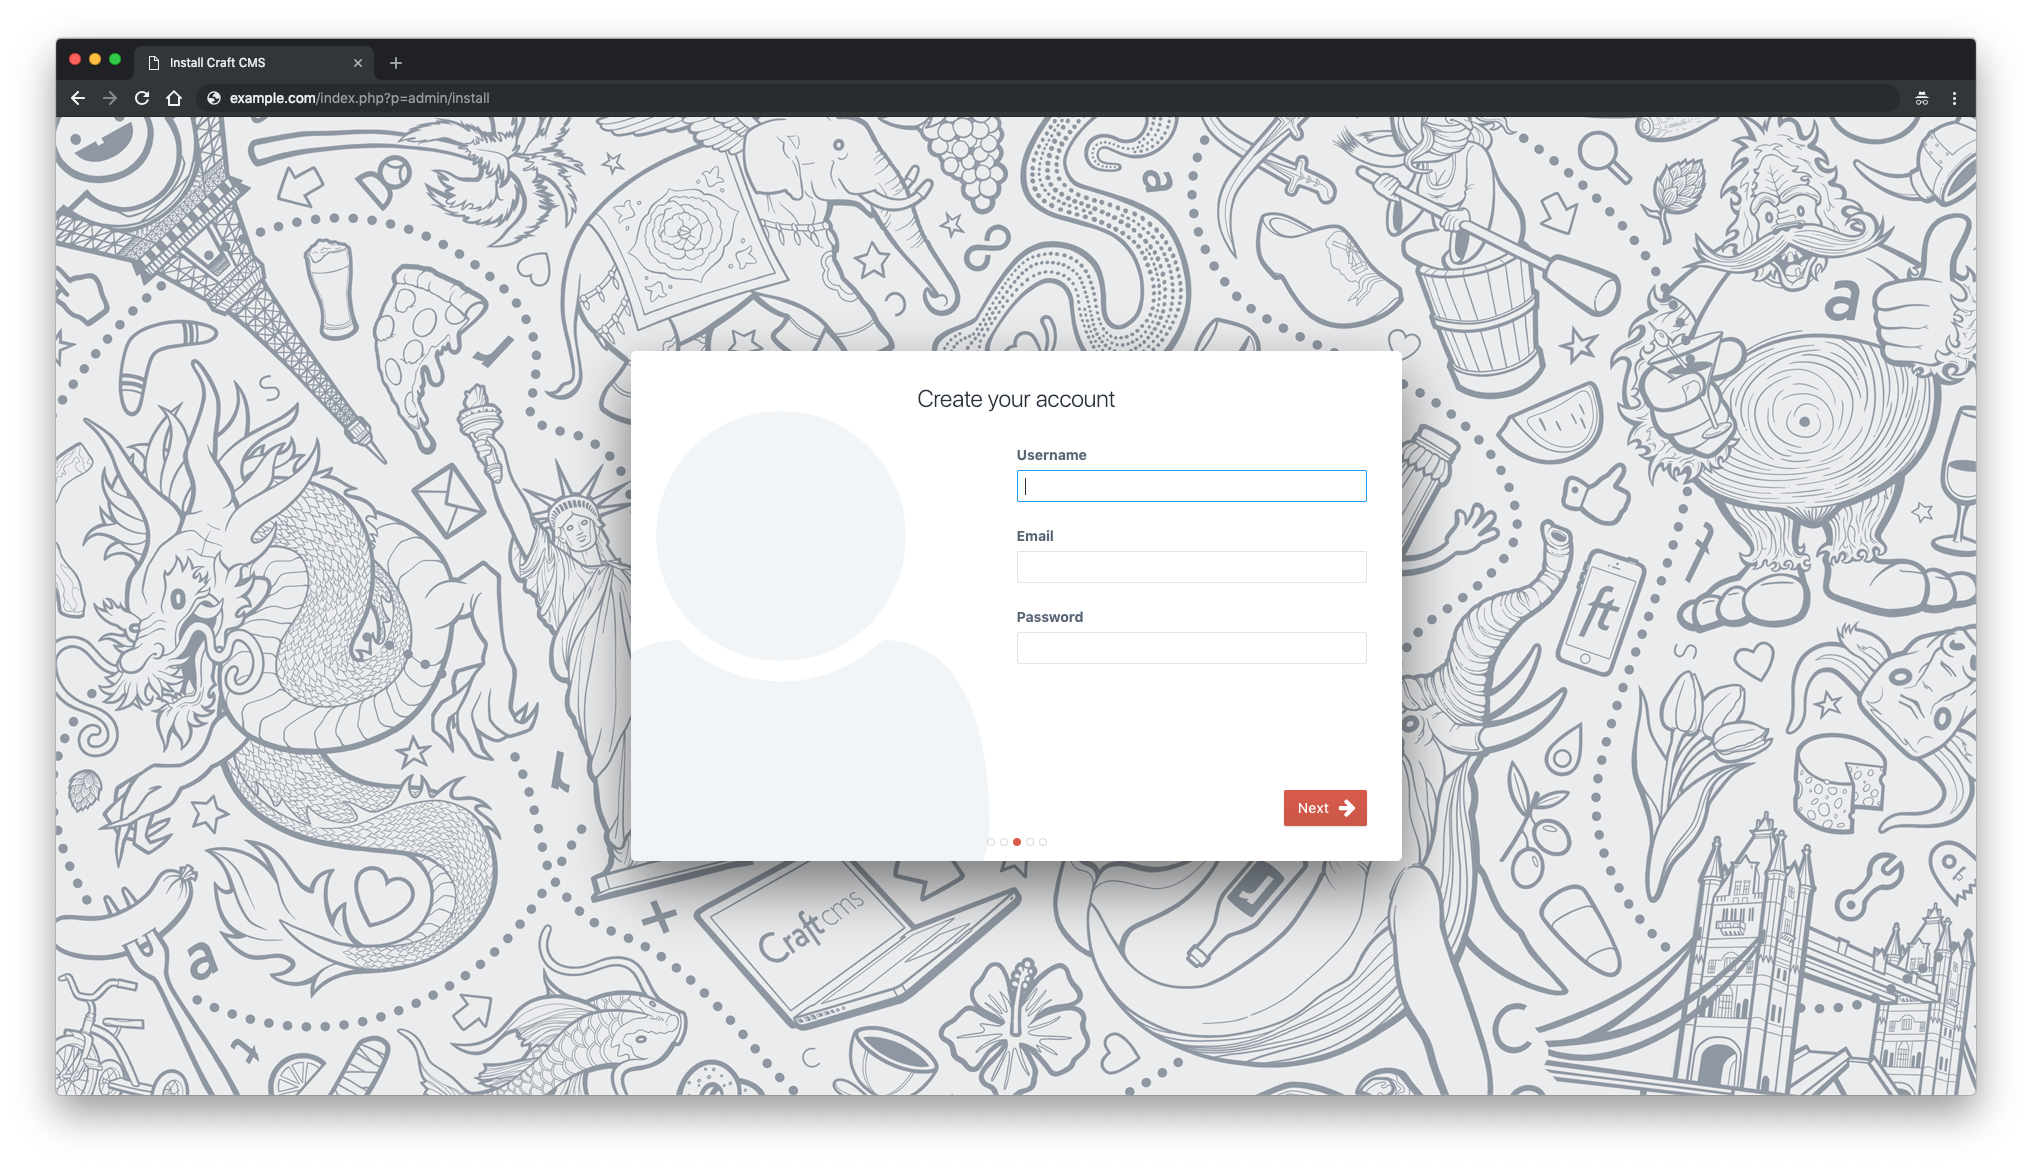
Create Craft account and click on the "Next" button:
Setup your site and click on the "Finish up" button:

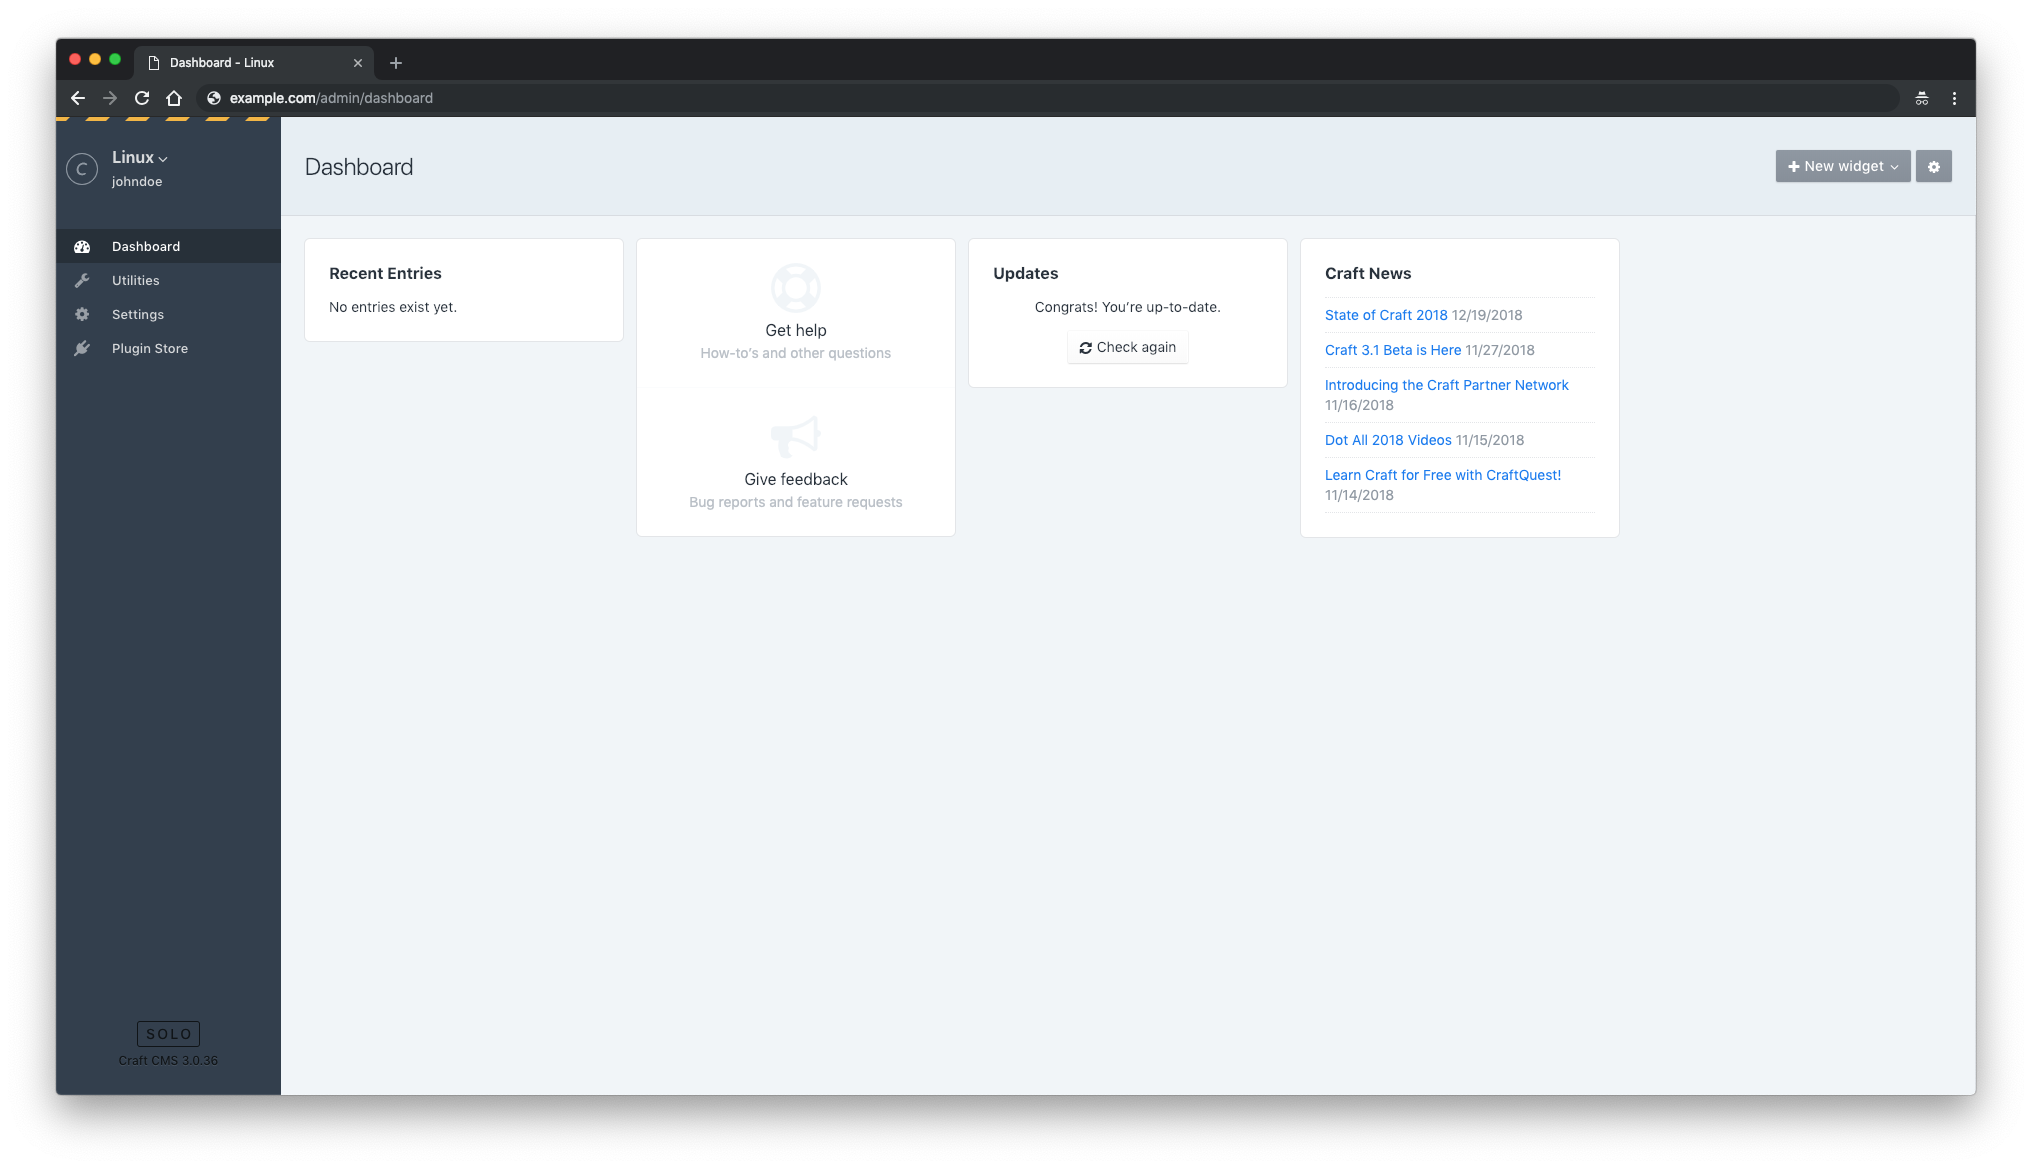
After this you should be redirected to the Craft admin page: