How to Install ArangoDB NoSQL Database on Ubuntu 18.04 LTS
ArangoDB is a free and open source, NoSQL and multi-model database that provides all the database features that are needed for a modern web application. ArangoDB does not use the traditional data storage system as in MySQL or PostgreSQL. It is specially designed for being high performance, open source and easily scalable. It is simple, easy to use and provides user-friendly web-based interface for system administration and system monitoring. ArangoDB is used in small and large organization who process massive amount of data. ArangoDB supports three data models key/value, documents and graphs. ArangoDB provides a storage engine to handle datasets that are much bigger than RAM. ArangoDB helps you to set up the database in a master-slave for Replication and Sharding.
In this tutorial, we will learn how to install ArangoDB3 on Ubuntu 18.04 server.
Requirements
- A server running Ubuntu 18.04.
- A static IP address 192.168.0.104 is set up to your server
- A root password is setup to your server.
Getting Started
Before starting, you will need to update your system with the latest version. You can do this by running the following command:
apt-get update -y
 apt-get upgrade -y
Once your server is updated, restart your server to apply the changes.
Install ArangoDB3
By default, ArangoDB is not available in the Ubuntu 18.04 default repository. So, you will need to add the repository for that. First, download and add the GPG key with the following command:
wget -q https://download.arangodb.com/arangodb34/DEBIAN/Release.key -O- | apt-key add -
Next, add the repository with the following command:
nano /etc/apt/sources.list.d/arangodb.list
Add the following line:
deb https://download.arangodb.com/arangodb34/DEBIAN/ /
Save and close the file, when you are finished. Then, update the repository and install ArangoDB3 with the following command:
apt-get update -y
apt-get install apt-transport-https arangodb3 -y
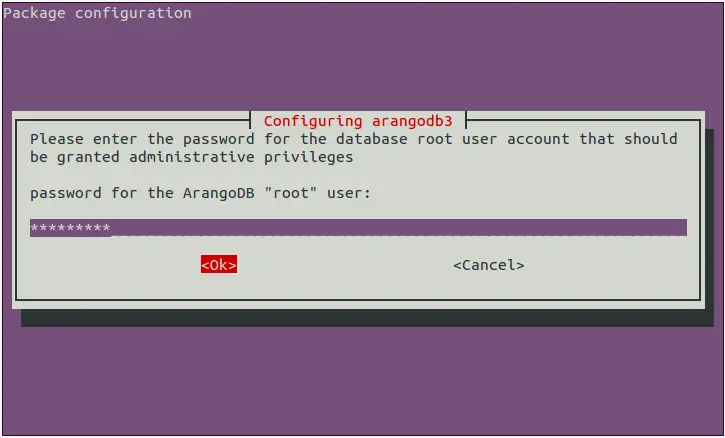
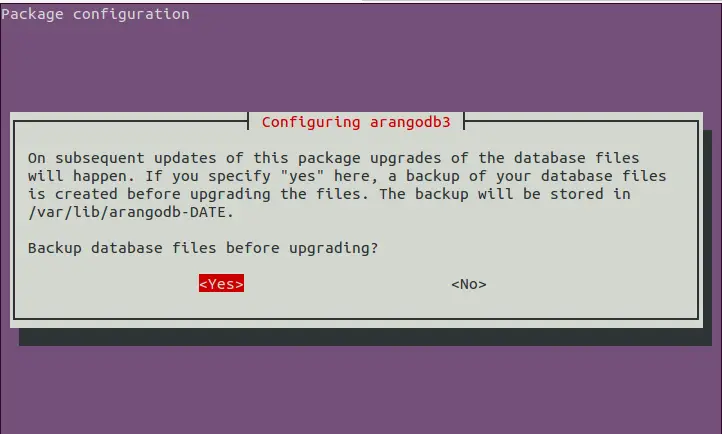
During the installation, you will need to give an answer of some questions:
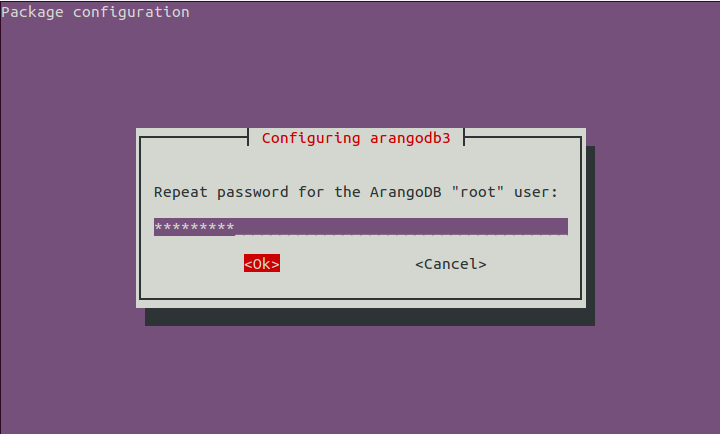
Set the database root password as shown below:
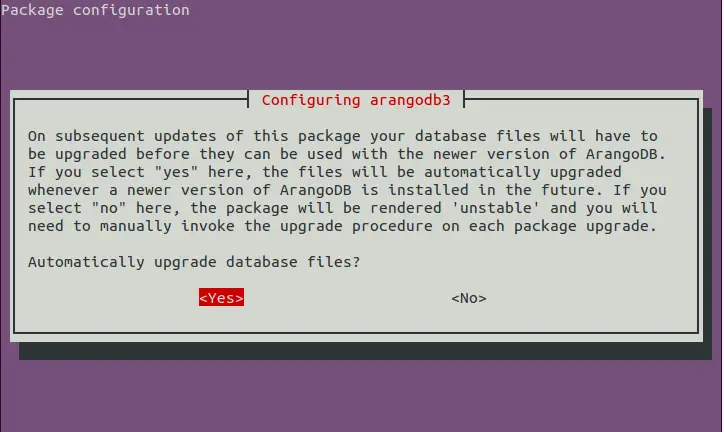
Select automatically upgrade database files as shown below:
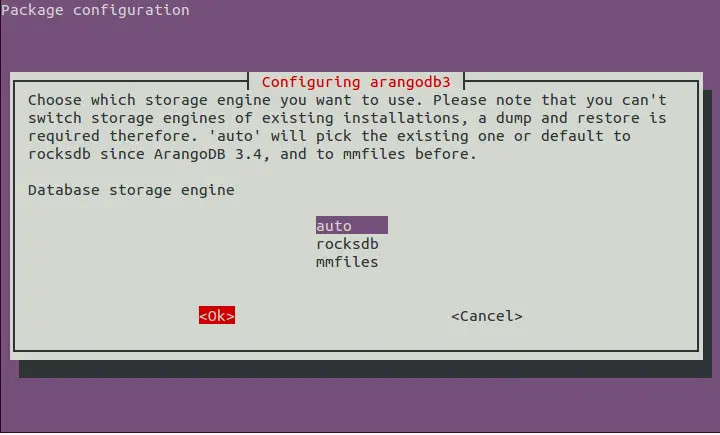
Select the database storage engine as shown below:
Backup the database before doing an upgrade as shown below:
Once the installation has been completed successfully, start the ArangoDB service and enable it to start on boot time with the following command:
systemctl start arangodb3
systemctl enable arangodb3
You can check the status of ArangoDB with the following command:
systemctl status arangodb3
You should see the following output:
? arangodb3.service - ArangoDB database server
   Loaded: loaded (/lib/systemd/system/arangodb3.service; enabled; vendor preset: enabled)
   Active: active (running) since Tue 2019-05-07 16:00:21 UTC; 2min 57s ago
 Main PID: 14070 (arangod)
    Tasks: 18 (limit: 131072)
   CGroup: /system.slice/arangodb3.service
           ??14070 /usr/sbin/arangod --uid arangodb --gid arangodb --pid-file /var/run/arangodb3/arangod.pid --temp.path /var/tmp/arangodb3 --l

May 07 16:00:21 ubuntu1804 arangod[14070]: 2019-05-07T16:00:21Z [14070] INFO ArangoDB 3.4.5 [linux] 64bit, using jemalloc, build tags/v3.4.5-0-
May 07 16:00:21 ubuntu1804 arangod[14070]: 2019-05-07T16:00:21Z [14070] INFO detected operating system: Linux version 4.15.0-20-generic (buildd
May 07 16:00:21 ubuntu1804 arangod[14070]: 2019-05-07T16:00:21Z [14070] INFO {authentication} Jwt secret not specified, generating...
May 07 16:00:21 ubuntu1804 arangod[14070]: 2019-05-07T16:00:21Z [14070] INFO using storage engine rocksdb
May 07 16:00:21 ubuntu1804 arangod[14070]: 2019-05-07T16:00:21Z [14070] INFO {cluster} Starting up with role SINGLE
May 07 16:00:21 ubuntu1804 arangod[14070]: 2019-05-07T16:00:21Z [14070] INFO {syscall} file-descriptors (nofiles) hard limit is 131072, soft li
May 07 16:00:21 ubuntu1804 arangod[14070]: 2019-05-07T16:00:21Z [14070] WARNING {threads} --server.threads (64) is more than eight times the nu
May 07 16:00:22 ubuntu1804 arangod[14070]: 2019-05-07T16:00:22Z [14070] INFO {authentication} Authentication is turned on (system only), authen
May 07 16:00:25 ubuntu1804 arangod[14070]: 2019-05-07T16:00:25Z [14070] INFO using endpoint 'http+tcp://127.0.0.1:8529' for non-encrypted reque
May 07 16:00:27 ubuntu1804 arangod[14070]: 2019-05-07T16:00:27Z [14070] INFO ArangoDB (version 3.4.5 [linux]) is ready for business. Have fun!
You can also secure the ArangoDB by running the arango-secure-installation script.
First, stop the ArangoDB service with the following command:
systemctl stop arangodb3
Then, secure ArangoDB with the following command:
arango-secure-installation
 Please enter password for root user:
 Repeat password:
Provide your root and press Enter, you should see the following output:
2019-05-07T16:03:53Z [14322] INFO {syscall} file-descriptors (nofiles) hard limit is 1048576, soft limit is 1048576
2019-05-07T16:03:53Z [14322] WARNING {threads} --server.threads (64) is more than eight times the number of cores (1), this might overload the server
2019-05-07T16:03:55Z [14322] INFO Password changed.
2019-05-07T16:03:55Z [14322] INFO {startup} server will now shut down due to upgrade, database initialization or admin restoration.
Working with ArangoDB
ArangoDB is now installed and running. You can now launch ArangoDB shell with the following command:
arangosh
 Please specify a password:
After providing root password, you should see the following output:
                                       _
  __ _ _ __ __ _ _ __   __ _  ___  ___| |__
 / _` | '__/ _` | '_ \ / _` |/ _ \/ __| '_ \
| (_| | | | (_| | | | | (_| | (_) \__ \ | | |
 \__,_|_|  \__,_|_| |_|\__, |\___/|___/_| |_|
                       |___/

arangosh (ArangoDB 3.4.5 [linux] 64bit, using jemalloc, build tags/v3.4.5-0-g648fbb8191, VPack 0.1.33, RocksDB 5.16.0, ICU 58.1, V8 5.7.492.77, OpenSSL 1.1.0j  20 Nov 2018)
Copyright (c) ArangoDB GmbH

Command-line history will be persisted when the shell is exited.
Connected to ArangoDB 'http+tcp://127.0.0.1:8529' version: 3.4.5 [SINGLE, server], database: '_system', username: 'root'

Type 'tutorial' for a tutorial or 'help' to see common examples
127.0.0.1:8529@_system>
Now, create a sample database with name mydb using the following command:
127.0.0.1:8529@_system> db._createDatabase("mydb");
Next, create database user and set password with the following command:
127.0.0.1:8529@_system> var users = require("@arangodb/users");
 127.0.0.1:8529@_system> users.save("myuser@localhost", "password");
 {
 "user" : "myuser@localhost",
 "active" : true,
 "extra" : {
 },
 "code" : 201
 }
Next, grant access to the database with the following command:
127.0.0.1:8529@_system> users.grantDatabase("myuser@localhost", "mydb");
Next, list your database with the following command:
127.0.0.1:8529@_system> db._databases()
Output:
[
  "_system",
  "mydb"
]
Next, connect to your mydb database using the myuser with the following command:
arangosh --server.username "myuser@localhost" --server.database mydb
 Please specify a password:
Provide your user password and press Enter, you should see the following output:
                                       _
  __ _ _ __ __ _ _ __   __ _  ___  ___| |__
 / _` | '__/ _` | '_ \ / _` |/ _ \/ __| '_ \
| (_| | | | (_| | | | | (_| | (_) \__ \ | | |
 \__,_|_|  \__,_|_| |_|\__, |\___/|___/_| |_|
                       |___/

arangosh (ArangoDB 3.4.5 [linux] 64bit, using jemalloc, build tags/v3.4.5-0-g648fbb8191, VPack 0.1.33, RocksDB 5.16.0, ICU 58.1, V8 5.7.492.77, OpenSSL 1.1.0j  20 Nov 2018)
Copyright (c) ArangoDB GmbH

Command-line history will be persisted when the shell is exited.
Connected to ArangoDB 'http+tcp://127.0.0.1:8529' version: 3.4.5 [SINGLE, server], database: 'mydb', username: 'myuser@localhost'

Type 'tutorial' for a tutorial or 'help' to see common examples
127.0.0.1:8529@mydb>
Access ArangoDB Web Interface
ArangoDB is now installed and configured, it's time to access ArangoDB web interface. ArangoDB web interface can be used to manage databases, collections, documents, users, graphs and check server status.
By default, ArangoDB is configured to access only from localhost. So, you will need to configure ArangoDB to access from remote location. You can do it by editing /etc/arangodb3/arangod.conf file:
nano /etc/arangodb3/arangod.conf
Change the following line:
From :
endpoint = tcp://127.0.0.1:8529
to
endpoint = tcp://192.168.0.104:8529
Save and close the file, when you are finished. Then, restart ArangoDB service to apply al these changes:
systemctl restart arangodb3
Now, open your web browser and type the URL http://192.168.0.104:8529. You will be redirected to the following page:

Now, provide your root username and password. Then, click on the Login button. You should see the following page:

Now, select the database and click on the Select DB. You should see the ArangoDB dashboard in the following page:
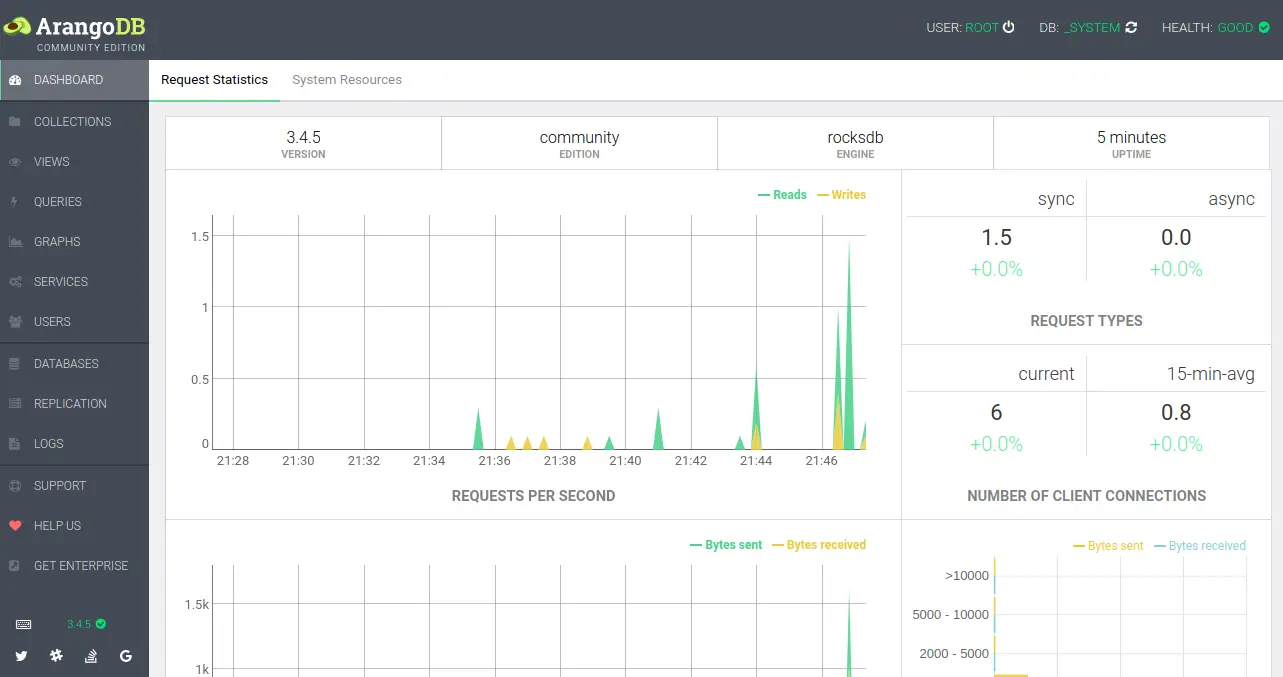
Congratulations! you have successfully installed and configured ArangoDB on Ubuntu 18.04 server. Feel free to ask me if you have any questions.

