How to Install CS-Cart on Ubuntu 18.04 LTS
CS-Cart is a simple and powerful eCommerce platform that can be used to host your own online store easily. It is written in PHP and uses MariaDB to store their data. You can sell and manage product inventories easily using built-in web-interface. CS-Cart does not offer a free version, it is available in a free 30-day trial. It is specially designed for building and managing an attractive storefront of any size. CS-Cart offers lot of features such as, multi-store, integrated SEO, theme editor, layout editor, different payment system, and many more.
In this tutorial, we will learn how to install CS-Cart on Ubuntu 18.04 server.
Requirements
- A server running Ubuntu 18.04.
- A root password is setup to your server.
Getting Started
Before starting, you will need to update your system with the latest version. You can do this by running the following command:
apt-get update -y
 apt-get upgrade -y
Once your server is updated, restart your server to apply the changes.
Install LAMP Server
CS-Cart runs on web server, written in PHP and uses MariaDB as a database. So, you will need to install Apache, MariaDB, PHP and other PHP modules to your system. You can install all of them with the following command:
apt-get install apache2 mariadb-server php7.2 libapache2-mod-php7.2 php7.2-common php7.2-sqlite3 php7.2-curl php7.2-intl php7.2-mbstring php7.2-xmlrpc php7.2-mysql php7.2-gd php7.2-xml php7.2-cli php7.2-zip php7.2-soap unzip -y
Once all the packages are installed, open php.ini file and modify some parameters:
nano /etc/php/7.2/apache2/php.ini
Change the following lines:
memory_limit = 256M
upload_max_filesize = 150M
max_execution_time = 360
date.timezone = Asia/Kolkata
Save and close the file, when you are finished. Then, restart Apache and MariaDB service and enable them to start on boot time with the following command:
systemctl restart apache2
 systemctl start mariadb
 systemctl enable apache2
 systemctl enable mariadb
Onc you have finished, you can proceed to the next step.
Configure MariaDB
By default, MariaDB is not hardened. So, you will need to secure it. You can do it with the following command:
mysql_secure_installation
This command will change root password, remove anonymous users, disallow root login remotely and remove test database and access to it as s$
    Enter current password for root (enter for none):
    Set root password? [Y/n]: N
    Remove anonymous users? [Y/n]: Y
    Disallow root login remotely? [Y/n]: Y
    Remove test database and access to it? [Y/n]:  Y
    Reload privilege tables now? [Y/n]:  Y
Once the MariaDB is secured, log in to MariaDB shell with the following command:
mysql -u root -p
Provide your root password, then create a database and user for CS-Cart with the following command:
MariaDB [(none)]> CREATE DATABASE cscartdb;
 MariaDB [(none)]> CREATE USER 'cscart'@'localhost' IDENTIFIED BY 'password';
Next, grant all the privileges to CS-Cart database with the following command:
MariaDB [(none)]> GRANT ALL PRIVILEGES ON cscartdb.* TO 'cscart'@'localhost' IDENTIFIED BY 'password' WITH GRANT OPTION;
Next, flush the privileges and exit from the MariaDB shell with the following command:
MariaDB [(none)]> FLUSH PRIVILEGES;
 MariaDB [(none)]> EXIT;
Once you have done, you can proceed to the next step.
Install CS-Cart
First, you will need to download the latest version of CS-Cart from their website. Once the download is completed successfully, unzip the downloaded file with the following command:
mkdir /var/www/html/cscart
 unzip cscart_v4.9.3.SP1.zip -d /var/www/html/cscart
Next, provide proper permissions to the cscart directory with the following command:
chown -R www-data:www-data /var/www/html/cscart/
 chmod -R 755 /var/www/html/cscart/
Once you have finished, you can proceed to the next step.
Configure Apache for CS-Cart
First, you will need to create an Apache virtual host file for CS-Cart. You can do it with the following command:
nano /etc/apache2/sites-available/cscart.conf
Add the following lines:
<VirtualHost *:80>
     ServerAdmin [email protected]
     ServerName example.com
     DocumentRoot /var/www/html/cscart/

     <Directory /var/www/html/cscart/>
        Options FollowSymlinks
        AllowOverride All
        allow from all
     </Directory>

     ErrorLog /var/log/apache2/cscart_error.log
     CustomLog /var/log/apache2/cscartcart_access.log combined
</VirtualHost>
Save and close the file, when you are finished. Then, enable CS-Cart virtual host file with the following command:
a2ensite cscart.conf
Next, enable Apache rewrite module with the following command:
a2enmod rewrite
Finally, restart Apache service to apply all the changes with the following command:
systemctl restart apache2
You can verify the Apache status with the following command:
systemctl status apache2
You should see the following output:
? apache2.service - The Apache HTTP Server
   Loaded: loaded (/lib/systemd/system/apache2.service; enabled; vendor preset: enabled)
  Drop-In: /lib/systemd/system/apache2.service.d
           ??apache2-systemd.conf
   Active: active (running) since Sun 2019-05-12 12:40:04 UTC; 6s ago
  Process: 6498 ExecStart=/usr/sbin/apachectl start (code=exited, status=0/SUCCESS)
 Main PID: 6517 (apache2)
    Tasks: 1 (limit: 1114)
   CGroup: /system.slice/apache2.service
           ??6517 /usr/sbin/apache2 -k start

May 12 12:40:23 ubuntu1804 systemd[1]: Starting The Apache HTTP Server...
May 12 12:40:23 ubuntu1804 apachectl[6498]: AH00557: apache2: apr_sockaddr_info_get() failed for ubuntu1804
May 12 12:40:23 ubuntu1804 apachectl[6498]: AH00558: apache2: Could not reliably determine the server's fully qualified domain name, using 192
May 12 12:40:23 ubuntu1804 systemd[1]: Started The Apache HTTP Server.
Once you have finished you can proceed to the next step.
Access CS-Cart Web Interface
CS-Cart is now installed and configured, it's time to access CS-Cart web interface.
Open your web browser and type the URL http://example.com. You will be redirected to the following page:
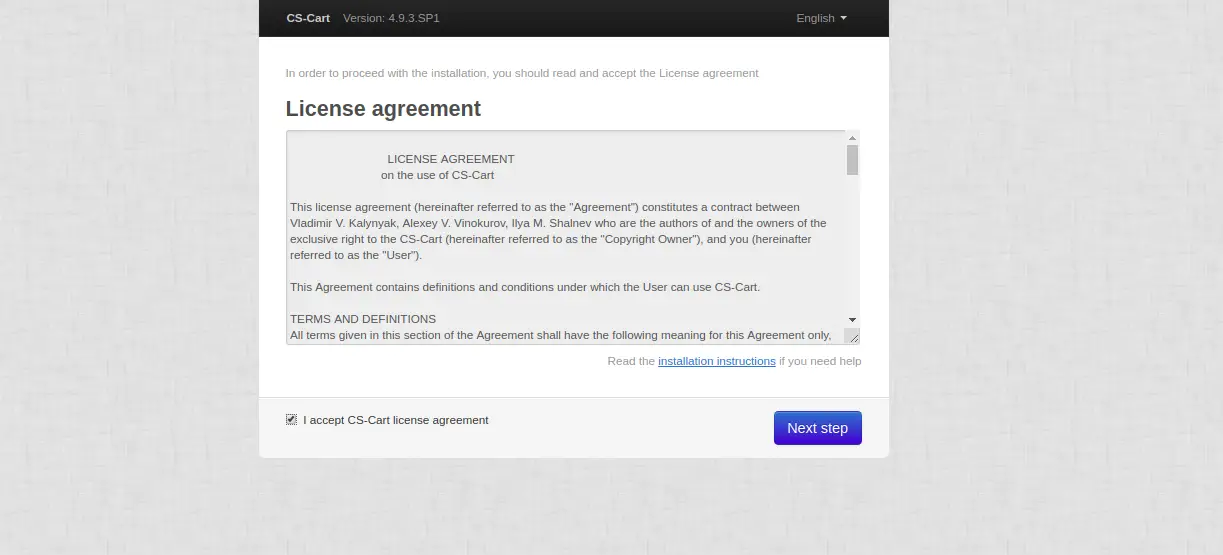
Accept the license agreement and click on the Next step button. You should see the following page:
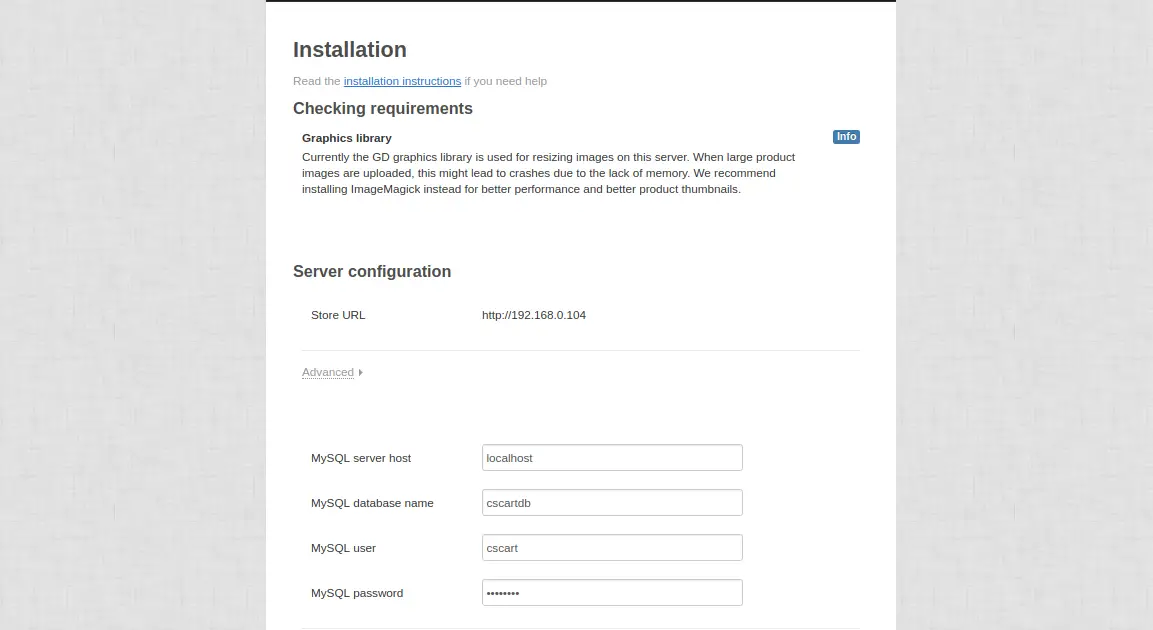
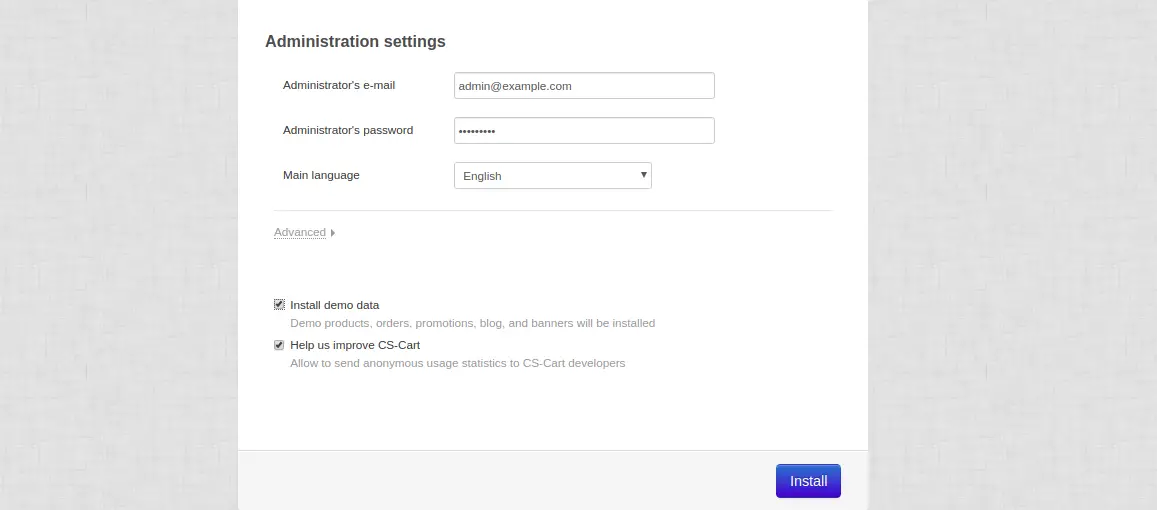
Now, provide your database name, database username, password, admin username and password. Then, click on the Install button. You should see the following page:
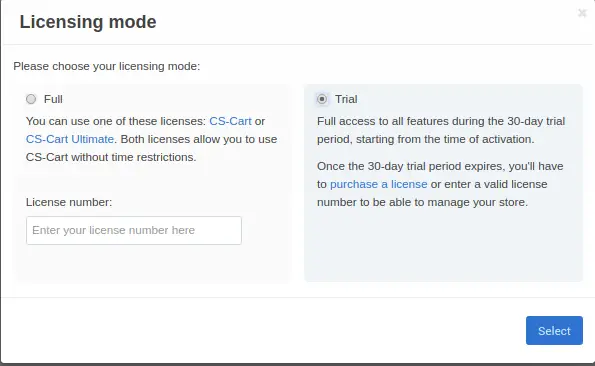
Now, select Trial and click on the Select button. You should see the following output:
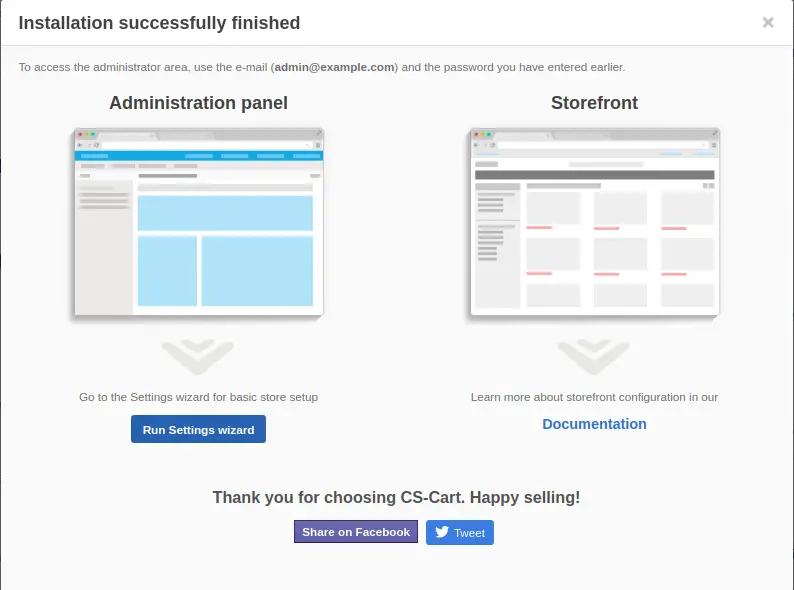
Now, click on the Administration panel. You should see CS-Cart dashboard in the following output:
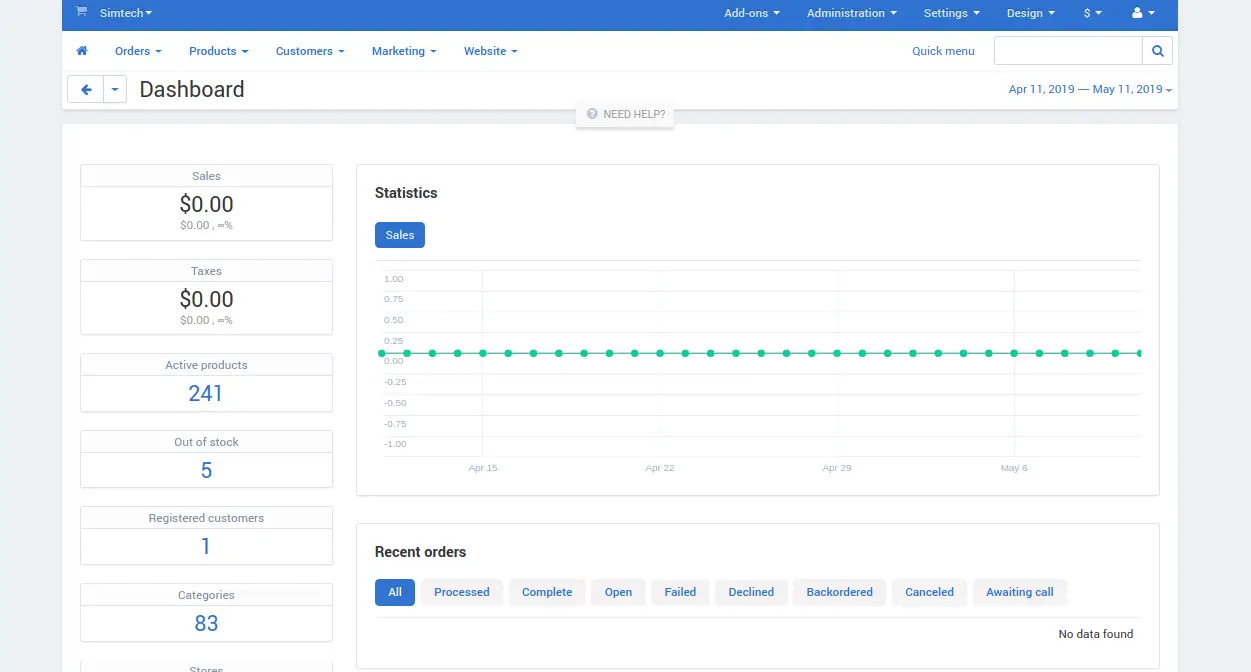
Congratulations! you have successfully installed and configured CS-Cart on Ubuntu 18.04 server. You can now create your own online store easily using CS-Cart. Feel free to ask me if you have any questions.

