How to Install Grav CMS with Nginx and Let's Encrypt on Ubuntu 18.04 LTS
This tutorial exists for these OS versions
- Ubuntu 20.04 (Focal Fossa)
- Ubuntu 18.04 (Bionic Beaver)
On this page
Grav is a fast, simple, and flexible, file-based CMS and platform. Grav is built with plain text files for your content. There is no database needed. The underlying architecture of Grav is designed to use well-established technologies to ensure that Grav is simple to use and easy to extend. Some of these key technologies include - Twig Templating for powerful control of the user interface, Markdown for content creation, YAML for simple configuration, Parsedown for fast Markdown and Markdown Extra support, Doctrine Cache layer for performance, Gregwar Image Library for dynamic image manipulation, and Symfony Console for CLI interface. This tutorial will walk you through the Grav CMS installation procedure on a fresh Ubuntu 18.04 server using Nginx as the web server and we will secure the website with a Let's encrypt SSL certificate.
Requirements
Make sure your system meets following Grav system requirements:
- Web Server (Apache, Nginx, LiteSpeed, Lightly, IIS, etc.)
- PHP version 7.1.3 or higher with the following PHP extensions:
curl,ctype,dom,gd,json,mbstring,openssl,session,simplexml,xml,zip, apcu, opcache, yaml
Prerequisites
- An operating system running Ubuntu 18.04 LTS.
- A non-root user with sudo privileges.
Initial steps
Check your Ubuntu version:
lsb_release -ds
# Ubuntu 18.04.2 LTS
Set up the timezone:
sudo dpkg-reconfigure tzdata
Update your operating system packages (software). This is an important first step because it ensures you have the latest updates and security fixes for your operating system's default software packages:
sudo apt update && sudo apt upgrade -y
Install some essential packages that are necessary for basic administration of Ubuntu operating system:
sudo apt install -y curl wget vim git unzip socat bash-completion
Step 1 - Install PHP and required PHP extensions
Install PHP, as well as the necessary PHP extensions:
sudo apt install -y php7.2 php7.2-cli php7.2-fpm php7.2-common php7.2-curl php7.2-gd php7.2-json php7.2-mbstring php7.2-xml php7.2-zip php7.2-opcache php-apcu
To show PHP compiled in modules, you can run:
php -m

ctype
curl
exif
fileinfo
. . .
. . .
Check the PHP version:
php --version

# PHP 7.2.17-0ubuntu0.18.04.1 (cli) (built: Apr 18 2019 14:12:38) ( NTS )
# Copyright (c) 1997-2018 The PHP Group
# Zend Engine v3.2.0, Copyright (c) 1998-2018 Zend Technologies
# with Zend OPcache v7.2.17-0ubuntu0.18.04.1, Copyright (c) 1999-2018, by Zend Technologies
PHP-FPM service is automatically started and enabled on reboot on Ubuntu 18.04 system, so there is no need to start and enable it manually. We can move on to the next step, which is the database installation and setup.
Step 2 - Install acme.sh client and obtain Let's Encrypt certificate (optional)
Securing your website with HTTPS is not necessary, but it is a good practice to secure your site traffic. In order to obtain TLS certificate from Let's Encrypt we will use acme.sh client. Acme.sh is a pure UNIX shell software for obtaining TLS certificates from Let's Encrypt with zero dependencies.
Download and install acme.sh:
sudo su - root
git clone https://github.com/Neilpang/acme.sh.git
cd acme.sh
./acme.sh --install --accountemail [email protected]
source ~/.bashrc
cd ~
Check acme.sh version:
acme.sh --version
# v2.8.1
Obtain RSA and ECC/ECDSA certificates for your domain/hostname:
# RSA 2048
acme.sh --issue --standalone -d example.com --keylength 2048
# ECDSA
acme.sh --issue --standalone -d example.com --keylength ec-256
If you want fake certificates for testing you can add the --staging flag to the above commands.
After running the above commands, your certificates and keys will be in:
- For RSA:
/home/username/example.comdirectory. - For ECC/ECDSA:
/home/username/example.com_eccdirectory.
To list your issued certs you can run:
acme.sh --list
Create a directory to store your certs. We will use the /etc/letsencrypt directory.
mkdir -p /etc/letsecnrypt/example.comsudo mkdir -p /etc/letsencrypt/example.com_ecc
Install/copy certificates to /etc/letsencrypt directory.
# RSA
acme.sh --install-cert -d example.com --cert-file /etc/letsencrypt/example.com/cert.pem --key-file /etc/letsencrypt/example.com/private.key --fullchain-file /etc/letsencrypt/example.com/fullchain.pem --reloadcmd "sudo systemctl reload nginx.service"
# ECC/ECDSA
acme.sh --install-cert -d example.com --ecc --cert-file /etc/letsencrypt/example.com_ecc/cert.pem --key-file /etc/letsencrypt/example.com_ecc/private.key --fullchain-file /etc/letsencrypt/example.com_ecc/fullchain.pem --reloadcmd "sudo systemctl reload nginx.service"
All the certificates will be automatically renewed every 60 days.
After obtaining certs exit form the root user and return back to normal sudo user:
exit
Step 3 - Install and Configure Nginx
Grav CMS can work fine with many web servers. In this tutorial, we selected Nginx.
Install Nginx:
sudo apt install -y nginx
Check the Nginx version:
sudo nginx -v
# nginx version: nginx/1.14.0 (Ubuntu)
Configure Nginx for Grav by running:
sudo vim /etc/nginx/sites-available/grav.conf
And populate the file with the following configuration:
server {

  listen 80;
  listen [::]:80;
 listen 443 ssl;
 listen [::]:443 ssl;

  server_name example.com;

  root /var/www/grav;

  index index.php;

  ssl_certificate /etc/letsencrypt/status.example.com/fullchain.cer;
  ssl_certificate_key /etc/letsencrypt/status.example.com/status.example.com.key;
  ssl_certificate /etc/letsencrypt/status.example.com_ecc/fullchain.cer;
  ssl_certificate_key /etc/letsencrypt/status.example.com_ecc/status.example.com.key;

  location / { try_files $uri $uri/ /index.php?$query_string; }
 location ~* /(\.git|cache|bin|logs|backup|tests)/.*$ { return 403; }
 location ~* /(system|vendor)/.*\.(txt|xml|md|html|yaml|yml|php|pl|py|cgi|twig|sh|bat)$ { return 403; }
 location ~* /user/.*\.(txt|md|yaml|yml|php|pl|py|cgi|twig|sh|bat)$ { return 403; }
 location ~ /(LICENSE\.txt|composer\.lock|composer\.json|nginx\.conf|web\.config|htaccess\.txt|\.htaccess) { return 403; }

  location ~ \.php$ {
    fastcgi_pass unix:/var/run/php/php7.2-fpm.sock;
    fastcgi_split_path_info ^(.+\.php)(/.+)$;
    fastcgi_index index.php;
    include fastcgi_params;
    fastcgi_param SCRIPT_FILENAME $document_root/$fastcgi_script_name;
  }

}
Activate the new grav.conf configuration by linking the file to the sites-enabled directory:
sudo ln -s /etc/nginx/sites-available/grav.conf /etc/nginx/sites-enabled/
Test NGINX configuration:
sudo nginx -t
Reload Nginx:
sudo systemctl reload nginx.service
Step 4 - Install Grav CMS
Create a document root directory where Grav should reside in:
sudo mkdir -p /var/www/grav
Change ownership of the /var/www/grav directory to {jour_user}:
sudo chown -R {your_user}:{your_user} /var/www/grav
NOTE: Replace {jour_user} with your initially created non-root user username.
Navigate to the document root directory:
cd /var/www/grav
Download the Grav source code via wget and unzip it:
wget https://getgrav.org/download/core/grav-admin/1.6.8
unzip 1.6.8
mv grav-admin/* . && mv grav-admin/.* .
rm -rf grav-admin 1.6.8
Change ownership of the /var/www/grav directory to www-data:
sudo chown -R www-data:www-data /var/www/grav
Open your site in a web browser and follow the instructions on the screen to finish Grav installation.
Step 5 - Complete the Grav CMS setup
Create an admin account:
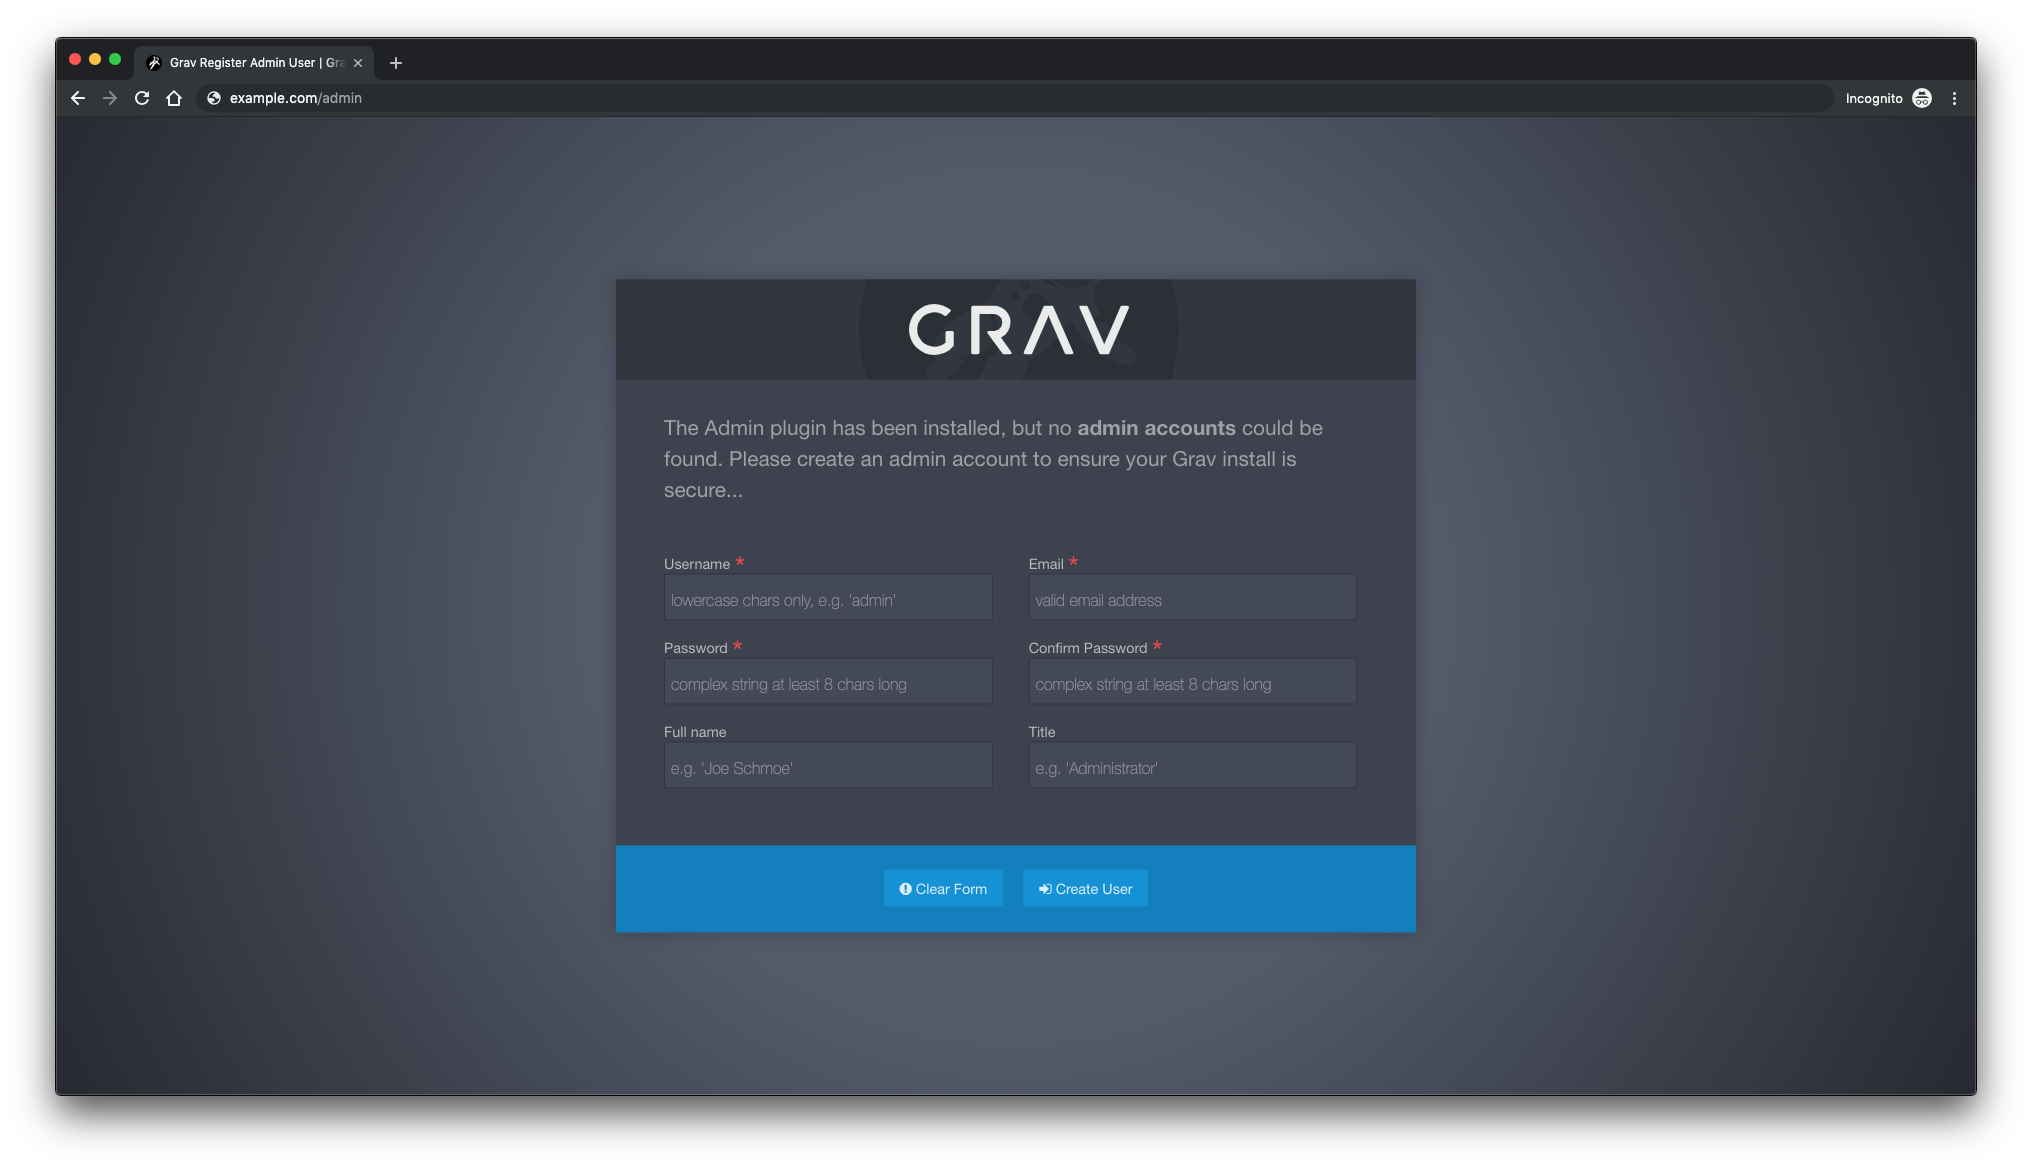
Upon the creation of an admin account you will be redirected to Grav admin dashboard:

That's all. Grav CMS installation is complete.

