How to Install Java (JDK and JRE) on Debian 10
In this tutorial, we will show you how to install Java on the Debian 10 (Buster). We will install both the JDK (Java Development Kit) and the JRE (Java Runtime Environment on a Debian server. We're going to show you how to install and manage multiple Java versions on the Debian 10.
What we will do:
- Install Java 11
- Install Java 12
- Setup Default Java Version
- Setup JAVA_HOME Environment Variable
Step 1 - Install Java 11 LTS
Firstly, we're going to show you how to install the default Java on Debian 10. According to the official Debian wiki, it is used the Java 11 as a default version.
Before going any further, let's update the repository and upgrade all packages using the apt command below.
sudo apt update
sudo apt upgrade
Wait for all packages being upgraded.
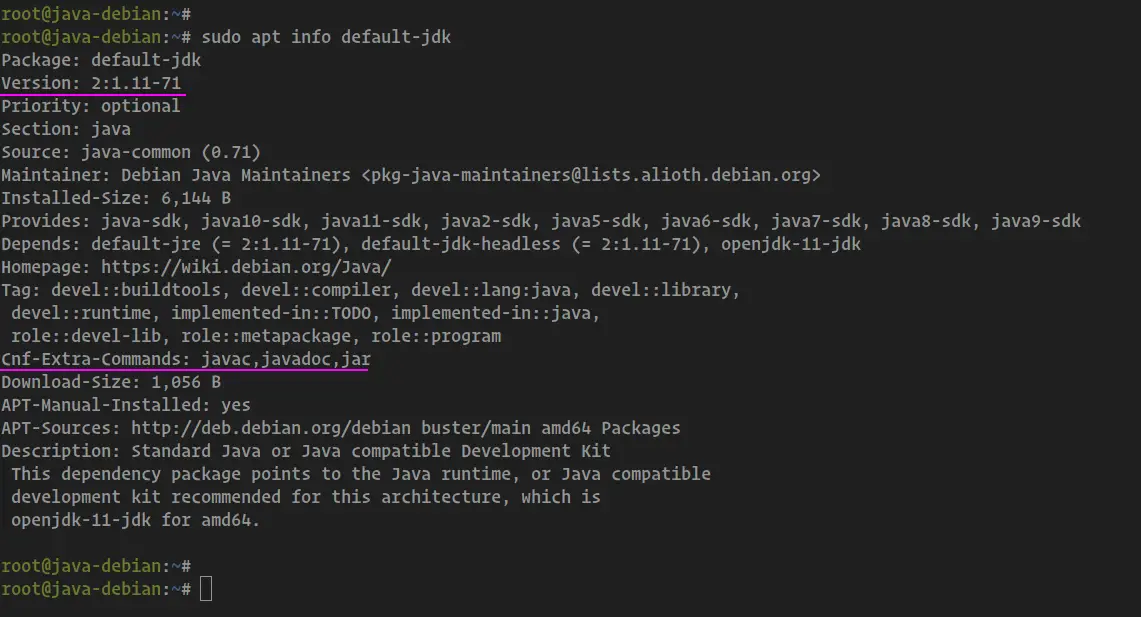
The default Java packages on the Debian repository named as a 'default-jdk'. Run the 'apt info' command below to get details about the Java package.
sudo apt info default-jdk
Now you will get the details package as below.
Next, install the 'default-jdk' package using the apt command below.
sudo apt install -y default-jdk
The command will automatically other packages such as 'default-jre' Java Runtime Environment that comes with the 'java' command-line.
Once all installation is complete, check the java version that we just installed.
java -version
javac -version
jar --version
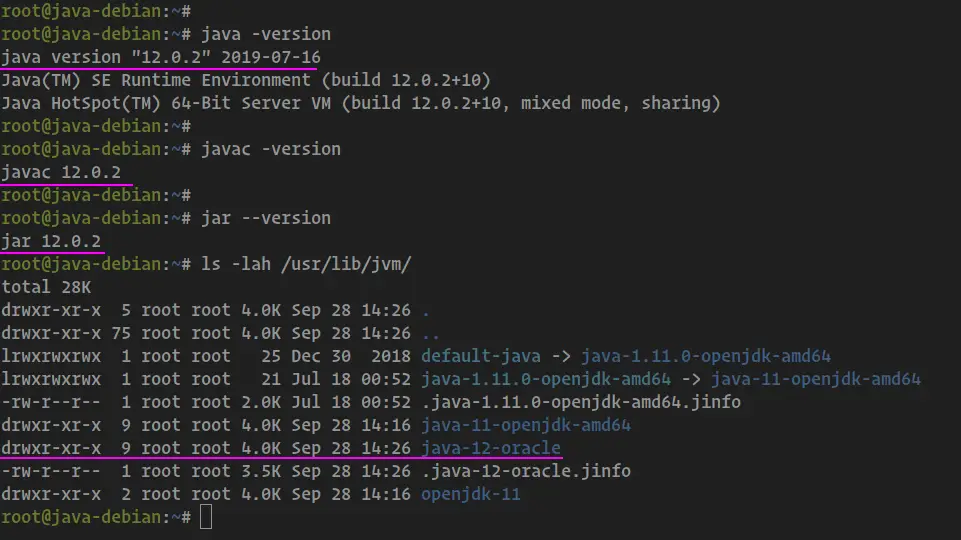
And you will get the result as below.
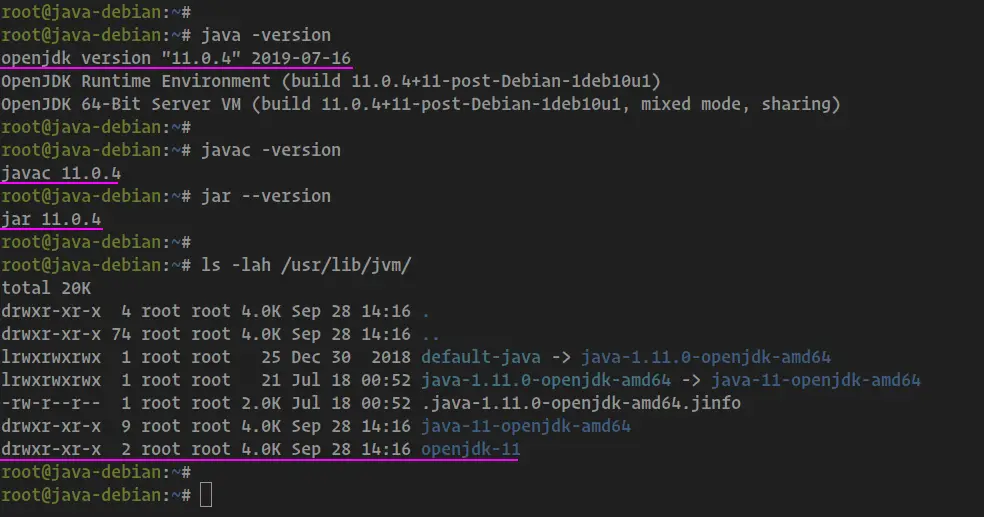
You will get the Java 11 has been installed on the Debian 10, installed to the '/usr/lib/jvm/' directory.
Check the directory using the following command.
ls -lah /usr/lib/jvm/
Step 2 - Install Java 12
In this step, we're going to install another Java version to the Debian 10. We will install Java 12 packages from the PPA repository of Ubuntu bionic beaver.
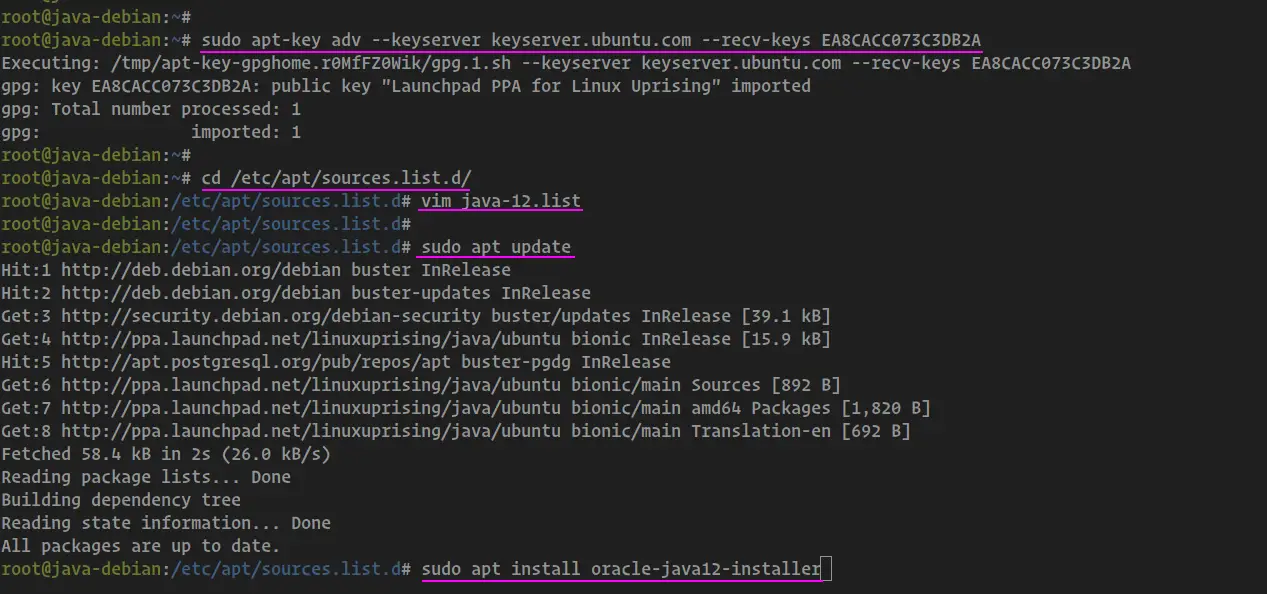
Firstly, we need to add the key of the package to the Debian 10 system using the apt-key command below.
sudo apt-key adv --keyserver keyserver.ubuntu.com --recv-keys EA8CACC073C3DB2A
After that, go to the '/etc/apt/sources.list.d' directory and create a new repository file called 'java-12.list' using the vim editor.
cd /etc/apt/sources.list.d/
vim java-12.list
Paste the following configurations.
deb http://ppa.launchpad.net/linuxuprising/java/ubuntu bionic main
deb-src http://ppa.launchpad.net/linuxuprising/java/ubuntu bionic main
Save and close.
Now update the repository and install the Java 12 using the installer package. Run the apt command below.
sudo apt update
sudo apt install oracle-java12-installer
During the installation, you will be asked about the Oracle License Agreement, choose 'OK'.
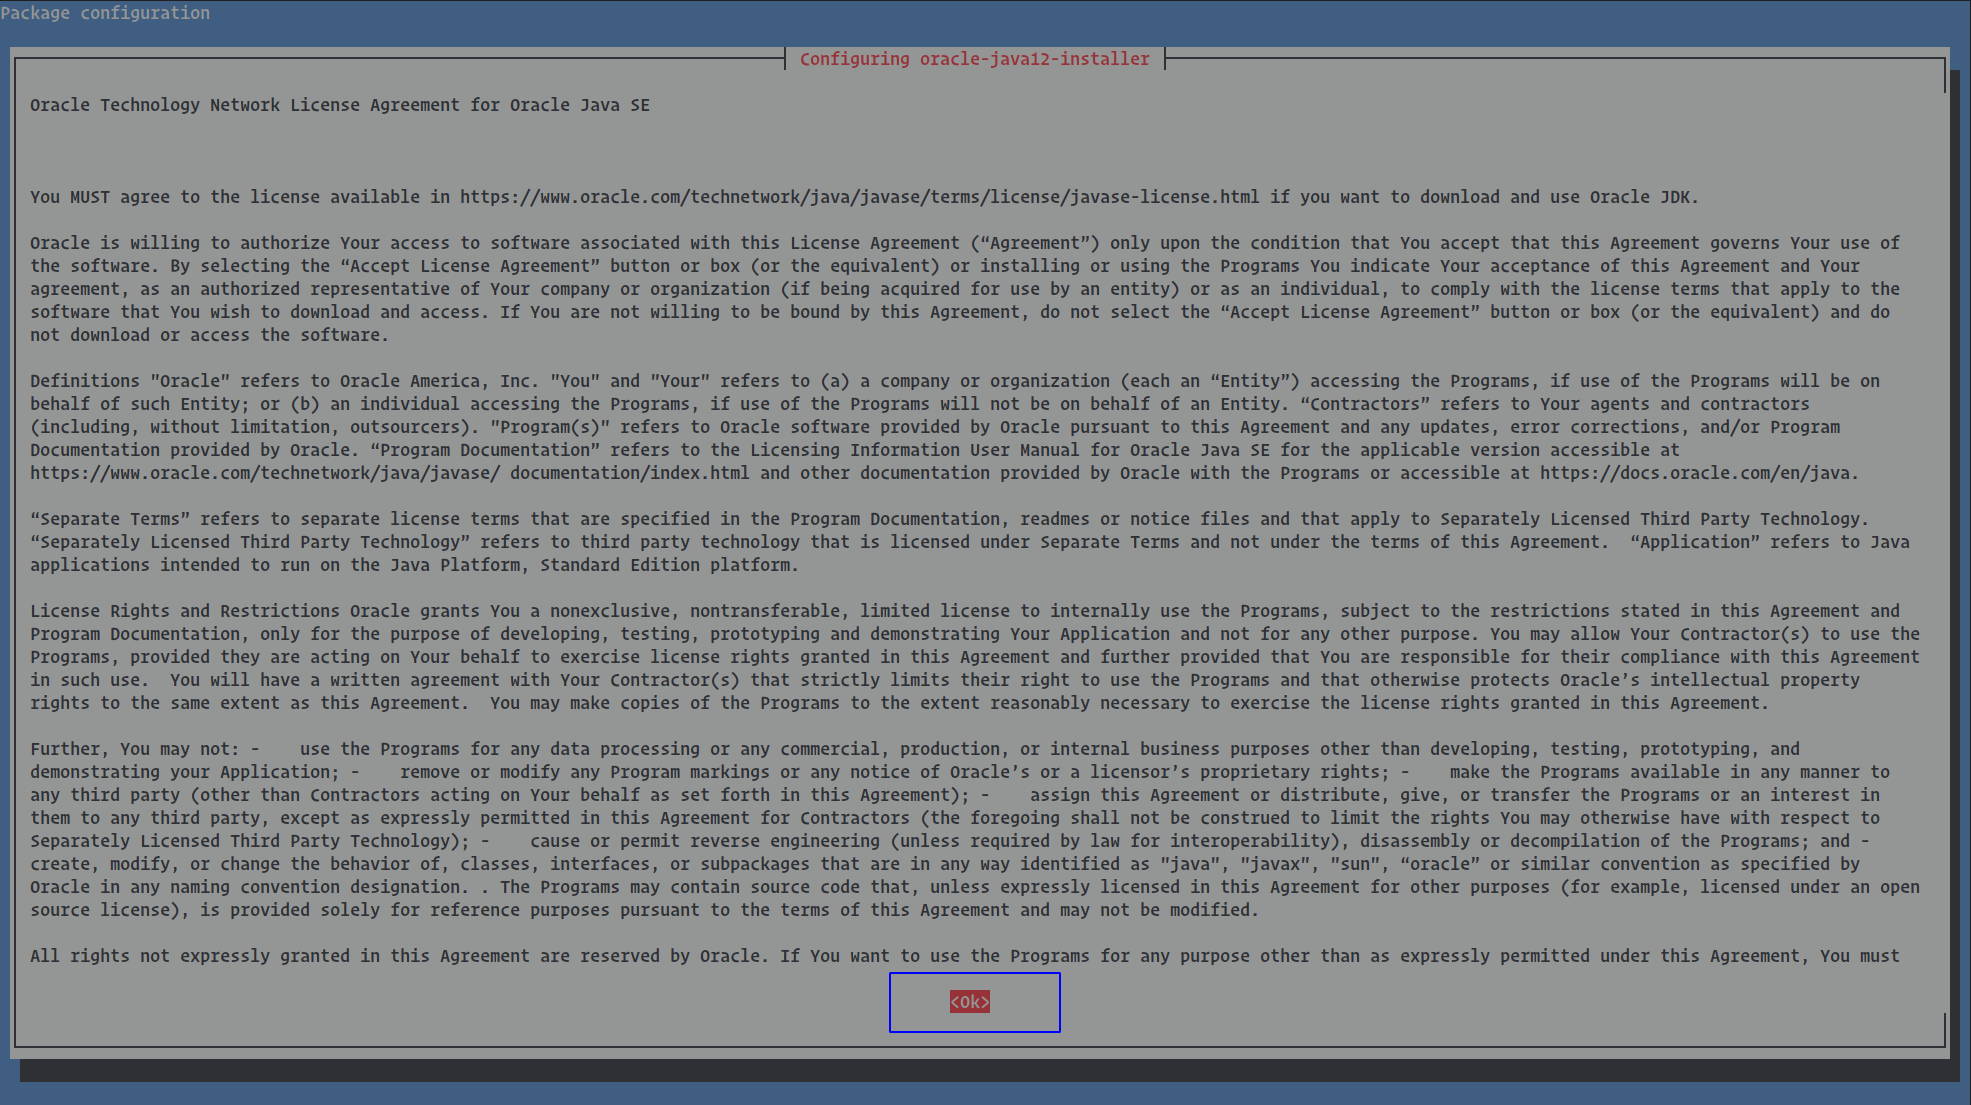
And 'Yes' accept the License.

Once all installation is complete, check the java version using the following commands.
java -version
javac -version
jar --version
Also, check the '/usr/lib/jvm' directory.
ls -lah /usr/lib/jvm/
And you will get the result as below.
As a result, the Java 12 has been installed on the Debian 10, installed to the '/usr/lib/jvm' directory.
Step 3 - Setup Default Java Version
At this stage, we've two Java versions installed on the Debian 10 system. And for this step, we're going to show you how to switch between two different versions of Java JDK (Java Development Kit) and JRE (Java Runtime Environment) on the Debian 10 system.
We must know that 'default-jdk' and 'default-jre' packages have comes with some java binary commands such as java, jar, javac, jshell, etc. And we're going to make a change on the system that will affect both JDK and JRE binary commands.
Firstly, we need to check all available Java versions on the system using the following command.
sudo update-java-alternatives -l
And you will get the result as below.
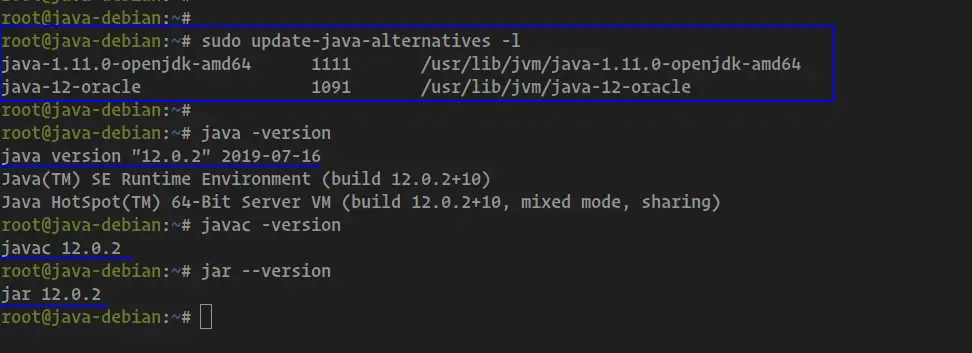
As a result, you will get the Java 11 and Java 12 is available on the system. The java 11 installed on driectory '/usr/lib/jvm/java-1.11.0-openjdk-amd64', and the java 12 installed on '/usr/lib/jvm/java-12-oracle' directory.
Now you can check the current JDK and JRE version that used by the system using the following commands.
java -version
javac -version
jar --version
And we're currently using Java 12 as the default version.
Next, we will change the default version of Java JDK and JRE from version 12 to 11.
Run the following command and change the java directory with your own.
sudo update-java-alternatives -s /usr/lib/jvm/java-1.11.0-openjdk-amd64
And you will get the result as below.
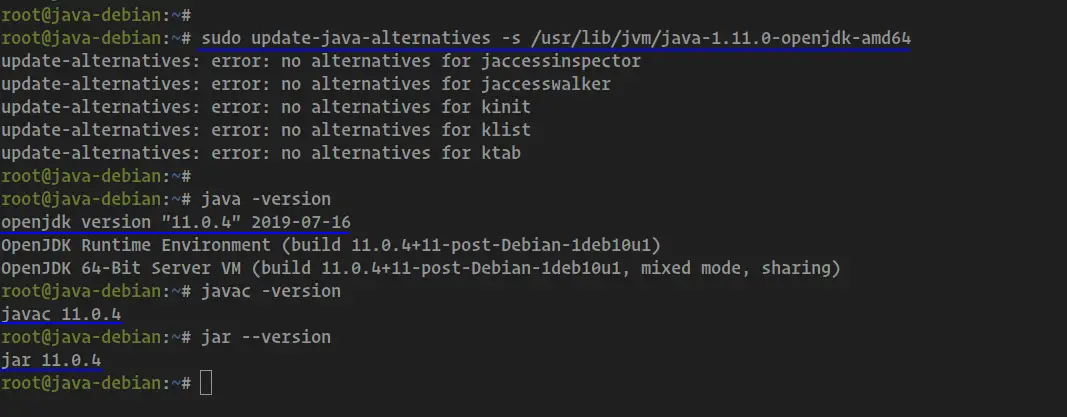
You can just ignore the error message and check the java version again.
java -version
javac -version
jar --version
And we're successfully changed the default Java JDK and JRE version 12 to 11.
Step 4 - Setup JAVA_HOME Environment Variable
In this step, we're going to set up the 'JAVA_HOME' environment variable through the '~/.bashrc' configuration file.
As a root user, edit the configuration file '~/.bashrc' using vim editor.
vim ~/.bashrc
Change the 'java-1.11.0-openjdk-amd64' directory with your own and paste it into it.
JAVA_HOME=/usr/lib/jvm/java-1.11.0-openjdk-amd64
PATH=$PATH:$JAVA_HOME/bin
Save and close.
Now logout from the root shell session and log in again, then check the 'JAVA_HOME' environment variable using the command below.
echo $JAVA_HOME
echo $PATH
And you will get the result as below.
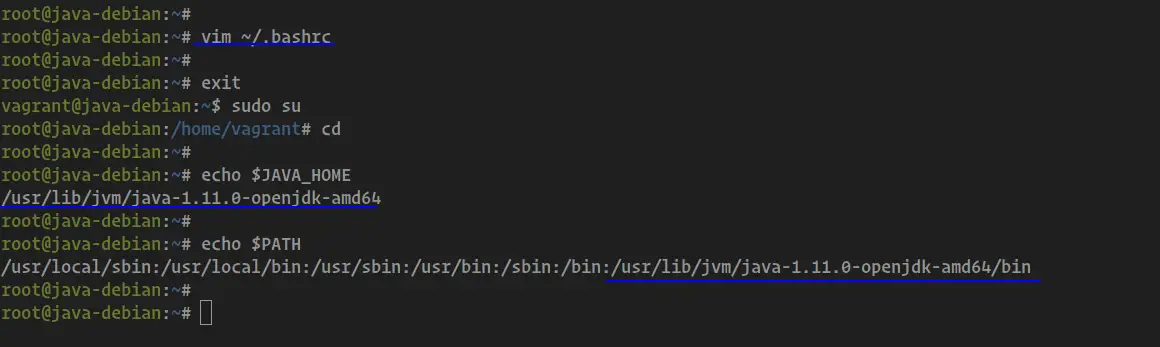
As a result, the 'JAVA_HOME' environment variable configuration has been completed.

