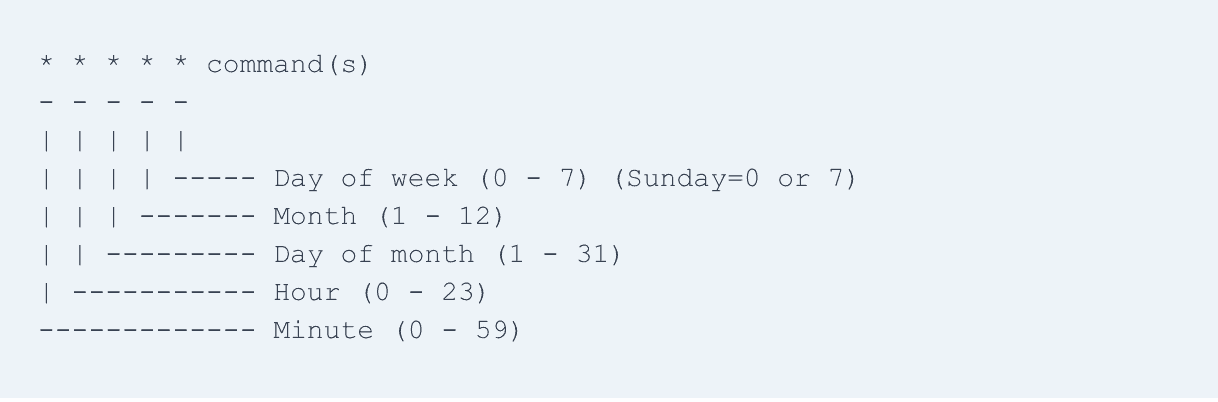
Updated on 7/1/2023 – In Linux, automated tasks are referred to as cron jobs. These jobs are executed by a daemon called CRON, which runs commands at predetermined times or intervals. The exact time for a command to run can be set by specifying the
minute, hour, day, and month. It is also possible to specify the periodicity of a command, such as running it every 30 minutes or at a particular time on a certain day of the week. Cron jobs can be used for a variety of purposes, such as sending emails, backing up data, or applying security patches. When the system is turned on, the CRON daemon starts and stays active as long as the system is running. Configuration files called crontabs contain sets of commands and their execution times, and CRON reads these files and runs the commands at the scheduled times.
Read: How to run a command in Linux every x seconds
If you want to display the crontabs that are currently running , issue the command below:
sudo crontab -l
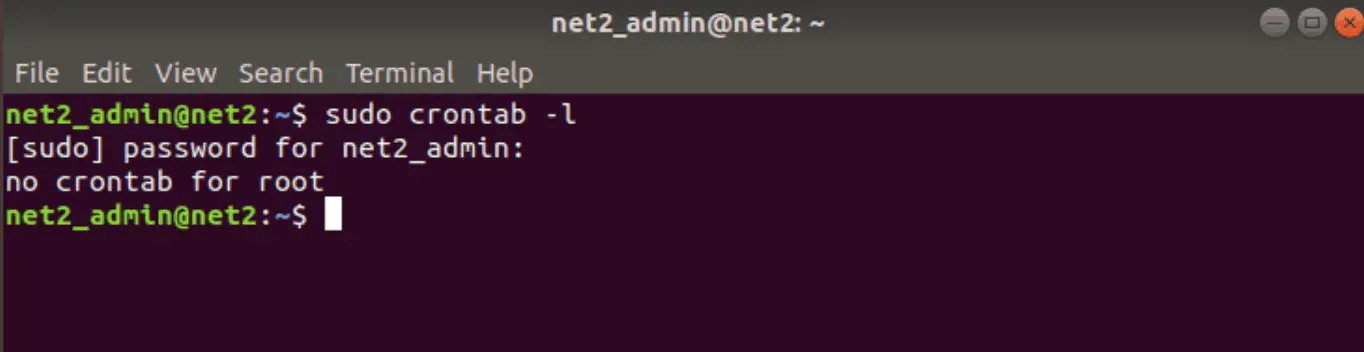
It’s worth noting that there aren’t any crontabs for the root user. Actually, each user has their own crontab file located in the /var/spool/cron directory. The names of these crontab files include the login names of their respective users. This enables cron to determine which UID to use when running the list of commands found in each configuration file. To edit another user’s crontab, you can use the following arguments with the crontab command:
crontab -u user_name -e
Crontab logs: In order to see the list of the commands that were executed and their scheduled times , you would need to check the directories /var/cron/log (in Red Hat) or /var/adm/cron/log since cron keeps its log file in these folders (in /var/spool/cron/crontabs in Debian and Ubuntu).
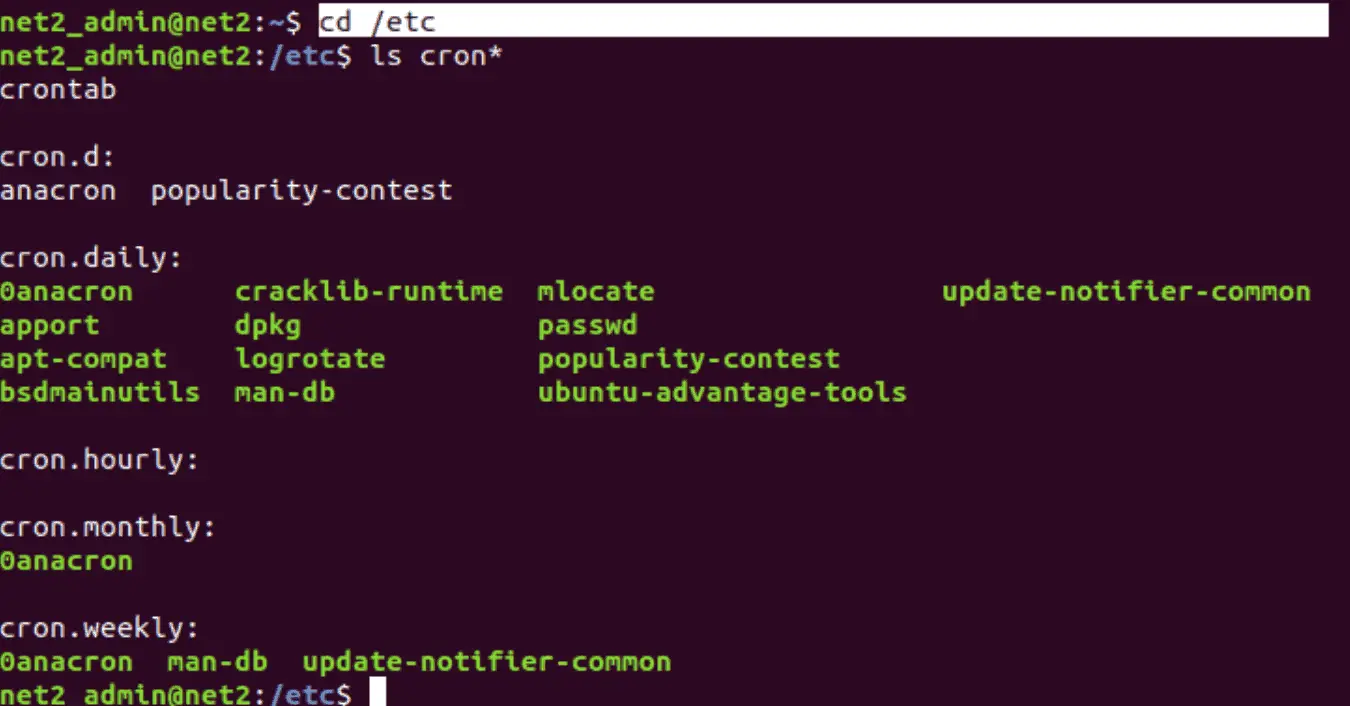
Note that crontab files can be defined system-wide or by a single user. For system-wide files , you would need to check the directories /etc/crontab and also the files in /etc/cron.d :
Linux job scheduler
As the root user, you can run the crontab -e command in order to schedule software updates.
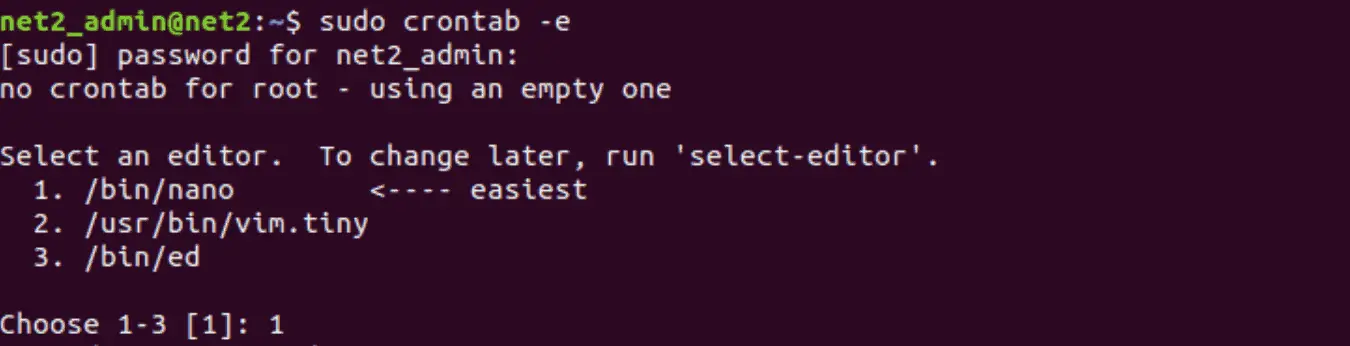
You can choose your preferred editor (vi command by default) as shown above in order to edit a crontab file.
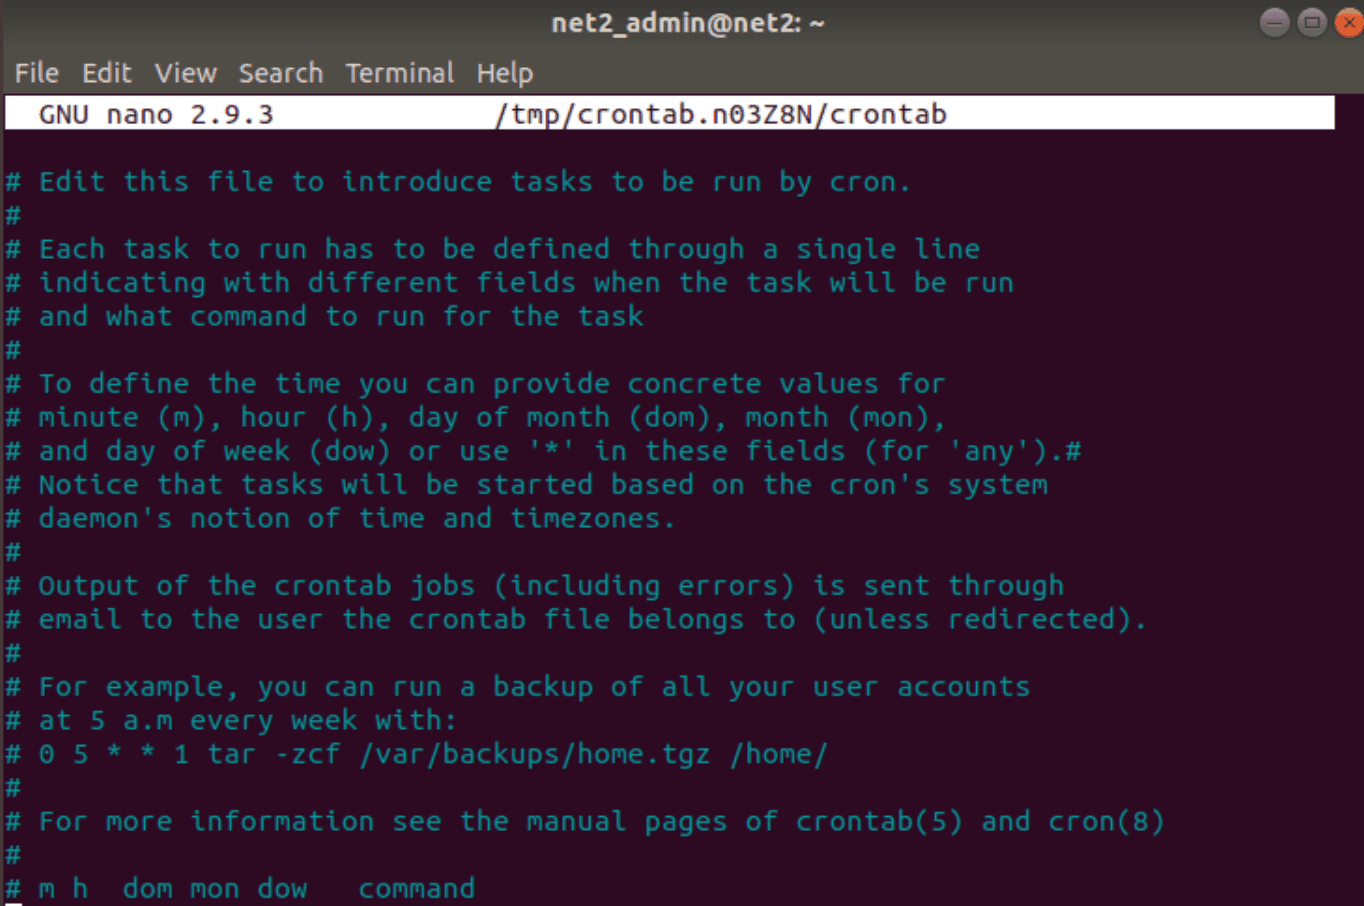
Here’s an example command to be interpreted by cron:
# min hour day/month month day/week command
59 10 * * 1 apt-get update -y | mail net2_admin@localhost
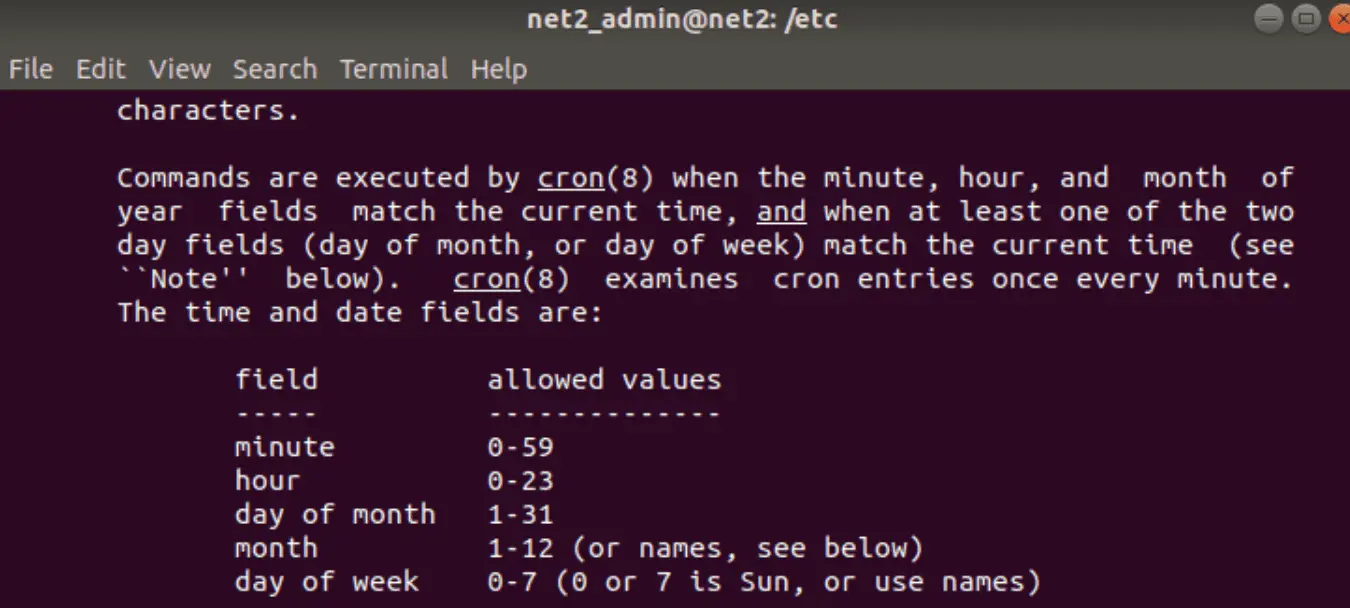
The first five fields designate the day and time whereas the last field tells cron when to run the command. The command can be any valid shell command without quotes and may contain tabs or spaces..
In the example above, the first line starts with a pound sign (#) which signals to cron that this is just a comment line.We can see here the name of the fields for illustration purpose.
In the second line, the command [ apt-get update -y | mail net2_admin@localhost ] is run at 59 minutes after hour 10 (10:59 a.m). The star (*) matches all values This then will instruct cron to run the command every Monday of each month.
The following example will tell cron to run updates at 09:44 a.m Monday through Thursday:
44 09 * * 1-4 yum -y update
Two integers therefore would indicate a range of values. If the first field contains a comma for instance : 0.15 that would indicate that cron will run every 15 minutes.
The comma specifies a set of values for repetition. For example, if write 1,2,5 in the Hour slot, the corresponding task will run at 1 am, 2 am and 5 am respectively.
15 20 * * 0-1,4 rm -rf ~/.cache/thumbnails4 in the Hour field , that would mean that the task will be carried out every four hours.
Keywords shortcuts or predefined macros
You have the possibility to also specify some predefined special keywords shortcuts instead of the numerical values (i.e. hourly, daily, etc.)
- @yearly (or @annually) – Runs the specified command once a year at midnight on the 1st of January. This is equivalent to 0 0 1 1 *.
- @monthly – Runs the specified command once a month, on the first day of the month and at midnight. Equivalent to 0 0 1 * *.
- @weekly – Runs the specified command once a week on Sunday and at midnight. Equivalent to 0 0 * * 0.
- @daily – Runs the specified command daily at midnight. Equivalent to 0 0 * * *.
- @hourly – Runs the specified command every hour at the beginning of the hour. Equivalent to 0 * * * *.
- @reboot – Runs the specified task at startup.
Read: How to keep Ubuntu clean
Crontab commands and management
You can install or edit a crontab file via crontab command ( replacing any previous version):
crontab filename
Here is a list of commands with the options that will allow you to modify, add or remove cron jobs :
crontab -l
This will display the content of your crontab (sent to standard output)
crontab -r
This will remove your crontab file (therefore you no longer have a crontab file).
If for instance you write
crontab -r mradmin
This will erase the crontab of the user mradmin. You can have both a filename and a username arguments in the same command (e.g., crontab -u mradmin crontab.new)
crontab -e
This will edit your crontab file and then resubmits it to the crontab directory.
NOTE: If the system is down, cron does not re-run the commands that are missed in the meantime.
For more information on the crontab format in linux, type man 5 crontab. To read about the crontab command, type man 1 crontab.
Crontab submission permission settings
The cron.allow and cron.deny configuration files allow system administrators to control access to the crontab command or the ability to submit crontab files. If the cron.allow file exists, it will include a list of users who are allowed to submit crontabs. If a user is not listed in this file, they are not permitted to use the crontab command. Adding a username to the cron.deny file will prevent that user from accessing the crontab commands. It’s worth noting that on most systems, access control is handled by crontab rather than cron. Even if a user unintentionally places a crontab file in the designated directory, the commands within it will still be executed by cron.
Read: How to manage permissions in Linux – guide for beginners
Cron jobs scheduling via GUI
The last section in this cron tutorial will be dedicated to scheduling tasks using a GUI. It is possible to schedule cron jobs via a graphical user interface. To do so , open up the terminal
and issue the command :
sudo apt–get install gnome-schedule
Make sure that your packages are up to date beforehand by running sudo apt-get update.
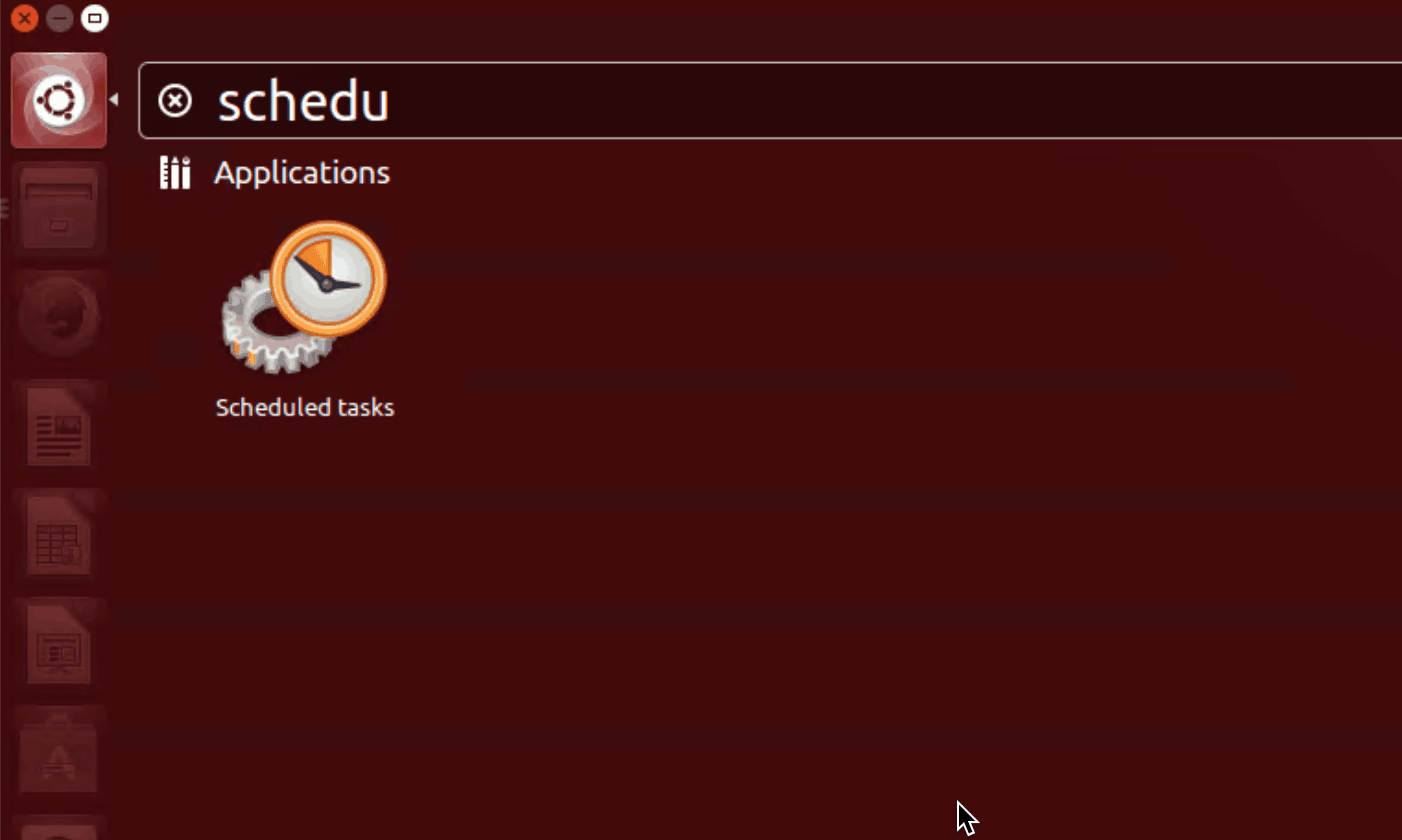
Once the installation is complete, look up the application you have just installed , i.e. scheduled tasks and double-click on it.
You will then get the screen below entitled ‘Configure Scheduled Tasks’ :

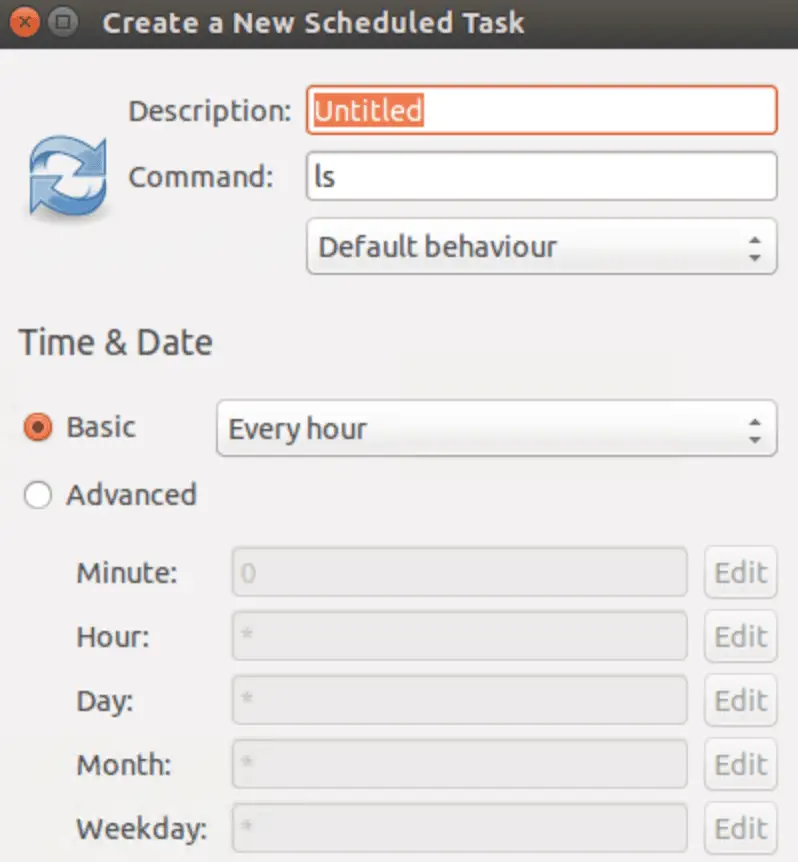
Clicking on New will bring up the window below :
Crontab example in linux (Ubuntu)
You just need to fill out all of the required information in order to create a new job:
- Job description
- Command
- Behavior
- Basic (periodicity)
- Advanced (specific date and time).
If you like the content, we would appreciate your support by buying us a coffee. Thank you so much for your visit and support.
I think , it is wrong this instruccion o interpretation
15 20 * * 0-1,4 rm -rf ~/.cache/thumbnails var wpcf7 = {"apiSettings":{"root":"https:\/\/net2.com\/wp-json\/contact-form-7\/v1","namespace":"contact-form-7\/v1"},"cached":"1"};