How to Install Fork CMS with NGINX on CentOS 8
On this page
- Requirements
- Prerequisites
- Initial steps
- Step 1 - Install PHP and PHP extensions
- Step 2 - Install MariaDB and create a database for Fork CMS
- Step 3 - Install Acme.sh client and obtain Let's Encrypt certificate (optional)
- Step 4 - Install and configure NGINX
- Step 5 - Install Composer
- Step 6 - Install Fork CMS
- Step 7 - Complete the Fork CMS setup
- Links
Fork is easy to use open-source CMS built using Symfony Components. It has an intuitive and user-friendly interface, powerful apps that you can download to expand your site, and a wide collection of beautiful themes. In this tutorial, we will go through the Fork CMS installation and setup on the CentOS 8 system by using Nginx as a web server, MariaDB as the database engine, and optionally you can secure the transport layer by using Acme.sh client and Let's Encrypt certificate authority to add SSL support.
Requirements
Requirements for installing and running Fork CMS are:
- PHP version 7.1 or higher.
- The following PHP extensions should be installed and enabled: cURL, libxml, DOM, SimpleXML, SPL, PDO (with MySQL driver), mb_string, iconv, GD2 graphics library, JSON, PCRE, intl.
- MySQL 5.0 or higher.
- NGINX or Apache with
.htaccess,mod_rewrite,mod_expires(optional but recommended),mod_deflate(optional) enabled.
Prerequisites
- An operating system running CentOS 8.
- A non-root user with sudo privileges.
Initial steps
Check your CentOS version:
cat /etc/centos-release
# CentOS Linux release 8.0.1905 (Core)
Set up the timezone:
timedatectl list-timezones
sudo timedatectl set-timezone 'Region/City'
Update your operating system packages (software). This is an important first step because it ensures you have the latest updates and security fixes for your operating system's default software packages:
sudo yum update -y
Install some essential packages that are necessary for basic administration of the CentOS operating system:
sudo yum install -y curl wget vim git unzip socat bash-completion epel-release
Step 1 - Install PHP and PHP extensions
Install PHP, as well as the necessary PHP extensions for Fork CMS:
sudo yum install -y php php-cli php-fpm php-common php-mysqlnd php-curl php-json php-zip php-gd php-xml php-mbstring php-opcache php-intl
To show PHP compiled in modules, you can run:
php -m

ctype
curl
exif
fileinfo
. . .
. . .
Check the PHP version:
php --version
# PHP 7.2.11 (cli) (built: Oct 9 2018 15:09:36) ( NTS )
Start and enable PHP-FPM service:
sudo systemctl start php-fpm.service
sudo systemctl enable php-fpm.service
We can move on to the next step, which is the database installation and setup.
Step 2 - Install MariaDB and create a database for Fork CMS
Install MariaDB database server:
sudo yum install -y mariadb-server
Check the MariaDB version:
mysql --version
# mysql Ver 15.1 Distrib 10.3.11-MariaDB, for Linux (x86_64) using readline 5.1
Start and enable MariaDB service:
sudo systemctl start mariadb.service
sudo systemctl enable mariadb.service
Run mysql_secure installation script to improve MariaDB security and set the password for MariaDB root user:
sudo mysql_secure_installation
Answer each of the questions:
Would you like to setup VALIDATE PASSWORD plugin? N
New password: your_secure_password
Re-enter new password: your_secure_password
Remove anonymous users? [Y/n] Y
Disallow root login remotely? [Y/n] Y
Remove test database and access to it? [Y/n] Y
Reload privilege tables now? [Y/n] Y
Connect to MariaDB shell as the root user:
sudo mysql -u root -p
# Enter password
Create an empty MariaDB database and user for Fork CMS and remember the credentials:
mysql> CREATE DATABASE dbname;
mysql> GRANT ALL ON dbname.* TO 'username' IDENTIFIED BY 'mypassword';
mysql> FLUSH PRIVILEGES;
Replace the word mypassword with a secure password of your choice. Exit from MariaDB:
mysql> exit
Replace dbname, andusername password
Step 3 - Install Acme.sh client and obtain Let's Encrypt certificate (optional)
Securing your website with HTTPS is not necessary, but it is a good practice to secure your site traffic. To obtain an SSL certificate from Let's Encrypt we will use Acme.sh client. Acme.sh is a pure Unix shell software for obtaining TLS certificates from Let's Encrypt with zero dependencies.
Download and install acme.sh:
sudo su - root
git clone https://github.com/Neilpang/acme.sh.git
cd acme.sh
./acme.sh --install --accountemail [email protected]
source ~/.bashrc
cd ~
Check acme.sh version:
acme.sh --version
# v2.8.2
Obtain RSA and ECC/ECDSA certificates for your domain/hostname:
# RSA 2048
acme.sh --issue --standalone -d example.com --keylength 2048
# ECDSA
acme.sh --issue --standalone -d example.com --keylength ec-256
If you want fake certificates for testing you can add --staging flag to the above commands.
After running the above commands, your certificates and keys will be in:
- For RSA:
/home/username/example.com directory. - For ECC/ECDSA:
/home/username/example.com_ecc directory.
To list your issued certs you can run:
acme.sh --list
Create a directory to store your certs. We will use a directory /etc/letsencrypt.
mkdir -p /etc/letsecnrypt/example.com
sudo mkdir -p /etc/letsencrypt/example.com_ecc
Install/copy certificates to /etc/letsencrypt directory.
# RSA
acme.sh --install-cert -d example.com --cert-file /etc/letsencrypt/example.com/cert.pem --key-file /etc/letsencrypt/example.com/private.key --fullchain-file /etc/letsencrypt/example.com/fullchain.pem --reloadcmd "sudo systemctl reload nginx.service"
# ECC/ECDSA
acme.sh --install-cert -d example.com --ecc --cert-file /etc/letsencrypt/example.com_ecc/cert.pem --key-file /etc/letsencrypt/example.com_ecc/private.key --fullchain-file /etc/letsencrypt/example.com_ecc/fullchain.pem --reloadcmd "sudo systemctl reload nginx.service"
All the certificates will be automatically renewed every 60 days.
After obtaining certs exit from root user and return back to normal sudo user:
exit
Step 4 - Install and configure NGINX
Install the NGINX web server:
sudo yum install -y nginx
Check the NGINX version:
nginx -v
# nginx version: nginx/1.14.1
Configure NGINX for Fork CMS. Run sudo vim /etc/nginx/conf.d/fork.conf and add the following configuration:
server {
    listen 80;
    listen 443 ssl;

    root /var/www/fork;
    index index.php index.html;

    server_name example.com;

    ssl_certificate /etc/letsencrypt/example.com/fullchain.pem;
    ssl_certificate_key /etc/letsencrypt/example.com/private.key;
    ssl_certificate /etc/letsencrypt/example.com_ecc/fullchain.pem;
    ssl_certificate_key /etc/letsencrypt/example.com_ecc/private.key;

    location / {
    # Checks whether the requested url exists as a file $uri or directory $uri/ in the root, else redirect to /index.php.
        try_files $uri $uri/ @redirects;
    }

    location @redirects {
        rewrite ^ /index.php;
    }

    location ~ \.php$ {
        try_files $uri =404;
        include fastcgi_params;
        fastcgi_pass 127.0.0.1:9000;
        fastcgi_index index.php;
        fastcgi_read_timeout 60;
        fastcgi_split_path_info ^(.+\.php)(/.+)$;
        fastcgi_param SCRIPT_FILENAME $document_root$fastcgi_script_name;
    }

    # Don't pollute the logs with common requests
    location = /robots.txt  { access_log off; log_not_found off; }
    location = /favicon.ico { access_log off; log_not_found off; }

    # As Fork CMS has the app_root as doc_root, we need to restrict access to a few things for security purposes!
    location ~* ^/(composer\..*|vendor\/.*|Procfile$|\.git\/.*|src\/Console.*|.*\.gitignore|\.editorconfig|\.travis.yml|autoload\.php|bower\.json|phpunit\.xml\.dist|.*\.md|app\/logs\/.*|app\/config\/.*|src\/Frontend\/Cache\/CompiledTemplates.*|src\/Frontend\/Cache\/Locale\/.*\.php|src\/Frontend\/Cache\/Navigation\/.*\.php|src\/Frontend\/Cache\/Search\/.*|src\/Backend\/Cache\/CompiledTemplates\/.*|src\/Backend\/Cache\/Locale\/.*\.php)$ {
        deny all;
        access_log off;
        log_not_found off;
    }

    # Deny access to dot-files.
    location ~ /\. {
        deny all;
        access_log off;
        log_not_found off;
    }
}
Check NGINX configuration for syntax errors:
sudo nginx -t
Reload NGINX service:
sudo systemctl reload nginx.service
Step 5 - Install Composer
Install Composer, the PHP dependency manager globally:
php -r "copy('https://getcomposer.org/installer', 'composer-setup.php');"

php -r "if (hash_file('sha384', 'composer-setup.php') === 'a5c698ffe4b8e849a443b120cd5ba38043260d5c4023dbf93e1558871f1f07f58274fc6f4c93bcfd858c6bd0775cd8d1') { echo 'Installer verified'; } else { echo 'Installer corrupt'; unlink('composer-setup.php'); } echo PHP_EOL;"

php composer-setup.php

php -r "unlink('composer-setup.php');"

sudo mv composer.phar /usr/local/bin/composer
Check Composer version:
composer --version
# Composer version 1.9.0 2019-08-02 17:46:47
Step 6 - Install Fork CMS
Create a document root directory.
sudo mkdir -p /var/www/fork
Change ownership of the /var/www/fork directory to the user that you are currently logged in, in my case, this username is johndoe.
sudo chown -R johndoe:johndoe /var/www/fork
Replace johndoe with your login username in the above command! Download the latest stable release of Fork CMS from the command line.
cd /var/www/fork
composer create-project forkcms/forkcms .
Change ownership of the /var/www/fork directory to www-data.
sudo chown -R nginx:nginx /var/www/fork
Edit the app/config/parameters.yml.dist file and set database information.
sudo vim /var/www/fork/app/config/parameters_install.yml
Run sudo vim /etc/php-fpm.d/www.conf and set user and group to nginx:
sudo vim /etc/php-fpm.d/www.conf
Create /var/lib/php/session directory and change its ownership to user nginx:
sudo mkdir -p /var/lib/php/session
sudo chown -R nginx:nginx /var/lib/php/session
Restart php-fpm.service:
sudo systemctl restart php-fpm.service
Using your preferred web browser, open your site and follow the Fork CMS installer. After following the installer you should have Fork up and running. To access the Fork admin area just append /private to your site URL.
Step 7 - Complete the Fork CMS setup
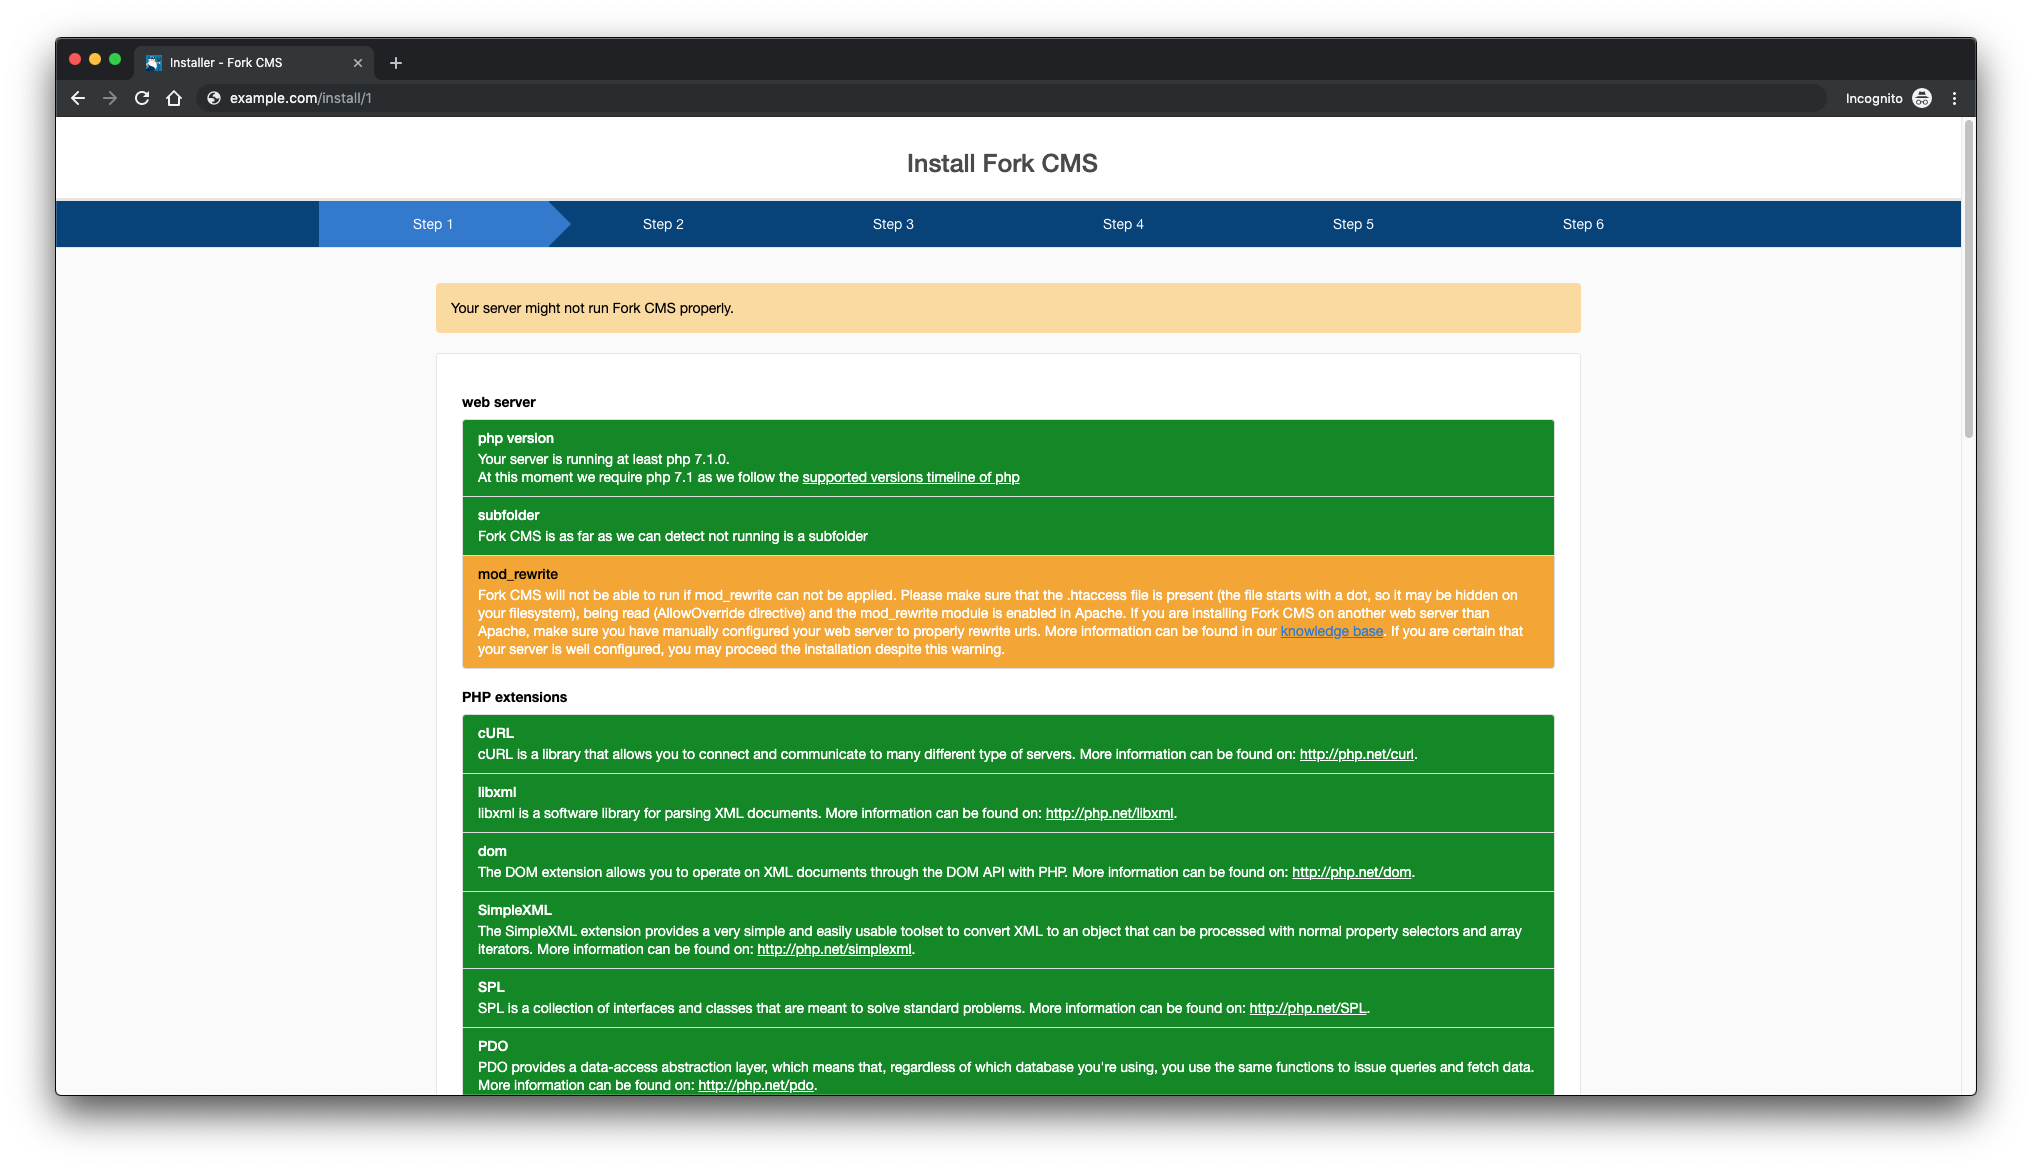
Make sure your server meets all the requirements and continue:
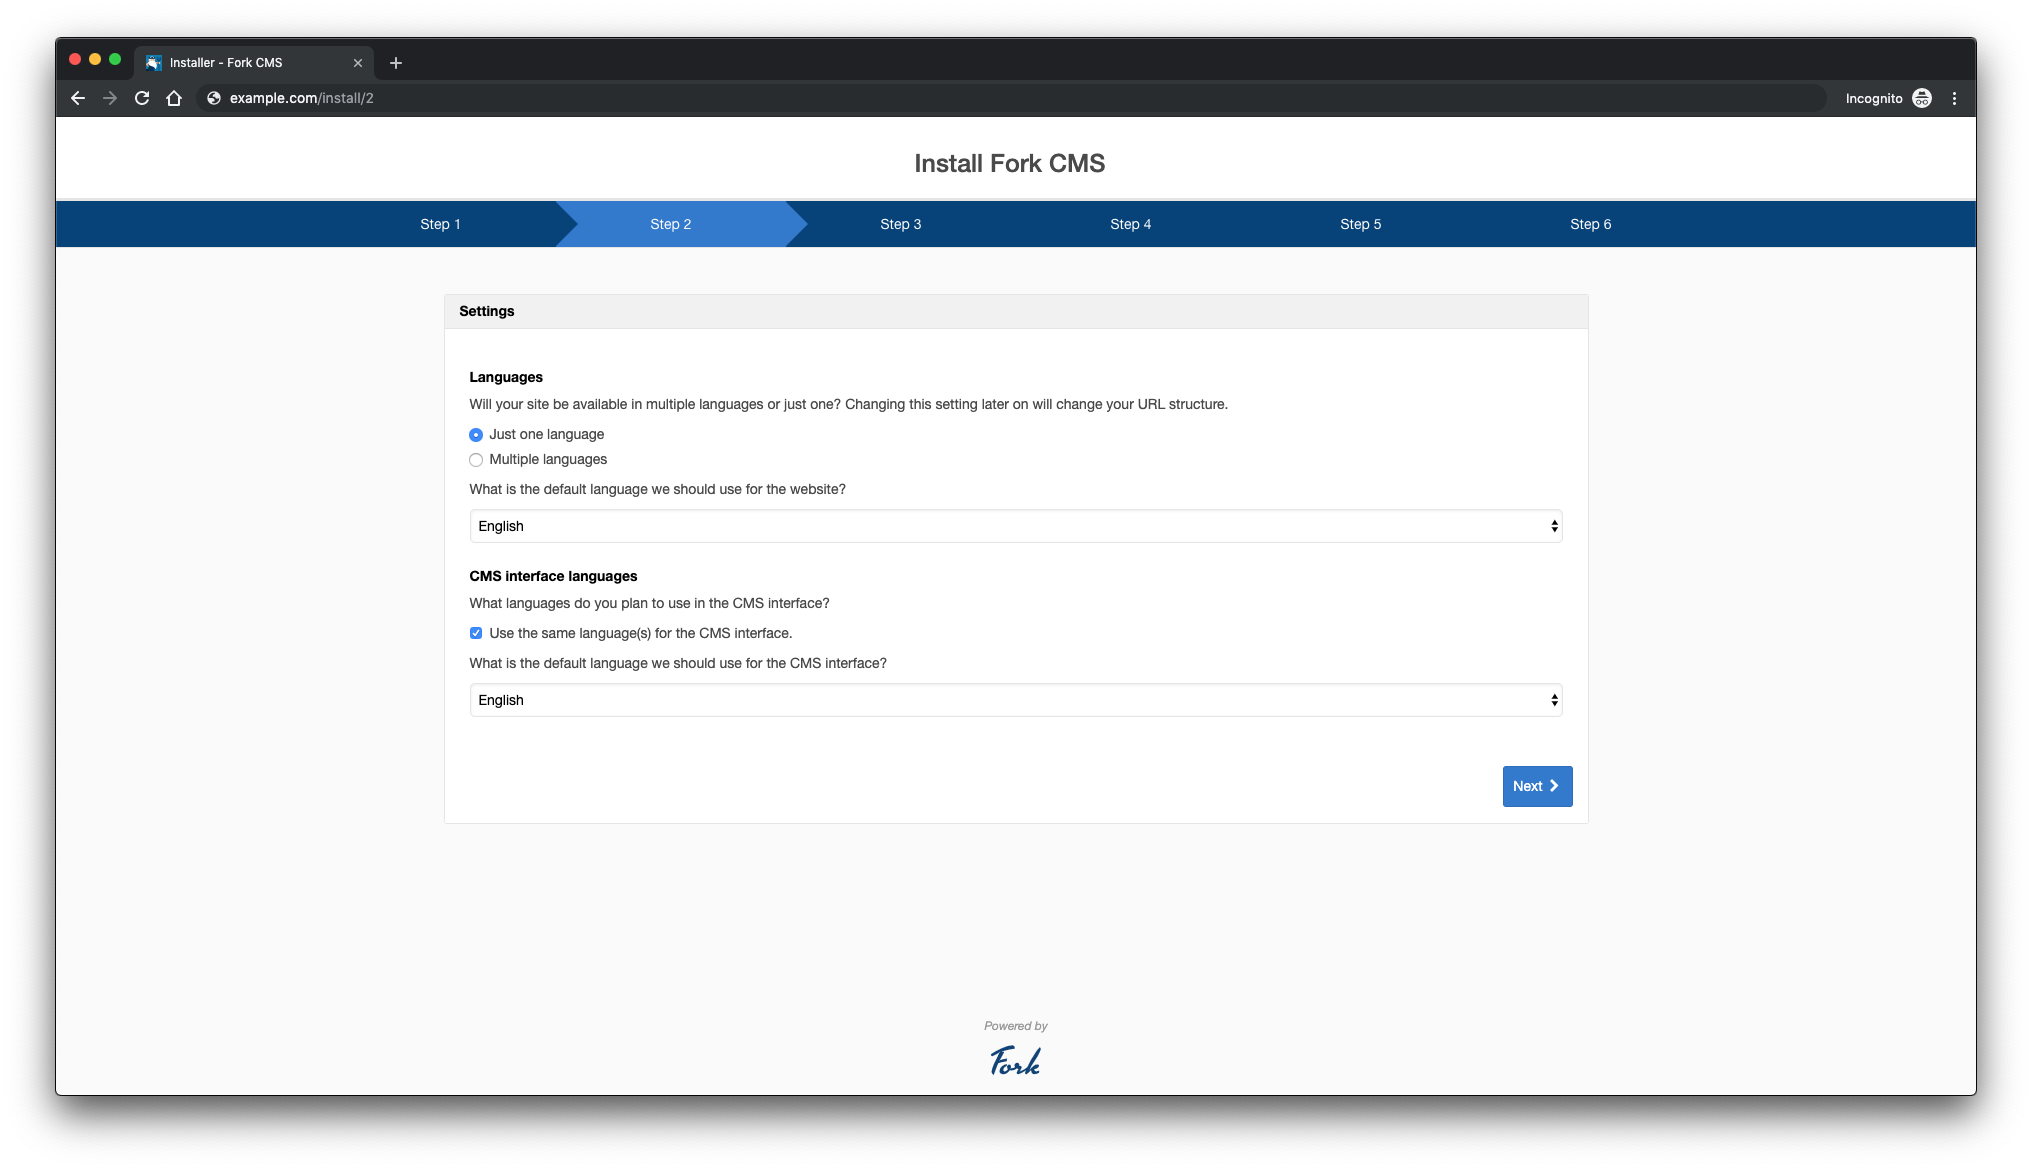
Select language and click next:
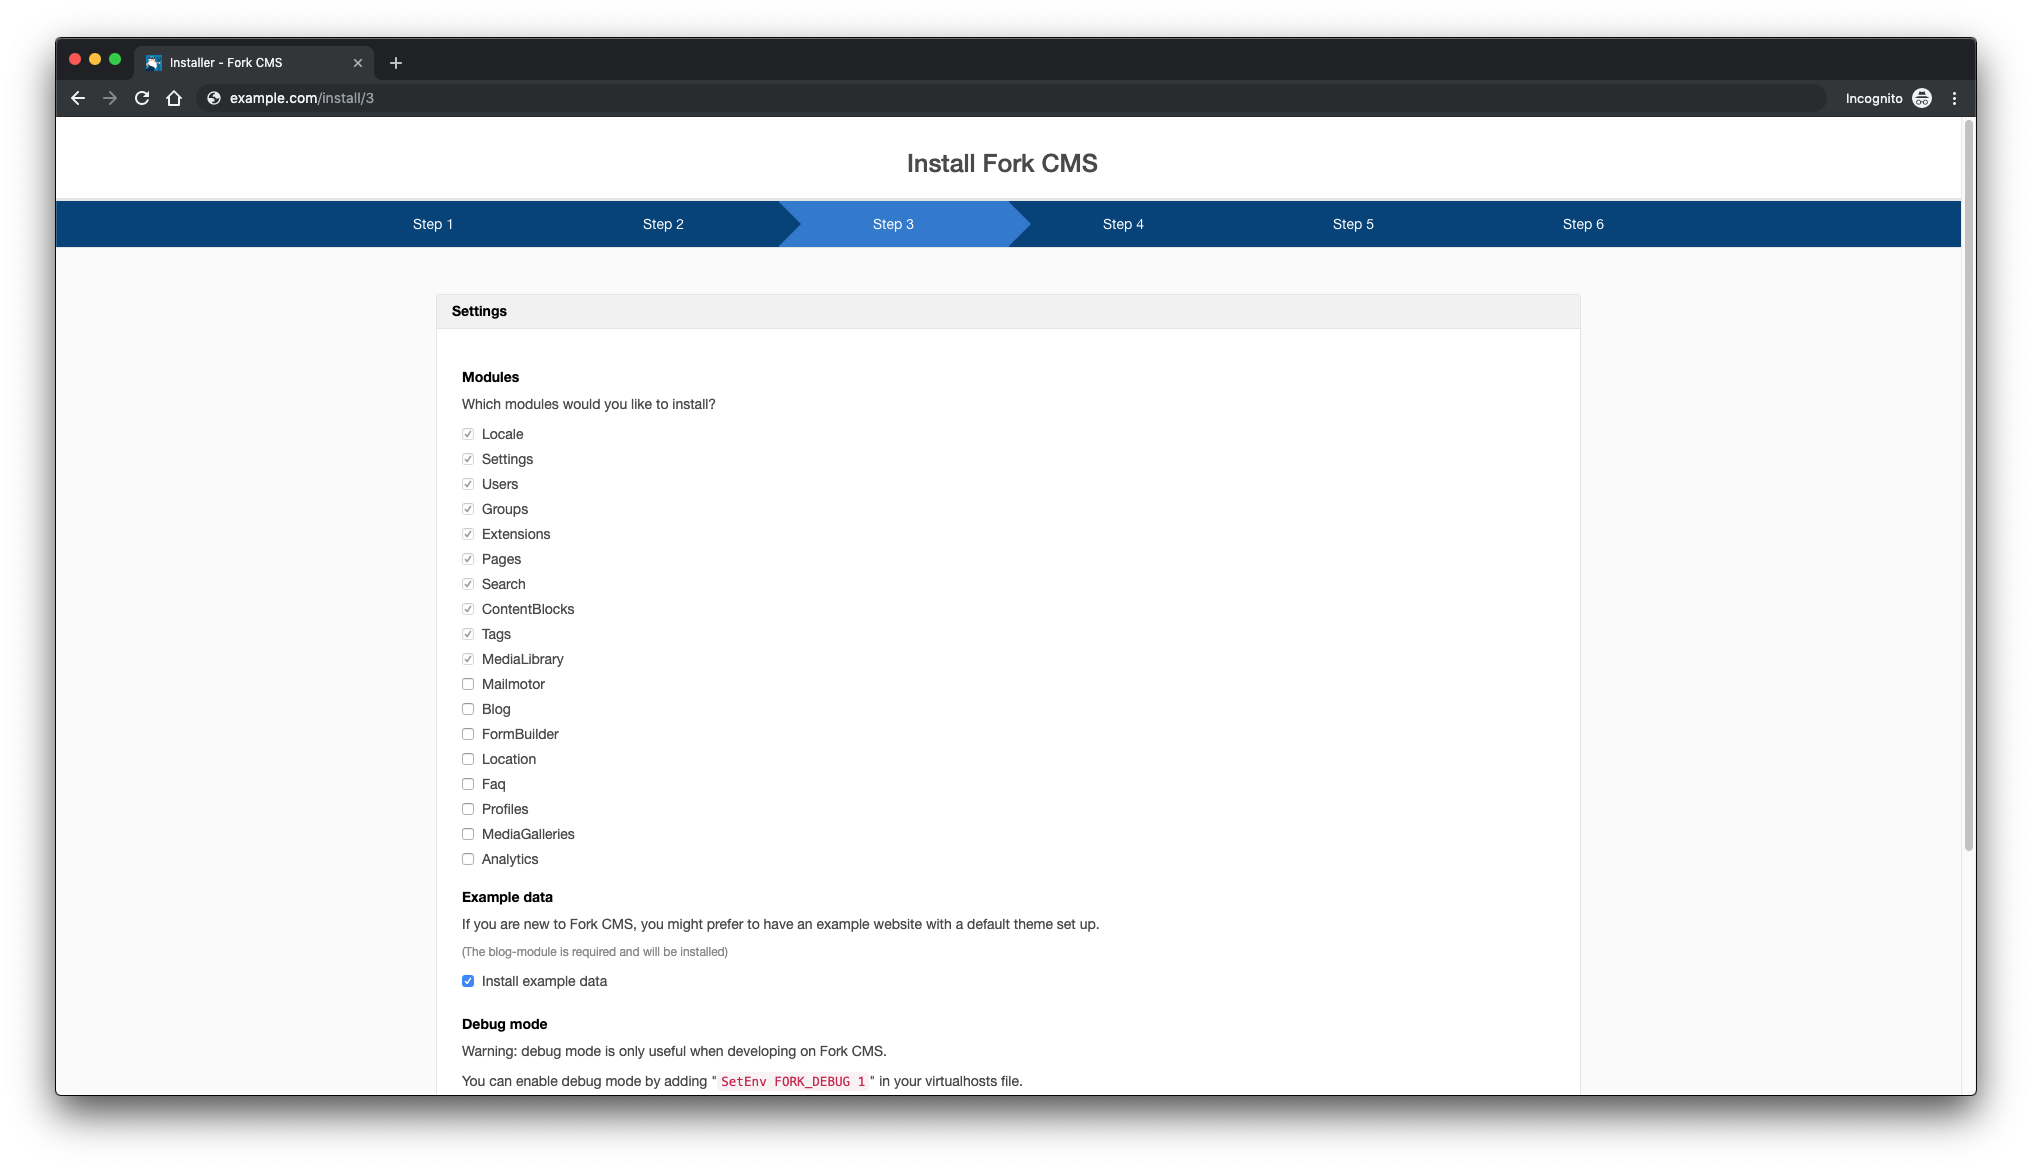
Select the settings as you wish and click next:
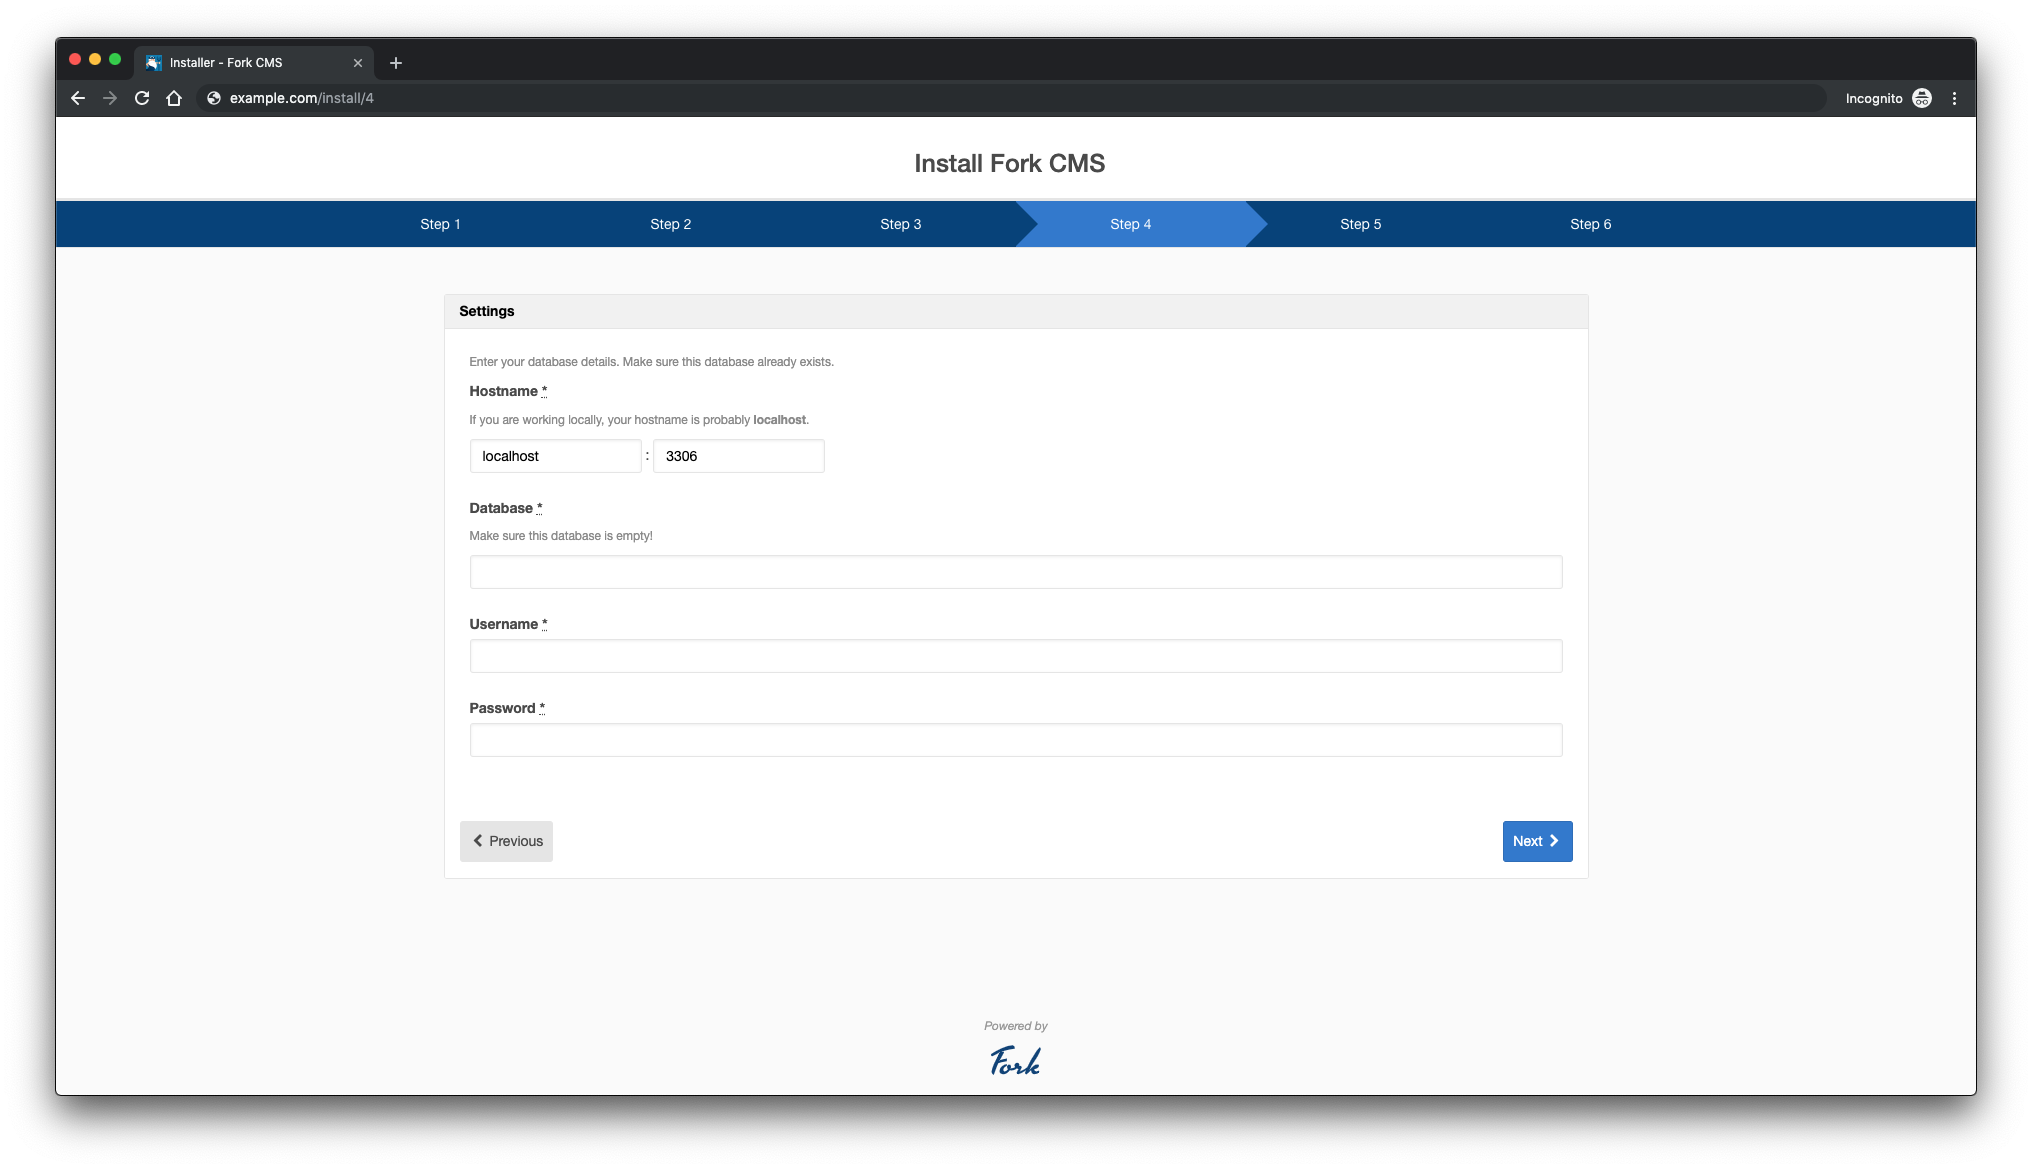
Enter your database settings and click next. Make sure you already created the database.
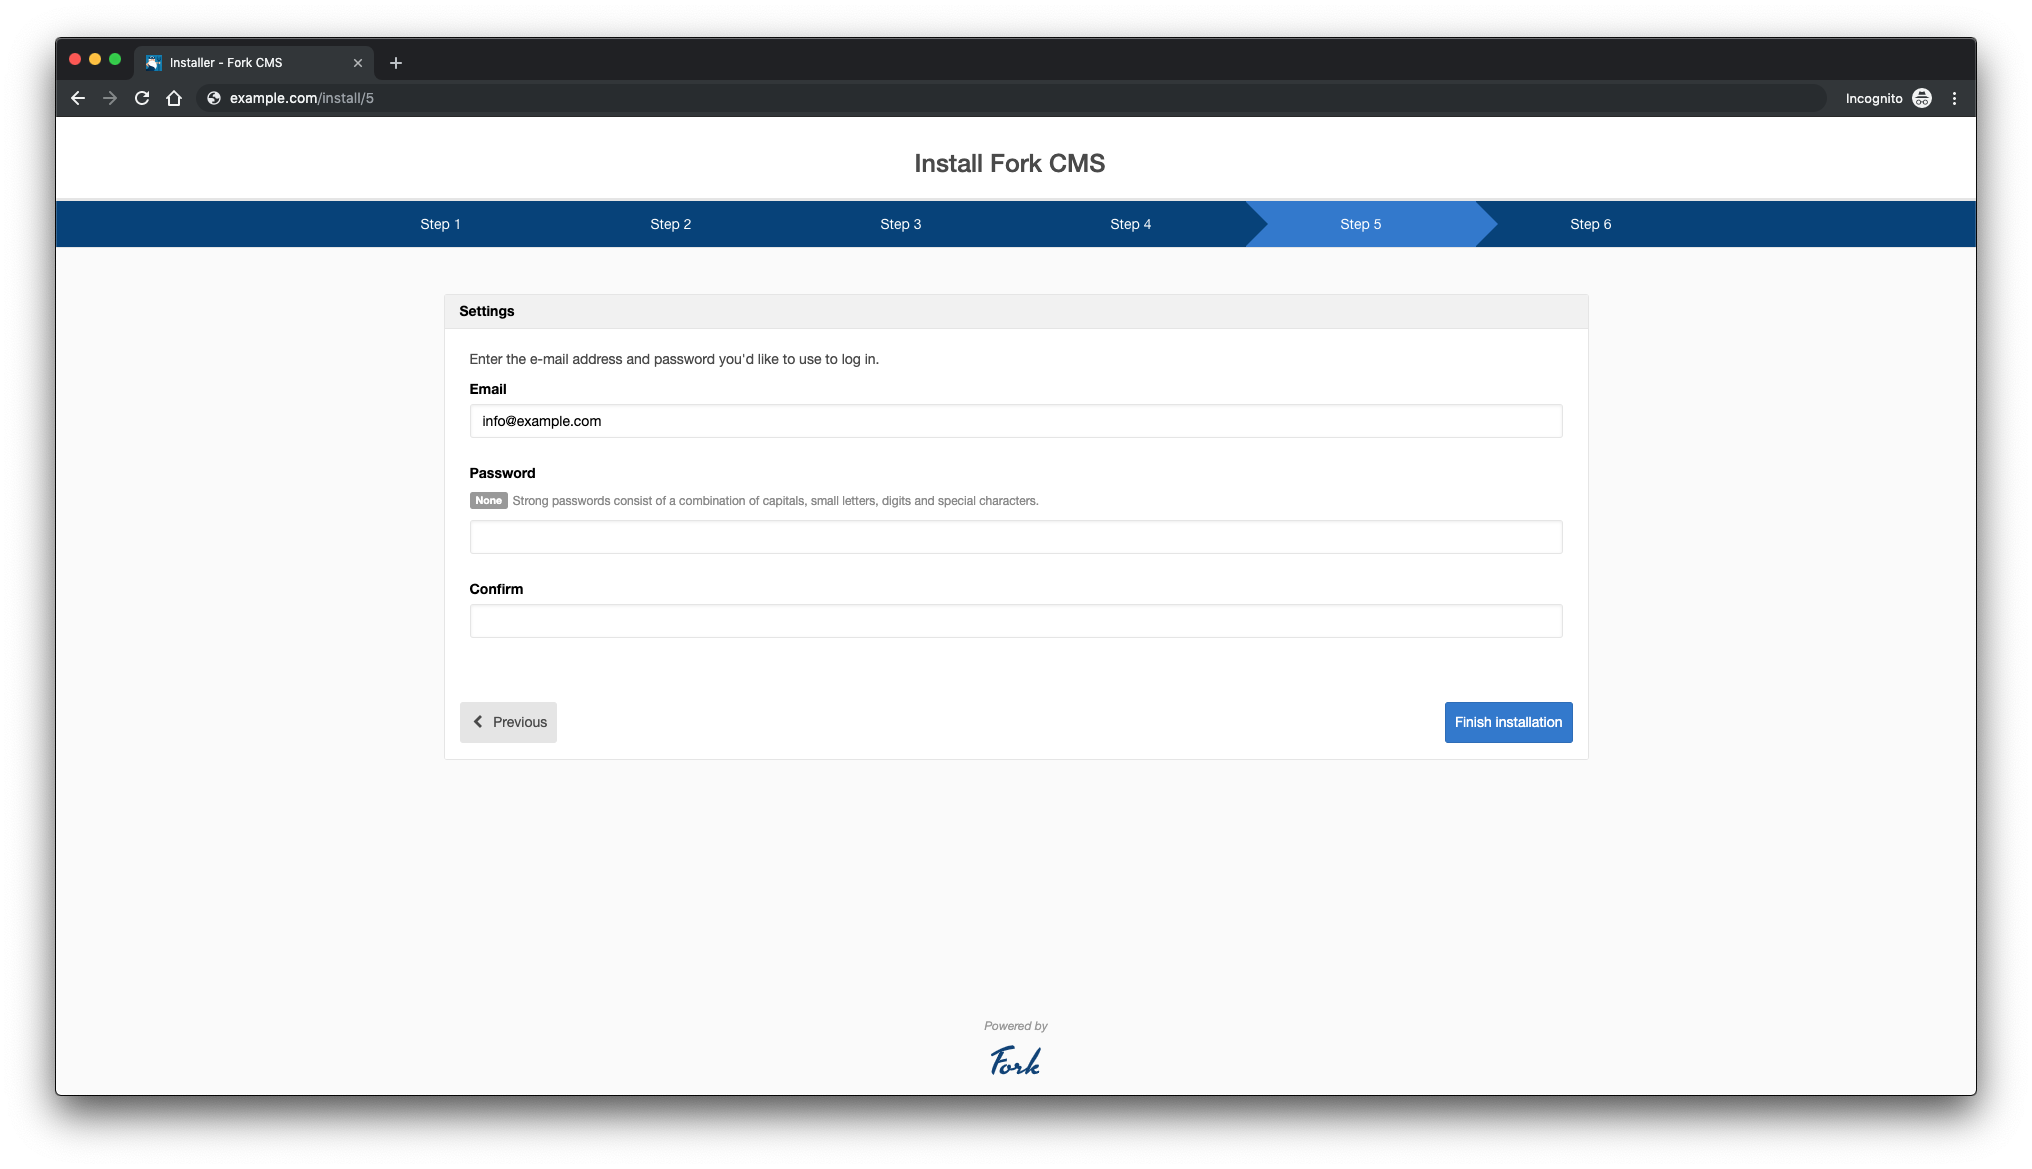
Create user and finish the installation:
You will see the following page after you complete all the above steps:

You have successfully installed Fork CMS. Enjoy your new CMS!

