How to Configure Network Interfaces using NMCLI on Centos 7.6
On this page
The first thing after installing a Linux OS as a server is configuring the network interface to have remote access and from your workstation/laptop and a cup of coffee you could manage your server at your convenient.
In this tutorial, we will use nmcli which stands for Network Manager Command Line tool for configuring our network interfaces.
Preliminary Note
The particularity of this command is you don’t need any requirements, however, it’s run as a root
The basic format of nmcli:
nmcli [OPTIONS] OBJECT { COMMAND | help }
OBJECT could be one of these options: connection, device, general, networking, radio, agent and monitor and we can use a prefix of these options:
nmcli -p device --> nmcli -p dev --> nmcli -p d
Note: -p stands for --pretty is an option
In this part of the tutorial, we will cover two objects: Connection and Device
Network Device
We can use this object with those most used commands: status, show, and set
We will start with display our interfaces (devices) if we have many with there status:
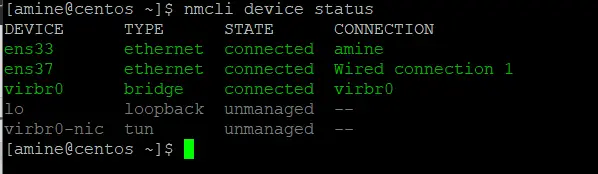
nmcli device status
Output:

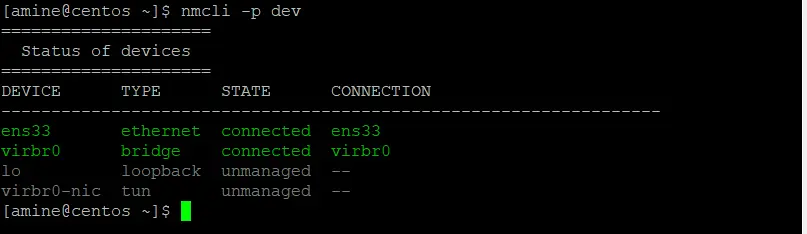
The first column is the name interfaces, my physical interface is ens33 it may be different from your environment, the last column is the name of profile it’s also called “connection profile”.
Another way:
nmcli -p device
The option -p stands for Pretty is a human-readable output.
Output :
We use nmcli dev show to list all information about all interfaces (it’s a lot of information), so we will specify an interface we will use ens33:
nmcli dev show ens33
Output:
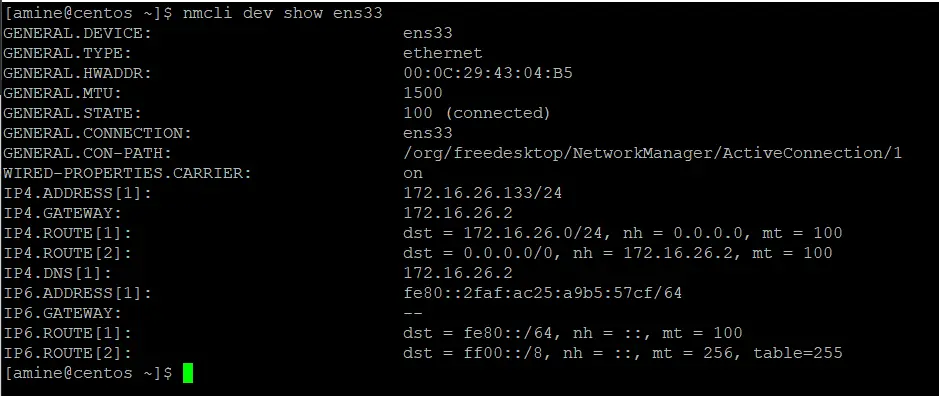
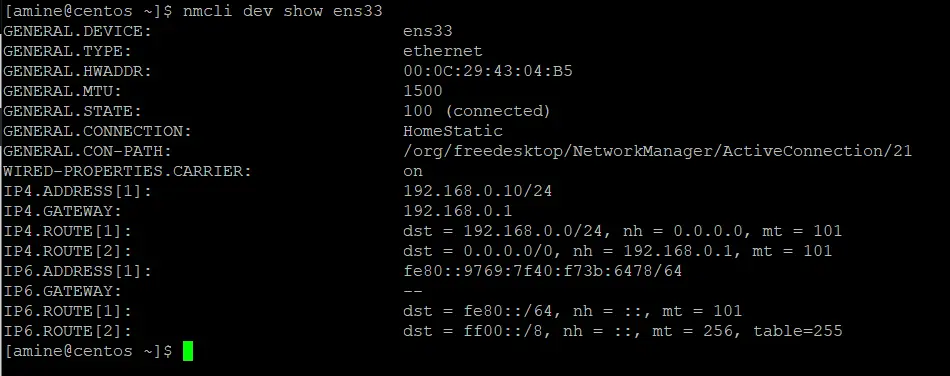
All information here is plenty explicit, we don’t need to go through this output.
We could set any devices to be managed with nmcli or not, using the set command.
To list our devices and check if it’s managed or not.
nmcli device status
Output:
Notice the STATE column.
Now I will change ens33 to an unmanaged interface.
sudo nmcli device set ens33 managed no
Output:
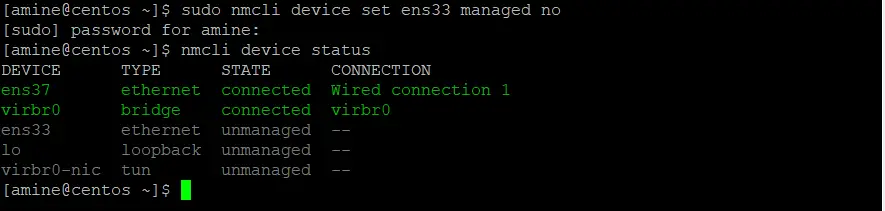
Note that we can not manage ens33 interface with NetworkManager anymore but the device is still connected.
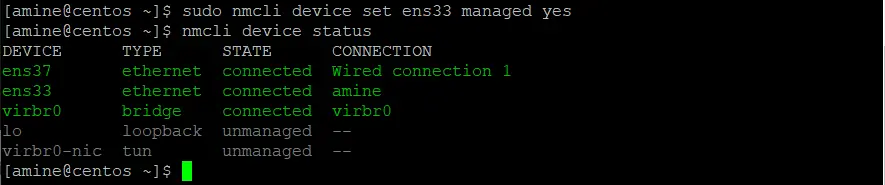
Let’s enable to manage ens33 interface:
sudo nmcli device set ens33 managed yes
Check the status of my interfaces:
nmcli device status
output :
Finally, we will see how to activate and deactivate our devices (interfaces) with disconnect and connect commands.
sudo nmcli dev disconnect ens33
You should have a successful message: Device “ens33” successfully disconnected.
Show the status of devices:
nmcli dev status
Output:
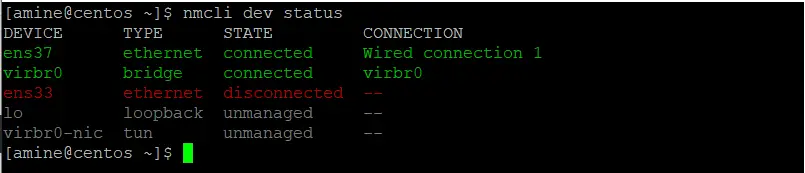
Notice the ens33 device is marked in red, the status is disconnected and no connexion profile attached. The device will be automatically activated after reboot or we can activate manually.
To activate our devices:
sudo nmcli dev connect ens33
Output:

The message with successful activation and a UUID of the profile connexion at the end.
Status of our interfaces:
nmcli dev status
Output:

The interface is no longer deactivate.
Profile Connection
Now let’s focus on the profile by showing the information:
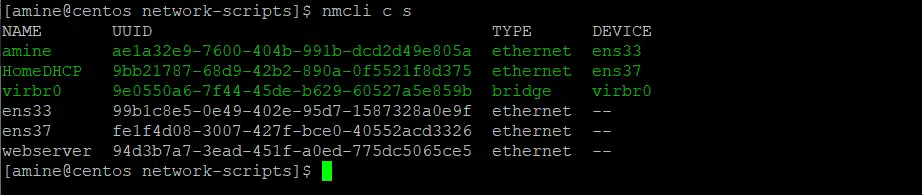
nmcli connection show
Output:

The first column is the name of the connection (not the device name), the second is The UUID or Universal Unique Identifier and the last one is the name of the device.
Profiles are the saved configuration of interfaces it’s stored in /etc/sysconfig/network-scripts/ and named with a prefix ifcfg- and then the name of the profile, let’s see:
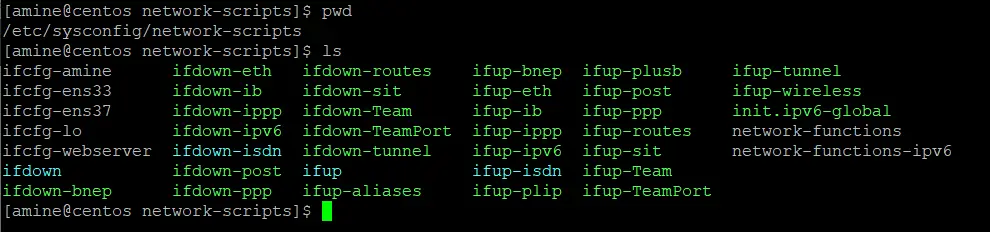
The profiles with the name of devices are auto-generated, ifcfg-amine is created manually.
Now let’s create some profiles.
Note: I have two physical interfaces attached to my virtual machine ens33 and ens37.
We will create an ethernet configuration profile with a dynamic IP address.
sudo nmcli con add type ethernet con-name HomeDHCP ifname ens37
The interface is ethernet type, HomeDHCP is the name of the profile, ens37 is the interface which is the profile is attached to.
Output:

Let see profiles now:
Notice here the profile is created but not attached to ens37 interface, we have to activate our new profile by:
sudo nmcli con up HomeDHCP
Careful the name of the profile is case sensitive.
Output:

Let see again:
Notice the first column NAME HomeDHCP is attached to ens37 interface. And ens37 profile (auto-generated) is not attached to any of the interfaces.
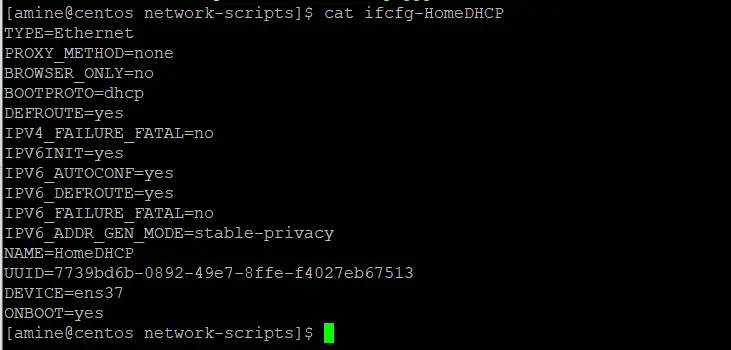
Let’s see inside the profile:
nmcli con show HomeDHCP
And check the file created in /etc/sysconfig/network-scripts/ifcfg-HomeDHCP
Let’s deactivate the HomeDHCP profile from the ens37 interface.
sudo nmcli con down HomeDHCP
output :
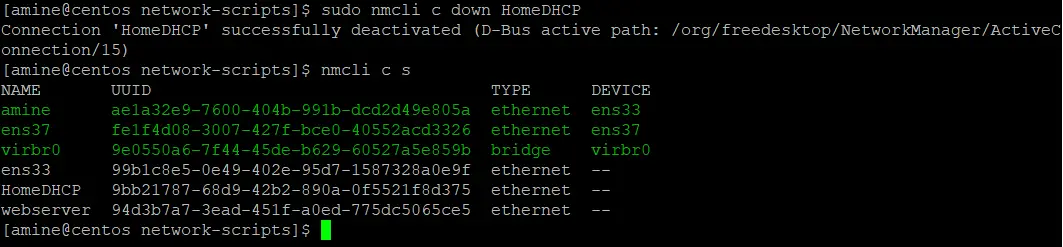
Notice that the default profile is attached to ens37 interface.
Let’s delete the HomeDHCP profile:
sudo nmcli con delete HomeDHCP
Output:


No more HomeDHCP profile.
Let’s now create an ethernet configuration profile named HomeStatic with static address IP.
sudo nmcli con add type ethernet con-name HomeStatic ifname ens37 ip4 192.168.0.10/24 gw4 192.168.0.1
Output:

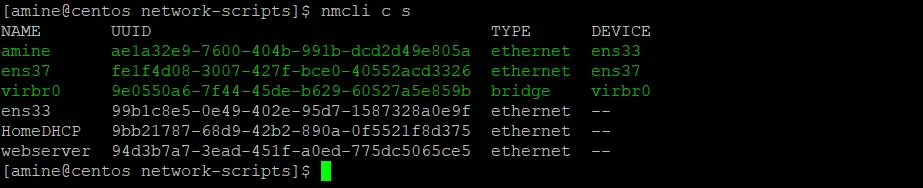
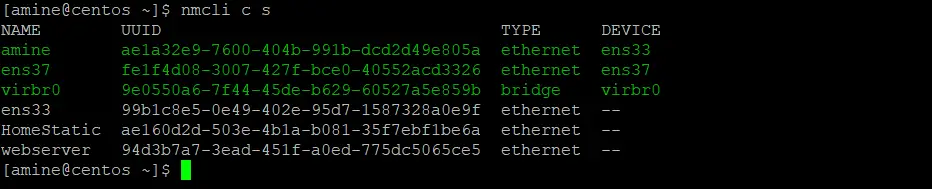
Check our interfaces connexion:
nmcli con s
Output:
Remember we have to attach the profile to the interface by activating the profile:
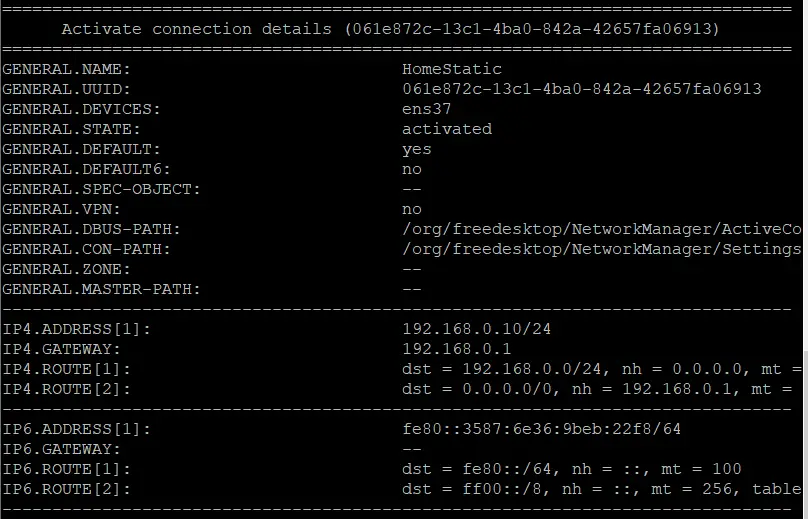
sudo nmcli con up HomeStatic
Output:

Display the profile configuration:
nmcli dev show ens33
Output:
Another way but there are many information so we will focus on what we want to see.
Output:
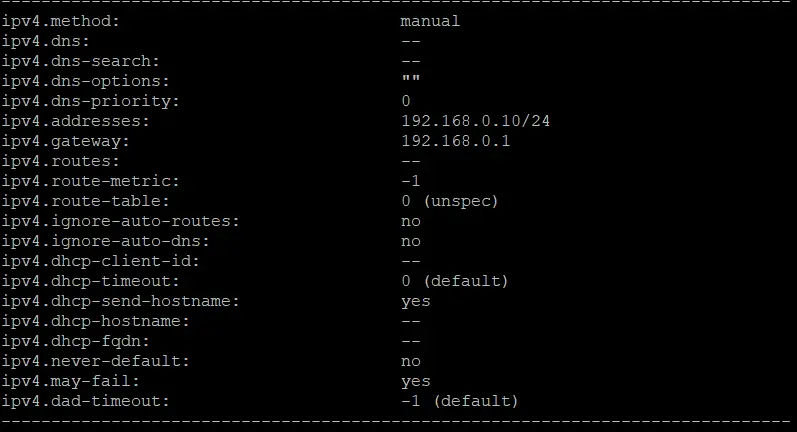
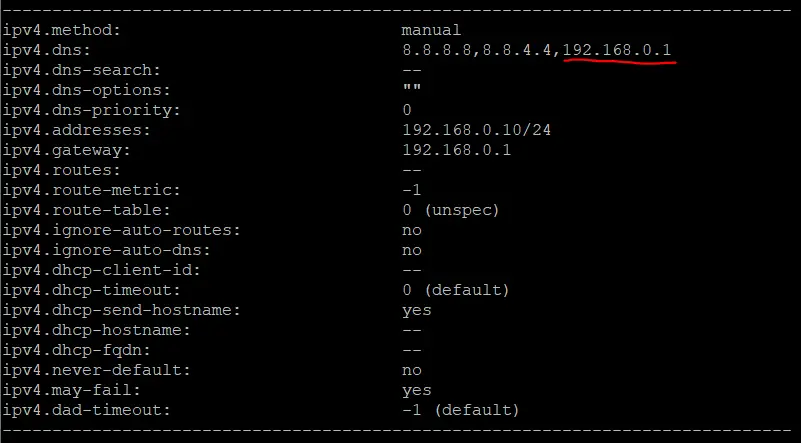
Notice here we don’t have any information of DNS servers so we will add a dns server with another command:
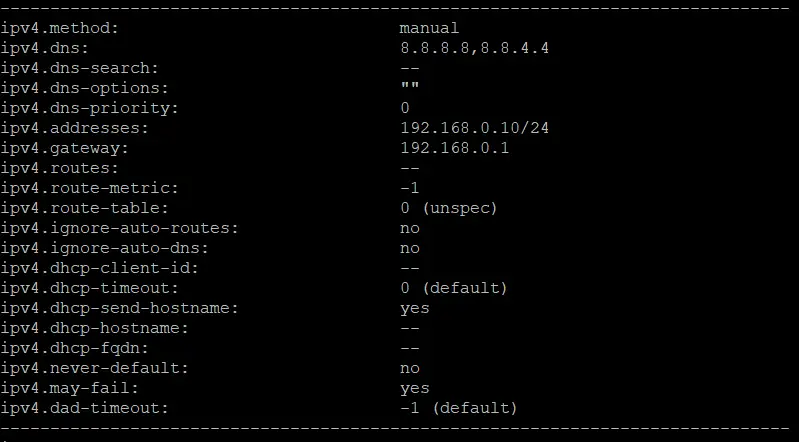
sudo nmcli con modify HomeStatic ipv4.dns "8.8.8.8 8.8.4.4"
check :
nmcli c s HomeStatic
Another way to add a dns server address:
sudo nmcli c mod HomeStatic +ipv4.dns "192.168.0.1"
And of course to delete a dns server address:
sudo nmcli c mod HomeStatic -ipv4.dns "192.168.0.1"
So far we go through the basic operations of networking to communicate with our servers with those two Objects and there commands in the next tutorial we will continue to explore and try to end up with a script to summarize what we have done.

