The best way to test the Linux based distribution without out-right installing it on your hard drive as dual boot system is to install it in a virtual machine, be it Virtual Box (by Oracle) or VMware Workstation (either Pro version or a Player, by VMware).
The biggest reason that you’d want to install a Linux Distribution in a virtual machine is that you do not need to reboot your host operating system to be able to use Linux, which is the case in both Live Boot and Dual Boot. With the help of a virtual machine, you can use your host system and guest system (the one in a virtual machine) simultaneously.
Here I will be showing you how to install any Linux distribution in a VMware player with an example of Ubuntu 18.04 LTS version. You can install any Linux distribution with the same method.
Installation of VMware Workstation Player
Before actually installing the VMware Workstation Player, you need to enable virtualization in your bios. A simple Google search will hit you up with many results on how to achieve this. Also, please note that VMware Workstation Player is free for personal and home use only.
Now head over to official VMware site, download the VMware Workstation Player and install the application with the help of installation wizard. After the installation, open up the player which should look something like :

Setting up VMware Workstation Player for Ubuntu
After you see the above screen, you are ready to rock your Linux Distribution in your VMware Workstation Player. Now follow the below step along with me to set up the virtual machine in order to install the Linux Distribution.
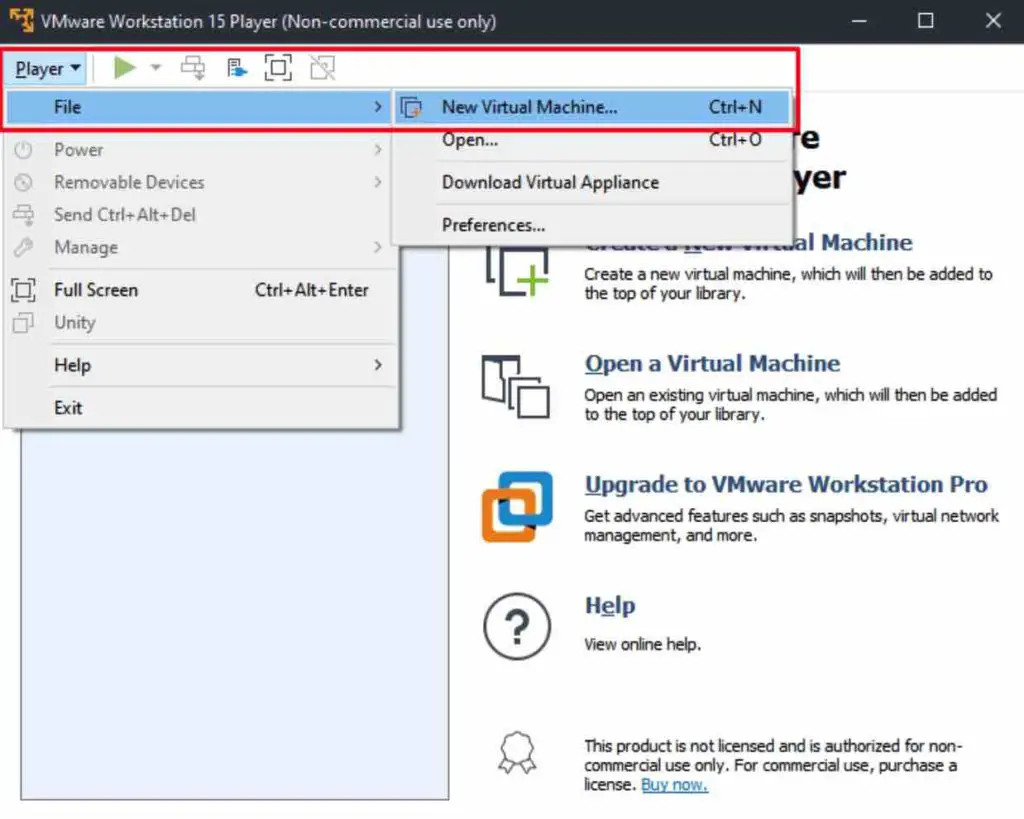
- Go to Player > File > New Virtual Machine or press Ctrl + N to create a new virtual machine.
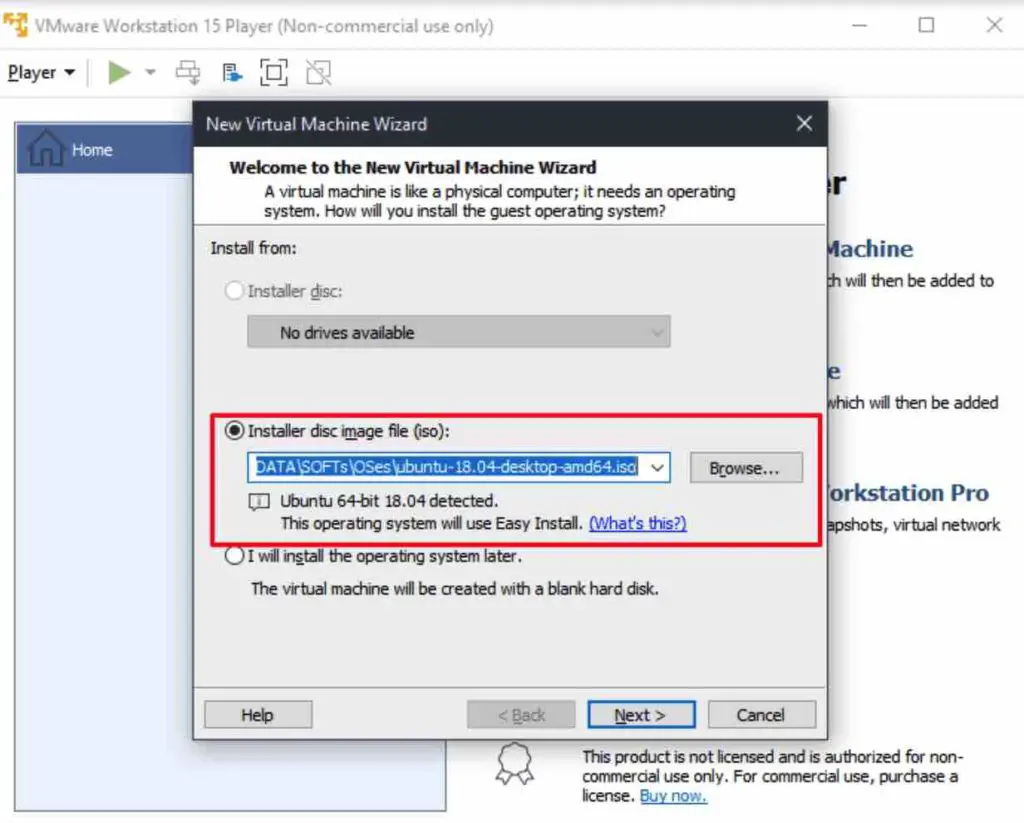
In the newly presented screen, select “Installer disc image file (iso):” option and click on Browse and select the ISO file of Ubuntu or your preferred Linux Distribution from your file system. After selecting the image file, click on next.
Linux virtual machine (Ubuntu)
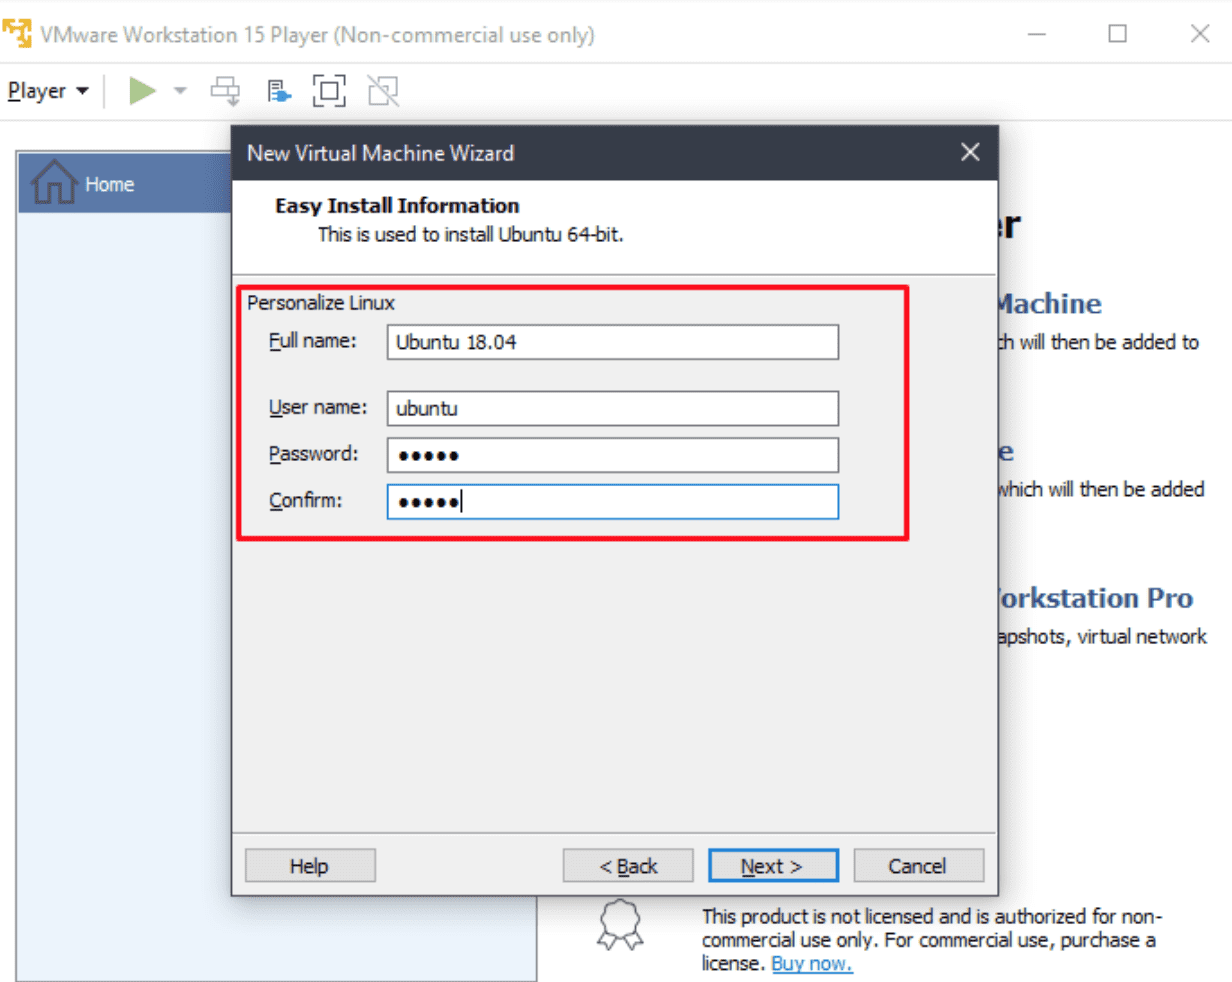
Next step is to create an account for Linux machine, provide your details, like Full name (will be your hostname, and shown on your Linux Distribution’s lock-screen), User name and Password. Please provide username and password such that it can be easily remembered by you because we will need it to log into our system once we have successfully installed it in VMware Workstation Player.
Vmware player Linux
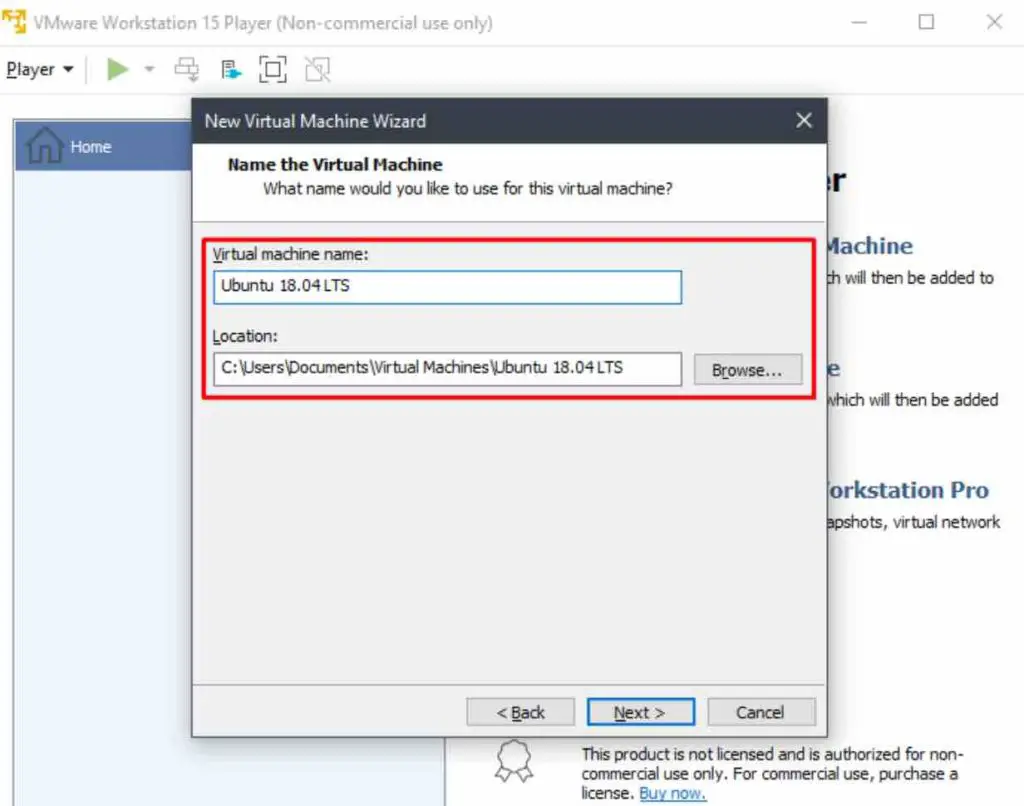
Now on the screen, you have options to select the location where you want the virtual machine to be stored. Ideally, this location should be on your SSD to speed up your installation and user experience after the installation. Click next once you’re done with the path.
Vmware for linux
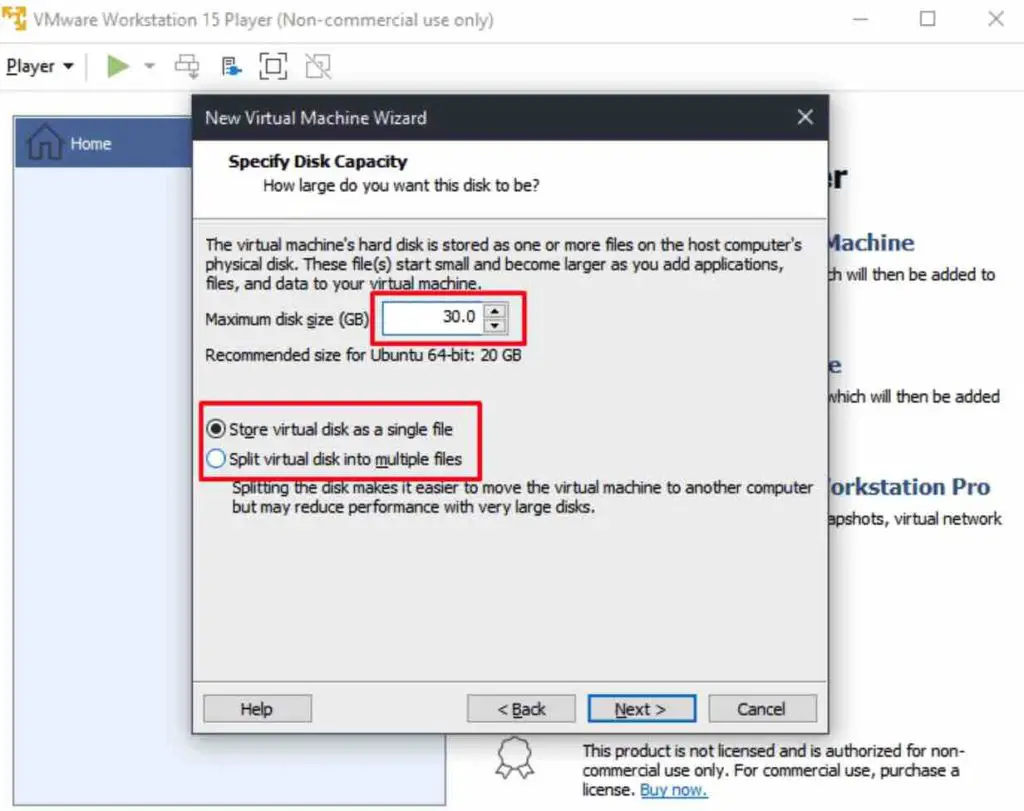
Allocate the maximum size of the virtual machine. Notice that it says Maximum disk size, this means it will allocate at max this much size to a virtual machine, it will be lower than this initially but it will start to grow, up to the maximum size once you start using your virtual machine.
Also, from “Store virtual disk as a single file” and “Split virtual disk into multiple files”, generally prefer to go with single file options as it faster than splitting it into multiple files if you are not going to move around your virtual machine much.
You can customize your virtual machine properties according to your need by going in “Customize Hardware…” option. I will go ahead with the default options.
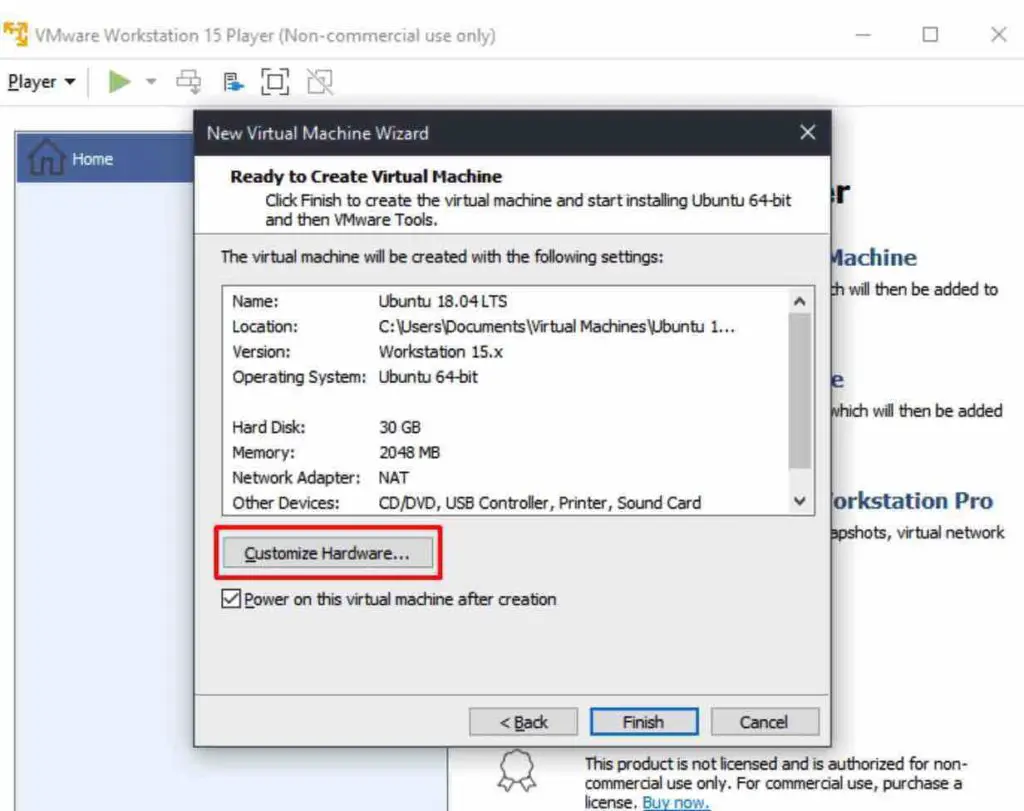
After you are finished with the above steps and click on “Finish”, the VMware Workstation Player will automatically start the newly created virtual machine. Also, it will start the installation of Ubuntu with the credentials provided in step – 3. Let it finish the installation process.
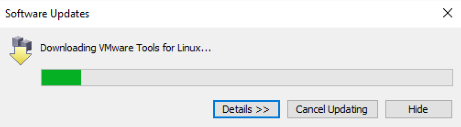
When the virtual machine starts, you should see a dialog box suggesting the installation of the VMware Tools for Linux package. This isn’t necessary, but it’s a part of the Easy Install procedure. It’s best to agree to this, so click OK
You may be interested to read: How to install Ubuntu on a MAC using a virtual box ?
After Installation
Congratulation on installing Linux Distribution and taking a step forward to learning Linux. After the installation is successful, you should be greeted with:
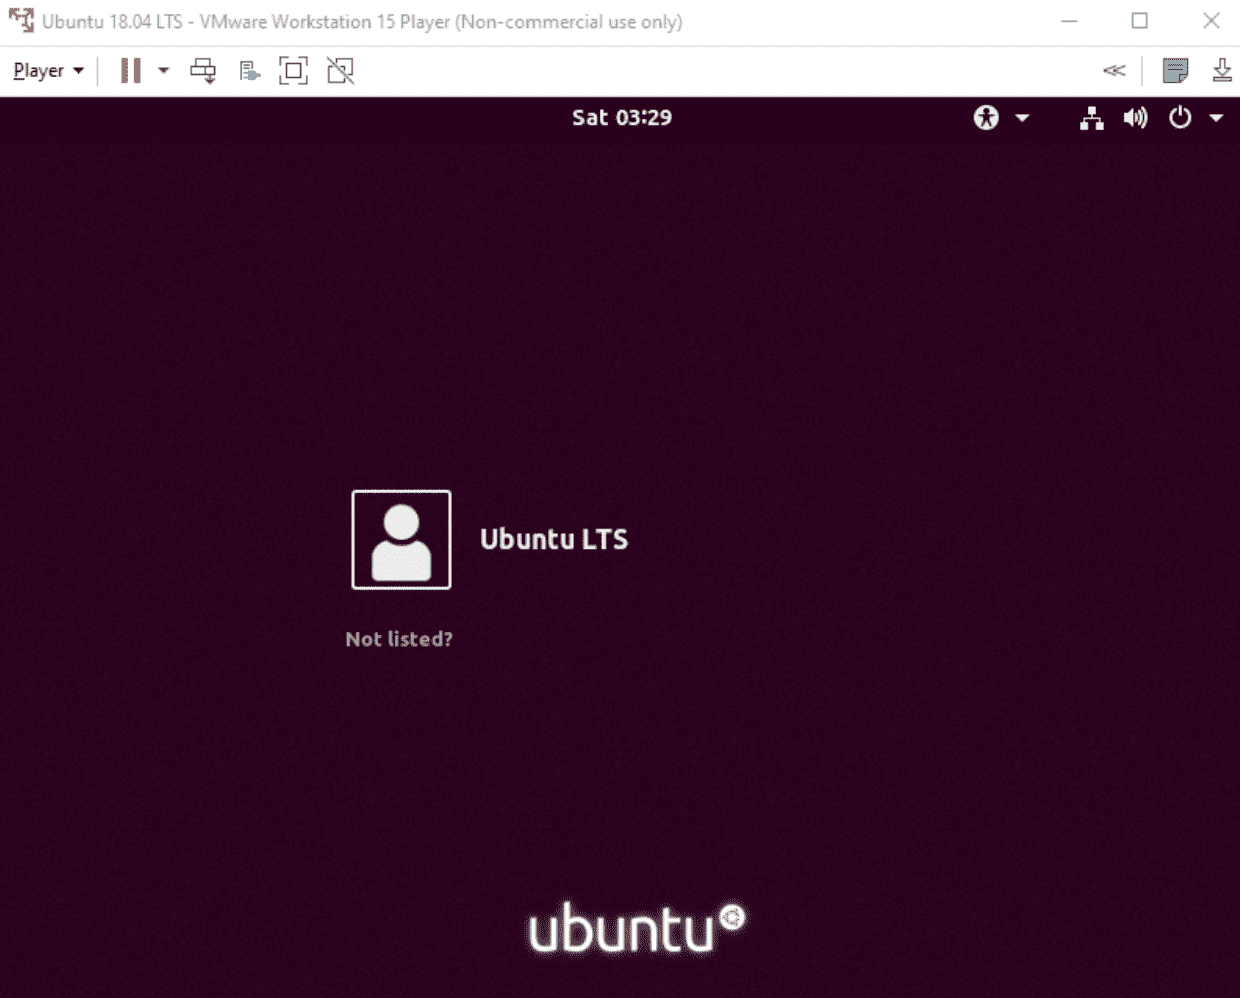
Click on Ubuntu LTS and you will be asked for a password (the one provided in the third Step above). Once you provide the correct password, you will be presented with your minty fresh Ubuntu installation.
Update the system
It is always advisable that you keep your operating system up-to-date, and hence the first step after installation should be to update your Linux Distribution. Type in below commands to fully update your Ubuntu.


After the above commands are completed, your Ubuntu should now be rocking the latest version there is.
If you like the content, we would appreciate your support by buying us a coffee. Thank you so much for your visit and support.