In this tutorial, we will be installing Wekan and Snap on a CentOS 7 VPS.
Wekan is a web-based kanban board application that provides task distribution using intuitive graphics for better and modern team collaboration. Wekan makes use of what they call ‘Board’ from which you can add your team members. Added members can be assigned on a ‘Card’ which is simply a card-like interface that contains the details about a task.
This basic concept of ‘Board’ and ‘Cards’ make the arrangement of tasks effortless to perform since team members can see what the overall progress of the team is with regards of work to be done, work that’s currently being done, and any work that’s already done which in return increases the productivity of the team.
Wekan almost provides the same features of Trello, with some advantages:
- Source code is fully open-source
- Source code is reviewed by security researchers
- Powered by mainstream web technologies e.g. Nginx, Node JS, and MongoDB
- No monthly subscription payment fees
- Can be hosted on your own server
- Can be used in a private or local network
- Continues releases and bug fixes from maintainers
 For installation, Wekan uses Snap, which is simply a packaging software for cross-platform and dependency-free installation.
Wekan is administered under the MIT License and is currently supported by Wekan Team under its maintainer under the name of ‘xet7’.
This is a step-by-step instruction on how to get your Wekan application running in no time. First, let’s start with the server requirements.
Table of Contents
Prerequisites
Before setting up a Wekan application, we recommend using a server with a fresh install of CentOS 7 Server that meets the following basic requirements:
Basic Requirements:
- 64-bit CPU
- 1 GB of free RAM for development and 4 GB of free RAM for a production environment
- Server with newly installed CentOS 7
- An account with root privileges, or access to the root user itself
- Domain name pointing to server’s public IP address
Step 1: Installing Updates and Dependencies
Access your public server via SSH through your favorite terminal using:
ssh root@IP_address -p Port_number
Make sure that IP_address and Port_number are set to your server’s IP address and SSH port number. Additionally, replace ‘root’ with the username of the account that has sudo privileges if necessary.
Once logged in, it is best to check for package updates on the repositories available.
yum update -y
We also recommend installing the EPEL release repository and the basic development libraries to stand clear of any missing libraries in the future.
yum install epel-release -y
yum groupinstall -y "Development Tools"
Step 2: Installing Snap
The latest version and future versions of Wekan will be created using Snap package framework for easier installation on different platforms. Since the Snap package is not officially available with CentOS 7, we will need to install and enable COPR – a lightweight build system for installing third-party repositories.
To proceed with the Snap installation, execute the following commands one by one:
yum makecache fast
yum install yum-plugin-copr
yum copr enable ngompa/snapcore-el7
yum install snapd
Once the Snap package is installed, we can now enable the snapd.socket service:
systemctl enable --now snapd.socket
Step 3: Installing Wekan
After a successful installation of the Snap package, we can now install Wekan using just one line:
snap install wekan
If the installation was a success, you should see the following output:
wekan 2.65 from Lauri Ojansivu (xet7) installed
Step 4: Setting Up Wekan
Since Wekan has been installed using Snap, we can use its built-in CLI to modify some of Wekan’s basic settings.
First would be the domain name. Set the domain name using the following command. Make sure to replace your_domain.com with your actual registered domain name.
snap set wekan root-url="http://wekan.your_domain.com"
It is required to assign a port on our Wekan installation. You may use any port that is available and in range.
snap set wekan port='3001'
Next step is to set up the email server for SMTP connections. It is recommended to be set up properly since it is required when registering and for a password reset.
snap set wekan mail-url='smtps://user:pass@wekan.rosehosting.com:453'
snap set wekan mail-from='Wekan Boards <support@wekan.rosehosting.com>'
Check other email configurations available for Wekan.
Once all the basic configurations are updated, we can now restart our Snap – Wekan service to apply the changes.
systemctl restart snap.wekan.wekan
Step 5: Accessing Wekan
Once the service has been restarted, we can now access the login page by visiting the following link:
http://[server_IP_address]:[port_assigned]
You should see the login page which looks like this:
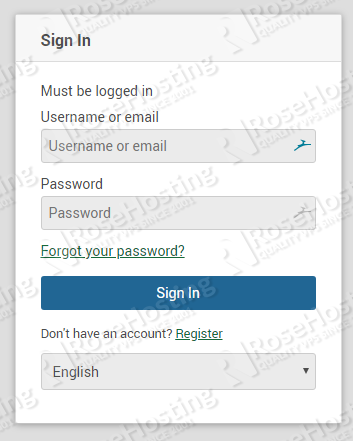
Currently, there is no default ‘username’ and ‘password’ for the Administrator account and registration should be done first.
Note that the first account to be registered will be automatically assigned with the Administrator role.
Once logged in, you should be able to see Wekan’s default dashboard interface which looks like the following image:

Step 6: Setting Up Wekan with an Nginx Reverse Proxy
Since our Wekan application is running on a port, we can set up a reverse proxy using Nginx web server to host our application directly on our desired domain or subdomain without needing to enter a port number.
First, install the Nginx web server by using the command:
yum -y install nginx
Once properly installed, create the Wekan virtual host file and paste the following text using your preferred text editor. Do not forget to modify the variables accordingly.
nano /etc/nginx/conf.d/wekan.conf
server {
	listen 80;
        server_name your_domain.com;

        location / {
            proxy_set_header   X-Real-IP $remote_addr;
            proxy_set_header   Host      $host;
            proxy_http_version 1.1;
            proxy_set_header   Upgrade $http_upgrade;
            proxy_set_header   Connection 'upgrade';
            proxy_cache_bypass $http_upgrade;
            proxy_pass         http://127.0.0.1:[port_assigned];
        }

        access_log /var/log/nginx/wekan-access.log;
        error_log /var/log/nginx/wekan-error.log;
}
Save and exit. Verify the Nginx configuration is correct by using:
nginx -t
Once everything is okay, restart Nginx and access your domain name using your preferred web browser.
systemctl restart nginx
You should now be able to see the login page of your freshly installed Wekan application.
That’s it! – you now have a Wekan application running on your CentOS 7 server.
 Of course, you don’t have to install Wekan on CentOS 7 if you have a Managed CentOS VPS with us. In that case, you can simply ask our support team to install Wekan on CentOS 7 for you. They are available 24/7, and they will be able to help you with the installation.
PS. If you enjoyed reading this blog post on how to install Wekan on CentOS 7, feel free to share it on social networks by using the shortcuts below, or simply leave a comment in the comments section. Thank you.