How to Install Feng Office on Debian 10
Feng Office is a free and open-source online project management and collaboration tool written in PHP. It is a web-based tool that integrates Project Management, Client Relationship Management, Financing and Billing that helps your organization run better. Feng Office provides a rich set of features including, Task Management, Time Tracking, Gantt Chart, Knowledge Management, Calendar, Timesheet, Automatic alerts and reminders and many more. Feng Office has three editions, Community, Professional, and Enterprise.
In this tutorial, we will explain, how to install Feng Office Community Edition on Debian 10 VPS.
Prerequisites
- A server running Debian 10 with minimum 2 GB of RAM.
- A valid domain name pointed to your server IP. In this tutorial, we will use example.com domain.
- A root password is configured on your server.
Getting Started
Before starting, update your system with the latest version. You can do it by running the following command:
apt-get update -y
apt-get upgrade -y
Once your system is updated, restart it to apply the changes.
Install Apache and MariaDB
First, you will need to install the Apache web server and MariaDB server on your server. You can install them by running the following command:
apt-get install apache2 mariadb-server -y
Once both packages are installed, start Apache and MariaDB service and enable them to start after system reboot with the following command:
systemctl start apache2
systemctl start mariadb
systemctl enable apache2
systemctl enable mariadb
Once you are finished, you can proceed to the next step.
Install and Configure PHP
By default, Debian 10 ships with PHP 7.3. You will need to install PHP version 7.1 to work Feng Office properly.
First, install the required packages with the following command:
apt-get install software-properties-common ca-certificates apt-transport-https -y
Next, add the SURY repository with the following command:
wget https://packages.sury.org/php/apt.gpg
apt-key add apt.gpg
echo "deb https://packages.sury.org/php/ $(lsb_release -sc) main" | tee /etc/apt/sources.list.d/php7.list
Next, update the repository and install PHP with all required modules with the following command:
apt-get install php7.1 php7.1-mysql php7.1-curl php7.1-json php7.1-cgi libapache2-mod-php7.1 php7.1-mcrypt php7.1-xmlrpc php7.1-gd php7.1-mbstring php7.1-common php7.1-soap php7.1-xml php7.1-intl php7.1-cli php7.1-ldap unzip php7.1-zip wget php7.1-readline php7.1-imap php7.1-tidy php7.1-recode php7.1-sq -y
Once all the packages are installed, open the php.ini file and tweak some settings:
nano /etc/php/7.1/cli/php.ini
Change the following lines:
max_execution_time = 300
max_input_time = 300
memory_limit = 512M
post_max_size = 128M
upload_max_filesize = 128M
html_errors = Off
display_startup_errors = Off
log_errors = On
output_buffering = Off
Save and close the file.
Next, open another php.ini file:
nano /etc/php/7.1/apache2/php.ini
Change the following lines:
max_execution_time = 300
max_input_time = 300
memory_limit = 512M
post_max_size = 128M
upload_max_filesize = 128M
html_errors = Off
display_startup_errors = Off
log_errors = On
output_buffering = Off
Save and close the file. Then, install other packages required by Feng Office using the following command:
apt-get install catdoc xpdf ghostscript imagemagick wkhtmltopdf -y
Once all the packages are installed, you can proceed to the next step.
Configure MariaDB for Feng Office
Next, you will need to create a database and user for Feng Office.
First, login to MariaDB shell with the following command:
mysql -u root -p
Provide your root password when prompt then create a database and user for Feng Office with the following command:
MariaDB [(none)]> CREATE DATABASE fengdb;
MariaDB [(none)]> GRANT ALL PRIVILEGES ON fengdb.* TO 'fenguser'@'localhost' IDENTIFIED BY 'password' WITH GRANT OPTION;
Next, flush the privileges and exit from the MariaDB shell with the following command:
MariaDB [(none)]> FLUSH PRIVILEGES;
MariaDB [(none)]> EXIT;
Once you have finished, you can proceed to the next step.
Download Feng Office
First, download the latest version of the Feng Office using the following command:
wget -O fengoffice.zip --no-check-certificate https://www.fengoffice.com/web/reference.php?dest=latest_version
Once downloaded, unzip the downloaded file with the following command:
unzip fengoffice.zip
Next, move the extracted directory to the Apache web root directory using the following command:
mv fengoffice-3.7.0.5 /var/www/html/fengoffice
Next, give proper permissions to the fengoffice directory:
chown -R www-data:www-data /var/www/html/fengoffice
chmod -R 777 /var/www/html/fengoffice
Once you are finished, you can proceed to the next step.
Configure Apache for Feng Office
Next, you will need to create an Apache virtual host configuration file to serve the Feng Office application. You can do it with the following command:
nano /etc/apache2/sites-available/feng.conf
Add the following lines:
<VirtualHost *:80>
     ServerAdmin [email protected]
     DocumentRoot /var/www/html/fengoffice
     ServerName example.com

     <Directory /var/www/html/fengoffice/>
          Options FollowSymlinks
          AllowOverride All
          Require all granted
     </Directory>

     ErrorLog ${APACHE_LOG_DIR}/error.log
     CustomLog ${APACHE_LOG_DIR}/access.log combined

</VirtualHost>
Save and close the file when you are finished. Then, enable the Apache virtual host, header and rewrite module with the following command:
a2ensite feng.conf
a2enmod rewrite
a2enmod headers
Next, restart the Apache web service to apply the changes:
systemctl restart apache2
You can check the status of the Apache webserver with the following command:
systemctl status apache2
You should get the following output:
? apache2.service - The Apache HTTP Server
   Loaded: loaded (/lib/systemd/system/apache2.service; enabled; vendor preset: enabled)
   Active: active (running) since Mon 2019-12-02 07:02:28 EST; 1min 3s ago
     Docs: https://httpd.apache.org/docs/2.4/
  Process: 2329 ExecStart=/usr/sbin/apachectl start (code=exited, status=0/SUCCESS)
 Main PID: 2333 (apache2)
    Tasks: 7 (limit: 1138)
   Memory: 21.8M
   CGroup: /system.slice/apache2.service
           ??2333 /usr/sbin/apache2 -k start
           ??2334 /usr/sbin/apache2 -k start
           ??2335 /usr/sbin/apache2 -k start
           ??2336 /usr/sbin/apache2 -k start
           ??2337 /usr/sbin/apache2 -k start
           ??2338 /usr/sbin/apache2 -k start
           ??2341 /usr/sbin/apache2 -k start

Dec 02 07:02:28 debian systemd[1]: Starting The Apache HTTP Server...
Dec 02 07:02:28 debian apachectl[2329]: AH00558: apache2: Could not reliably determine the server's fully qualified domain name, using 127.0.1.
Dec 02 07:02:28 debian systemd[1]: Started The Apache HTTP Server.
Access Feng Office Web Interface
Now, open your web browser and navigate the URL http://example.com. You will be redirected to the following page:
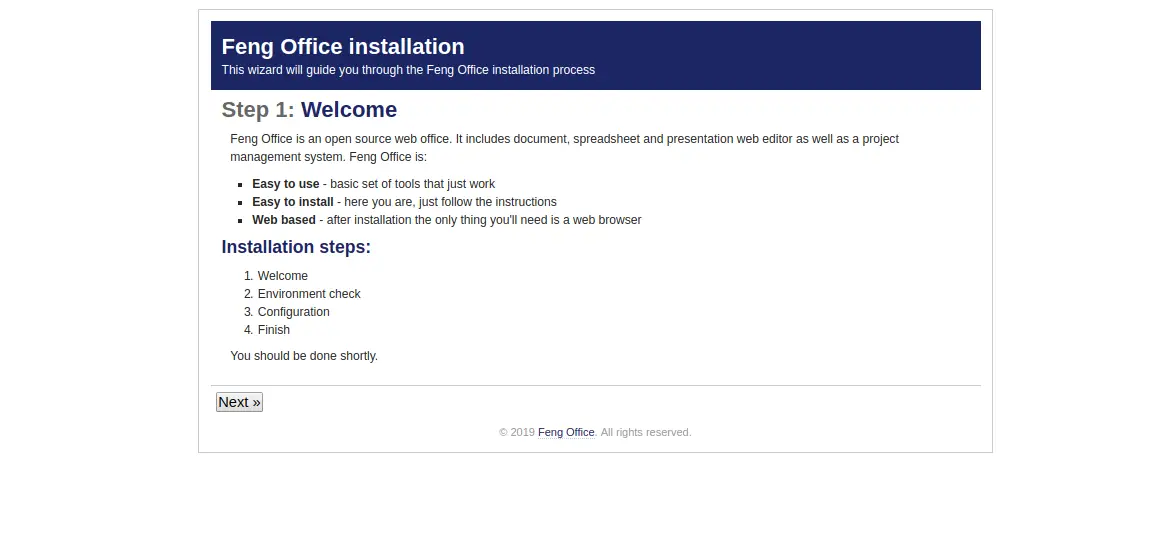
Click on the Next button. You should see the following page:
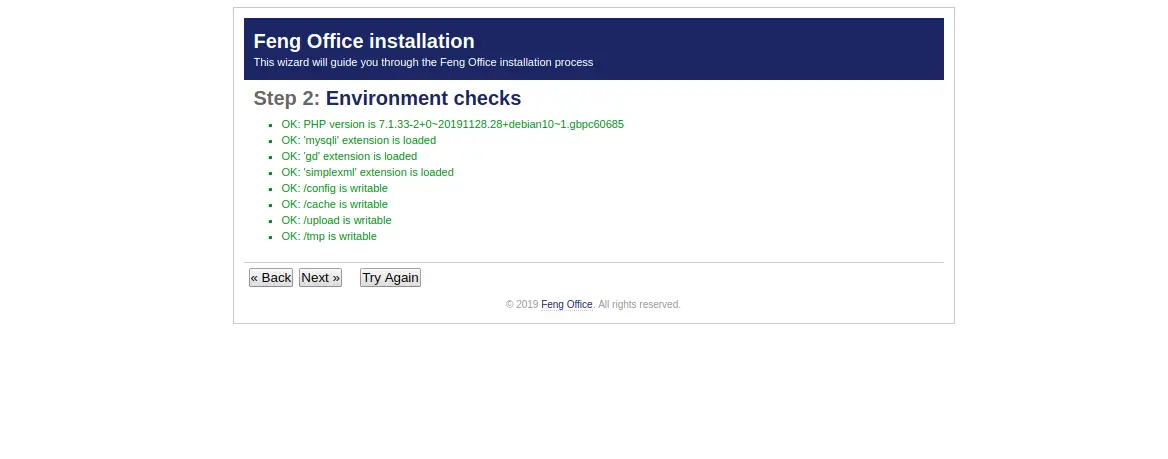
Make sure all the prerequisites are properly installed. Then, click on the Next button. You should see the following page:
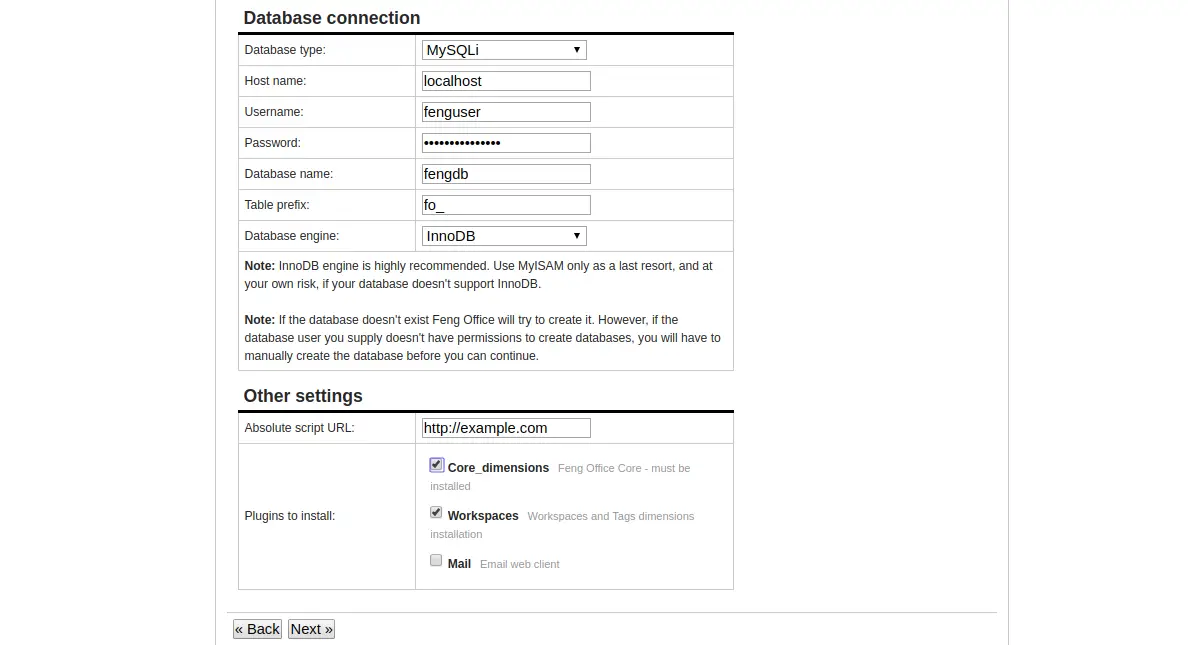
Now, provide your Database name, Database username, password, select Core_dimensions and Workspaces modules and click on the Next button. You should see the following page:

Now, click on the Finish button to complete the installation. You should see the following page:
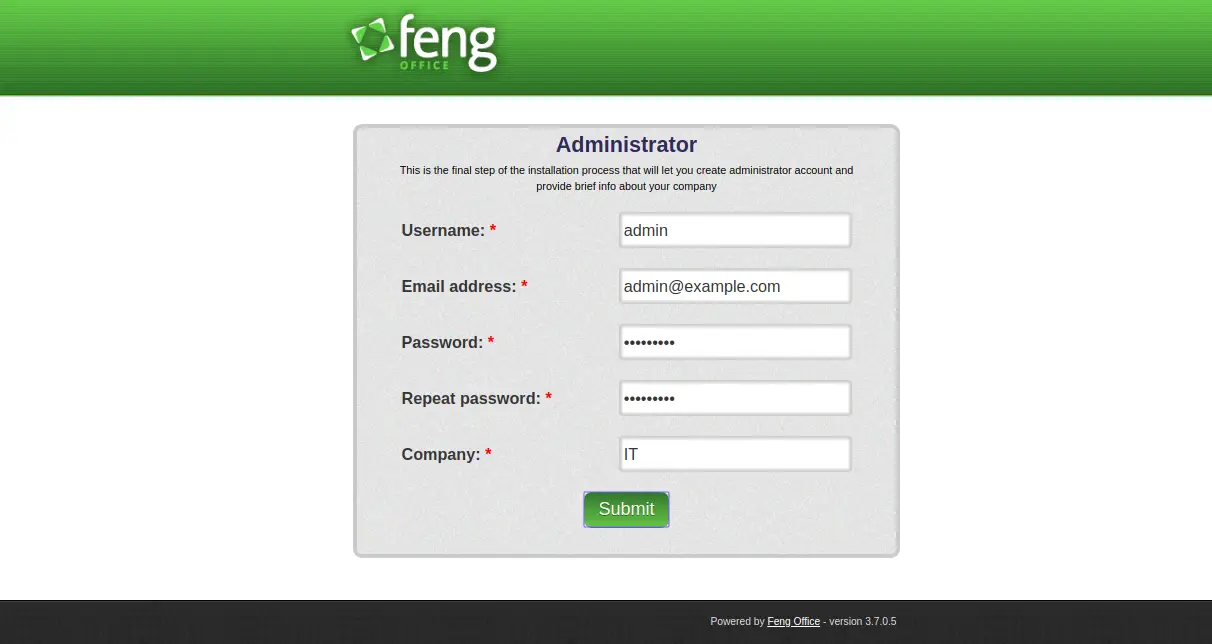
Provide your admin username, email, password and click on the Submit button. You will be redirected to the Feng Office login page:
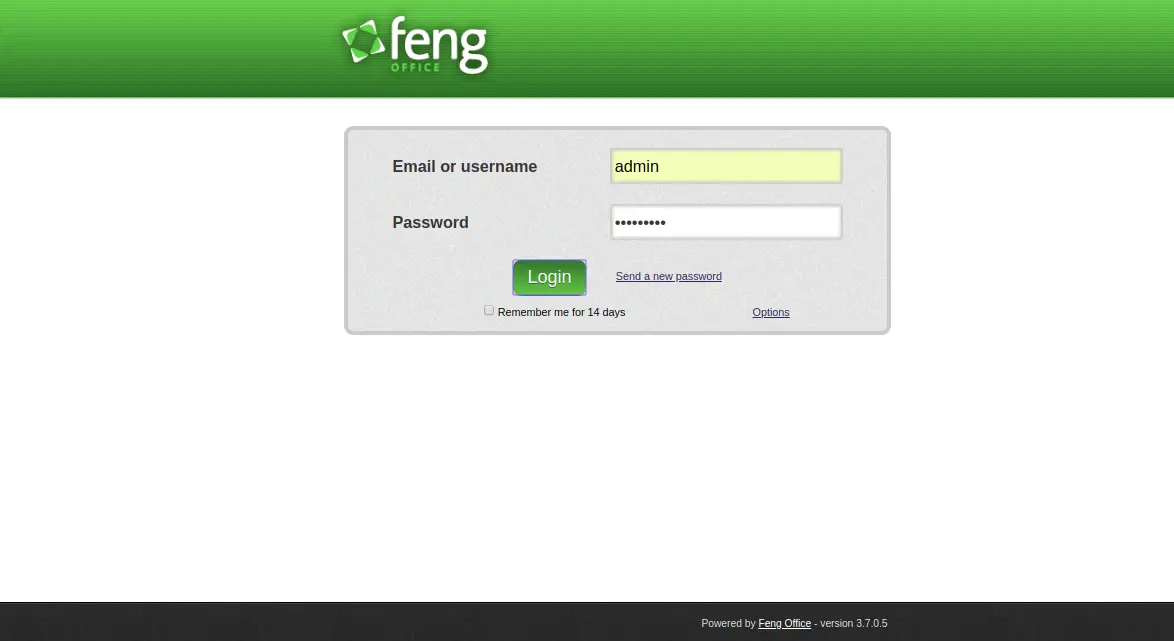
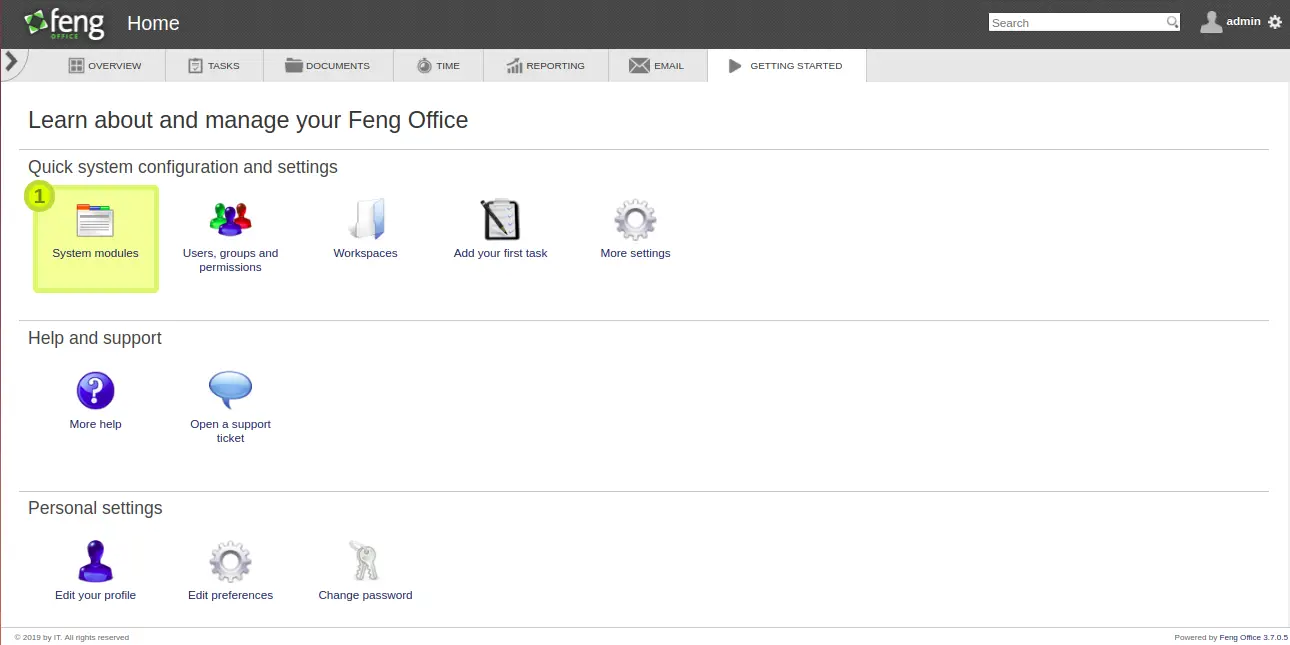
Now, provide your admin username, password and click on the Login button. You should see the Feng Office dashboard in the following page:
Secure Feng Office with Let's Encrypt Free SSL
Feng Office is now installed and configured. Next, it is recommended to secure it with Let's Encrypt free SSL. To do so, you will need to install a Certbot client on your server. Certbot is a Let's Encrypt client that can be used to download and install an SSL certificate for your domain.
First, add the Certbot repository in your server with the following command:
add-apt-repository ppa:certbot/certbot
Once the repository is added, update the repository and install the Certbot with the following command:
apt-get update -y
apt-get install certbot python-certbot-apache -y
Certbot is now installed and ready to use.
Run the following command to obtain and install the SSL certificate for your domain:
certbot --apache -d example.com
You will be asked to provide your email address and agree to the terms of service.
Saving debug log to /var/log/letsencrypt/letsencrypt.log
Plugins selected: Authenticator apache, Installer apache
Enter email address (used for urgent renewal and security notices) (Enter 'c' to
cancel): [email protected]

- - - - - - - - - - - - - - - - - - - - - - - - - - - - - - - - - - - - - - - -
Please read the Terms of Service at
https://letsencrypt.org/documents/LE-SA-v1.2-November-15-2017.pdf. You must
agree in order to register with the ACME server at
https://acme-v02.api.letsencrypt.org/directory
- - - - - - - - - - - - - - - - - - - - - - - - - - - - - - - - - - - - - - - -
(A)gree/(C)ancel: A
Next, you will need to choose whether or not to redirect HTTP traffic to HTTPS, removing HTTP access as shown below:
- - - - - - - - - - - - - - - - - - - - - - - - - - - - - - - - - - - - - - - -
1: No redirect - Make no further changes to the webserver configuration.
2: Redirect - Make all requests redirect to secure HTTPS access. Choose this for
new sites, or if you're confident your site works on HTTPS. You can undo this
change by editing your web server's configuration.
- - - - - - - - - - - - - - - - - - - - - - - - - - - - - - - - - - - - - - - -
Select the appropriate number [1-2] then [enter] (press 'c' to cancel): 2
Choose option 2 to download and install a free SSL certificate for your domain and hit Enter to finish the installation.
Now, you can access your Feng Office securely with the URL https://example.com.
Conclusion
Congratulations! you have successfully installed, configured and secured Feng Office on Debian 10 server. You can now easily manage your project with Feng Office web interface.

