Install LibModsecurity Web Application Firewall with Nginx on CentOS 8
On this page
LibModSecurity is a free and open-source web application firewall that can be used to protect an Nginx server from different kinds of cyberattacks. It comes with a Core Rule Set including, SQL injection, cross-site scripting, Trojans and many more. It works by monitoring HTTP traffic in real-time and fight against vulnerabilities using the OWASP ModSecurity Core Rule Set. It can be used with Apache, Nginx, and IIS and also compatible with Debian, Ubuntu, & CentOS.
In this tutorial, we will show you how to download and compile LibModSecurity with Nginx support on CentOS 8.
Requirements
- A server running CentOS 8.
- A root password is configured on the server.
Getting Started
Before starting, update your server with the latest version using the following command:
dnf update
Once your server is up-to-date, restart it to apply the changes.
Install Required Repositories and Dependencies
First, install EPEL and REMI repository on your system. You can install them with the following command:
dnf install https://dl.fedoraproject.org/pub/epel/epel-release-latest-8.noarch.rpm
 dnf install https://rpms.remirepo.net/enterprise/remi-release-8.rpm
Next, install all required dependencies with the following command:
dnf install gcc-c++ flex bison yajl curl-devel zlib-devel pcre-devel autoconf automake git curl make libxml2-devel pkgconfig libtool httpd-devel redhat-rpm-config wget openssl openssl-devel nano
Once all the packages are installed, you can install other dependencies using the PowerTool repository:
dnf --enablerepo=PowerTools install doxygen yajl-devel
Next, install GeoIP using the REMI repository by running the following command:
dnf --enablerepo=remi install GeoIP-devel
Once all the packages are installed, you can proceed to the next step.
Download and Compile LibModsecurity
First, you will need to download the LibModsecurity source and compile it on your system. To do so, change the directory to /opt and download the latest version of LibModsecurity from the Git repository:
cd /opt/
 git clone --depth 1 -b v3/master --single-branch https://github.com/SpiderLabs/ModSecurity
Next, change the directory to ModSecurity and download libInjection code with the following command:
cd ModSecurity
 git submodule init
 git submodule update
Next, configure the LibModsecurity using the following command:
./build.sh
 ./configure
Finally, compile and install LibModSecurity with the following command:
make
 make install
At this point, LibModsecurity has been installed on your system. You can now proceed to install Nginx with LibModsecurity support.
Download and Compile Nginx with LibModsecurity Support
First, you will need to create a system user and group for Nginx. You can create it with the following command:
useradd -r -M -s /sbin/nologin -d /usr/local/nginx nginx
Next, you will need to download Nginx and compile it with LibModsecurity support.
To do so, first download the ModSecurity-nginx connector from the Git repository with the following command:
cd /opt
 git clone https://github.com/SpiderLabs/ModSecurity-nginx.git
Next, download the latest stable version of the Nginx with the following command:
wget http://nginx.org/download/nginx-1.17.6.tar.gz
Once downloaded, extract the downloaded file using the following command:
tar -xvzf nginx-1.17.6.tar.gz
Next, change the Nginx directory and configure it with the following command:
cd nginx-1.17.6
 ./configure --user=nginx --group=nginx --with-pcre-jit --with-debug --with-http_ssl_module --with-http_realip_module --add-module=/opt/ModSecurity-nginx
Next, install the Nginx with the following command:
make
 make install
At this point, Nginx has been installed with LibModsecurity support. You can now proceed to configure Nginx.
Confgure Nginx with ModSecurity
First, you will need to copy the sample ModSecurity configuration file from the Nginx source directory to Nginx configuration directory.
You can copy them with the following command:
cp /opt/ModSecurity/modsecurity.conf-recommended /usr/local/nginx/conf/modsecurity.conf
 cp /opt/ModSecurity/unicode.mapping /usr/local/nginx/conf/
Next, create a symbolic link of Nginx binary to /usr/sbin/ path with the following command:
ln -s /usr/local/nginx/sbin/nginx /usr/sbin/
Next, create the Nginx log directory with the following command:
mkdir /var/log/nginx
Next, open the Nginx configuration file with the following command:
nano /usr/local/nginx/conf/nginx.conf
Make the following changes:
user  nginx;
worker_processes  1;
pid  /run/nginx.pid;
events {
    worker_connections  1024;
}


http {
    include	  mime.types;
    default_type  application/octet-stream;
    sendfile        on;
    keepalive_timeout  65;
    server {
	listen       80;
        server_name  your-server-ip;
        modsecurity  on;
        modsecurity_rules_file  /usr/local/nginx/conf/modsecurity.conf;
        access_log  /var/log/nginx/access.log;
        error_log  /var/log/nginx/error.log;
        location / {
            root   html;
            index  index.html index.htm;
        }
        error_page   500 502 503 504  /50x.html;
        location = /50x.html {
            root   html;
        }
    }
}
Save and close the file when you are finished. Then, check Nginx for any syntax error with the following command:
nginx -t
You should see the following output:
nginx: the configuration file /usr/local/nginx/conf/nginx.conf syntax is ok
nginx: configuration file /usr/local/nginx/conf/nginx.conf test is successful
At this point, Nginx has been configured. You can proceed to create a systemd service file for Nginx.
Create a Systemd Service file for Nginx
Next, you will need to create a systemd file to manage the Nginx service. You can create it with the following command:
nano /etc/systemd/system/nginx.service
Add the following lines:
[Unit]
Description=The nginx server
After=network.target remote-fs.target nss-lookup.target

[Service]
Type=forking
PIDFile=/run/nginx.pid
ExecStartPre=/usr/bin/rm -f /run/nginx.pid
ExecStartPre=/usr/sbin/nginx -t
ExecStart=/usr/sbin/nginx
ExecReload=/bin/kill -s HUP $MAINPID
KillSignal=SIGQUIT
TimeoutStopSec=5
KillMode=mixed
PrivateTmp=true

[Install]
WantedBy=multi-user.target
Save and close the file when you are finished. Then, reload the systemd daemon with the following command:
systemctl daemon-reload
Next, start the Nginx service and enable it to start after system reboot with the following command:
systemctl start nginx
 systemctl enable --now nginx
You should see the following output:
Created symlink /etc/systemd/system/multi-user.target.wants/nginx.service → /etc/systemd/system/nginx.service.
Next, verify the Nginx service with the following command:
systemctl status nginx
You should see the following output:
? nginx.service - The nginx HTTP and reverse proxy server
   Loaded: loaded (/etc/systemd/system/nginx.service; enabled; vendor preset: disabled)
   Active: active (running) since Mon 2019-12-30 10:20:01 EST; 41s ago
  Process: 17730 ExecStart=/usr/sbin/nginx (code=exited, status=0/SUCCESS)
  Process: 17728 ExecStartPre=/usr/sbin/nginx -t (code=exited, status=0/SUCCESS)
  Process: 17727 ExecStartPre=/usr/bin/rm -f /run/nginx.pid (code=exited, status=0/SUCCESS)
 Main PID: 17732 (nginx)
    Tasks: 2 (limit: 6102)
   Memory: 5.0M
   CGroup: /system.slice/nginx.service
           ??17732 nginx: master process /usr/sbin/nginx
           ??17733 nginx: worker process

Dec 30 10:20:00 nginx systemd[1]: Starting The nginx HTTP and reverse proxy server...
Dec 30 10:20:00 nginx nginx[17728]: nginx: the configuration file /usr/local/nginx/conf/nginx.conf syntax is ok
Dec 30 10:20:00 nginx nginx[17728]: nginx: configuration file /usr/local/nginx/conf/nginx.conf test is successful
Dec 30 10:20:01 nginx systemd[1]: nginx.service: Failed to parse PID from file /run/nginx.pid: Invalid argument
Dec 30 10:20:01 nginx systemd[1]: Started The nginx HTTP and reverse proxy server.
At this point, Nginx has been started and running. You can now proceed to configure ModSecurity.
Configure ModeSecurity
By default, ModSecurity is set on detection only mode. So you will need to turn on the ModSecurity rule engine. You can do it by editing the file modsecurity.conf:
nano /usr/local/nginx/conf/modsecurity.conf
Find the following line:
SecRuleEngine DetectionOnly
And, replace it with the following line:
SecRuleEngine On
Also find the following line:
/var/log/modsec_audit.log
And, replace it with the following line:
/var/log/nginx/modsec_audit.log
Save and close the file when you are finished.
Next, download the latest version of ModSecurity Core Rule Set from the Git repository using the following command:
git clone https://github.com/SpiderLabs/owasp-modsecurity-crs.git /usr/local/nginx/conf/owasp-crs
Once downloaded, rename the CRS example configuration file with the following command:
mv /usr/local/nginx/conf/owasp-crs/crs-setup.conf.example /usr/local/nginx/conf/owasp-crs/crs-setup.conf
Next, configure the ModeSecurity to use these rules by editing the file /usr/local/nginx/conf/modsecurity.conf:
nano /usr/local/nginx/conf/modsecurity.conf
Add the following lines at the end of the file:
Include owasp-crs/crs-setup.conf
Include owasp-crs/rules/*.conf
Save and close the file when you are finished. Then, restart the Nginx service to implement the changes:
systemctl restart nginx
Test ModSecurity
ModSecurity is now installed and configured. It's time to test whether it is working or not.
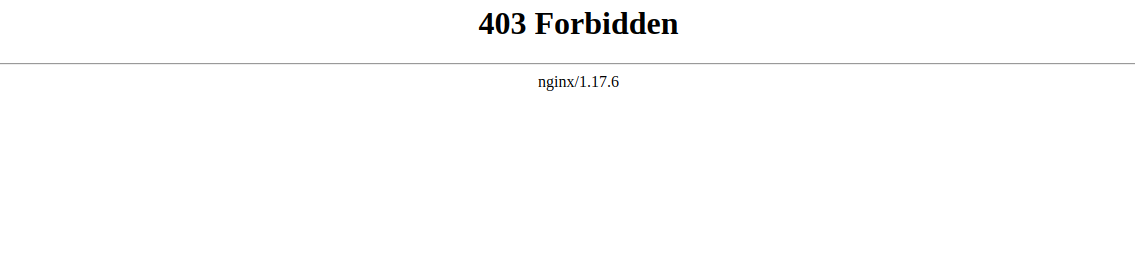
To test ModSecurity against command injection, open your web browser and type the URL http://localhost/index.html?exec=/bin/bash. You should see the 403 Forbidden error in the following page:
To test ModSecurity against CSS attack, open your terminal and run the following command:
curl http://localhost/?q="><script>alert(1)</script>"
You should get the following output:
<html>
<head><title>403 Forbidden</title></head>
<body>
<center><h1>403 Forbidden</h1></center>
<hr><center>nginx/1.17.6</center>
</body>
</html>
Conclusion
Congratulations! you have successfully download and compiled LibModSecurity with Nginx. Your server is now secured from various attacks. For more information, you can visit the ModSecurity documentation at ModSecurity Doc.

