Ubuntu automatically assigns an IP address to the network via DHCP (Dynamic Host Configuration Protocol ). It will continue to get such a dynamic IP (keeps changing) address until you decide to change it to a static one. Ubuntu has switched to the YAML based Netplan for configuring a network since release 18.04. This article will guide you through the process of configuring a static or dynamic IP address in your Ubuntu machine. I will use Ubuntu 18.04 LTS in this article.
Getting familiar with the new configuration file
The new configuration file is now found at /etc/netplan/file*.yaml (file* is your configuration file). The Ubuntu server uses 01-netcfg.yaml and desktop version uses 01-network-manager-all.yaml. if you have more than one network interface connected then it will create a new file for the next interface with 02 at the beginning of the file name. Netplan follows numerical order strictly, therefore, the file with 01 will be applied before the file with 02. Here are some points you should note before configuring.
Type in following command to list all available network interfaces:
ifconfig -a
Note down the name of the network interface that you want to configure.
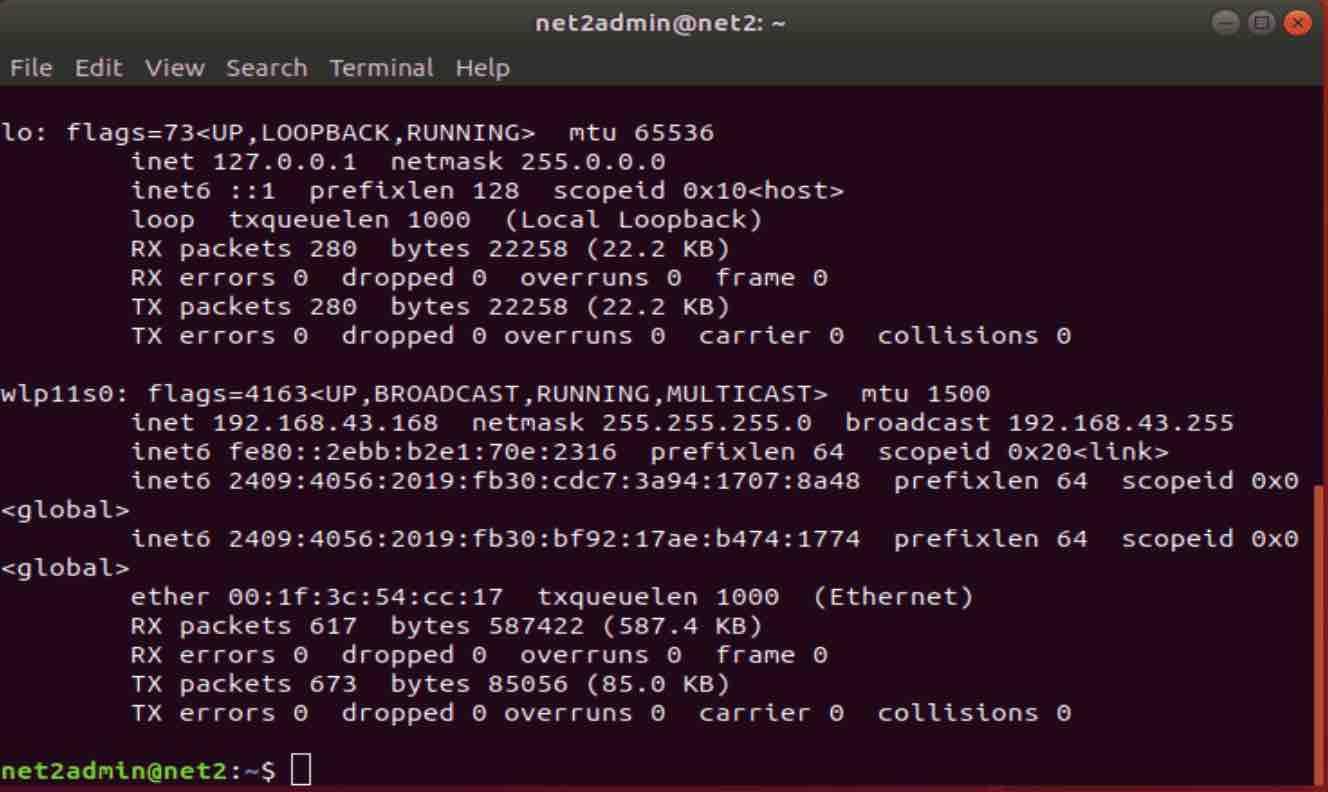
Don’t forget to note down or take a screenshot of the IP address.
Now edit the configuration file using the “nano” editor.
sudo nano /etc/netplan/01-network-manager-all.yaml
You can also see the content of the file using the “cat” command before editing.
If you don’t find the file, then you can generate one using the following command:
sudo netplan generate
This is the file you need to configure in order to to set the static or dynamic IP addresses.
Configuring static IP address
A fixed IP address is called static IP address , i.e. it never changes. It is required to set up an Ubuntu static IP address in order to access a device remotely and without losing a connection over the network. It is used to connect to an IP camera, home file server, game server, and many other devices. A static IP address is necessary only for servers and not for personal PCs. This is said, if you decide to change to a static IP address then follow the instructions below.
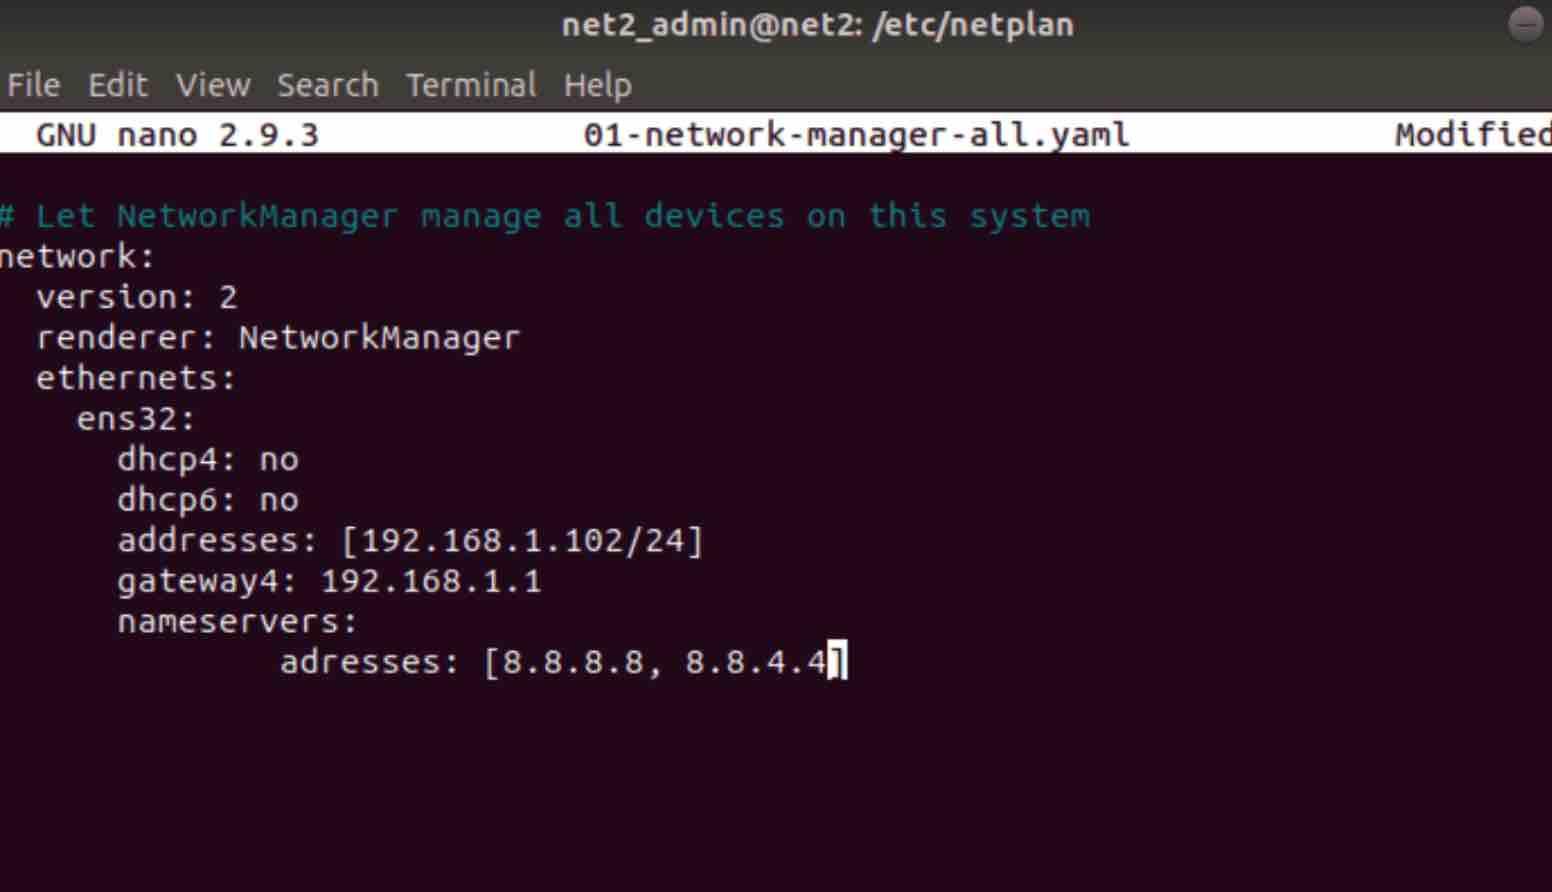
In the file you opened above 01-network-manager-all.yaml, find the network interface you want to configure.
Now under the network interface (ens32 in our case), insert the following lines and make sure to to plug in your own values according to your network settings :
ens32: network interface
dhcp4: no
dhcp6: no
addresses: sequence of static addresses to the interface
gateway4: IPv4 for the default gateway
nameservers: IP addresses sequence for nameserver
WARNING:
You must respect a proper indentation for each line since the prefixed number of spaces for each line is important. Not adhering to this, may lead up to an error message similar to: Invalid YAML at
Read: How to set up a firewall on Ubuntu 22.04
The addresses field expects a sequence. See netplan man for help.
Now save the file and exit from the editor. It should look like this:
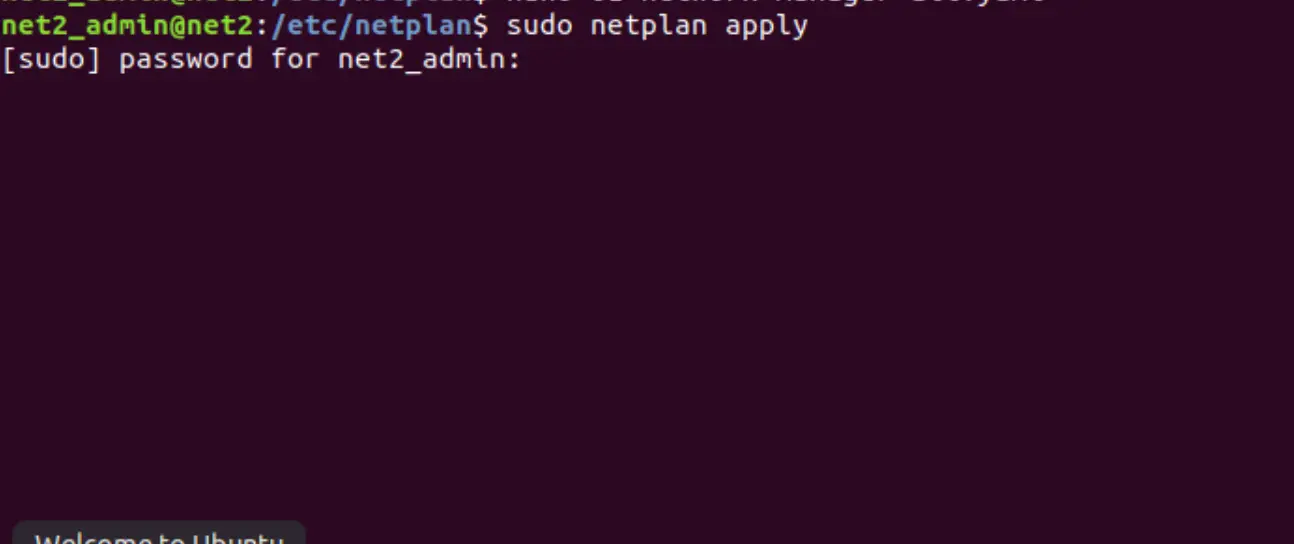
Apply the changes with the following command:
sudo netplan apply
Or
sudo netplan –debug apply to debug errors
Now verify the changes in the network interface that you wanted to configure. To do so, run:
Ubuntu netplan (ubuntu config static ip)
ifconfig –a
if new settings don’t apply then restart your machine and check again.
That’s it you have successfully configured your static IP address.
Read: How to Configure Network Settings in Ubuntu 22.04
Configuring a dynamic IP address
A dynamic IP address as its name suggests is a temporary IP address assigned by a DHCP server for every new network. A dynamic IP address is used due to the shortage of IP addresses on IPV4. A single dynamic IP address can be used between many devices. Follow the guide below to set a dynamic address on your PC.
Again edit the file with
sudo nano /etc/netplan/01-network-manager-all.yaml
Now find the name of the network interface you want to configure and insert the following lines:
- dhcp4: yes
- dhcp6: yes
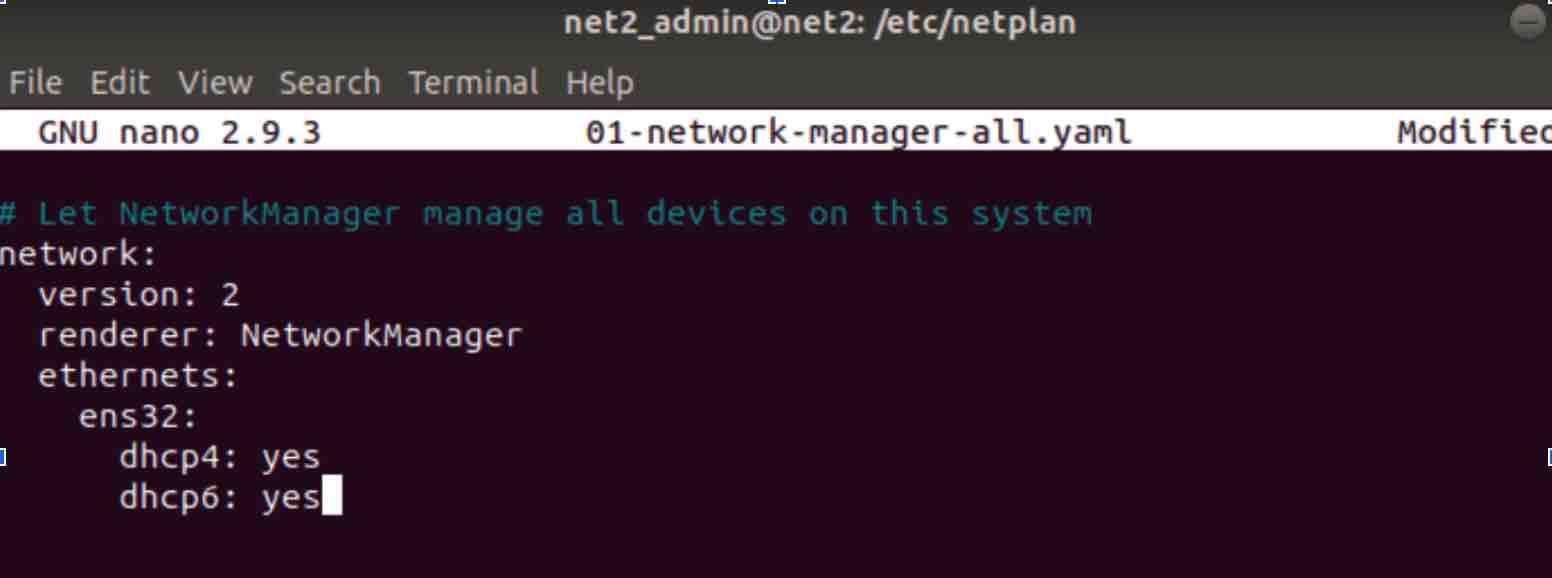
Save the file and close the editor.
Apply the changes with sudo Netplan apply command.
Now your network device should have a dynamic IP address.
If you like the content, we would appreciate your support by buying us a coffee. Thank you so much for your visit and support.