How to Install Attendize on FreeBSD 12
Attendize is an Open-source ticket selling and event management platform and is everything you need for a successful event. Attendize has a wide array of features aimed at making organizing events as effortless as possible.
List of features:
- Beautiful mobile-friendly event pages.
- Easy attendee management - Refunds, Messaging, etc.
- Data export - attendees list to XLS, CSV, etc.
- Generate a print-friendly attendee list.
- Ability to manage unlimited organizers/events.
- Manage multiple organizers.
- Real-time event statistics.
- Customizable event pages.
- Multiple currency support.
- Quick and easy checkout process.
- Customizable tickets - with QR codes, organizer logos, etc.
- Fully brandable - Have your logos on tickets etc.
- Affiliate tracking - track sales volume/number of visits generated, etc.
- Widget support - embed ticket selling widget into existing websites/WordPress blogs.
- Social sharing.
- Support multiple payment gateways - Stripe and PayPal out the box. Other payment gateways can be added.
- Support for offline payments.
- Refund payments - partial refund & full refunds.
- Ability to add a service charge to tickets.
- Messaging - eg. Email all attendees with an X ticket.
- Public event listings page for organizers.
- Ability to ask custom questions during checkout.
- Browser-based QR code scanner for door management.
This tutorial will show you the steps to install Attendize on FreeBSD 12.
Prerequisites
- A server running FreeBSD 12.
- A non-root user with sudo privileges.
Requirements
- Nginx
- MariaDB
- PHP version 7.1.3 or higher with the following extensions: (OpenSSL, PDO, Mbstring, Tokenizer, Fileinfo, GD)
Initial Steps
Check the FreeBSD version.
uname -ro
# FreeBSD 12.1-RELEASE
Update your operating system packages (software). This is an important first step because it ensures you have the latest updates and security fixes for your operating system's default software packages.
freebsd-update fetch install
pkg update && pkg upgrade -y
Install some essential packages that are necessary for the basic administration of the FreeBSD 12 operating system.
pkg install -y sudo vim unzip curl wget bash socat git
Create a new user account with your preferred username, we will use johndoe.
adduser
# Username: johndoe
# Full name: John Doe
# Uid (Leave empty for default): <Enter>
# Login group [johndoe]: <Enter>
# Login group is johndoe. Invite johndoe into other groups? []: wheel
# Login class [default]: <Enter>
# Shell (sh csh tcsh nologin) [sh]: bash
# Home directory [/home/johndoe]: <Enter>
# Home directory permissions (Leave empty for default): <Enter>
# Use password-based authentication? [yes]: <Enter>
# Use an empty password? (yes/no) [no]: <Enter>
# Use a random password? (yes/no) [no]: <Enter>
# Enter password: your_secure_password
# Enter password again: your_secure_password
# Lock out the account after creation? [no]: <Enter>
# OK? (yes/no): yes
# Add another user? (yes/no): no
# Goodbye!
Run the visudo command and uncomment %wheel ALL=(ALL) ALL line, to allow members of the wheel group to execute any command.
visudo

# Uncomment by removing hash (#) sign
%wheel ALL=(ALL) ALL
Now, switch to your newly created user with su command.
su - johndoe
NOTE: Replace johndoe with your username.
Set up the timezone.
sudo tzsetup
Step 1 - Install PHP
Install PHP, as well as the necessary PHP extensions.
sudo pkg install -y php72 php72-mbstring php72-tokenizer php72-pdo php72-pdo_mysql php72-openssl php72-hash php72-json php72-phar php72-filter php72-zlib php72-dom php72-xml php72-xmlwriter php72-xmlreader php72-pecl-imagick php72-curl php72-session php72-ctype php72-iconv php72-gd php72-simplexml php72-zip php72-filter php72-tokenizer php72-calendar php72-fileinfo php72-intl php72-mysqli php72-phar php72-opcache php72-pdo_pgsql
Check the PHP version.
php --version
# PHP 7.2.17 (cli) (built: Apr 13 2019 01:13:32) ( NTS )
# Copyright (c) 1997-2018 The PHP Group
# Zend Engine v3.2.0, Copyright (c) 1998-2018 Zend Technologies
Soft-link php.ini-production to php.ini.
sudo ln -s /usr/local/etc/php.ini-production /usr/local/etc/php.ini
Enable and start PHP-FPM.
sudo sysrc php_fpm_enable=yes
sudo service php-fpm start
Step 2 - Install MariaDB and create a database
Install MariaDB.
sudo pkg install -y mariadb102-client mariadb102-server
Check the MariaDB version.
mysql --version
# mysql  Ver 15.1 Distrib 10.2.22-MariaDB, for FreeBSD12.0 (amd64) using readline 5.1
Start and enable MariaDB.
sudo sysrc mysql_enable="yes"
sudo service mysql-server start
Run the mysql_secure_installation script to improve the security of your MariaDB installation.
sudo mysql_secure_installation
Log into MariaDB as the root user.
mysql -u root -p
# Enter password:
Create a new MariaDB database and user. Remember the credentials for this new user. Replace dbname, username, and password in the below commands with your database name, database username, and password.
CREATE DATABASE dbname;
GRANT ALL ON dbname.* TO 'username' IDENTIFIED BY 'password';
FLUSH PRIVILEGES;
exit;
Step 4 - Install and configure Nginx
Install Nginx.
sudo pkg install -y nginx
Check the Nginx version.
nginx -v
# nginx version: nginx/1.14.2
Enable and start Nginx service.
sudo sysrc nginx_enable=yes
sudo service nginx start
Run sudo vim /usr/local/etc/nginx/attendize.conf and set up Nginx virtual server for Attendize.
server {
  listen 80;
  listen [::]:80;
  server_name example.com;
  root /usr/local/www/attendize/public;

  index index.php;

  location / {
    try_files $uri $uri/ /index.php$is_args$args;
  }

  location ~ \.php$ {
    try_files $uri =404;
    include fastcgi_params;
    fastcgi_index index.php;
    fastcgi_param SCRIPT_FILENAME $document_root$fastcgi_script_name;
    fastcgi_pass 127.0.0.1:9000;
  }
}
Save the file and exit from your editor.
Include attendize.conf file to the main nginx.conf file by running sudo vim /usr/local/etc/nginx/nginx.conf and add the following line to the http {} block.
include attendize.conf;
Test our Nginx configuration changes.
sudo nginx -t
Reload Nginx.
sudo service nginx reload
Step 5 - Install Composer
Install Composer globally by running the following script in your terminal.
php -r "copy('https://getcomposer.org/installer', 'composer-setup.php');"
php -r "if (hash_file('sha384', 'composer-setup.php') === 'e0012edf3e80b6978849f5eff0d4b4e4c79ff1609dd1e613307e16318854d24ae64f26d17af3ef0bf7cfb710ca74755a') { echo 'Installer verified'; } else { echo 'Installer corrupt'; unlink('composer-setup.php'); } echo PHP_EOL;"
php composer-setup.php
php -r "unlink('composer-setup.php');"
sudo mv composer.phar /usr/local/bin/composer
NOTE: In the command block listed above, the hash will change with every version of the installer. Visit https://getcomposer.org/download for the latest Composer installation commands.
Check the version.
composer --version
# Composer version 1.10.1 2020-03-13 17:46:47
Step 6 - Install Attendize
Create a document root directory where Attendize should reside in.
sudo mkdir -p /usr/local/www/attendize
Change ownership of the /usr/local/www/attendize directory to johndoe. Replace "johndoe" with your username.
sudo chown -R johndoe:johndoe /usr/local/www/attendize
Navigate to the document root directory.
cd /usr/local/www/attendize
Download the latest release of Attendize and unzip it.
wget https://github.com/Attendize/Attendize/archive/v1.3.0.zip
unzip v1.3.0.zip rm v1.3.0.zip
mv Attendize-1.3.0/* . && mv Attendize-1.3.0/.* .
rmdir Attendize-1.3.0
Make a copy of the environment configuration file.
cp .env.example .env
Run the composer to install the various libraries.
composer install
NOTE: If your system has less than 2GB memory, you may run into errors when running composer install. To overcome this, configure a larger amount of swap memory.
Generate an application key.
php artisan key:generate
Change ownership of the /usr/local/www/attendize directory to www.
sudo chown -R www:www /usr/local/www/attendize
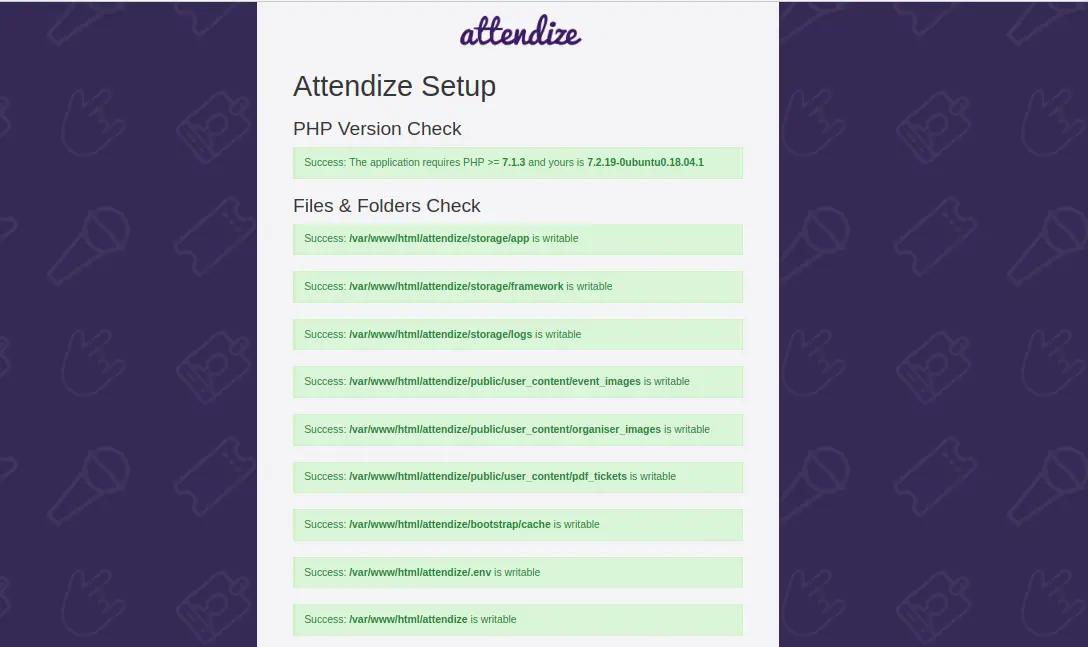
Navigate to http://example.com/install and you will see the installer screen.
After following the on-screen instructions, Attendize will be installed.
Step 7 - Access Attendize
Now, open your web browser and type the URL http://example.com. You will be redirected to the following page:
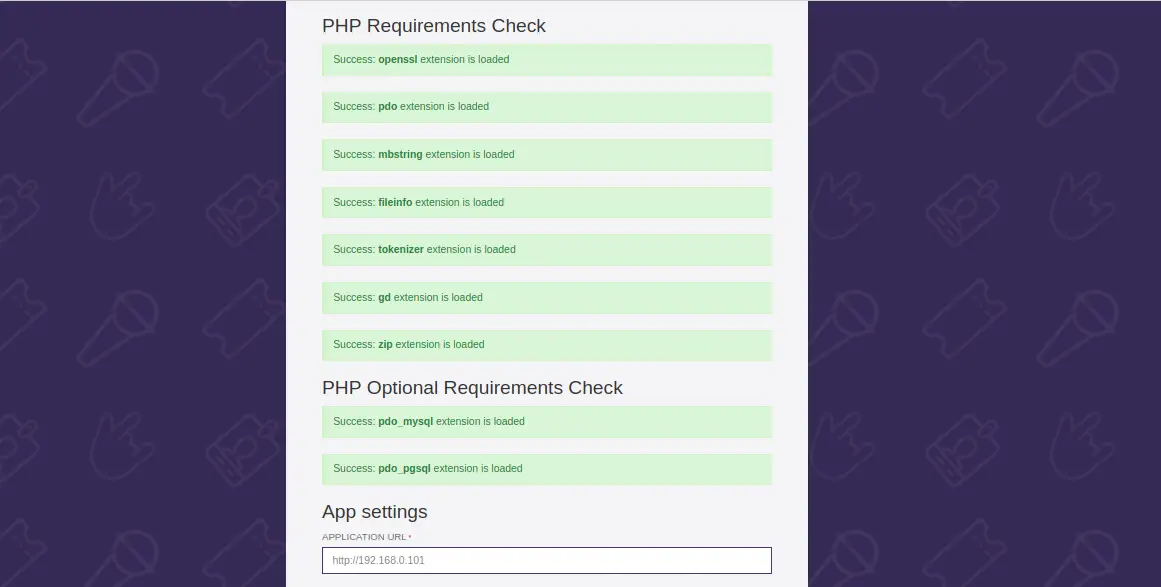
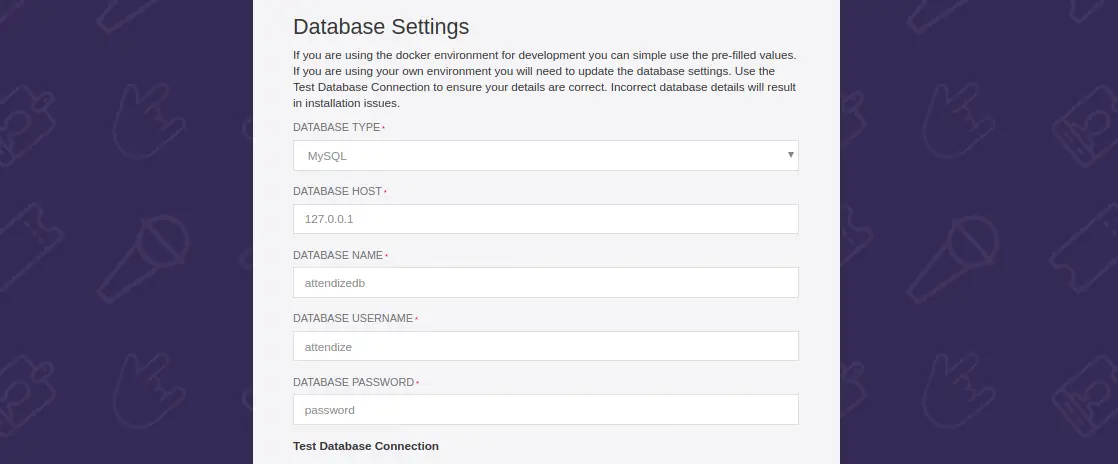
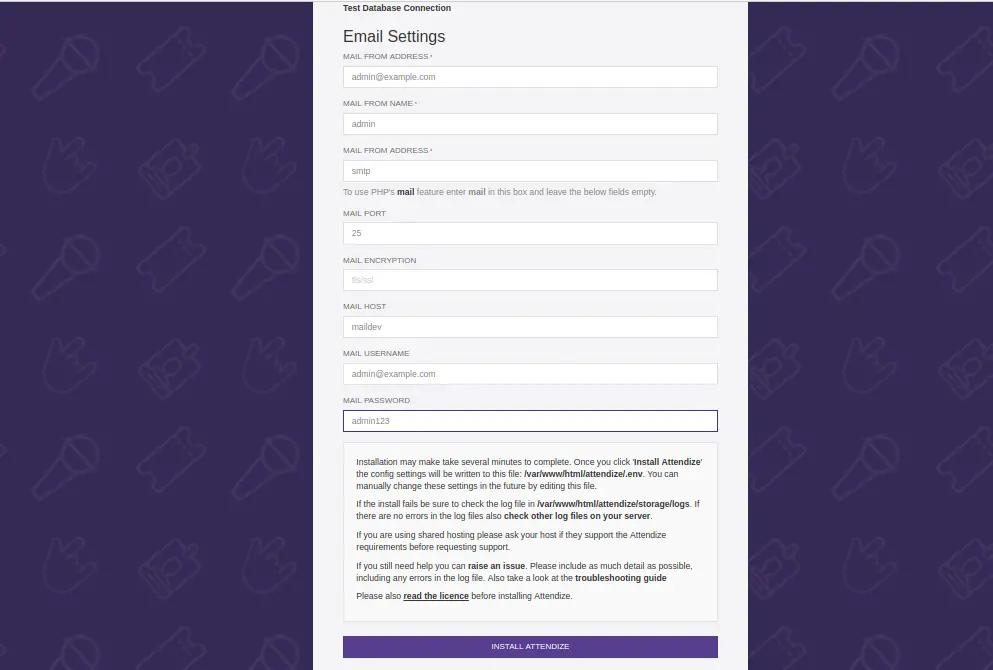
Make sure all the required extensions are installed. Then, provide your database information, email information and click on the INSTALL ATTENDIZE button. You should see the following page:
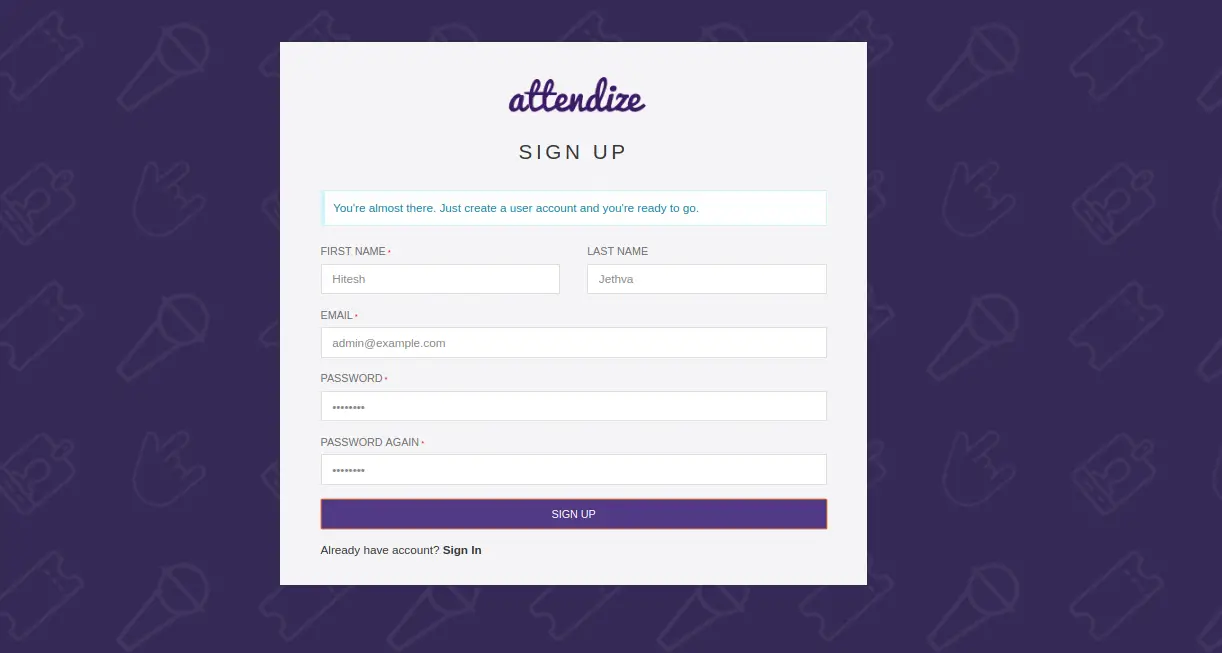
Provide your name, email address, and password. Then, click on the SIGN-UP button. You should see the following page:
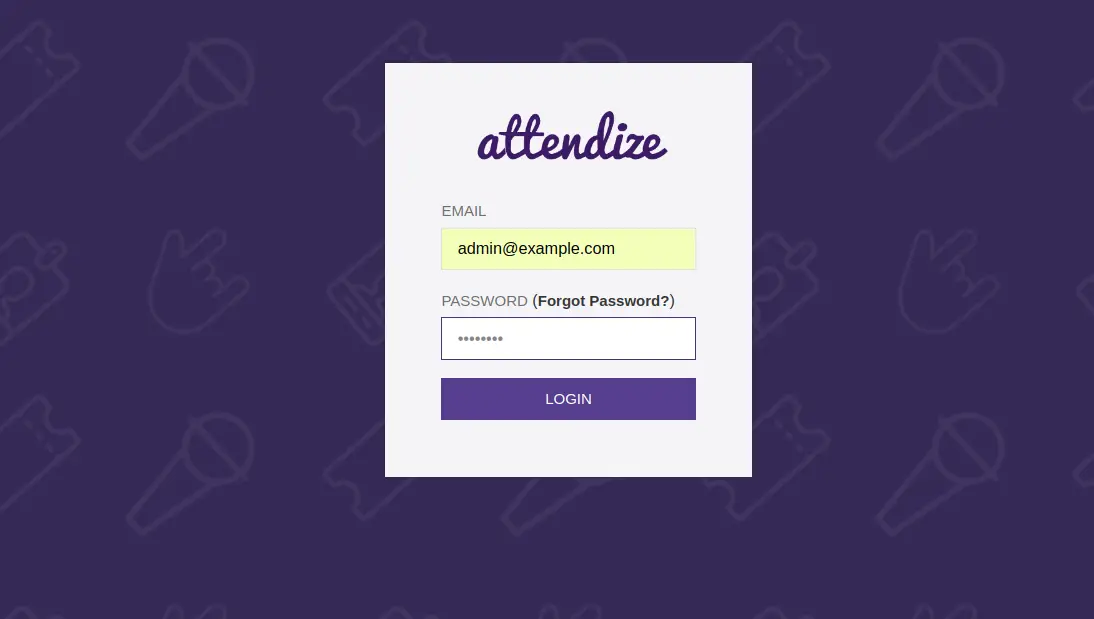
Now, provide your login details and click on the LOGIN button. You should see the following page:
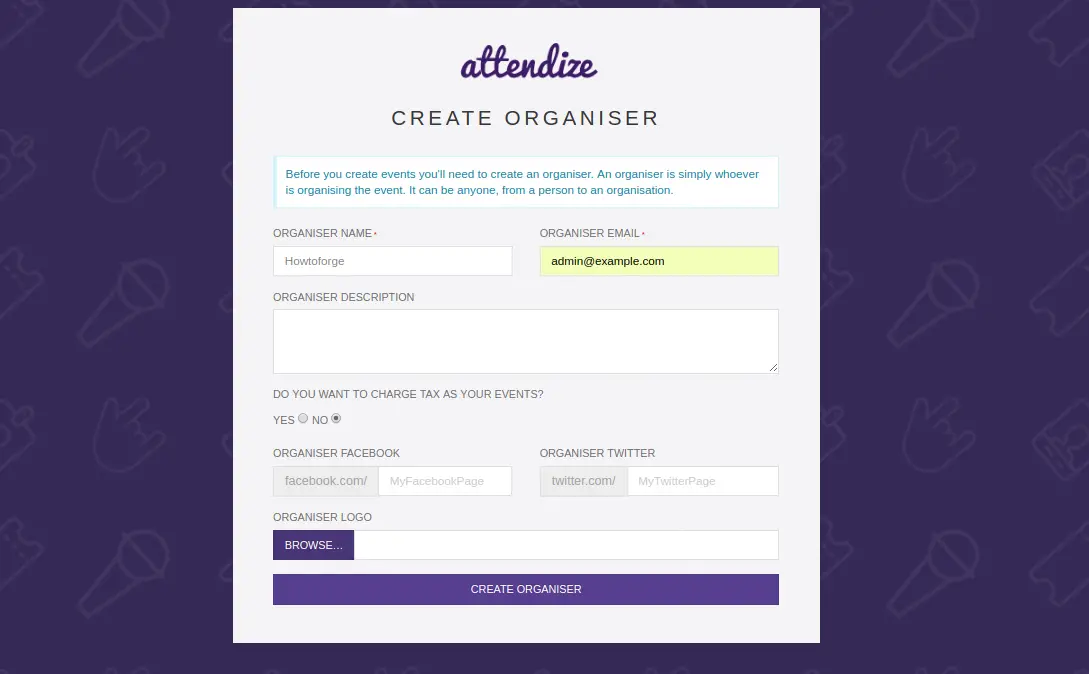
Now, provide your organizer name, email, description and click on the CREATE ORGANISER button. You should see the following page:
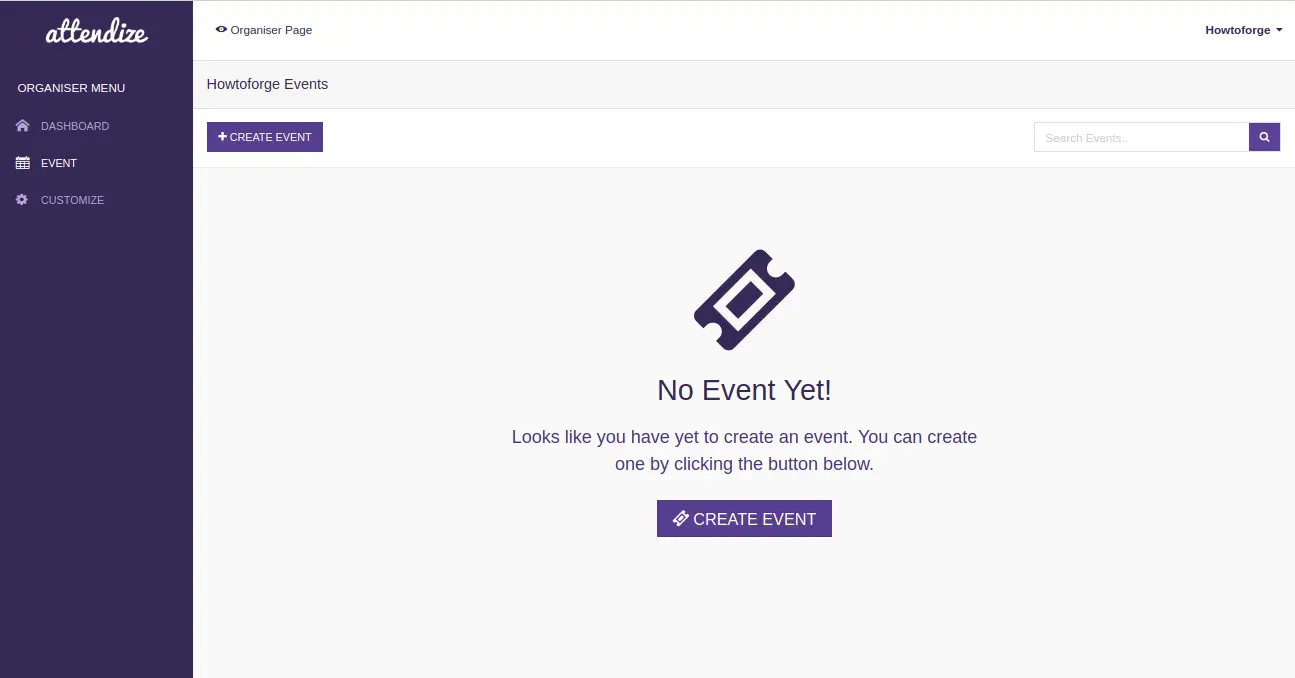
Congratulations! you have successfully installed Attendize ticket selling and event management application in your FreeBSD 12 server. You can now organize and manage an unlimited number of events without any extra cost using Attendize. For more information, you can visit the Attendize official documentation at Attendize Doc

