How to Install PostgreSQL on FreeBSD 12
PostgreSQL or Postgres is a powerful object-relational high-performance database management system (ORDBMS) published under a flexible BSD-style license. PostgreSQL is well suited for large databases and has many advanced features.
In this tutorial, we will show you how to install and configure a PostgreSQL database server on FreeBSD. We will install the latest version of PostgreSQL 11 on the FreeBSD 12.0 system.
Prerequisite
For this guide, we will use FreeBSD 12 with 1 GB of RAM memory and 2 CPUs. If you have a large deployment, you will need more than that. You will also need the root privileges for package installation.
What we will do:
- Update and Upgrade Packages
- Install PostgreSQL 11
- Configure PostgreSQL Authentication
- Setup New User and Database
- Testing
Step 1 - Update and Upgrade Packages
Firstly, we will update the packages repository and upgrade all packages to the latest version using the pkg package management tool for FreeBSD.
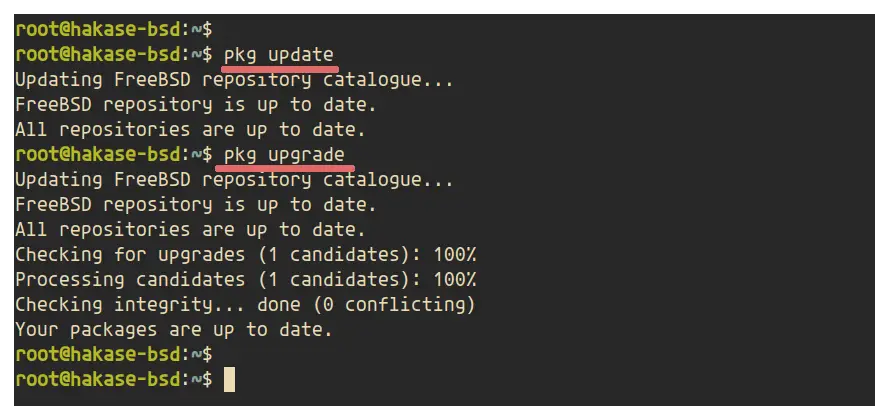
Update all available repository and upgrade all packages to the latest version using the following command.
pkg update
pkg upgrade
Once all installation is complete, go to the next step.
Step 2 - Install PostgreSQL 11
In this step, we're going to install the latest stable version PostgreSQL 11. By default, the FreeBSD repository provides multiple versions of PostgreSQL package.
You can use the following command to check all available version of PostgreSQL packages.
pkg search postgresql
And you will get multiple versions of PostgreSQL database server.
Now install the PostgreSQL 11 package using the command below.
pkg install postgresql11-server postgresql11-client
Once the installation is complete, you will get the result as below.
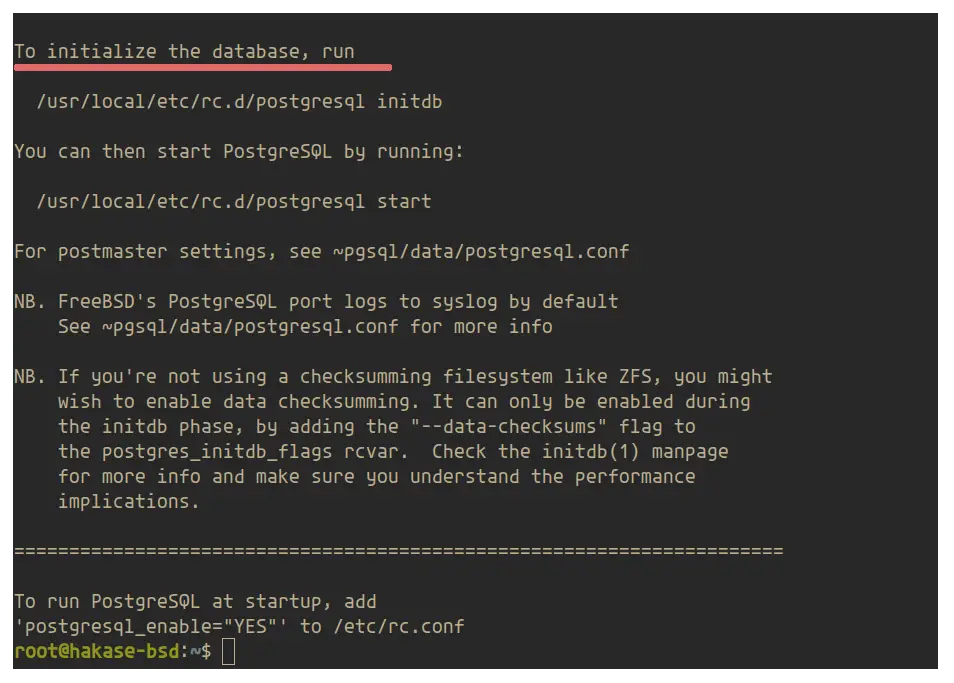
Next, we need to add the PostgreSQL service to the system boot and initialize the database before starting the service.
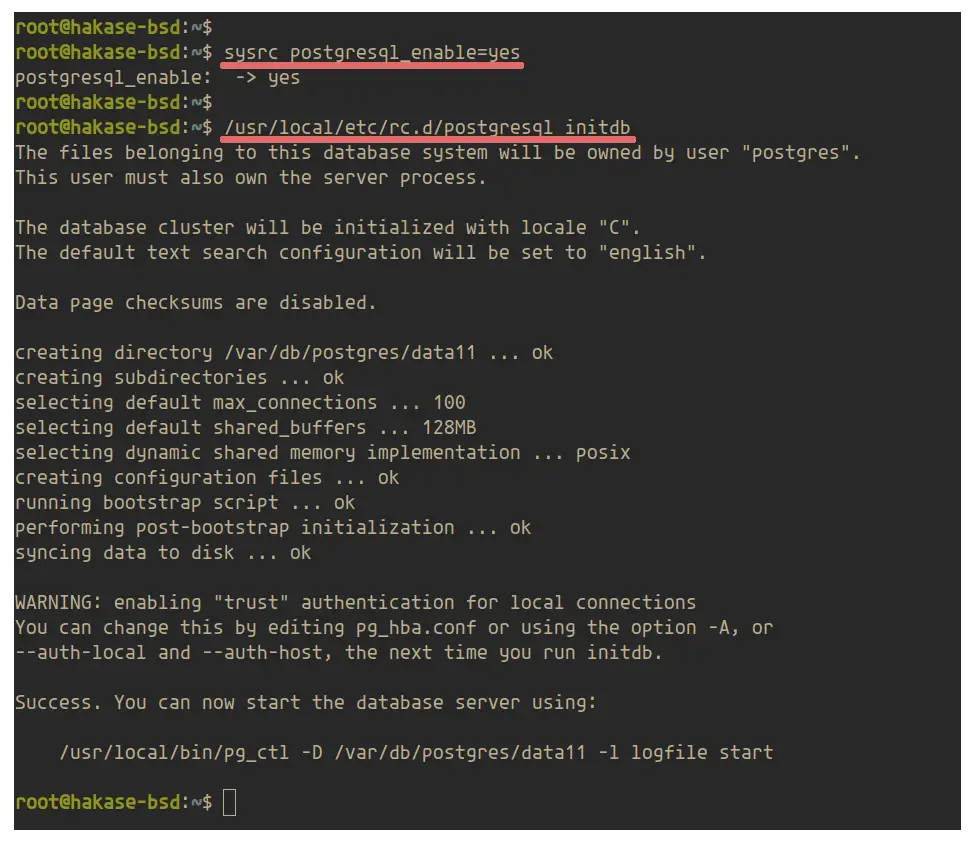
Add the PostgreSQL to the system boot using the command below.
sysrc postgresql_enable=yes
Now initialize the PostgreSQL database using the following command.
/usr/local/etc/rc.d/postgresql initdb
And you will get the result as below.
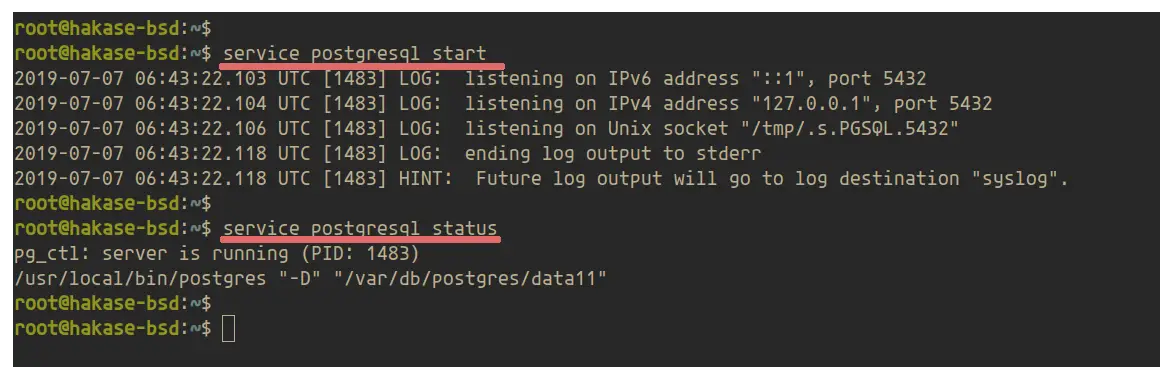
Now start the PostgreSQL service and check its status.
service postgresql start
service postgresql status
The PostgreSQL service is up and running on FreeBSD 12.0.
Additionally:
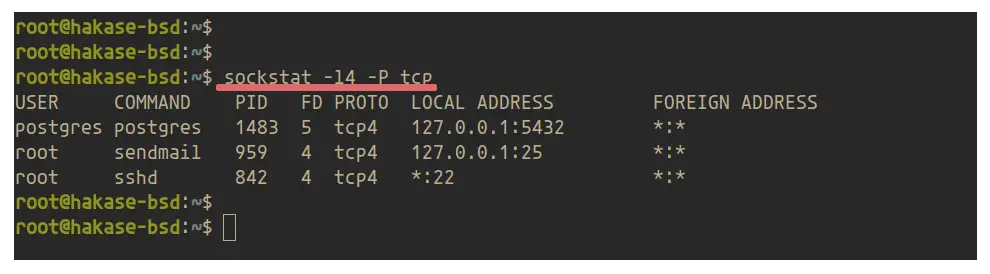
You can check the system port used by the PostgreSQL service using the sockstat command below.
sockstat -l4 -P tcp
And you will get the port '5432' is used by the PostgreSQL service.
Step 3 - Configure PostgreSQL Authentication
In this step, we're going to set up the authentication method for PostgreSQL. PostgreSQL supports different authentication methods such as trust authentication (default), password-based authentication, Kerberos, GSSAPI, LDAP, RADIUS, and PAM.
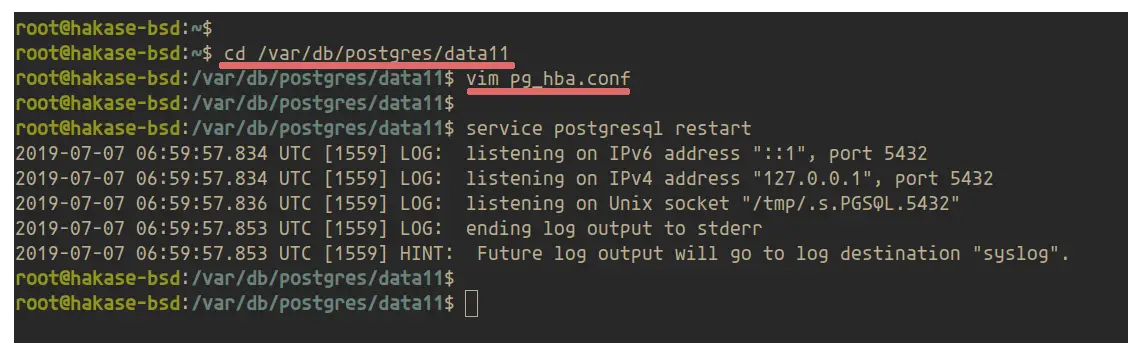
For this guide, we're going to set up the password-based authentication using MD5. Go to the '/var/db/postgresql/data11' directory, edit the 'pg_hba.conf' file using vim editor.
cd /var/db/postgres/data11
vim pg_hba.conf
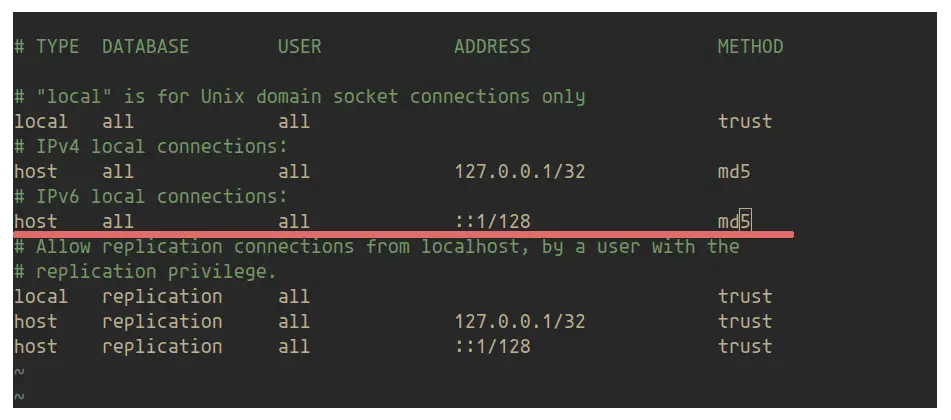
Now change the authentication method for all local connection to 'md5' as below.
# TYPE  DATABASE        USER            ADDRESS                 METHOD

# "local" is for Unix domain socket connections only
local   all             all                                     trust
# IPv4 local connections:
host    all             all             127.0.0.1/32            md5
# IPv6 local connections:
host    all             all             ::1/128                 md5
Save and close.
Now restart the PostgreSQL service.
service postgresql restart
As a result, the password-based authentication using md5 for the PostgreSQL server has been enabled.
Step 4 - Setup New User and Database
In this step, we're going to set up a new user and database on PostgreSQL. We're going to create a new password for default user 'postgres', and create a new user and database.
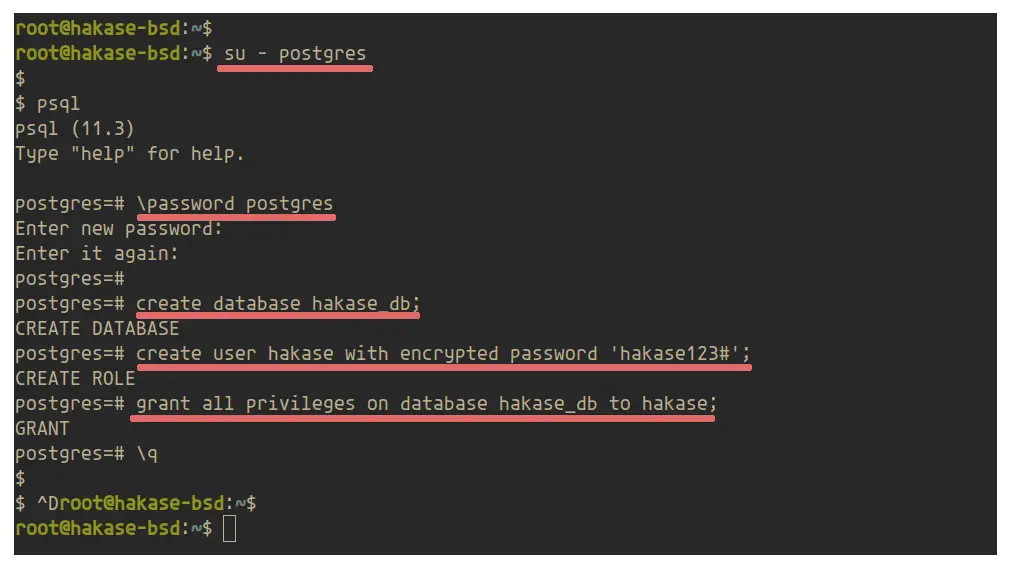
Log in to the 'postgres' user using the command below.
su - postgres
Now login to the interactive PostgreSQL shell 'psql'.
psql
Then create a new password for the 'postgres' user.
\password postgres
TYPE THE PASSWORD
Next, we will create a new user called 'hakase' with the database 'hakase_db'. And the give privileges for the user to the database.
Run the following PostgreSQL querys below.
create database hakase_db;
create user hakase with encrypted password 'hakase123#';
grant all privileges on database hakase_db to hakase;
Now exit from the PostgreSQL interactive shell.
\q
As a result, the password for the default 'postgres' user has been created. And the new user and database have been set up.
Step 5 - Testing
Log in to the 'postgres' user and then run the 'psql' command to get into the PostgreSQL interactive shell.
su - postgres
psql
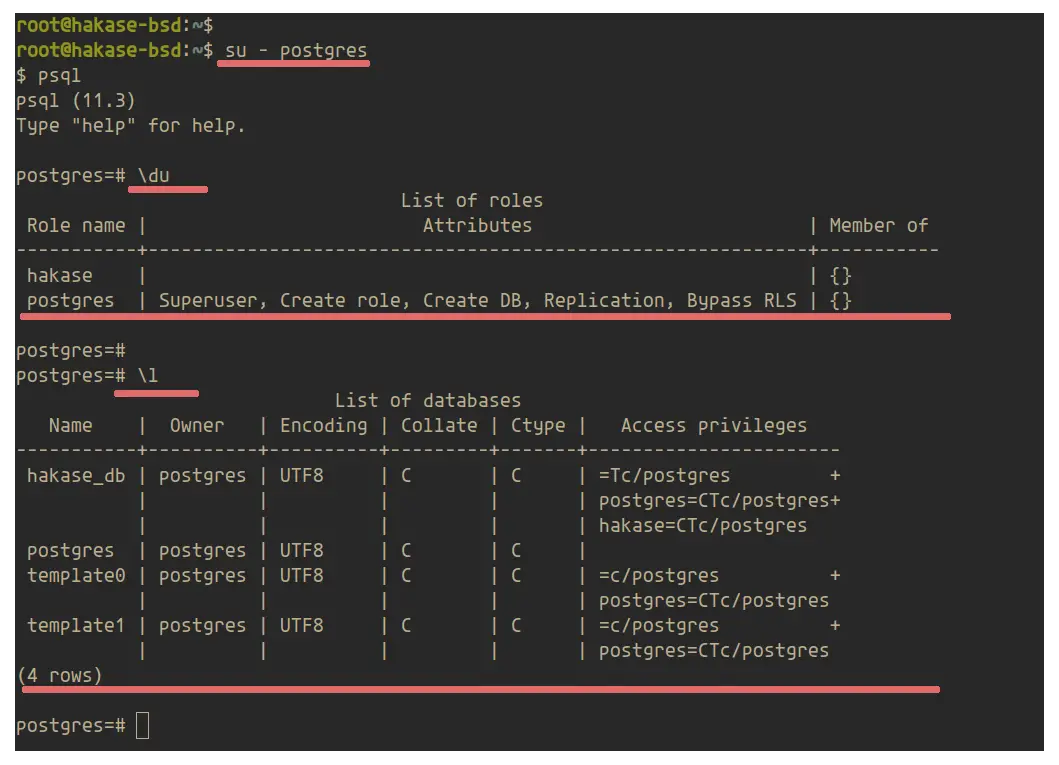
Show list users and database on the PostgreSQL server using the following queries.
\du
\l
And you will get the new user 'hakase' and the database 'hakase_db' on the result.
Type '\q' to exit from the psql shell.
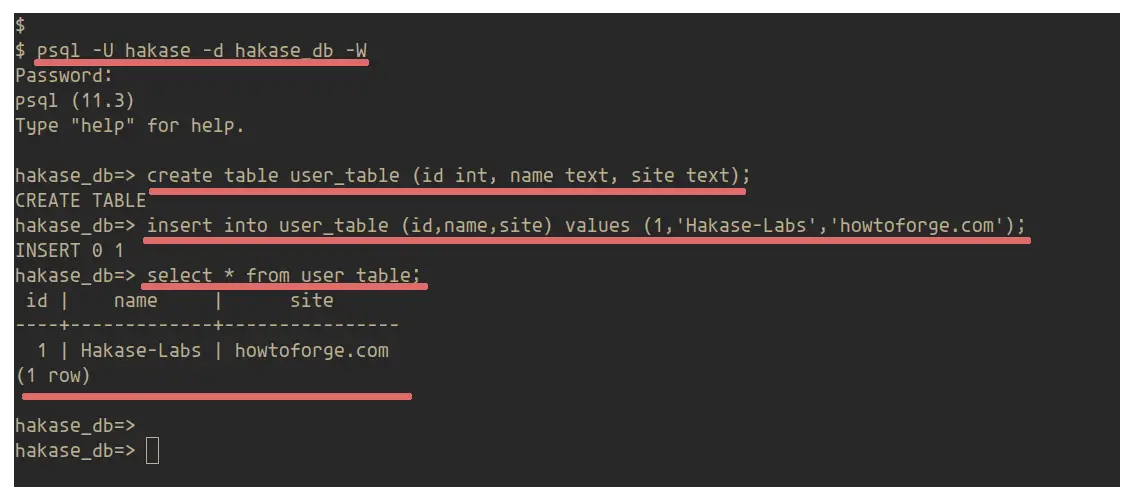
Next, we will log in using the created user 'hakase' to the database 'hakase_db' using the command below.
psql -U hakase -d hakase_db -W
Type the hakase password
Now create a new table 'user_table' and insert some data into it.
create table user_table (id int, name text, site text);
insert into user_table (id,name,site) values (1,'Hakase-Labs','howtoforge.com');
Show content of tables using the following query.
select * from user_table;
And you will get the result as below.
Finally, the installation and configuration of PostgreSQL 11 on the FreeBSD 12 system has been completed successfully.

