


LaTeX offers a number of tools to create and customise tables, in this series we will be using the tabular and tabularx environment to create and customise tables.
Basic table
To create a table you simply specify the environment \begin{tabular}{columns}
\begin{tabular}{c|c}
    Release &Codename \\ \hline
    Fedora Core 1 &Yarrow \\
    Fedora Core 2 &Tettnang \\
    Fedora Core 3 &Heidelberg \\
    Fedora Core 4 &Stentz \\
\end{tabular}

In the above example “{c|c}” in the curly bracket refers to the position of the text in the column. The below table summarises the positional argument together with the description.
| Position | Argument |
|---|---|
| c | Position text in the centre |
| l | Position text left-justified |
| r | Position text right-justified |
| p{width} | Align the text at the top of the cell |
| m{width} | Align the text in the middle of the cell |
| b{width} | Align the text at the bottom of the cell |
Both m{width} and b{width} requires the array package to be specified in the preamble.
Using the example above, let us breakdown the important points used and describe a few more options that you will see in this series
| Option | Description |
|---|---|
| & | Defines each cell, the ampersand is only used from the second column |
| \\ | This terminates the row and start a new row |
| | | Specifies the vertical line in the table (optional) |
| \hline | Specifies the horizontal line (optional) |
| *{num}{form} | This is handy when you have many columns and is an efficient way of limiting the repetition |
| || | Specifies the double vertical line |
Customizing a table
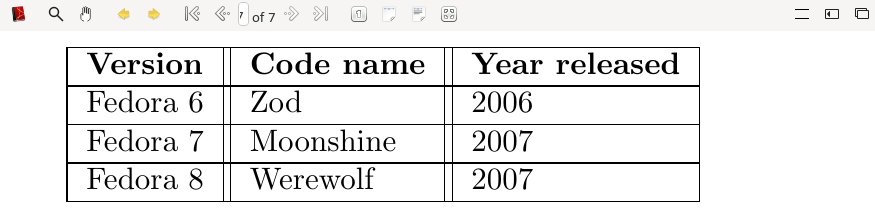
Now that some of the options available are known, let us create a table using the options described in the previous section.
\begin{tabular}{*{3}{|l|}}
\hline
	\textbf{Version} &\textbf{Code name} &\textbf{Year released} \\
\hline
	Fedora 6 &Zod &2006 \\ \hline
	Fedora 7 &Moonshine &2007 \\ \hline
	Fedora 8 &Werewolf &2007 \\
\hline
\end{tabular}
Managing long text
With LaTeX, if there are many texts in a column it will not be formatted well and does not look presentable.
The below example shows how long text is formatted, we will use “blindtext” in the preamble so that we can produce sample text.
\begin{tabular}{|l|l|}\hline
	Summary &Description \\ \hline
	Test &\blindtext \\
\end{tabular}

As you can see the text exceeds the page width; however, there are a couple of options to overcome this challenge.
- Specify the column width, for example, m{5cm}
- Utilise the tabularx environment, this requires tabularx package in the preamble.
Managing long text with column width
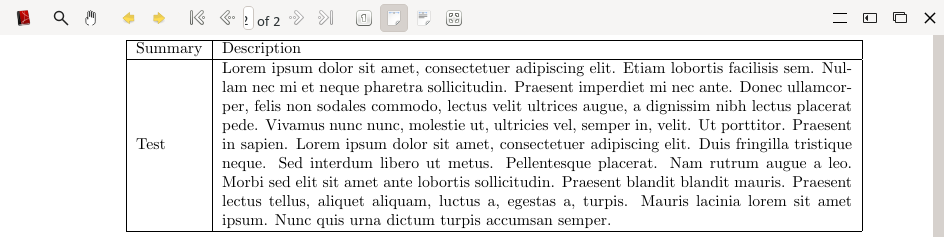
By specifying the column width the text will be wrapped into the width as shown in the example below.
\begin{tabular}{|l|m{14cm}|} \hline
	Summary &Description \\ \hline
	Test &\blindtext \\ \hline
\end{tabular}\vspace{3mm}
Managing long text with tabularx
Before we can leverage tabularx we need to add it in the preamble. Tabularx takes the following example
**\begin{tabularx}{width}{columns}**

\begin{tabularx}{\textwidth}{|l|X|} \hline
Summary & Tabularx Description\\ \hline
Text &\blindtext \\ \hline
\end{tabularx}
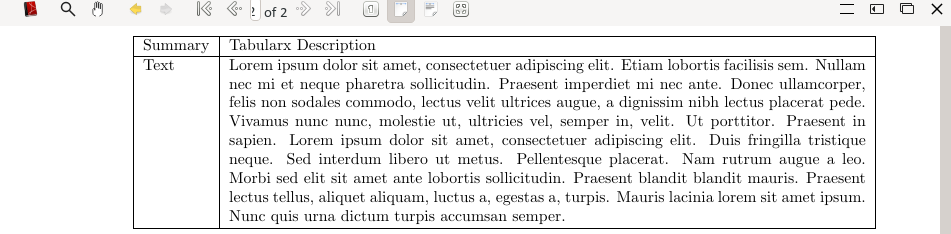
Notice that the column that we want the long text to be wrapped has a capital “X” specified.
Multi-row and multi-column
There are times when you will need to merge rows and/or column. This section describes how it is accomplished. To use multi-row and multi-column add multi-row to the preamble.
Multirow
Multirow takes the following argument \multirow{number_of_rows}{width}{text}, let us look at the below example.
\begin{tabular}{|l|l|}\hline
	Release &Codename \\ \hline
	Fedora Core 4 &Stentz \\ \hline
	\multirow{2}{*}{MultiRow} &Fedora 8 \\
	&Werewolf \\ \hline
\end{tabular}
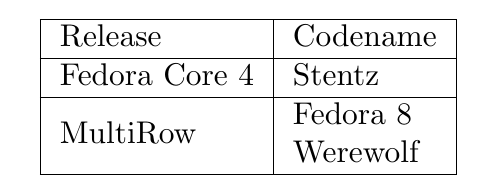
In the above example, two rows were specified, the ‘*’ tells LaTeX to automatically manage the size of the cell.
Multicolumn
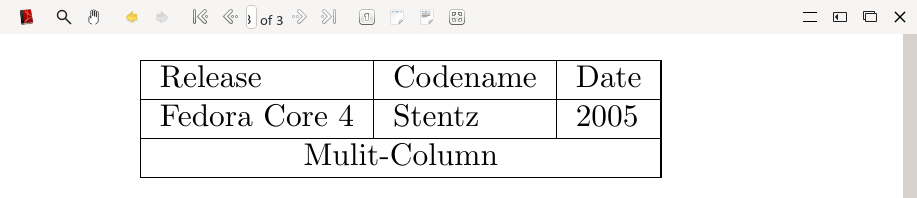
Multicolumn argument is \multicolumn{number_of_columns}{cell_position}{text}, below example demonstrates multicolumn.
\begin{tabular}{|l|l|l|}\hline
	Release &Codename &Date \\ \hline
	Fedora Core 4 &Stentz &2005 \\ \hline
	\multicolumn{3}{|c|}{Mulit-Column} \\ \hline
\end{tabular}
Working with colours
Colours can be assigned to the text, an individual cell or the entire row. Additionally, we can configure alternating colours for each row.
Before we can add colour to our tables we need to include \usepackage[table]{xcolor} into the preamble. We can also define colours using the following colour reference LaTeX Colour or by adding an exclamation after the colour prefixed by the shade from 0 to 100. For example, gray!30
\definecolor{darkblue}{rgb}{0.0, 0.0, 0.55}
\definecolor{darkgray}{rgb}{0.66, 0.66, 0.66}
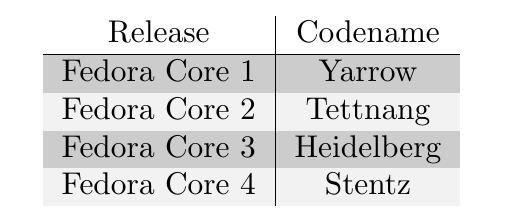
Below example demonstrate this a table with alternate colours, \rowcolors take the following options \rowcolors{row_start_colour}{even_row_colour}{odd_row_colour}.
\rowcolors{2}{darkgray}{gray!20}
\begin{tabular}{c|c}
	Release &Codename \\ \hline
	Fedora  Core 1 &Yarrow \\
	Fedora Core 2 &Tettnang \\
	Fedora Core 3 &Heidelberg \\
	Fedora Core 4 &Stentz \\
\end{tabular}
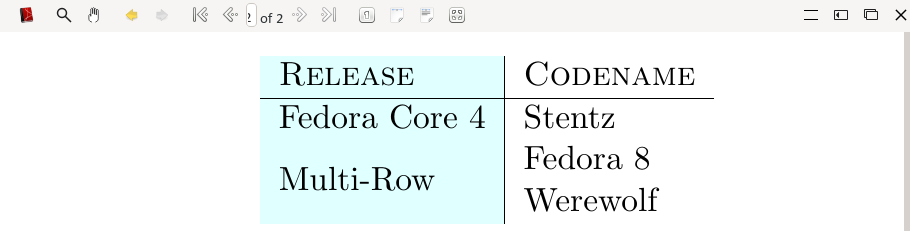
In addition to the above example, \rowcolor can be used to specify the colour of each row, this method works best when there are multi-rows. The following examples show the impact of using the \rowcolours with multi-row and how to work around it.
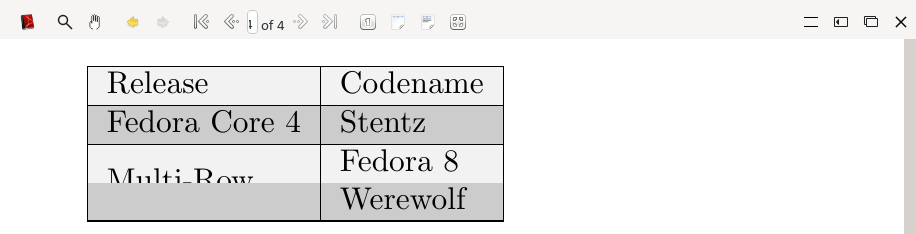
As you can see the multi-row is visible in the first row, to fix this we have to do the following.
\begin{tabular}{|l|l|}\hline
	\rowcolor{darkblue}\textsc{\color{white}Release}  &\textsc{\color{white}Codename} \\ \hline
	\rowcolor{gray!10}Fedora Core 4 &Stentz \\ \hline
	\rowcolor{gray!40}&Fedora 8 \\
	\rowcolor{gray!40}\multirow{-2}{*}{Multi-Row} &Werewolf \\ \hline
\end{tabular}
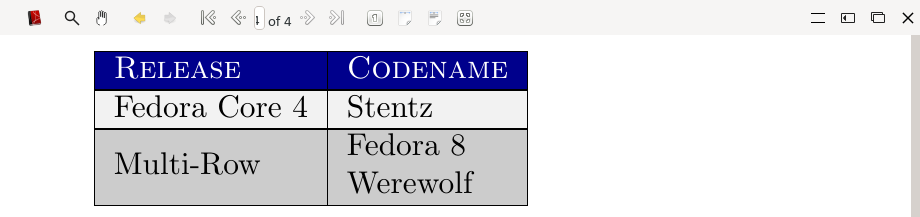
Let us discuss the changes that were implemented to resolve the multi-row with the alternate colour issue.
- The first row started above the multi-row
- The number of rows was changed from 2 to -2, which means to read from the line above
- \rowcolor was specified for each row, more importantly, the multi-rows must have the same colour so that you can have the desired results.
One last note on colour, to change the colour of a column you need to create a new column type and define the colour. The example below illustrates how to define the new column colour.
\newcolumntype{g}{>{\columncolor{darkblue}}l}
Let’s break it down:
- \newcolumntype{g}: defines the letter g as the new column
- {>{\columncolor{darkblue}}l}: here we select our desired colour, and l tells the column to be left-justified, this can be subsitued with c or r
\begin{tabular}{g|l}
	\textsc{Release}  &\textsc{Codename} \\ \hline
	Fedora Core 4 &Stentz \\
	&Fedora 8 \\
	\multirow{-2}{*}{Multi-Row} &Werewolf \\
\end{tabular}\
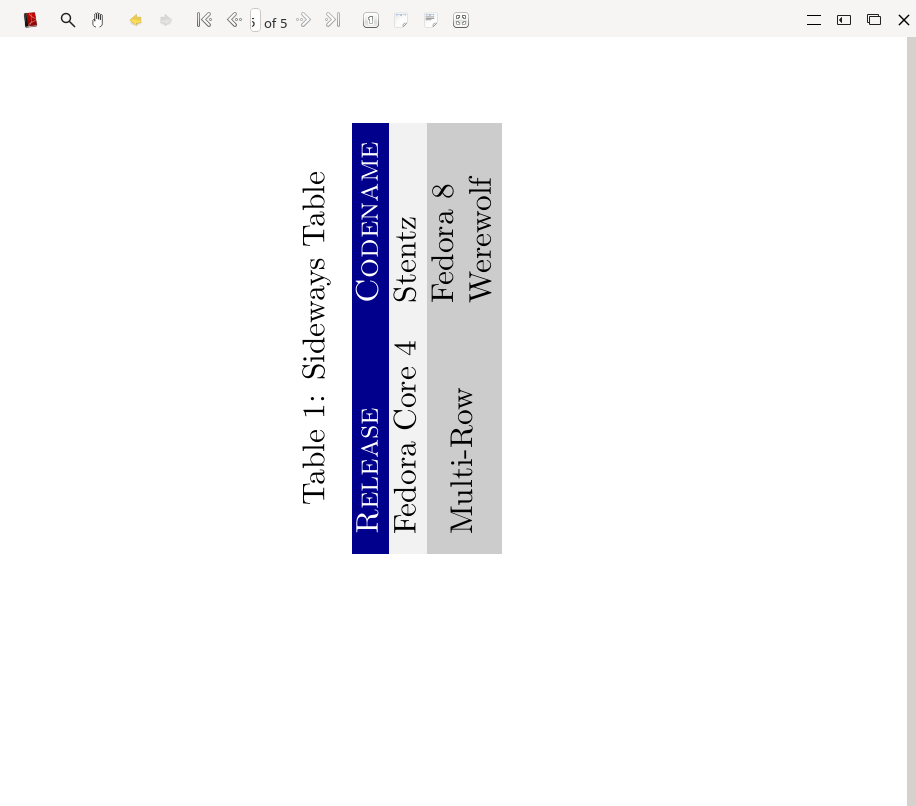
Landscape table
There may be times when your table has many columns and will not fit elegantly in portrait. With the rotating package in preamble you will be able to create a sideways table. The below example demonstrates this.
For the landscape table, we will use the sidewaystable environment and add the tabular environment within it, we also specified additional options.
- \centering to position the table in the centre of the page
- \caption{} to give our table a name
- \label{} this enables us to reference the table in our document
\begin{sidewaystable}
\centering
\caption{Sideways Table}
\label{sidetable}
\begin{tabular}{ll}
	\rowcolor{darkblue}\textsc{\color{white}Release}  &\textsc{\color{white}Codename} \\
	\rowcolor{gray!10}Fedora Core 4 &Stentz \\
	\rowcolor{gray!40} &Fedora 8 \\
	\rowcolor{gray!40}\multirow{-2}{*}{Multi-Row} &Werewolf \\
\end{tabular}\vspace{3mm}
\end{sidewaystable}
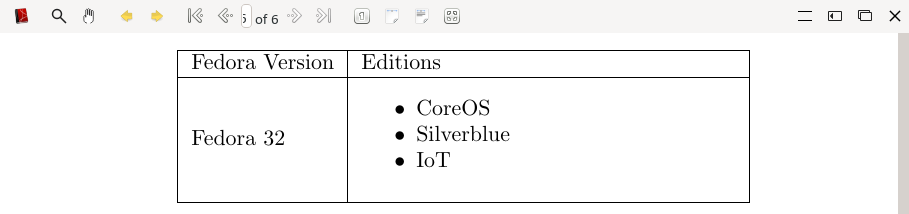
Lists in tables
To include a list into a table you can use tabularx and include the list in the column where the X is specified. Another option will be to use tabular but you must specify the column width.
List in tabularx
\begin{tabularx}{\textwidth}{|l|X|} \hline
	Fedora Version &Editions \\ \hline
	Fedora 32 &\begin{itemize}[noitemsep]
		\item CoreOS
		\item Silverblue
		\item IoT
	\end{itemize} \\ \hline
\end{tabularx}\vspace{3mm}

List in tabular
\begin{tabular}{|l|m{6cm}|}\hline
		Fedora Version &Editions \\ \hline
	Fedora 32 &\begin{itemize}[noitemsep]
		\item CoreOS
		\item Silverblue
		\item IoT
	\end{itemize} \\ \hline
\end{tabular}
Conclusion
LaTeX offers many ways to customise your table with tabular and tabularx, you can also add both tabular and tabularx within the table environment (\begin\table) to add the table name and to position the table.
The packages used in this series are:
\usepackage{fullpage}
\usepackage{blindtext}  % add demo text
\usepackage{array} % used for column positions
\usepackage{tabularx} % adds tabularx which is used for text wrapping
\usepackage{multirow} % multi-row and multi-colour support
\usepackage[table]{xcolor} % add colour to the columns
\usepackage{rotating} % for landscape/sideways tables
Additional Reading
This was an intermediate lesson on tables. For more advanced information about tables and LaTex in general, you can go to the LaTeX Wiki.

bgd
In addition to the rotating package, the package pdflscape will allow one to create a table (or other text) that is rotated, which in addition will be oriented correctly when viewed online by using \begin{landscape} and \end{landscape}.
Earl Ramirez
Thanks, bgd
nated
The part about resizing tables was really helpful. I’ve struggled with that in the past.
rthrt
nice
please write some about lilipond
Earl Ramirez
Are you referring to the LiliPond for music?
Göran Uddeborg
Thanks! I’ve used LaTeX for many years (if somewhat sporadically) but there is always something more to learn. You taught me some new nice things.
A little mistake to correct: in the list of “options”, to be used in tables in the beginning you say that a single backslash starts a new line. That should be a double backslash, I believe.
Earl Ramirez
Glad that it was helpful for you, good catch, yes, it’s a double backslash that starts a new row. Must have missed the escape character.
Thanks.
Kenedy
You’re right, is a double backslash.
ydor9e
Talking about tables, an interesting subject is how to brake a table when it does not fit in a single page. I always struggle to do that.
Earl Ramirez
The longtable package (https://www.ctan.org/pkg/longtable) will resolve this for you, here is an example that you can use.
\documentclass[a4paper,11pt]{article}
\usepackage{blindtext}
\usepackage{longtable}
\usepackage{array}
\usepackage{multirow}
\usepackage{fullpage}
%opening
\title{}
\author{}
\begin{document}
\maketitle
\section{Long Table}
\begin{longtable}{|l|p{14cm}|}
\caption{Multi-page Table} \
\hline
\multicolumn{2}{|c|}{Begin Table} \
\hline
Name &Description \
\endfirsthead % Specify the header, this will be shown on each page
\multicolumn{2}{|c|}{Table Continues} \\ \hline
{\bfseries Name} &{\bfseries Description} \\
\endhead % Tells ``Table Continues'' to show above the header
\hline
\endfoot
\hline
\multicolumn{2}{|c|}{End of Table} \\
\hline
\endlastfoot %
Text1 &\blindtext \\
Text2 &\blindtext \\
Text3 &\blindtext\\
Text4 &\blindtext \\
Text5 &\blindtext \\
Text6 &\blindtext \\
Text7 &\blindtext \\
Text8 &\blindtext \\
Text9 &\blindtext \\
Text10 &\blindtext \\
\end{longtable}
\end{document}
galeon
Please consider writting part 3 about for loop’s (ex forloop package) which can be used to automatic genereation of tables. I use them once to insert many (more than 20) similar figures.
Earl Ramirez
I will try and squeeze it in to one of the future articles, thanks.