How to Install Lighttpd with PHP-FPM and MariaDB on CentOS 8
This tutorial exists for these OS versions
On this page
Lighttpd is an open source web server that focused on simplicity and high performance. it's a light web server with small and low memory consumption, but stil remaining standard-compliance, secure, and flexibility. The Lighttpd web sevrer is a part of the LLMP Stack, which stand for Linux, Lighttpd, MySQL/MariaDB, and PHP/PHP-FPM.
In this tutorial, we will show you how to install and configure the LLMP Stack on the CentOS 8 Server. We will install the Lighttpd web server with the MariaDB database server, and the PHP-FPM on the latest version of CentOS 8 server.
Prerequisites
- CentOS 8 server
- Root privileges
- Understanding basic CentOS Server
What will we do?
- Install Lighttpd Web Server
- Install MariaDB Database Server
- Install PHP-FPM
- Setup Lighttpd and PHP-FPM
- Testing
Step 1 - Install Lighttpd Web Server
First, we will add the EPEL repository and install the Lighttpd webserver to our CentOS 8 system. By default, the Lighttpd is available on the EPEL (Extract Packages for Enterprise Linux) repository.
Add the EPEL repository to the CentOS 8 system using the DNF command below.
sudo dnf install epel-release
After that, check all available repositories using the following command.
dnf repolist
Now make sure that you get the EPEL repository on the result.

Next, install Lighttpd packages using the command below.
sudo dnf install lighttpd -y
Once all installation is completed, start the Lighttpd service and add it to the system boot.
systemctl start lighttpd
systemctl enable lighttpd
Now check the Lighttpd service status using the following command.
systemctl status lighttpd
Below is the result you will get.

As a result, the Lighttpd service is up and running on the CentOS 8 system.
Next, add the HTTP service to the firewalld rule list using the 'firewall-cmd' command below.
firewall-cmd --add-service=http --permanent
firewall-cmd --reload
Now open your web browser and type the server IP address on the address bar.
As a result, you will get the default 'index.html' of the Lighttpd web server.

Step 2 - Install MariaDB Database Server
In this step, we will install the MariaDB database server and set up the default root password for the MariaDB server.
To install the MariaDB database server, run the dnf command below.
sudo dnf install mariadb-server -y
Once all installation is finished, start the MariaDB service and add it to the system boot.
systemctl start mariadb
systemctl enable mariadb
Now check the MariaDB service using the command below.
systemctl status mariadb
Below is the result you will get.

As a result, the MariaDB service is up and running on the CentOS 8 system.
Next, run the 'mysql_secure_installation' command below to set up the default root password.
mysql_secure_installation
Now type the new password for your MariaDB server and type 'Y' for all configurations.
Enter current password for root (enter for none):
OK, successfully used password, moving on...

Set a root password? [Y/n] Y
Remove anonymous users? [Y/n] Y
Disallow root login remotely? [Y/n] Y
Remove test database and access to it? [Y/n] Y
Reload privilege tables now? [Y/n] Y
And the MariaDB root password has been configured.
Next, log in to the MySQL shell using the default root user and your password.
mysql -u root -p
Once you've logged in, check all available users on the MariaDB server using the following queries.
select User,Host from mysql.user;
And you will get all default users for MySQL server. Now type 'exit' to log out from the MySQL shell.
As a result, the MariaDB database server's installation and configuration on the CentOS 8 system have been completed.
Step 3 - Install and Configure PHP-FPM
For this step, we will install and configure the PHP-FPM for Lighttpd web server.
Install PHP and PHP-FPM packages using the dnf command below.
sudo dnf install php php-fpm lighttpd-fastcgi php-mysqlnd php-pdo php-gd php-mbstring
Once all installation is completed, edit the configiuration '/etc/php-fpm.d/www.conf' using vim editor.
vim /etc/php-fpm.d/www.conf
Change the default 'user' and 'group' to Lighttpd as below.
user = lighttpd
group = lighttpd
Change the default PHP-FPM listen using the local IP address with port '9000'.
listen = 127.0.0.1:9000
Save and close.
Next, edit the PHP configuration '/etc/php.ini' using vim editor.
vim /etc/php.ini
Uncomment the following line to get support with the PHP-CGI for the Lighttpd web server.
cgi.fix_pathinfo=1
Save and close.
Next, start the PHP-FPM service and add it to the system boot.
systemctl start php-fpm
systemctl enable php-fpm

The PHP-FPM service is up and running, check using the following command.
ss -plnt
systemctl status php-fpm
Below is the result you will get.

As a result, the PHP-FPM is up and running on the CentOS 8 server with the local IP address and port '9000'.
Step 4 - Setup Lighttpd and PHP-FPM
In this step, we will configure the Lighttpd to make it work with our PHP-FPM installation.
By default, the Lighttpd can be used to serve PHP web application using two ways:
- Serve through PHP-FPM Service
- Serve through self-spawning PHP-CI
To do that, we need to enable the FastCGI module on the Lighttpd web server and add our configuration to the FastCGI module configuration file.
- Enable FastCGI Module
Before going any further, go to the '/etc/lighttpd/' directory and edit the configuration 'modules.conf' using vim editor.
cd /etc/lighttpd/
vim modules.conf
Uncomment the 'FastCGI' module as below.
##
## FastCGI (mod_fastcgi)
##
include "conf.d/fastcgi.conf"
Save and close.
Next, we must add our PHP configuration to the 'conf.d/fastcgi.conf' configuration file.
Inside the '/etc/lighttpd' directory, edit the FastCGI configuration 'conf.d/fastcgi.conf' using vim editor.
vim conf.d/fastcgi.conf
- Using with PHP-FPM Service
If you want to use the PHP-FPM service, which is already running on the local IP address with TCP port '9000', paste the following configuration.
fastcgi.server += ( ".php" =>
        ((
                "host" => "127.0.0.1",
                "port" => "9000",
                "broken-scriptfilename" => "enable"
        ))
)
Save and close.
- Using Self Spawning PHP Service
Next, if you want to use the self spawning PHP-CGI for Lighttpd, paste the following configuration into it.
fastcgi.server = ( ".php" =>
        ((
                "bin-path" => "/usr/bin/php-cgi",
                "socket" => "/var/run/lighttpd/php.socket",
                "max-procs" => 4,
                "bin-environment" => (
                "PHP_FCGI_CHILDREN" => "",
                "PHP_FCGI_MAX_REQUESTS" => "500"
                    ),
                "broken-scriptfilename" => "enable"
        ))
)
Save and close.
Next, create a new directory '/var/run/lighttpd' and change the ownership of that directory to the 'lighttpd' user.
mkdir -p /var/run/lighttpd
sudo chown -R lighttpd:lighttpd /var/run/lighttpd
Now restart the Lighttpd service to apply the new configuration.
systemctl restart lighttpd
Ensure there is no error, and as a result, the configuration of Lighttpd with PHP-FPM Service or using spawning PHP-CGI has been completed successfully.

Step 5 - Testing
To test our LLMP installation, we will create a new phpinfo file on the default Lighttpd Document Root directory.
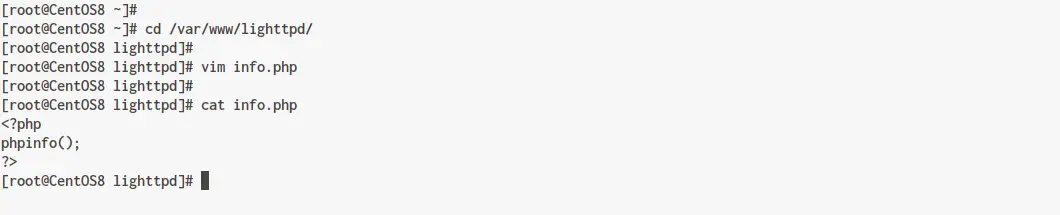
Go to the '/var/www/lighttpd' directory and create a new php file 'info.php' using vim editor.
cd /var/www/lighttpd/
vim info.php
Paste the following script into it.
<?php
phpinfo();
?>
Save and close.
Next, open your web browser and type the server IP address following by the 'info.php' file as below.
Now you will get the result as below.

As can be seen, the PHP-FPM is working with the Lighttpd web server.
As a result, the installation of LLMP Stack (Linux, Lighttpd, MariaDB, and PHP-FPM) on the CentOS 8 Server has been completed successfully.
Step 6 - Additional: Checking PHP and Lighttpd Services
If you're running the Lighttpd with slef-spawned PHP service using the ocnfiguration below.

You can check the PHP service using the command below.
ss -pl | grep php
systemctl status php-fpm
Below is the result you will get.

As can be seen, the self-spawned PHP process is running under 4 socket file. Even the PHP-FPM service is down, the Lighttpd is still working for processing PHP applications.

