How to Install Diaspora Decentralized Social Media on Debian 10
On this page
- Step 1 - Install Packages Dependencies
- Step 2 - Create New PostgreSQL User for Diaspora
- Step 3 - Create a New User
- Step 4 - Install RVM and Ruby
- Step 5 - Download and Configure Diaspora
- Step 6 - Setup Diaspora as a Service
- Step 7 - Generate SSL Letsencrypt
- Step 8 - Create New User and Download Diaspora
- Step 9 - Testing
Diaspora is an open-source, privacy-aware, and distributed social network. It consists of a group of independently deployed and owned nodes which interoperate to create the network. Diaspora is a social network that focused on three philosophy, decentralization, freedom, and privacy.
In this tutorial, we will show you how to install Diaspora distributed social network on the Debian Buster 10. We will install Diaspora with the Nginx web server and the PostgreSQL database server. On top of it, we will secure the Diaspora installation using SSL Letsencrypt.
Prerequisites
- Debian Buster 10
- Min 2 GB of RAM
- Root privileges
What will we do?
- Install Packages Dependencies
- Create New PostgreSQL User for Diaspora
- Create New User
- Install Ruby with RVM (Ruby Version Manager)
- Install and Configure Diaspora Decentralized Social Network
- Setup Diaspora as a Systemd Service
- Setup Nginx as a Reverse Proxy for Diaspora
- Testing
Step 1 - Install Packages Dependencies
First, we will install some packages dependencies for our Diaspora installation, including the PostgreSQL, Redis, and Nginx web server.
Install packages dependencies using the apt command below.
sudo apt-get install build-essential cmake gnupg2 libssl-dev libcurl4-openssl-dev libxml2-dev libxslt-dev imagemagick ghostscript curl libmagickwand-dev git libpq-dev redis-server nodejs postgresql
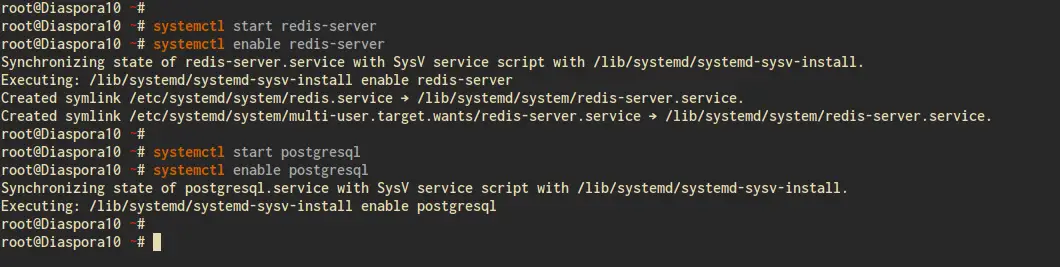
Once all installation is completed, start the PostgreSQL, Nginx, and Redis services, then add all of it to the system boot.
systemctl start redis-server
systemctl enable redis-server

systemctl start postgresql
systemctl enable postgresql
As a result, some packages dependencies for Diaspora installation has been installed to the Debian Buster 10.
Step 2 - Create New PostgreSQL User for Diaspora
In this step, we will change the password for default 'postgres' user and create a new PostgreSQL user for Diaspora.
Log in to the PostgreSQL shell using the 'psql' command below.
sudo -i -u postgres psql
Change the password for the default user 'postgres' using the following query.
\password postgres
Now type your new password and repeat, and the password for default user 'postgres' has been configured.
Next, create a new user 'diaspora' with the privilege 'CREATEDB' for creating a database using the PostgreSQL query below.
CREATE USER diaspora WITH CREATEDB PASSWORD 'yourpassword';
Type 'EXIT' to log out from the PostgreSQL shell.
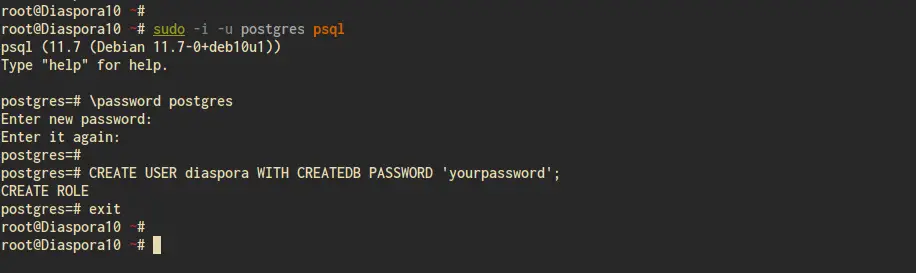
As a result, the new PostgreSQL user for Diaspora has been created.
Step 3 - Create a New User
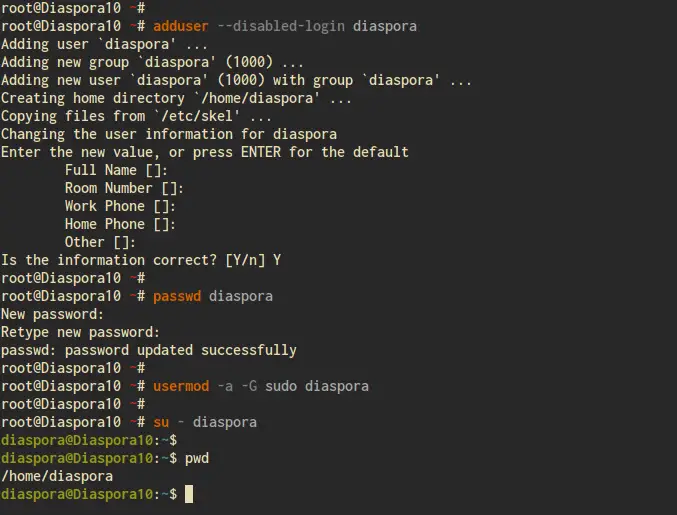
After creating the PostgreSQL database user, we will create a new system user named 'diaspora' and add it to the sudo group.
Create a new user named 'diaspora' and set up the password for it using the following command.
adduser --disabled-login Diaspora
passwd diaspora
Now add the 'diaspora' user to the 'sudo' group.
usermod -a -G sudo diaspora
As a result, the 'diaspora' user will be able to run the 'sudo' command to get the root privileges.
Step 4 - Install RVM and Ruby
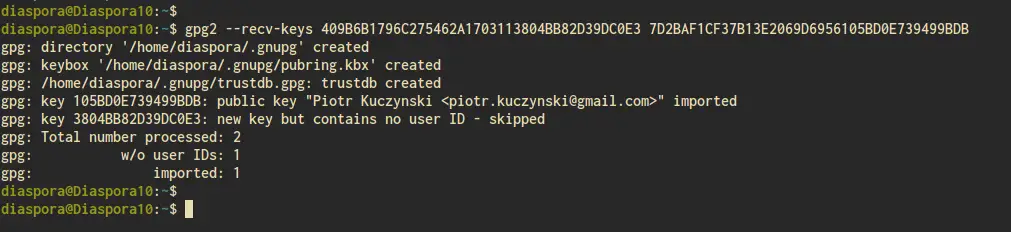
Before going any further, log in to the 'diaspora' user using the command below.
su - diaspora
Next, we will install RVM (Ruby Version Manager) and installing Ruby 2.6 for the user 'diaspora'.
Add the GPGP Key for RVM packages using the command below.
gpg2 --recv-keys 409B6B1796C275462A1703113804BB82D39DC0E3 7D2BAF1CF37B13E2069D6956105BD0E739499BDB
Now install the RVM (Ruby Version Manager) using the following command.
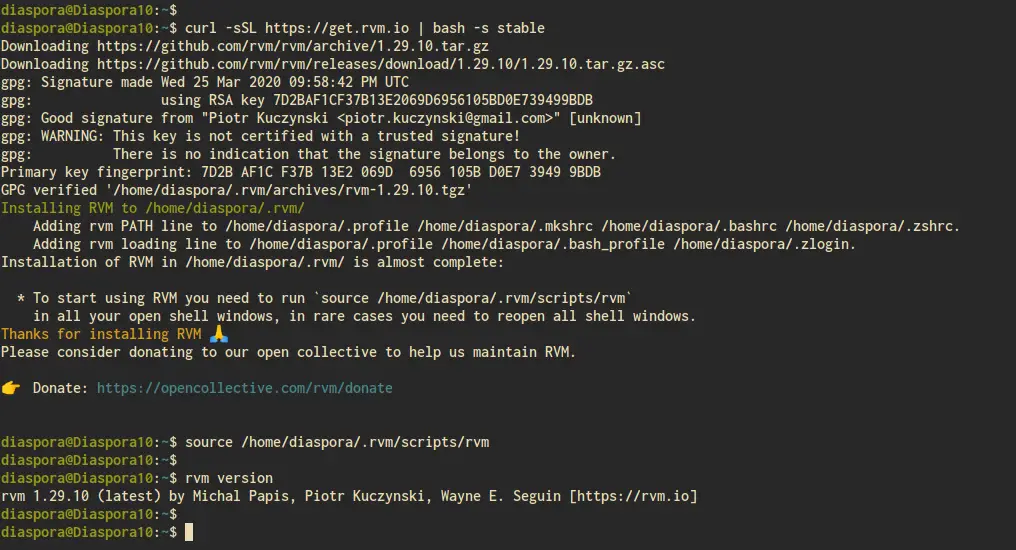
curl -sSL https://get.rvm.io | bash -s stable
Type your password for the 'diaspora' user and press Enter.
Once all installation is completed, load the rvm script to your server.
source /home/diaspora/.rvm/scripts/rvm
As a result, you're able to run the rvm command for installing Ruby.
Install Ruby 2.6 using the rvm command below.
rvm install 2.6
Once all installation is completed, check your ruby version.
ruby -v
Below is the result you will get.
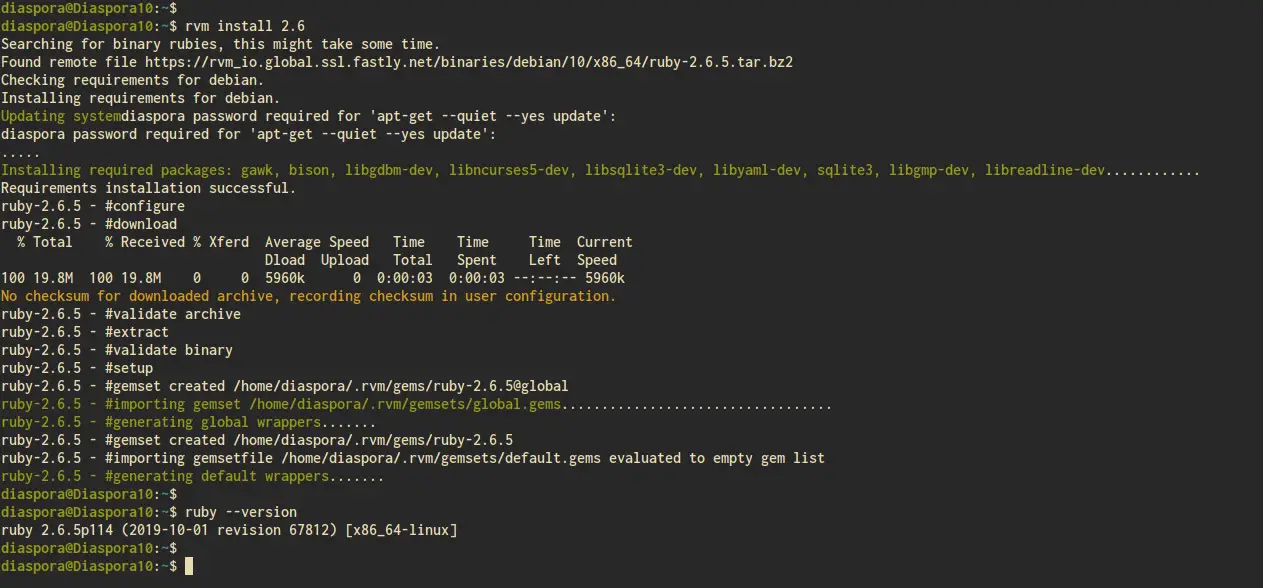
As a result, the RVM and Ruby installation under the 'diaspora' user has been completed.
Step 5 - Download and Configure Diaspora
Before going any further, make sure that you're logged in with the 'diaspora' user.
Download the Diaspora source code using the git command and go into it.
git clone -b master https://github.com/diaspora/diaspora.git
cd diaspora
Now copy the sample of database configuration 'database.yml' and the diaspora configuration 'diaspora.yml'.
cp config/database.yml.example config/database.yml
cp config/diaspora.yml.example config/diaspora.yml
Next, edit the database configuration 'database.yml' using vim editor.
vim config/database.yml
On the 'PostgreSQL' database section, change the detailed username and password with your data.
postgresql: &postgresql
  adapter: postgresql
  host: "localhost"
  port: 5432
  username: "diaspora"
  password: "yourpassword"
  encoding: unicode
Save and close.
Next, edit the diaspora configuration 'diaspora.yml'.
vim config/diaspora.yml
Change the configuration as below, and make sure the domain name with your own.
configuration: ## Section
...
  environment: ## Section
...
    url: "https://pod.hakase-labs.to/"
    certificate_authorities: '/etc/ssl/certs/ca-certificates.crt'
    require_ssl: true
...
  server: ## Section
    rails_environment: 'production'
...
Save and close.
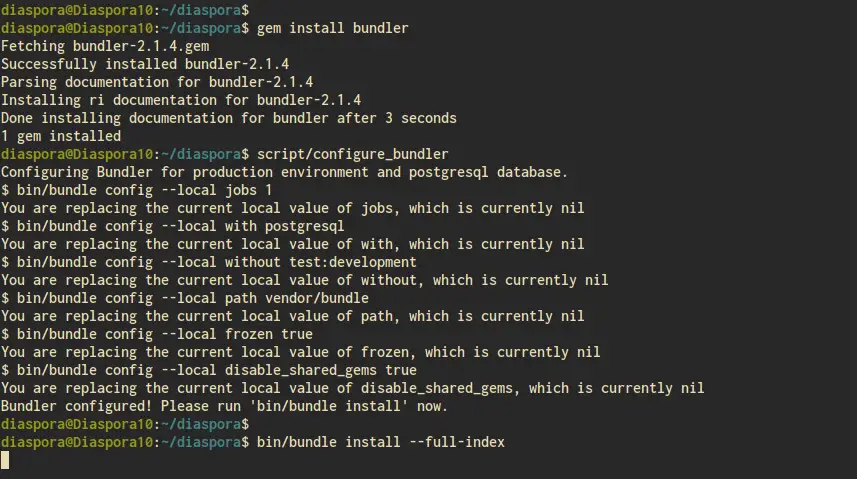
Next, install gem and ruby libraries needed for Diaspora using the following commands.
gem install bundler
script/configure_bundler
bin/bundle install --full-index
After that, run the database migration for Diaspora.
RAILS_ENV=production bundle exec rake db:create db:migrate
Once all is completed, compile all rails asset pipeline using the following command.
RAILS_ENV=production bin/rake assets:precompile
And the installation of Diaspora has been completed.
Step 6 - Setup Diaspora as a Service
After installing the Diaspora, we will configure the Diaspora as a systemd service.
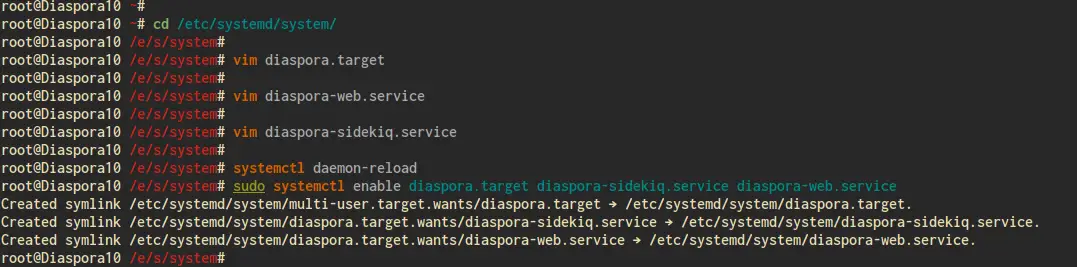
Now go to the '/etc/systemd/system' directory and create a new grouping units service file 'diaspora.target' using vim editor.
cd /etc/systemd/system/
vim diaspora.target
Paste the following configuration into it.
[Unit]
Description=Diaspora social network
Wants=postgresql.service
Wants=redis-server.service
After=redis-server.service
After=postgresql.service

[Install]
WantedBy=multi-user.target
Save and close.
Next, create a new service file for the Diaspora named 'diaspora-web.service' using vim editor.
vim diaspora-web.service
Paste the following configuration into it.
[Unit]
Description=Diaspora social network (unicorn)
PartOf=diaspora.target
StopWhenUnneeded=true

[Service]
User=diaspora
Environment=RAILS_ENV=production
WorkingDirectory=/home/diaspora/diaspora
ExecStart=/bin/bash -lc "bin/bundle exec unicorn -c config/unicorn.rb -E production"
Restart=always

[Install]
WantedBy=diaspora.target
Save and close.
Next, create a new service file 'diaspora-sidekiq.service' for the monitoring service using the vim command below.
vim diaspora-sidekiq.service
Paste the following configuration.
[Unit]
Description=Diaspora social network (sidekiq)
PartOf=diaspora.target
StopWhenUnneeded=true

[Service]
User=diaspora
Environment=RAILS_ENV=production
WorkingDirectory=/home/diaspora/diaspora
ExecStart=/bin/bash -lc "bin/bundle exec sidekiq"
Restart=always

[Install]
WantedBy=diaspora.target
Save and close.
Now reload the systemd manager and add all diaspora services to the system boot.
sudo systemctl daemon-reload
sudo systemctl enable diaspora.target diaspora-sidekiq.service diaspora-web.service
Then start the Diaspora service using the command below.
systemctl start diaspora.target
The 'diaspora.target' will automatically start other services the 'diaspora-web.service' and 'diaspora-sidekiq.service'.
Check diaspora services using the following command.
systemctl status diaspora-web
systemctl status diaspora-sidekiq
Below is the result you will get.
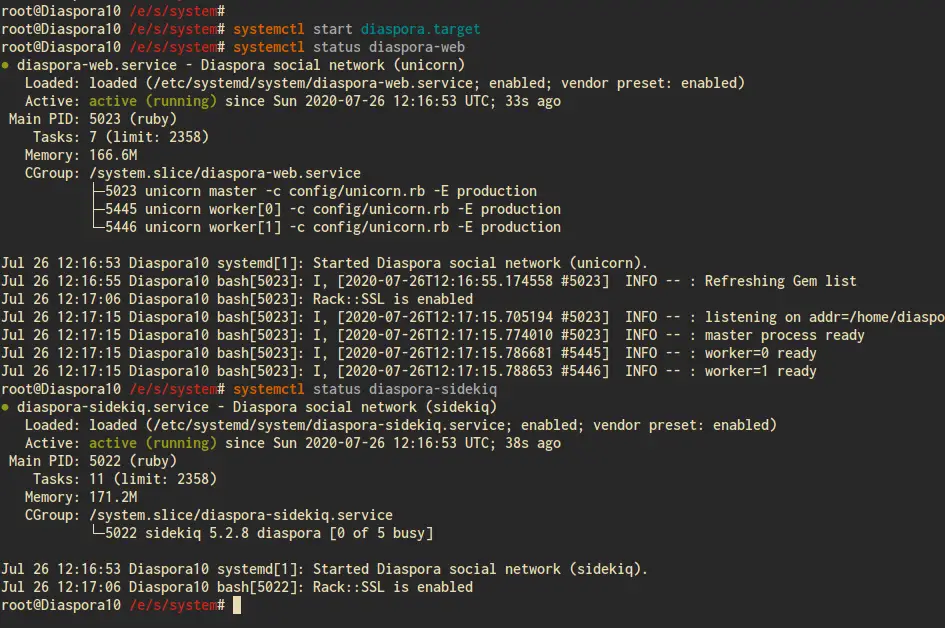
As a result, the Diaspora is now up and running as a systemd service. And finally, the configuration of the Diaspora has been completed.
Step 7 - Generate SSL Letsencrypt
For this tutorial, we will secure our Diaspora installation using SSL Letsencrypt. in this step, we will install the certbot tool and generate SSL Letsencrypt for our Diaspora domain installation.
Install Certbot using the apt command below.
sudo apt install certbot
Once all installation is completed, generate the SSL Letsencrypt for your Diaspora domain name using the certbot command below.
certbot certonly --rsa-key-size 2048 --standalone --agree-tos --no-eff-email --email [email protected] -d pod.hakase-labs.to
Now your certificate will be available at the '/etc/letsencrypt/live/yourdomain.com/' directory.
Step 8 - Create New User and Download Diaspora
In this step, we will install and configure the Nginx web server as a reverse proxy for Diaspora.
Install Nginx using the apt command below.
sudo apt install nginx
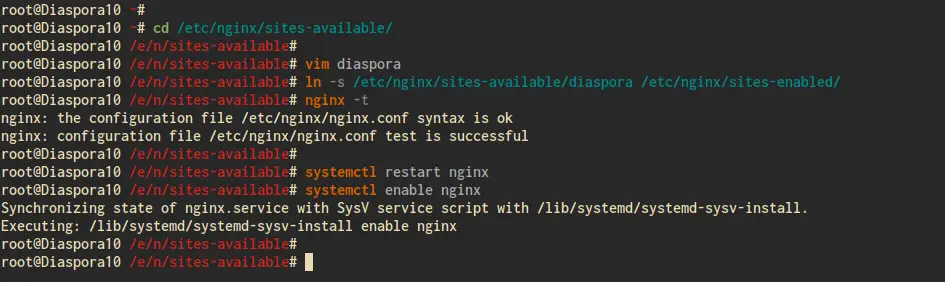
Once all installation is completed, go to the '/etc/nginx/sites-available' directory and create a new virtual host configuration 'diaspora' using vim editor.
cd /etc/nginx/sites-available/
vim diaspora
Change the domain name and path of SSL Letsencrypt with your own, then paste into it.
upstream diaspora_server {
 server unix:/home/diaspora/diaspora/tmp/diaspora.sock;
}

server {
  listen 80;
  listen [::]:80;
  server_name pod.hakase-labs.to;
  return 301 https://pod.hakase-labs.to$request_uri;

  access_log /dev/null;
  error_log /dev/null;
}

server {
  listen 443 ssl http2;
  listen [::]:443 ssl http2;
  server_name pod.hakase-labs.to;

  access_log /var/log/nginx/dspr-access.log;
  error_log /var/log/nginx/dspr-error.log;

  ssl_certificate /etc/letsencrypt/live/pod.hakase-labs.to/fullchain.pem;
  ssl_certificate_key /etc/letsencrypt/live/pod.hakase-labs.to/privkey.pem;

  ssl_protocols TLSv1.2;
  ssl_ciphers EECDH+CHACHA20:EECDH+AESGCM:EECDH+AES;
  ssl_ecdh_curve X25519:P-521:P-384:P-256;
  ssl_prefer_server_ciphers on;
  ssl_session_cache shared:SSL:10m;

  root /home/diaspora/diaspora/public;

  client_max_body_size 5M;
  client_body_buffer_size 256K;

  try_files $uri @diaspora;

  location /assets/ {
    expires max;
    add_header Cache-Control public;
  }

  location @diaspora {
    proxy_set_header X-Real-IP $remote_addr;
    proxy_set_header X-Forwarded-For $proxy_add_x_forwarded_for;
    proxy_set_header X-Forwarded-Proto https;
    proxy_set_header Host $http_host;
    proxy_redirect off;
    proxy_pass http://diaspora_server;
  }
}
Save and close.
Now activate the Diaspora configuration and test the Nginx configuration.
ln -s /etc/nginx/sites-available/diaspora /etc/nginx/sites-enabled/
nginx -t
Make sure there is no error, then restart the Nginx service and add it to the system boot.
systemctl restart nginx
systemctl enable nginx
As a result, the Nginx web server's configuration as a reverse proxy for Diaspora has been completed.
Step 9 - Testing
Open your web browser and type your Diaspora domain name on the address bar.
And you will get the default Diaspora home page as below.
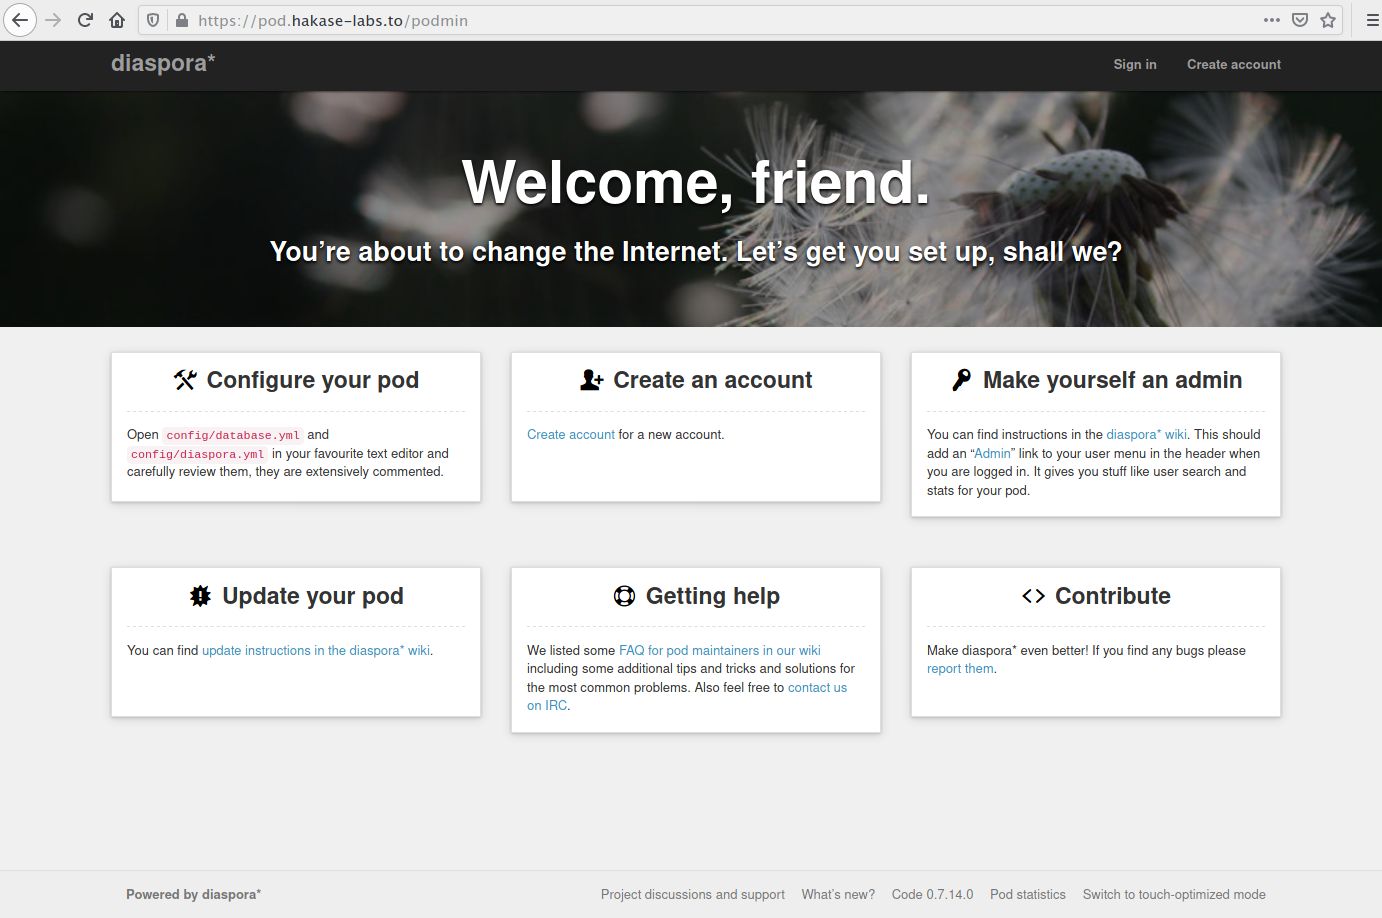
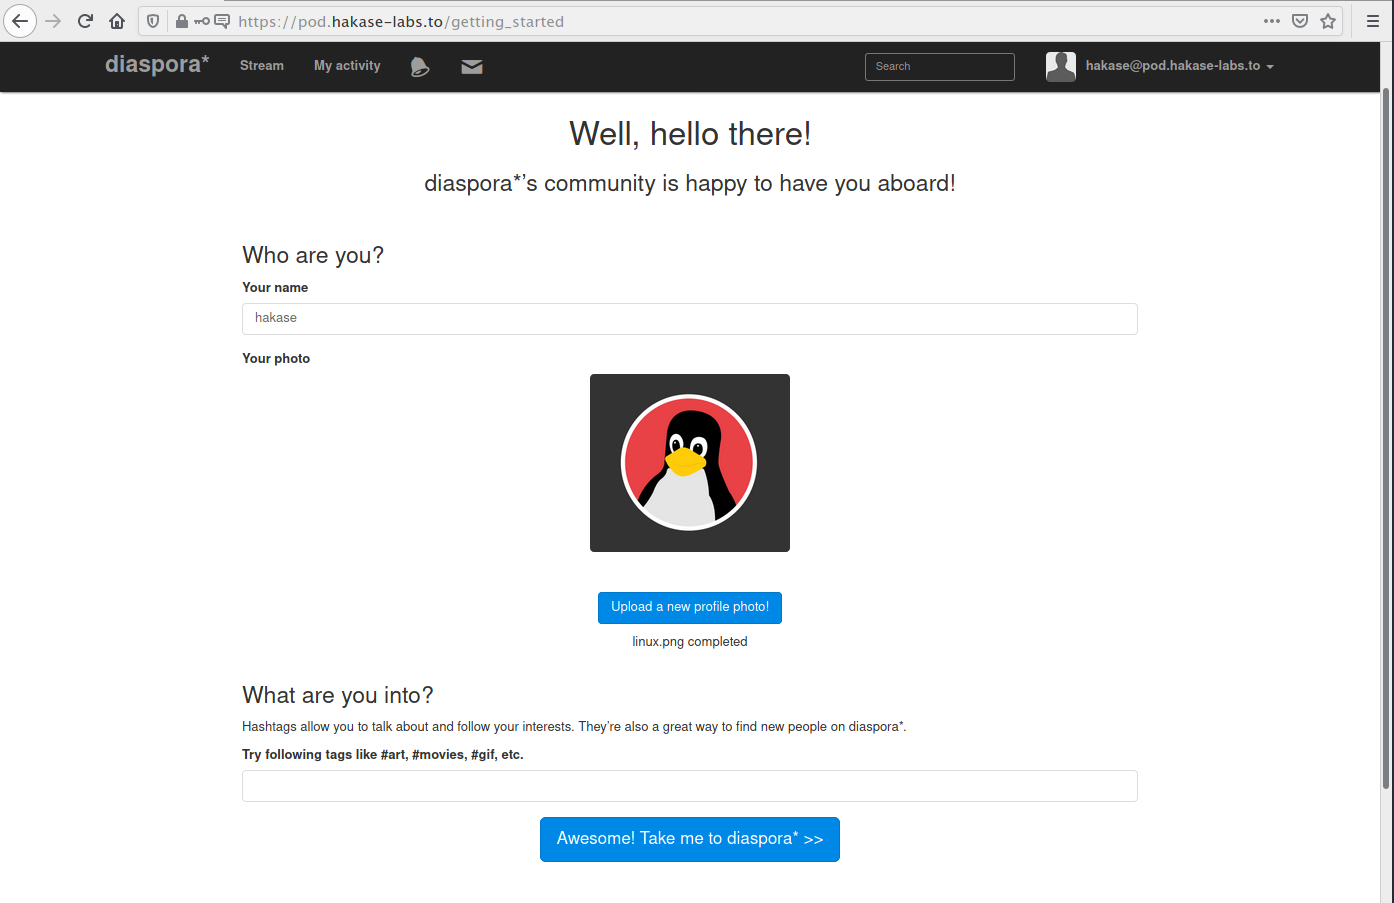
Click the link on the 'Create an account' section.
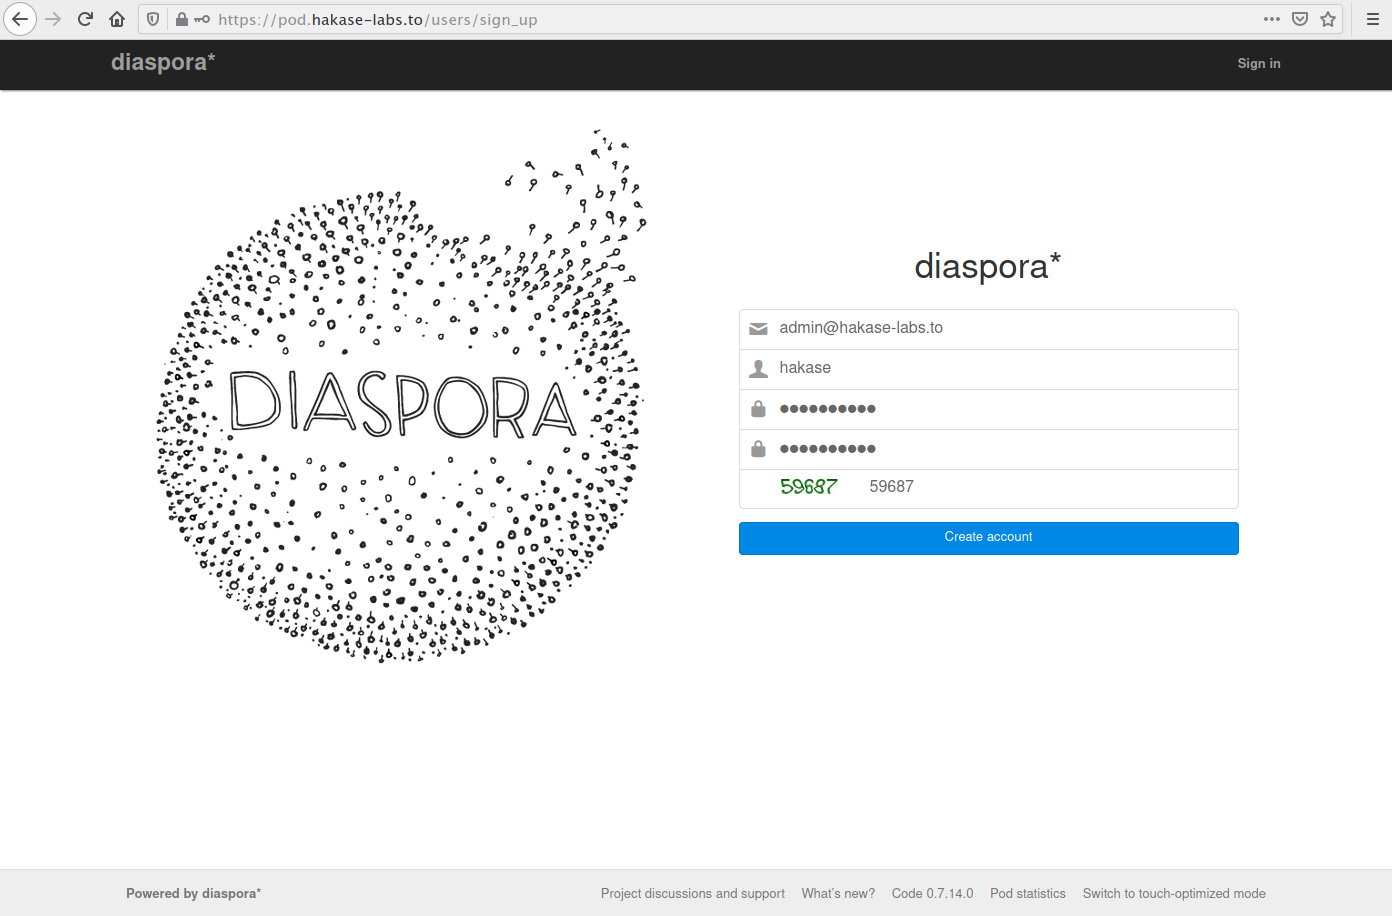
Now type your email address, username, and password for the first Diaspora account, then click 'Create acount'.
Upload your profile picture etc, then click 'Awesome! Take me to diaspora' button.
And you will get the Diaspora dashboard as below.
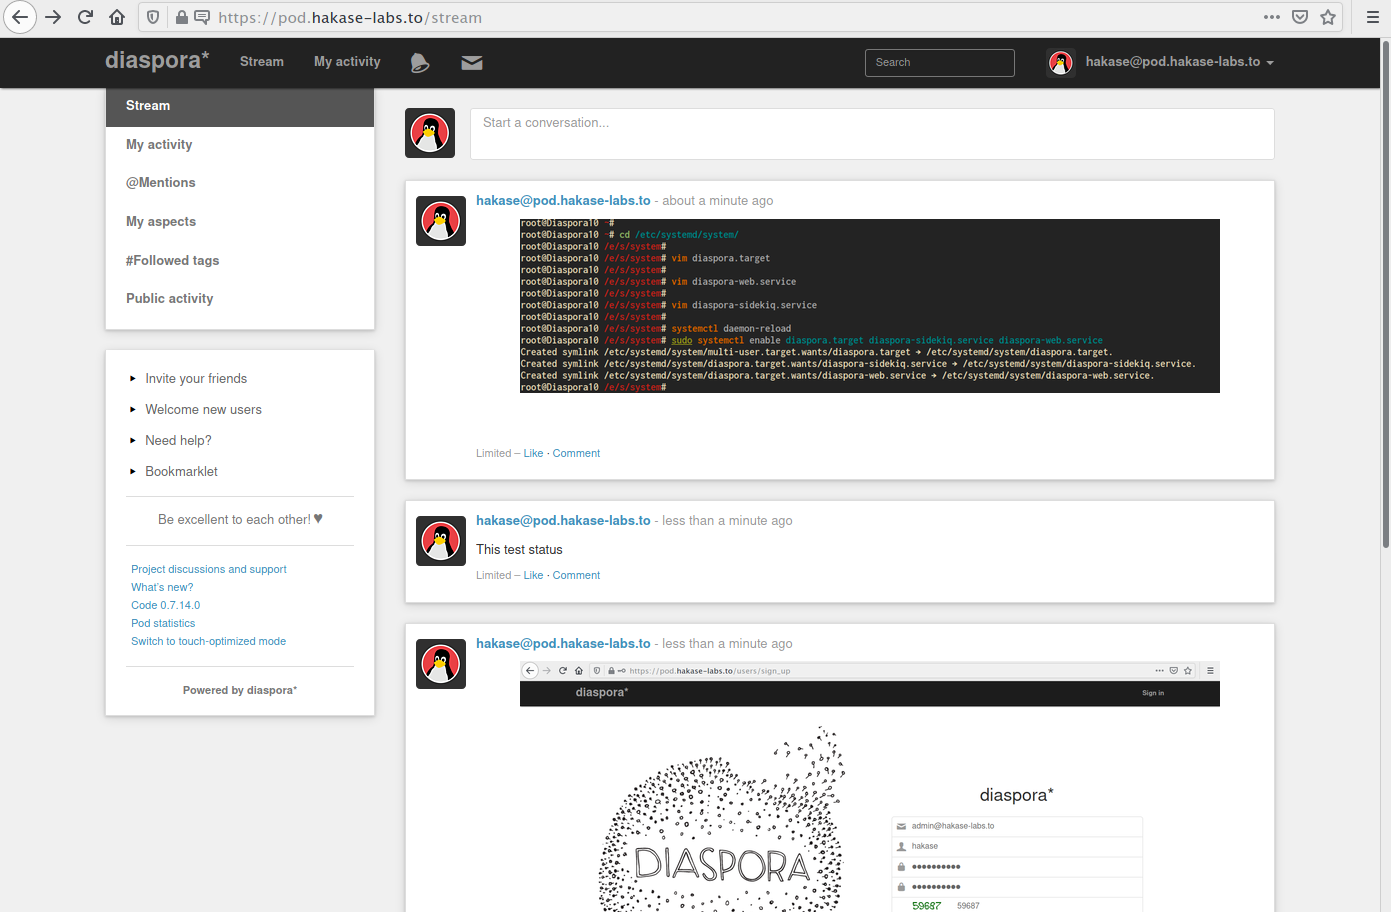
As can be seen, the installation of Diaspora with Nginx Reverse Proxy on Debian Buster 10 has been completed successfully.

