How to Install Sensu Monitoring on Ubuntu 20.04
This tutorial exists for these OS versions
- Ubuntu 22.04 (Jammy Jellyfish)
- Ubuntu 20.04 (Focal Fossa)
- Ubuntu 16.04 (Xenial Xerus)
On this page
Sensu is a free and open-source tool used for monitoring infrastructure and application health. It is written in Ruby, uses RabbitMQ to handle messages and Redis to store data. It can be install on most operating systems including, Ubuntu, Debian, RHEL, CentOS, IBM, AIX, FreeBSD, Mac OS, Solaris, Windows and many more. It is one of the most popular and next-generation platforms that replaces other monitoring systems like Zabbix, Icinga, and Nagios. Sensu uses a client-server model. You will only need to install a sensu client on each system that you want to monitor.
In this tutorial, we will show how to install Sensu monitoring server on Ubuntu 20.04 server.
Prerequisites
- A server running Ubuntu 20.04.
- A root password is configured the server.
Getting Started
First, you will need to update your system to the latest stable version. You can do this by updating all system packages using the following command:
apt-get update -y
Once your system is updated, install other dependencies using the following command:
apt-get install gnupg2 curl wget unzip -y
Once all the packages are installed, you can proceed to the next step.
Install Redis and RabbitMQ
Sensu uses RabbitMQ to handle messages and Redis to store data. So both packages must be installed in your system. By default, RabbitMQ is not available in the Ubuntu 20.04 default repository. So you will need to add the RabbitMQ repository in your system.
First, import the GPG key with the following command:
wget -O- https://packages.erlang-solutions.com/ubuntu/erlang_solutions.asc | apt-key add -
Next, add the repository by running the following command:
echo "deb http://binaries.erlang-solutions.com/debian $(lsb_release -cs) contrib" | tee /etc/apt/sources.list.d/erlang-solutions.list
Next, update the repository and install RabbitMQ package with the following command:
apt-get update -y
apt-get install rabbitmq-server -y
Once installed, you will need to create a RabbitMQ vhost for Sensu. You can create it with the following command:
rabbitmqctl add_vhost /sensu
You should see the following output:
Adding vhost "/sensu" ...
Next, create a user to manage the vhost with the following command:
rabbitmqctl add_user sensu password
You should see the following output:
Adding user "sensu" ...
Next, you will need to assign full permissions for the vhost /sensu.
rabbitmqctl set_permissions -p /sensu sensu ".*" ".*" ".*"
You should get the following output:
Setting permissions for user "sensu" in vhost "/sensu" ...
Next, install the Redis server with the following command:
apt-get install redis-server -y
Once the installation has been completed, start the Redis service and enable it to start at system reboot with the following command:
systemctl start redis-server
systemctl enable redis-server
Once you are finished, you can proceed to the next step.
Install Sensu Server
By default, Sensu is not available in the Ubuntu official repository. So you will need to add Sensu repository in your system.
First, import repository GPG key with the following command:
wget -O- https://sensu.global.ssl.fastly.net/apt/pubkey.gpg | apt-key add -
Next, add the repository with the following command:
echo "deb https://sensu.global.ssl.fastly.net/apt bionic main" | tee /etc/apt/sources.list.d/sensu.list
Once the repository is added, update the repository and install the Sensu with the following command:
apt-get update -y
apt-get install sensu -y
Once the Sensu is installed, you can proceed to the next step.
Configure Sensu
Next, you will need to create configuration files for RabbitMQ, Redis, and Api. First, create a api.json file with the following command:
nano /etc/sensu/conf.d/api.json
Add the following lines:
{
  "api": {
    "host": "localhost",
    "bind": "0.0.0.0",
    "port": 4567
  }
}
Save and close the file then create a redis.json file with the following command:
nano /etc/sensu/conf.d/redis.json
Add the following lines:
{
  "redis": {
    "host": "127.0.0.1",
    "port": 6379
  }
}
Save and close the file then create a RabbitMQ configuration file with the following command:
nano /etc/sensu/conf.d/rabbitmq.json
Add the following lines:
{
  "rabbitmq": {
    "host": "127.0.0.1",
    "port": 5672,
    "vhost": "/sensu",
    "user": "sensu",
    "password": "password"
  }
}
Save and close the file when you are finished.
Install and Configure Sensu Dashboard
Next, you will need to install the Uchiwa dashboard in your system. Uchiwa is an open-source dashboard to monitor Sensu through web interface.
You can install the Uchiwa with the following command:
apt-get install uchiwa -y
After installing Uchiwa, create a configuration file for Uchiwa with the following command:
nano /etc/sensu/uchiwa.json
Add the following lines:
{
  "sensu": [
    {
      "name": "Sensu",
      "host": "127.0.0.1",
      "port": 4567,
      "timeout": 10
    }
  ],
  "uchiwa": {
    "host": "0.0.0.0",
    "port": 3000,
    "refresh": 10
  }
}
Save and close the file when you are finished.
Next, you will need to create a client.json file to monitor the Sensu server itself. You can create it with the following command:
nano /etc/sensu/conf.d/client.json
Add the following lines:
{
  "client": {
    "name": "sensu-server",
    "address": "127.0.0.1",
    "environment": "management",
    "subscriptions": [
      "dev",
      "ubuntu"
   ],
    "socket": {
      "bind": "127.0.0.1",
      "port": 3030
    }
  }
}
Save and close the file when you are finished.
Next, start the Sensu server, Api, Uchiwa and Sensu client service with the following command:
systemctl start sensu-server
systemctl start sensu-api
systemctl start uchiwa
systemctl start sensu-client
Once all services are started, you can verify the status of the all service with the following command:
systemctl status sensu-server sensu-api sensu-client uchiwa
You should get the following output:
? sensu-server.service - sensu server
     Loaded: loaded (/lib/systemd/system/sensu-server.service; disabled; vendor preset: enabled)
     Active: active (running) since Sun 2020-08-23 09:04:43 UTC; 4min 18s ago
   Main PID: 10031 (sensu-server)
      Tasks: 24 (limit: 2353)
     Memory: 20.6M
     CGroup: /system.slice/sensu-server.service
             ??10031 /opt/sensu/embedded/bin/ruby /opt/sensu/bin/sensu-server -c /etc/sensu/config.json -d /etc/sensu/conf.d -e /etc/sensu/ext>

Aug 23 09:04:43 ubuntu2004 systemd[1]: Started sensu server.

? sensu-api.service - sensu api
     Loaded: loaded (/lib/systemd/system/sensu-api.service; enabled; vendor preset: enabled)
     Active: active (running) since Sun 2020-08-23 09:04:42 UTC; 4min 19s ago
   Main PID: 10023 (sensu-api)
      Tasks: 2 (limit: 2353)
     Memory: 18.9M
     CGroup: /system.slice/sensu-api.service
             ??10023 /opt/sensu/embedded/bin/ruby /opt/sensu/bin/sensu-api -c /etc/sensu/config.json -d /etc/sensu/conf.d -e /etc/sensu/extens>

Aug 23 09:04:42 ubuntu2004 systemd[1]: Started sensu api.

? sensu-client.service - sensu client
     Loaded: loaded (/lib/systemd/system/sensu-client.service; disabled; vendor preset: enabled)
     Active: active (running) since Sun 2020-08-23 09:04:42 UTC; 4min 18s ago
   Main PID: 10027 (sensu-client)
      Tasks: 2 (limit: 2353)
     Memory: 17.0M
     CGroup: /system.slice/sensu-client.service
             ??10027 /opt/sensu/embedded/bin/ruby /opt/sensu/bin/sensu-client -c /etc/sensu/config.json -d /etc/sensu/conf.d -e /etc/sensu/ext>

Aug 23 09:04:42 ubuntu2004 systemd[1]: sensu-client.service: Succeeded.
Aug 23 09:04:42 ubuntu2004 systemd[1]: Stopped sensu client.
Aug 23 09:04:42 ubuntu2004 systemd[1]: Started sensu client.

? uchiwa.service - LSB: Uchiwa, a Sensu dashboard.
     Loaded: loaded (/etc/init.d/uchiwa; generated)
     Active: active (exited) since Sun 2020-08-23 09:04:41 UTC; 4min 19s ago
Once you are finished, you can proceed to the next step.
Access Sensu Dashboard
Now, open your web browser and type the URL http://your-server-ip:3000. You should see the Sensu dashboard in the following screen:
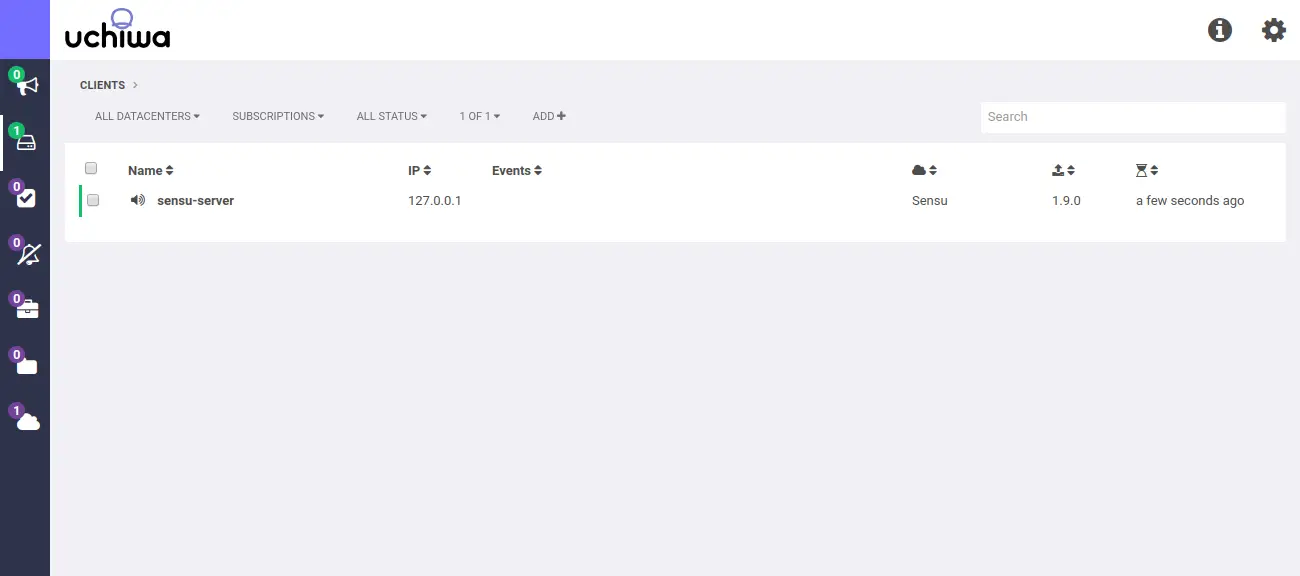
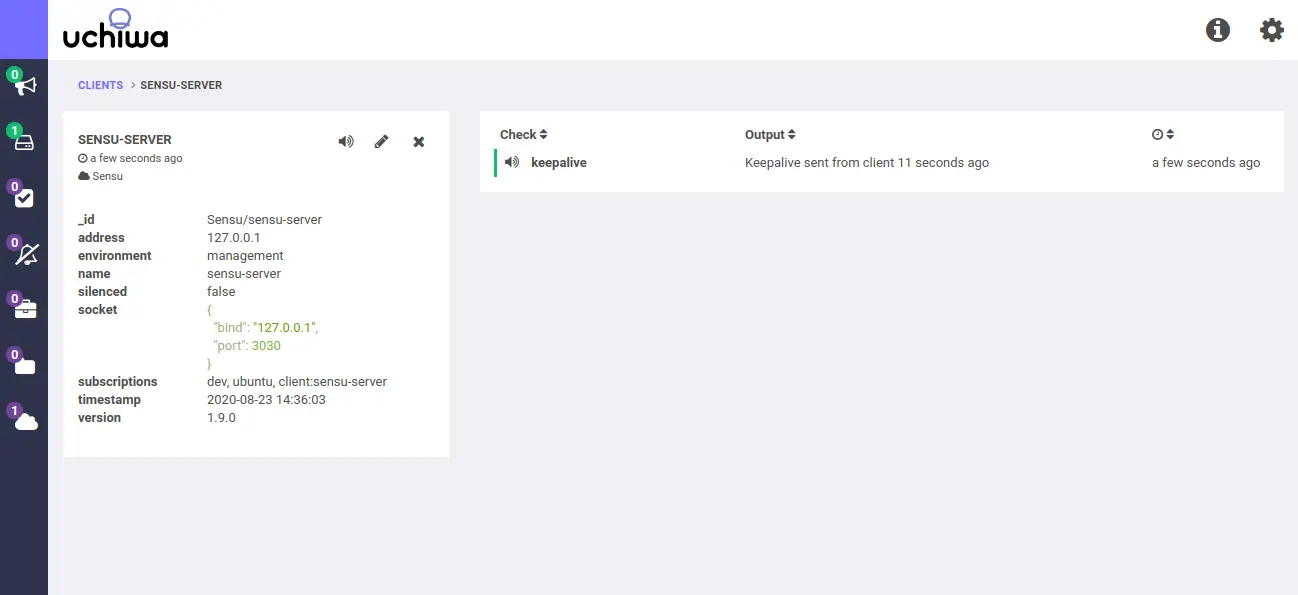
Now, click on the client icon in the left pane. You should see the status of the Sensu client in the following screen:
Conclusion
Congratulations! you have successfully installed and configured Sensu and Uchiwa on Ubuntu 20.04 server. You can now add more clients and start monitoring from the Uchiwa dashboard. Feel free to ask me if you have any questions.

