Install Apache Solr search platform on CentOS 8
Apache Solr is an open-source search platform written on Java. Apache Solr builds on Apache Lucene. Using Solr you can create custom search engines that index files, databases, and websites. Solr is highly reliable, scalable, and fault-tolerant that will provide many powerful features like distributed indexing, replication, load-balanced querying, automated failover and recovery, centralized configuration management, and many more enterprise features.
Solr handles many types of data types like JSON, XML, many office document types, CSV, and more.
In this tutorial, we will show you how to install Apache Solr 8.6.3 on CentOS 8.
Requirements
A server running CentOS 8.
A non-root user with sudo privilege set up on your server.
Step 1: Install Java
Before starting, let's update our system by running the following command.
sudo dnf update
For the latest Apache Solr we need to install Java 8 or greater version.
First, we check out if Java is already installed in our machine by issuing the following command:
which java
If Java is not installed, run the following command:
sudo dnf install java-11-openjdk
Once Java is installed, we can verify it by running the following command:
java -version
Output:-
openjdk version "11.0.8" 2020-07-14 LTS
OpenJDK Runtime Environment 18.9 (build 11.0.8+10-LTS)
OpenJDK 64-Bit Server VM 18.9 (build 11.0.8+10-LTS, mixed mode, sharing)
Step 2: Install Apache Solr on CentOS 8
First We will need to download the latest version of Apache Solr from the Apache official website, https://downloads.apache.org/lucene/solr/
We can easily download it using the wget command:
wget https://downloads.apache.org/lucene/solr/8.6.3/solr-8.6.3.tgz
Now we extract tar file using the following command:
tar xzf solr-8.6.3.tgz solr-8.6.3/bin/install_solr_service.sh --strip-components=2
Now Install Solr as a service by running the following command:
sudo bash ./install_solr_service.sh solr-8.6.3.tgz
It will start the installation, We should see the following output:
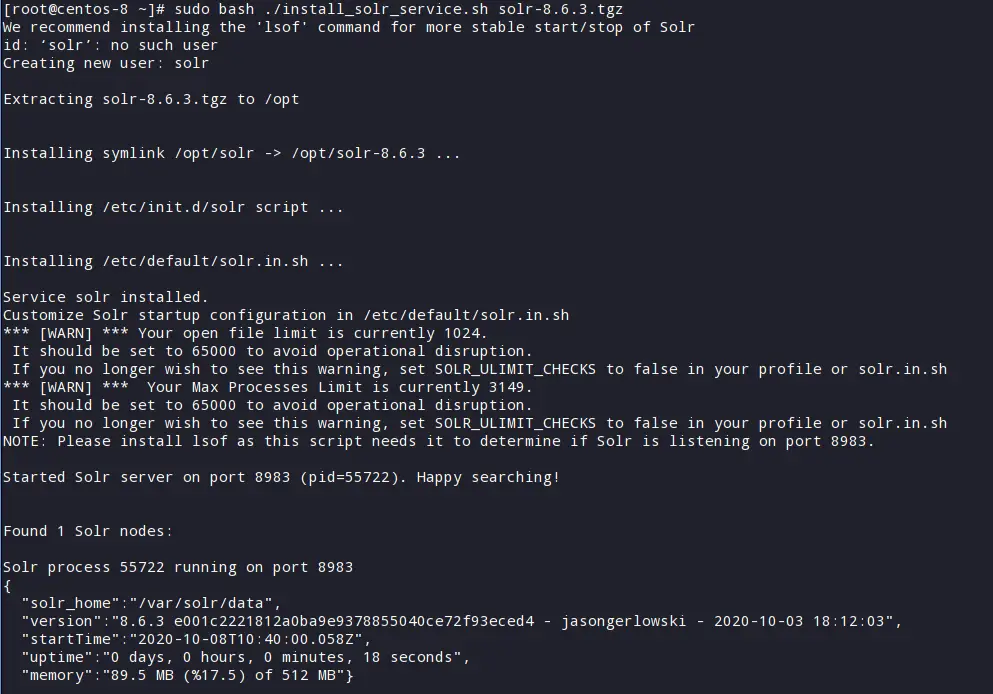
It will create the account with the name of solr on your system. By default, Solr port is 8983. we can verify it with the following command:
netstat -tunelp | grep 8983
We should get the following output:
tcp6 0 0 :::8983 :::* LISTEN 974 38261 -
Apache Solr is run as a Systemd service. We can easily start|stop|restart the Solr service with the following commands:
systemctl start solr
systemctl stop solr
systemctl restart solr
To check the status of the Apache Solr service, run the following command:
systemctl status solr
Now we enable solr service by running the following command:
systemctl enable solr
Note:- we need to disable SELinux, edit the following file to disable SELinux permanently
vim /etc/selinux/config
and set as following
SELINUX=disabled
save and exit
Step 3: Firewall
By default Solr listens on port 8983, so we will need to allow this port through the firewall.
We can do this by running the following command:
sudo firewall-cmd --zone=public --add-port=8983/tcp --permanent
sudo firewall-cmd --reload
Step 4: Accessing Solr Web Interface
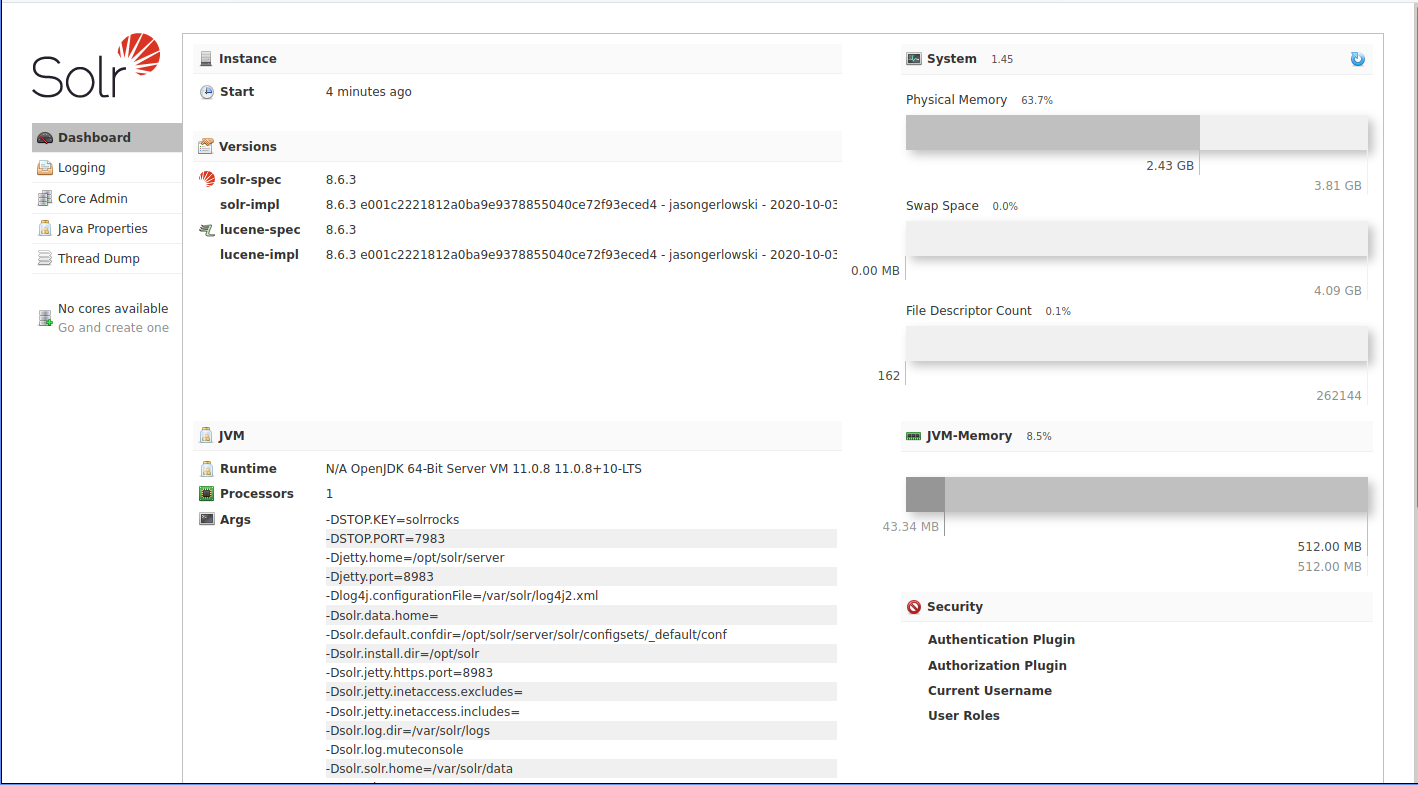
Now that we have enabled access through the firewall, it is time to access Solr web interface.
In the web browser and type the URL http://your-server-ip:8983/solr. We should see the Solr dashboard as below:
Step 5: Create Your First Solr Collection
After the successful installation of Apache Solr service on our system, Let's set the password for solr user by running the following command as root
passwd solr
Collection is a logical index spread across multiple servers.
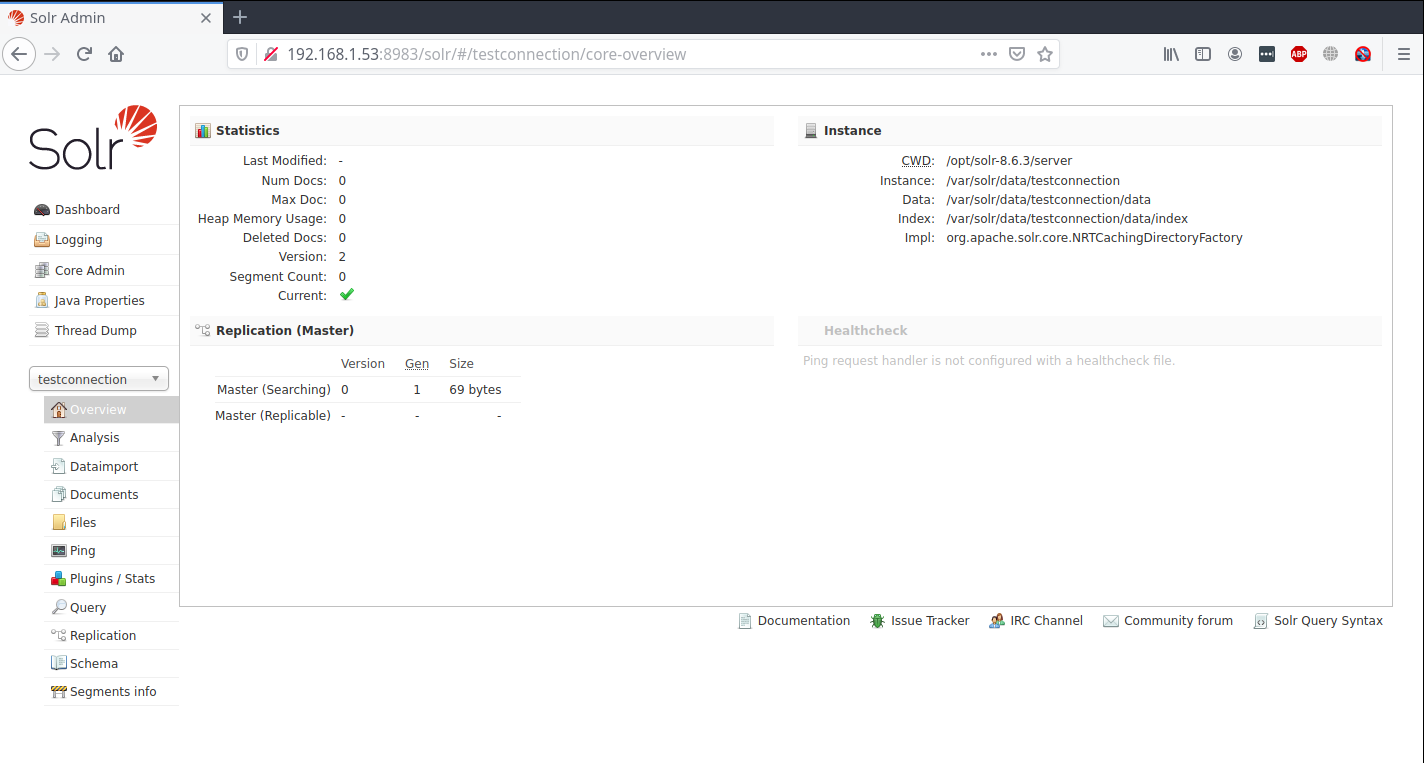
Now we will create our first collection using the following command.
su - solr -c "/opt/solr/bin/solr create -c testconnection -n data_driven_schema_configs"
Output:-
Created new core 'testconnection'
This 'testconnection' collections are available on the dashboard from the Collections left panel.
Conclusion
In this tutorial we learn how to install and configure Apache Solr in centos 8, It supports many plugins and many more features, You can use this tool to use the full potential of a vertical search. For more information, visit the Apache Solr official website https://lucene.apache.org/solr/

