Ventoy is a top-rated free and open-source utility to create a multiboot USB stick from ISO files. I use it regularly, and highly recommend you to use.
Recently I covered on how you can create a bootable USB stick using Baleno Etcher. This time I will guide you how easily you can create a multiboot USB stick by just doing copy-paste ISO file to your USB device.
Table of Contents
Ventoy Features
- Support UEFI Secure Booting
- Support Linux Persistence
- MBR and GPT Partition Support
- Directly boot from ISO files, No need to extract
- Windows autoinstallation supported
- To know more, check out ventoy official website
Ventoy is a cross-platform utility you can easily use this tool in Windows as well as all UNIX-based Operating System like macOS and Linux.
Installation
Today, I will guide how you can easily make a multi bootable USB stick from ventoy in Linux.
Step 1:
First, download the latest release of ventoy from its official GitHub repository and save it to the safe download location.
Once the file is downloaded-go to the download location path and open your Linux terminal using CTL + ALT + T depending upon your distribution or search terminal from Activity manager search bar.
Go to the download location and right now the file is compressed in tar format. So, we have to extract it before going further using tar Linux utility.
Type the following command into your Linux terminal to extract the tar file.
$ tar -xf [FILENAME].tar.gz ./Once the file is extracted, navigate to the extracted location.
Step 2:
Before doing anything else, connect your USB device with your system and find your USB device’s disc address. We can use the fdisk utility to find out the USB device address.
$ sudo fdisk -l
Step 2:
Now just execute ventoy shell file with -i syntax for install assigning the location of your USB device.
$ sudo ./Ventoy2Disk.sh -i /dev/sdc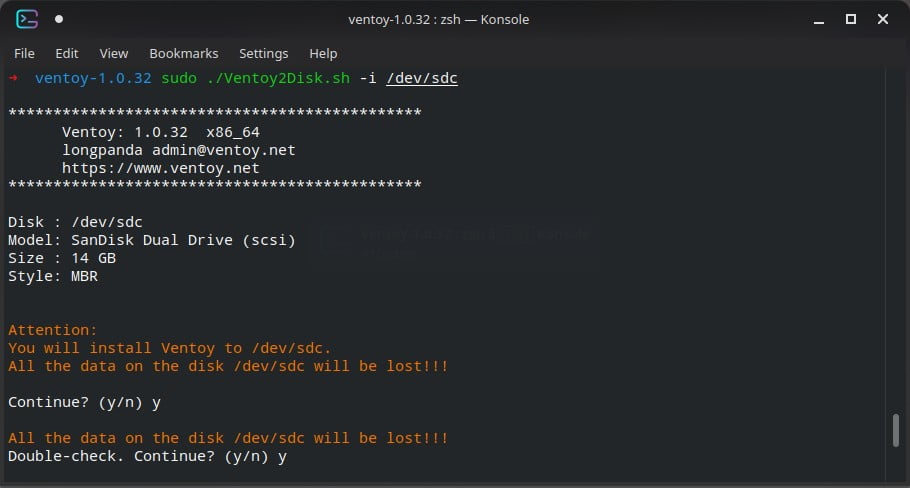
Ensure backup if any data is in your USB device before running this command; otherwise, it will be permanently lost.
Once everything is done, you will get a bellow message in your terminal that your successfully installed ventoy with your USB location.

Step 3:
Now your USB device will be renamed with ventoy. You just have to copy-paste the ISO file of OS in your USB stick.
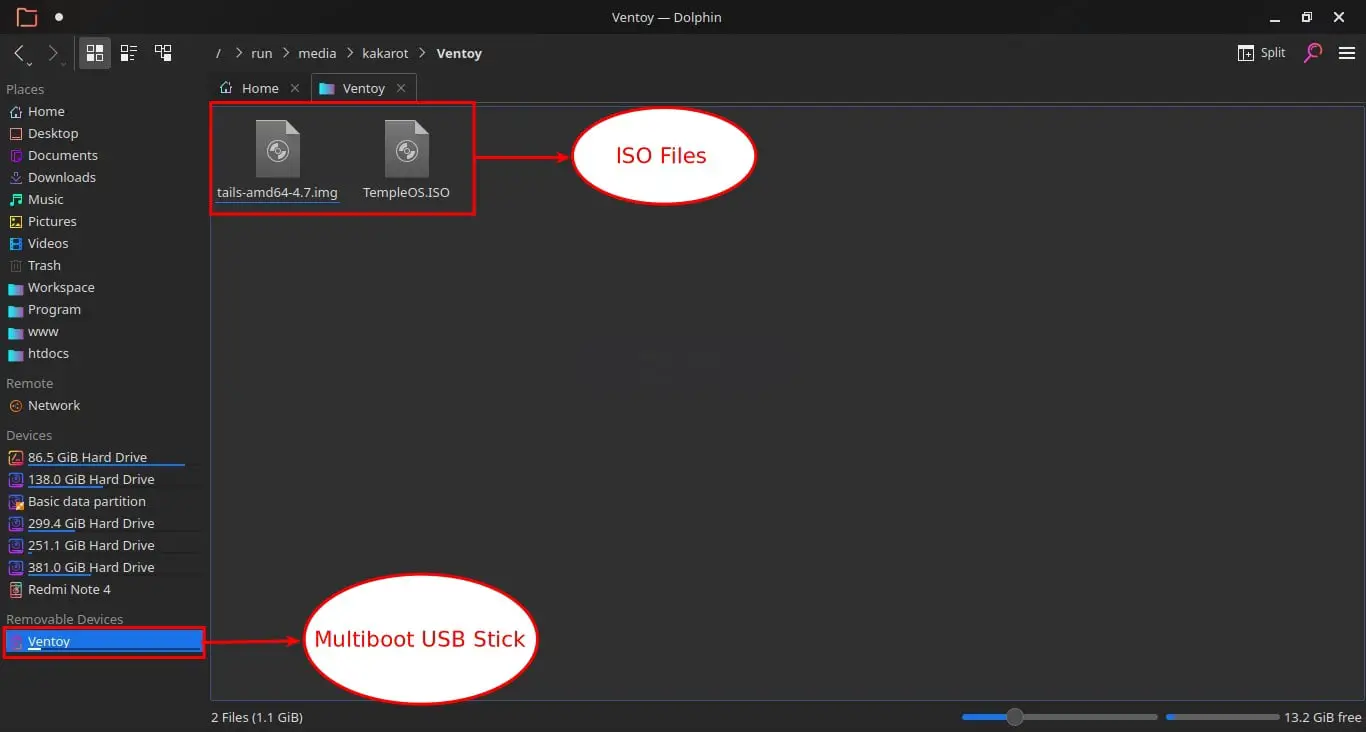
Now you can easily carry your USB with a multiboot USB stick. Insert USB to your system and go to your bios and select ISO you want to use.
Wrap up
There are many utilities available to make a bootable USB disk. Ventoy is one of them and easy to use the tool. If you are facing any issue, let us know in the comment section.

Innovative tech mind with 12 years of experience working as a computer programmer, web developer, and security researcher. Capable of working with a variety of technology and software solutions, and managing databases.
I find it interesting, and slightly disappointing, that you did not discuss how to enable persistence for one of your images. Perhaps you could cover that later.
Sure, we actually want to keep it simple.