One of the most simple and easy ways to create a bootable USB drive for Linux is with Rufus, which will create a bootable drive in a matter of a few clicks.
When you have decided to switch from Windows 10/11 to Linux distributions like Ubuntu, Linux Mint, Pop_OS!, or any other distribution, the foremost part is to have a bootable USB drive to perform the installation process.
In Linux, we have multiple utility tools to create bootable thumb drives, such as BalenaEtcher, Ventoy, and my personal favorites, dd command.
For Windows, we still have options to use the above application.
Don’t you love the open source project? Rufus is an open-source application that allows you to create a bootable USB drive for Linux in a few simple steps.
I’m not saying other utilities are not open-source, but what I love about Rufus is its size (1.3 MB) compared to other utility tools, and you do not need to install it either. Isn’t that amazing? Just download and run to create a bootable device.
It is a piece of cake to create a bootable drive using Rufus.
Table of Contents
Prerequisite
- Any ISO File
- A minimum of a 16GB USB drive is required for DVD ISO of RedHat, 8GB of storage is enough for Ubuntu/Debian and other Linux distributions.
Steps to Download and Creating Bootable USB
In a few simple clicks, you will be able to download Rufus to your system and then we will start the process of creating bootable USB drive for Linux.
 Download Latest Rufus
To get the latest version of Rufus, click on the below button, which redirects you to the official site. From there, you can download the latest version of Rufus for your Windows system.
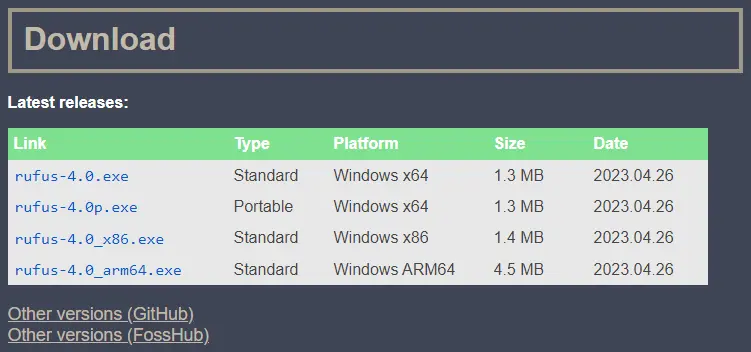
Once the page gets loaded, we need to scroll down and go to the Download section and select the latest Rufus version. While writing this article, Rufus’s latest version is “Rufus 4.0”, so the version may differ when you read this article.
Run Rufus!
Once the file is downloaded, go to the directory where the file is located and right-click on a file and select “Run as administrator” to launch the Rufus.
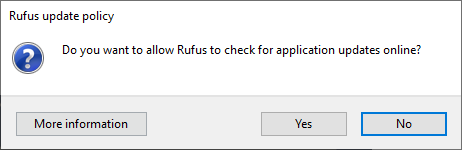
As you run the application, It will ask you to provide auto-update permission. If you want, Rufus should automatically detect the latest version click on “Yes”, else you want to check the latest version manually, click on “No”.
Note: The below step will format your USB drive, so it requests you to make a backup of your USB drive, else you may lose your valuable data.
Select Drive and ISO File
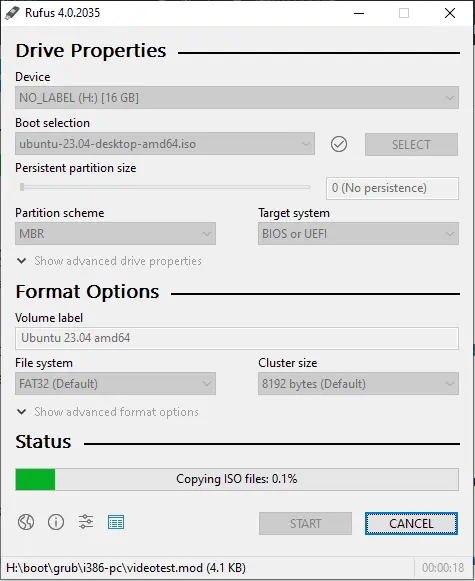
This is the main screen where you need to choose a USB drive and provide the file location of the respective ISO.
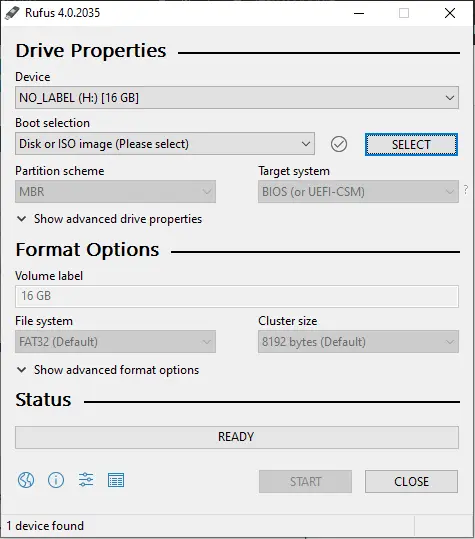
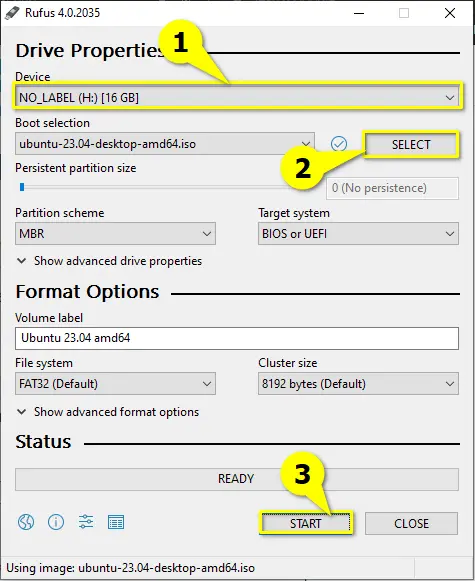
Device: In this drop-down menu, you will find the connected USB device name along with the USB disk size. In the case of multiple USB drives, select the USB drive that you want to use for bootable from the drop-down menu.
Boot selection: At this step, you need to provide the ISO file location for which you want to create a bootable device. You do not need to change the default options “Disk or ISO image” unless and until you have a different objective.
On the right side of the current screen, click on “Select” to specify the downloaded ISO file location.
Persistent partition size: It is a new feature introduced in Rufus that users desperately miss. If you don’t know what persistent partition size is, then I’ll explain it in a simple way. It helps you to store the changes that you have made in Live Boot.
For the sake of simplicity, we will not touch on any other options to avoid confusion.
Click on Start to Create a Bootable USB device
Once you’ve followed the above instructions, click on “Start” to create a bootable USB drive.
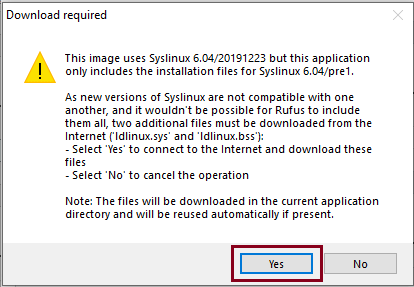
Next, you need to click on the “Yes” button to download the required file.
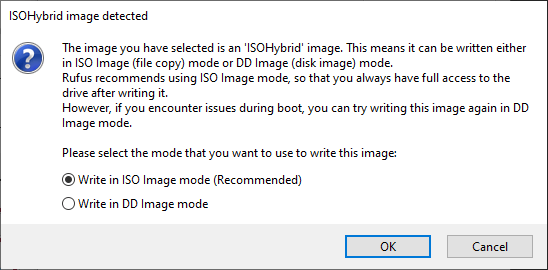
Over here, you have two options to write ISO images to your USB drive.
- Write in ISO Image mode(Recommended)
- Write in DD Image mode.
Usually, most Linux distributions can boot and install from an ISO image. However, in some conditions, DD Image mode is required to choose, otherwise, your system will not be able to boot it or install it.
In that scenario, use “Write in DD Image mode” and proceed to the next screen.
The only problem with the ‘Write in dd Image’ method will create multiple partitions on the USB Disk, which makes the drive unusable.
You do not need to panic because we already have an article on this topic so make sure to read it once you complete the installation process.
Read this :- How to Restore USB Mormal after Creating a Bootable USB DRIVE
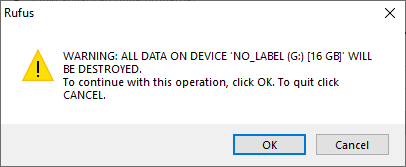
This step will format your USB drive. If you stored some important files, make sure to take a backup of your pen drive to avoid an unnecessary headache.
If you are unsure, go back and check whether an important file is still not there on your USB drive.
Once you are sure click on ‘OK’.
Please sit back and have a cup of coffee because this process will take some time to complete.
Once the process is complete, you are ready to boot your system using your bootable drive.
While booting if you are finding difficulty to boot your system from your USB drive, then check out this guide for help.
Wrap-up
That’s all, my readers, to create a bootable USB drive using Rufus for your favorite Linux distributions. In case you need some assistance from my end, feel free to comment.
See you in the next article..share love and peace.

A man with a tech effusive who has explored some of the amazing technology stuff and is exploring more. While moving towards, I had a chance to work on Android development, Linux, AWS, and DevOps with several open-source tools.
good job boy
trying to put pclos 2021 onto a usb flash drive to take with me when i travel. we’ll see!
Using Rufus 3.20 and Debian 11.5, your procedure does not result in a bootable USB drive to install Linux. Your instructions seem right, but the result is not usable.
Thanks for letting us know. We will check into this.
I checked, and it’s working well.
If you’re reading this know that is possible to transfer your current Windows License to another machine if you have an OEM license. You can also use a key finder application to find out your product key in case you lost it.
You are a very intelligent individual!
Yasu Christe. How many times have I come across articles like this that purport to make a procedure easy to follow only to find complication upon complication upon complication. Not everyone is a computer engineer and this lot, for me, might as well be in pillocking Chinese (!)