How to Install MERN Stack for JS based applications on Ubuntu 20.04
The MERN Stack is made from four components: MongoDB, Express, React, and Node. It provides a bundle of JavaScript technologies used for building dynamic JS websites.
MongoDB is an open-source and most widely used NoSQL database system used for developing robust web applications. Express.js is a Node.js web application framework used for developing hybrid web-based applications. React.js is an open-source JavaScript framework used to create a front-end interface for mobile applications. Node.js is a JavaScript environment that allows developers to run codes on the server.
In this guide, we will show you how to install the MERN stack on Ubuntu 20.04.
Prerequisites
- A server running Ubuntu 20.04.
- A root password is configured on the server.
Getting Started
First, update the system packages to the updated version by running the following command:
apt-get update -y
Once all the packages are updated, you can proceed to the next step.
Install MongoDB Server
By default, the latest version of MongoDB is not included in the Ubuntu 20.04 default repository. So you will need to add the MongoDB repository to your system.
First, install all the required dependencies using the following command:
apt-get install gnupg2 wget curl unzip git -y
After installing all the dependencies, add the MongoDB GPG key with the following command:
wget -qO- https://www.mongodb.org/static/pgp/server-4.4.asc | apt-key add -
Next, add the MongoDB repository with the following command:
echo "deb [ arch=amd64,arm64 ] https://repo.mongodb.org/apt/ubuntu focal/mongodb-org/4.4 multiverse" | tee /etc/apt/sources.list.d/mongodb-org-4.4.list
Next, update the repository and install the MongoDB server using the following command:
apt-get update -y
apt-get install mongodb-org -y
Once MongoDB has been installed, start the MongoDB service and enable it to start at system reboot:
systemctl start mongod
systemctl enable mongod
Next, verify the status of the MongoDB service using the following command:
systemctl status mongod
You should see the following output:
? mongod.service - MongoDB Database Server
     Loaded: loaded (/lib/systemd/system/mongod.service; disabled; vendor preset: enabled)
     Active: active (running) since Fri 2021-07-23 12:21:17 UTC; 5s ago
       Docs: https://docs.mongodb.org/manual
   Main PID: 8774 (mongod)
     Memory: 58.8M
     CGroup: /system.slice/mongod.service
             ??8774 /usr/bin/mongod --config /etc/mongod.conf

Jul 23 12:21:17 ubuntu systemd[1]: Started MongoDB Database Server.
Next, verify the MongoDB installation with the following command:
mongo --eval 'db.runCommand({ connectionStatus: 1 })'
You should get the following output:
MongoDB shell version v4.4.7
connecting to: mongodb://127.0.0.1:27017/?compressors=disabled&gssapiServiceName=mongodb
Implicit session: session { "id" : UUID("59c89093-9e9d-413b-aafa-ae0a4ddda087") }
MongoDB server version: 4.4.7
{
	"authInfo" : {
		"authenticatedUsers" : [ ],
		"authenticatedUserRoles" : [ ]
	},
	"ok" : 1
}
Create MongoDB Admin User
First, connect to the MongoDB instance with the following command:
mongo
Once you are connected, change the database to admin with the following command:
> use admin
Next, create an admin user and set a password with the following command:
> db.createUser({user: "admin" , pwd: passwordPrompt() , roles: [{ role: "userAdminAnyDatabase" , db: "admin"}]})
Enter password:
You should get the following output:
Successfully added user: {
	"user" : "admin",
	"roles" : [
		{
			"role" : "userAdminAnyDatabase",
			"db" : "admin"
		}
	]
}
Next, exit from the MongoDB shell with the following command:
> quit()
Install Node.js
By default, the latest version of Node.js is not included in the Ubuntu default repository. So you will need to add the Node source repository to your system.
To add the Node source repository, run the following command:
curl -sL https://deb.nodesource.com/setup_14.x | bash -
Once the repository is added, install the Node.js with the following command:
apt-get install nodejs -y
After the installation, verify the Node.js version with the following command:
node --version
You should see the following output:
v14.17.2
You can also verify the NPM version using the following command:
npm --version
You should see the following output:
6.14.13
Install React.js
First, you will need to install a create-react-app tool to create a React.js application.
You can install it with the following command:
npm install -g create-react-app
After the installation, create a React.js application with the following command:
create-react-app myapp
You should see the following output:
Success! Created myapp at /root/myapp
Inside that directory, you can run several commands:

  npm start
    Starts the development server.

  npm run build
    Bundles the app into static files for production.

  npm test
    Starts the test runner.

  npm run eject
    Removes this tool and copies build dependencies, configuration files
    and scripts into the app directory. If you do this, you can’t go back!

We suggest that you begin by typing:

  cd myapp
  npm start

Happy hacking!
Next, change the directory to myapp and start the application with the following command:
cd myapp
npm start 0.0.0.0
You should see the following output:
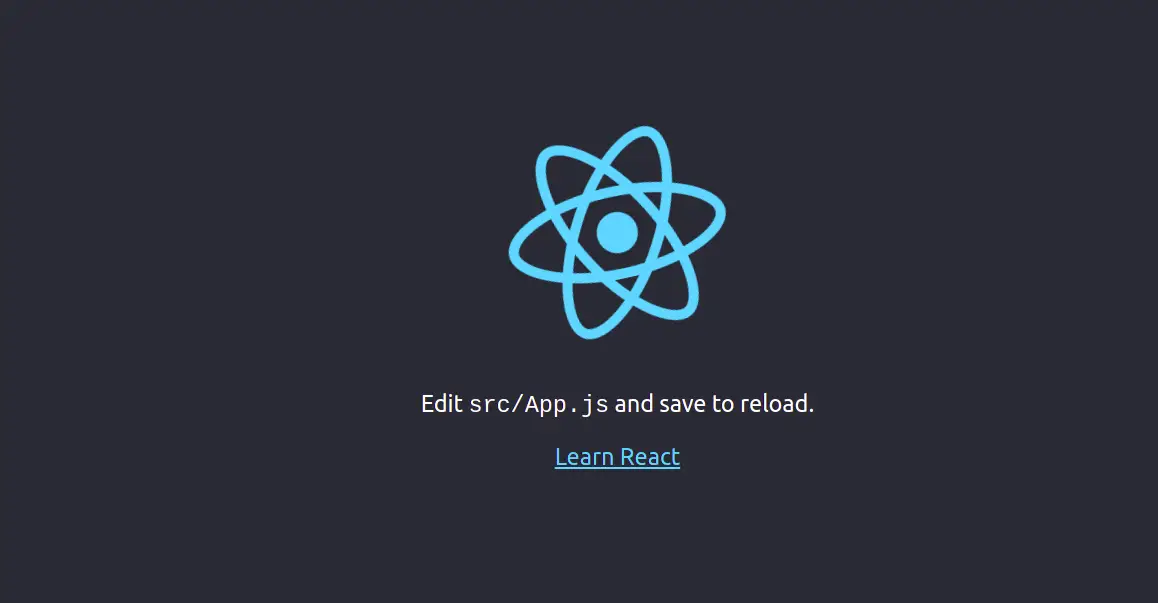
Compiled successfully!

You can now view myapp in the browser.

  http://localhost:3000

Note that the development build is not optimized.
To create a production build, use npm run build.
You can now access the React.js app using the URL http://your-server-ip:3000. You should see your React.js dashboard on the following page:
Now, press CTRL+C in your terminal to close the application.
Install Express.js
First, install the express-generator with the following command:
npm install -g express-generator
After the installation, create a new project with the following command:
express myproject
You should get the following output:
  warning: the default view engine will not be jade in future releases
  warning: use `--view=jade' or `--help' for additional options


   create : myproject/
   create : myproject/public/
   create : myproject/public/javascripts/
   create : myproject/public/images/
   create : myproject/public/stylesheets/
   create : myproject/public/stylesheets/style.css
   create : myproject/routes/
   create : myproject/routes/index.js
   create : myproject/routes/users.js
   create : myproject/views/
   create : myproject/views/error.jade
   create : myproject/views/index.jade
   create : myproject/views/layout.jade
   create : myproject/app.js
   create : myproject/package.json
   create : myproject/bin/
   create : myproject/bin/www

   change directory:
     $ cd myproject

   install dependencies:
     $ npm install

   run the app:
     $ DEBUG=myproject:* npm start
Now, change the directory to your project and install all NPM dependencies using the following command:
cd myproject
npm install
Now, start the Express web server using the following command:
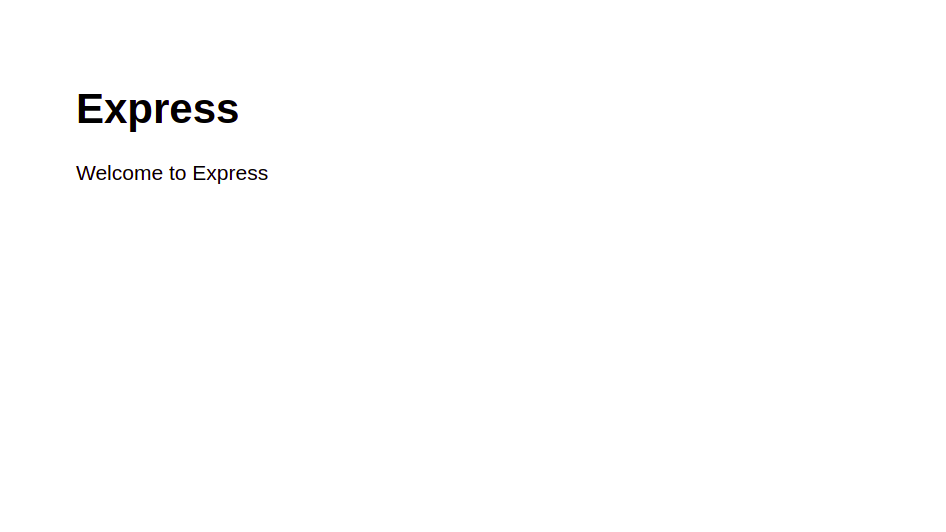
npm start 0.0.0.0
Now, open your web browser and access the Express application using the URL http://your-server-ip:3000. You should see the following page:
Conclusion
Congratulations! you have successfully installed the MERN stack on Ubuntu 20.04 server. You can now start MERN applications development. Feel free to ask me if you have any questions.

