GitLab is a web-based Git repository manager providing wiki, issue-tracking, and continuous integration and deployment. It is a DevOps platform that helps developers to modernize their application development lifecycle. It allows you to create your private repository with the required control, flexibility, and simplicity within your own server.
RoseHosting Cloud provides pre-configured GitLab image. You can deploy a GitLab with Docker containers in the RoseHosting PaaS platform to increase scalability and elasticity.
In this post, we will show you how to deploy a GitLab with Docker on RoseHosting Cloud.
Table of Contents
Install GitLab Server
First, log in to the RoseHosting Cloud platform at https://app.rosehosting.cloud as shown below:
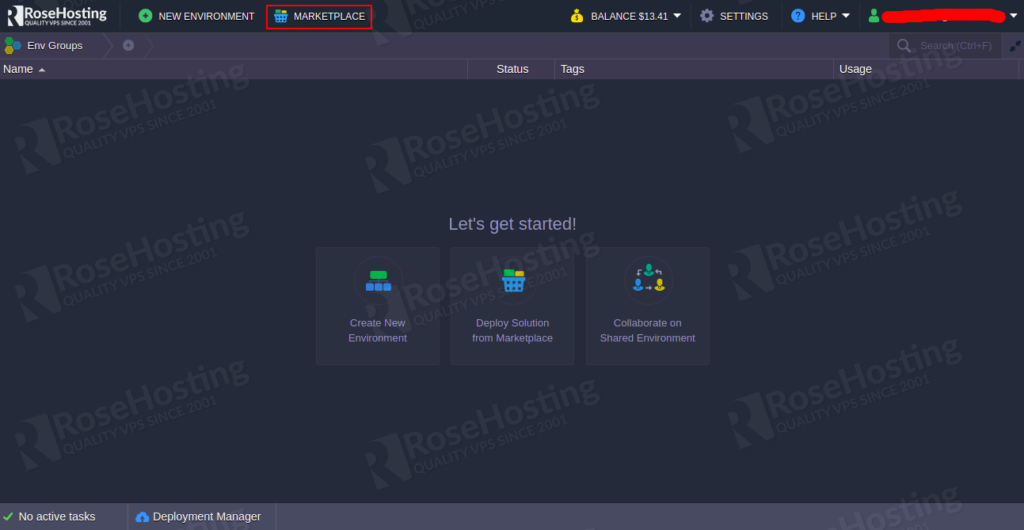
Click on the MARKETPLACE. You should see the following screen:
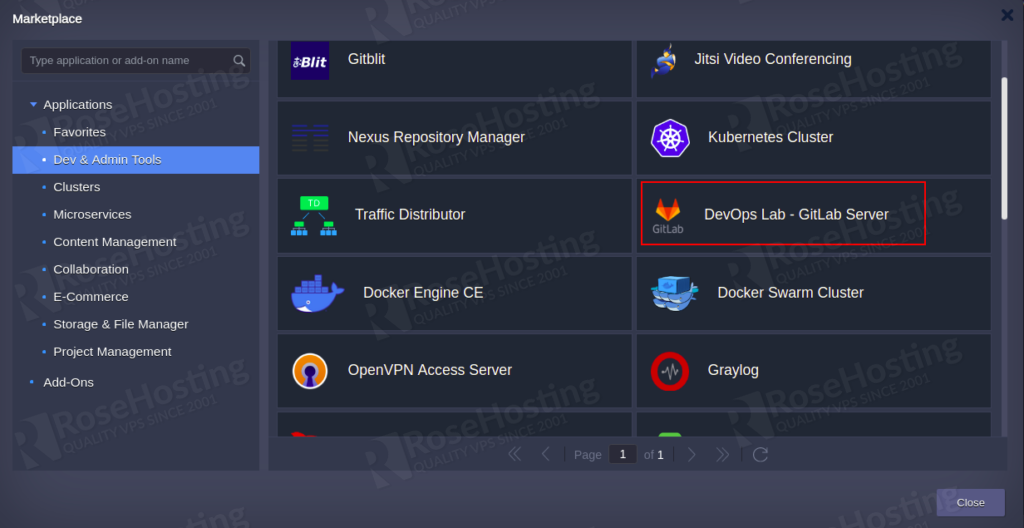
Click on the Dev & Admin Tools => DevOps Lab – GitLab Server, and click on the Install button. You should see the following screen:
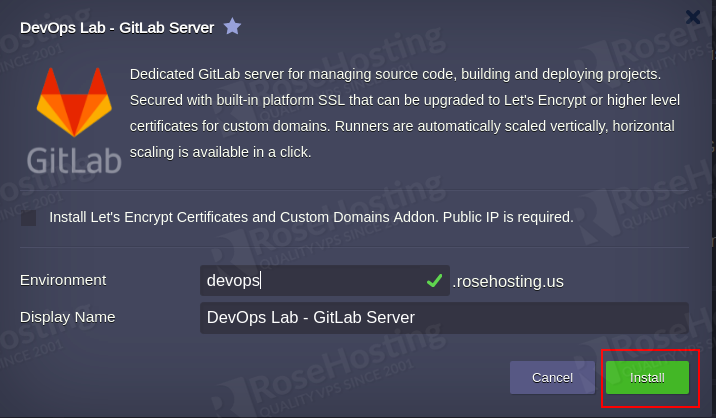
Provide your environment name and click on the Install button. Wait for a few minutes to complete the installation. After the successful installation, you will receive an email and redirected to the following screen:
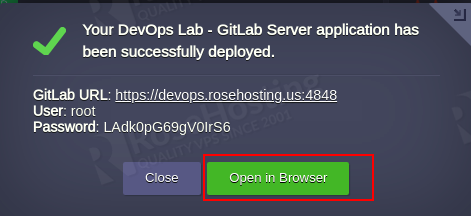
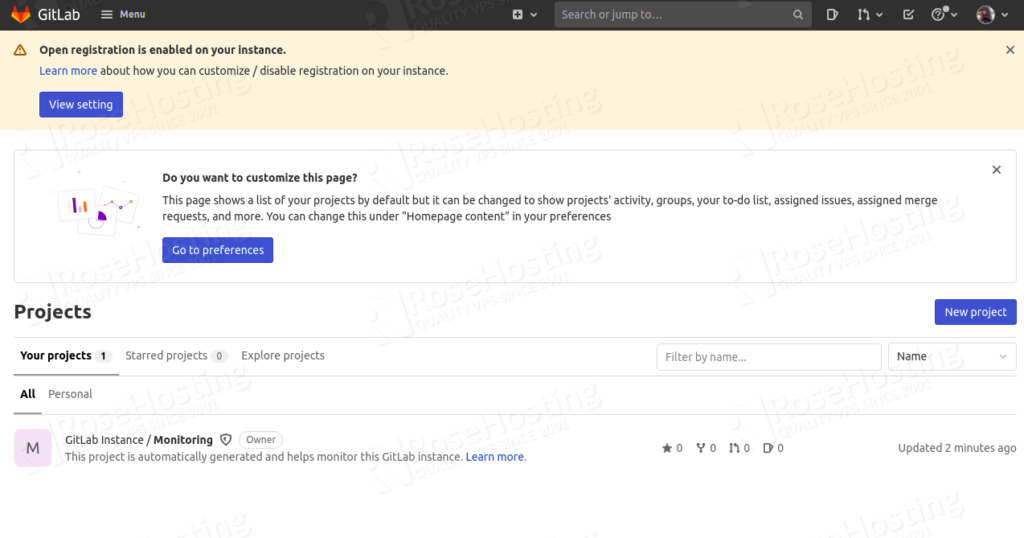
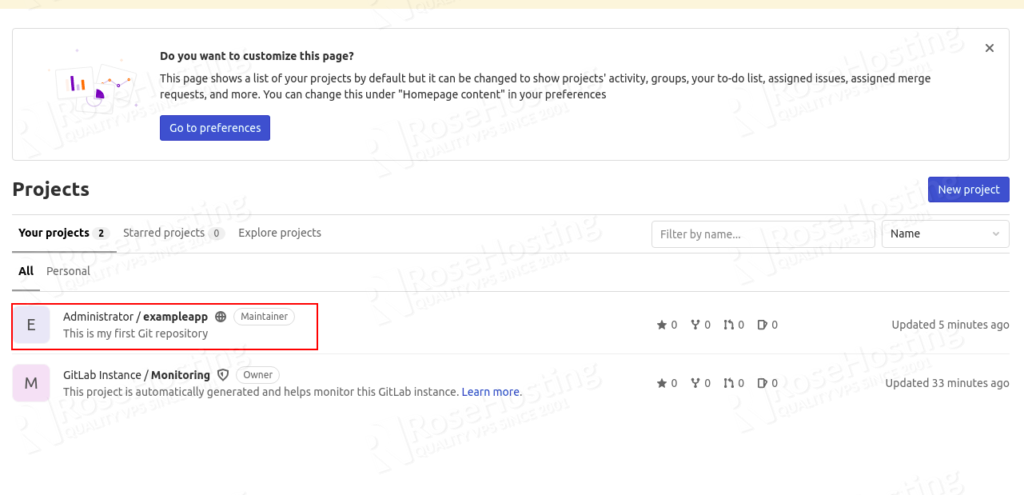
Click on Open in Browser. You should see the GitLab dashboard on the following screen.
Scale Runners Horizontally
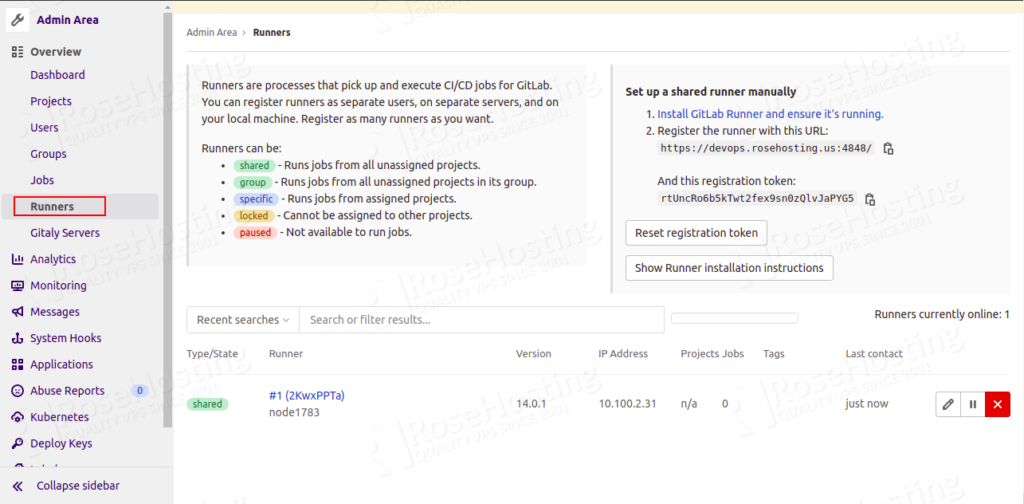
By default, the GitLab Server package creates a single Runners. To check whether the GitLab Runner instance is properly registered at the Git server. Click on the Menu => Admin and click on the Runners in the left pane. You should see the following screen:
You can increase the number of Runners to get the benefits of horizontal scaling without the need to perform any extra manual configuration.
To increase the Runners, go to the RoseHosting Dashboard as shown below:
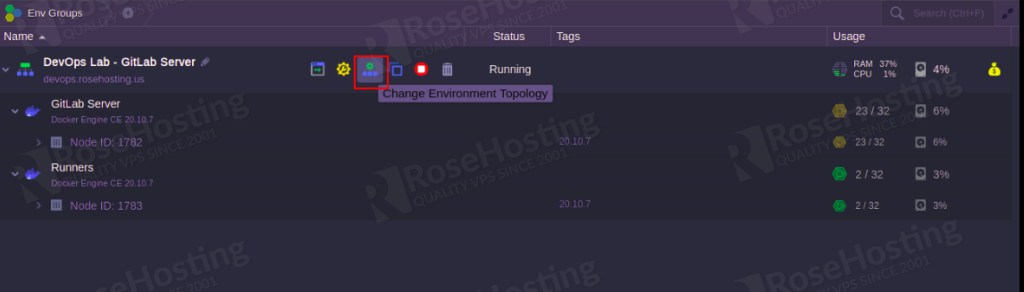
Click on the Change Environment Topology button. You should see the following screen:
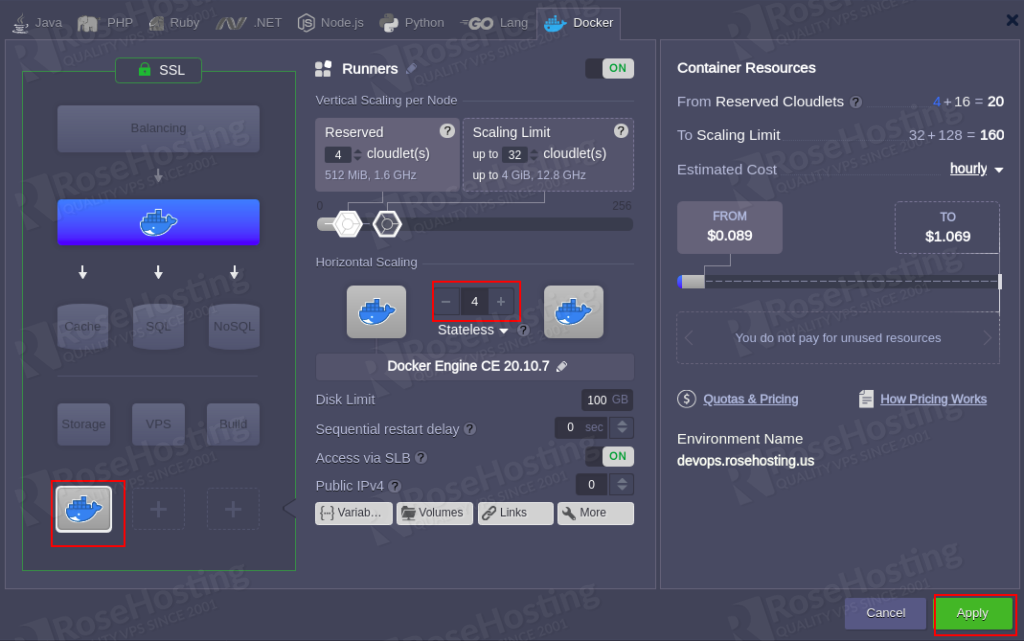
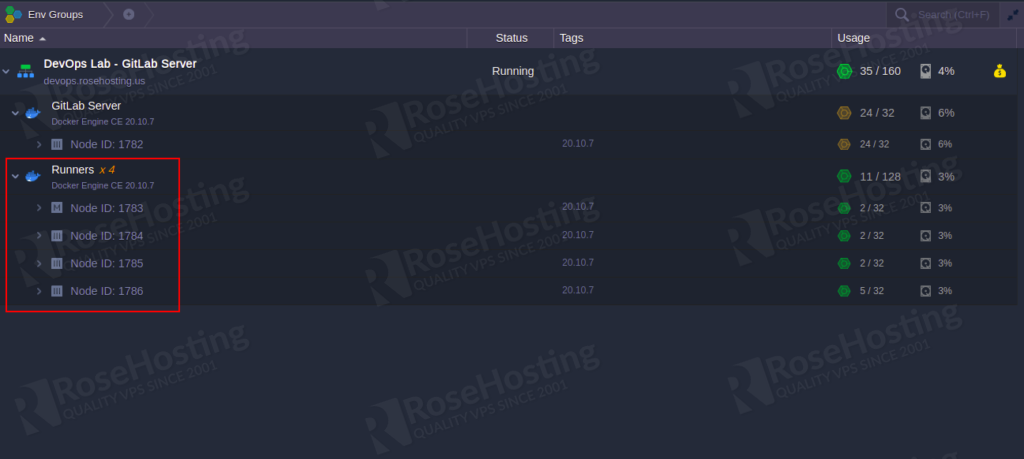
Click on Docker-ce and click on + icon in the Horizontal Scaling section to add more Runners. Then, click on the Apply button to rebuild the environment. Once the new environment has been built, you should see the following screen:
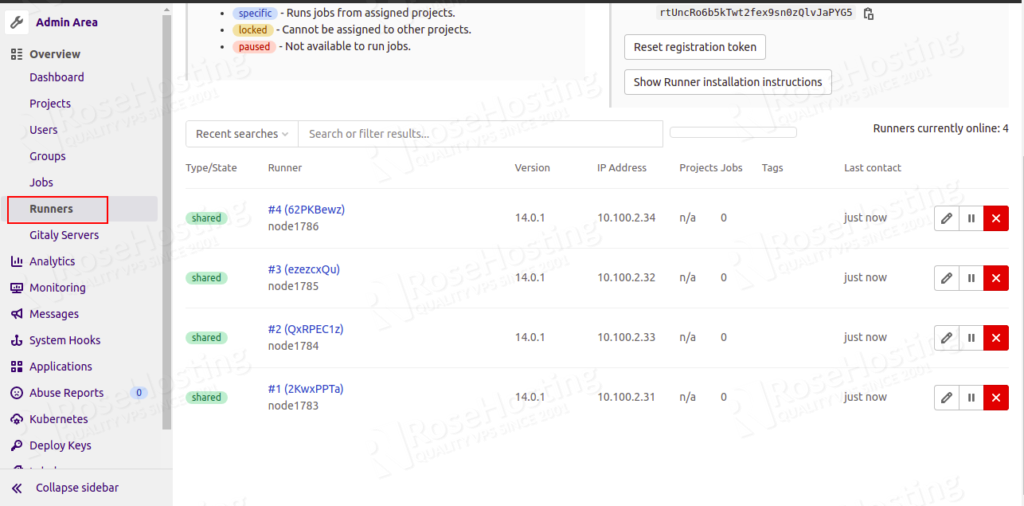
Next, go back to GitLab dashboard => Admin area and confirm the newly added runners as shown below:
Import Project from GitHub
RoseHosting Cloud platform allows you to import your own project hosted on GitHub to your private GitLab server.
To import the project, go to the GitLab home page and click on the Create a project button. You should see the following screen:
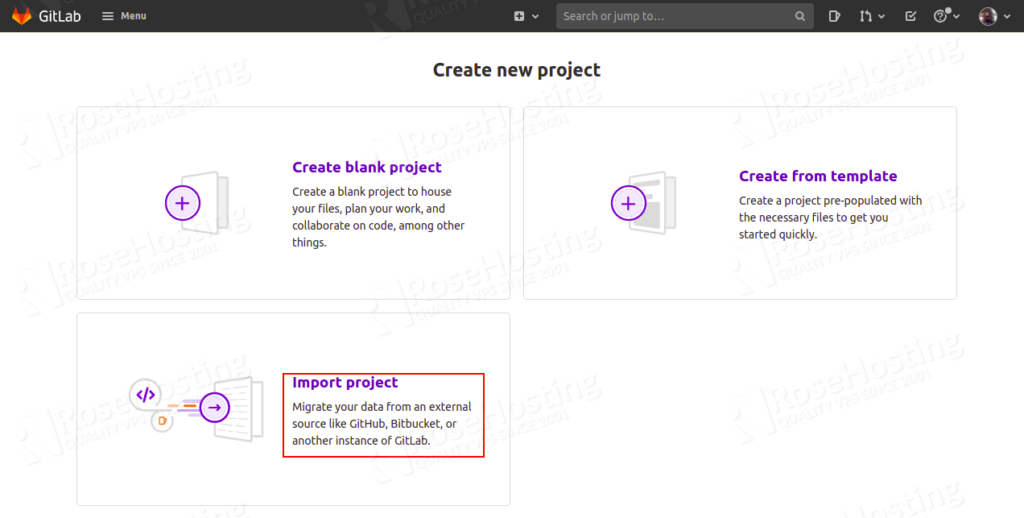
Click on the Import project button. You should see the following screen:
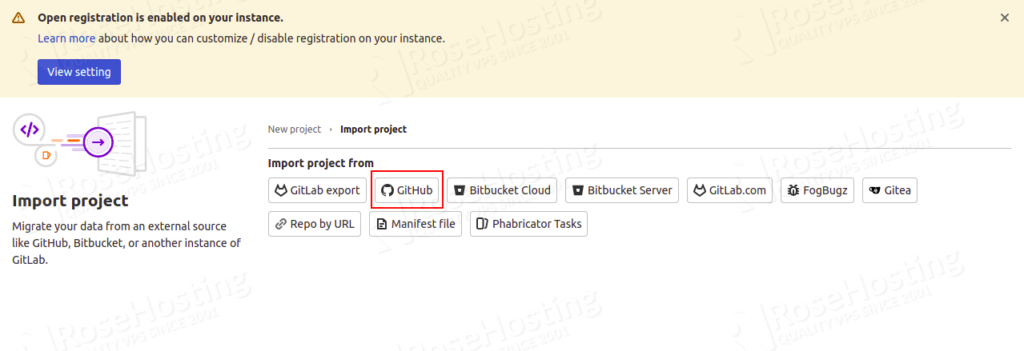
Next, click on GitHub. You should see the following screen:
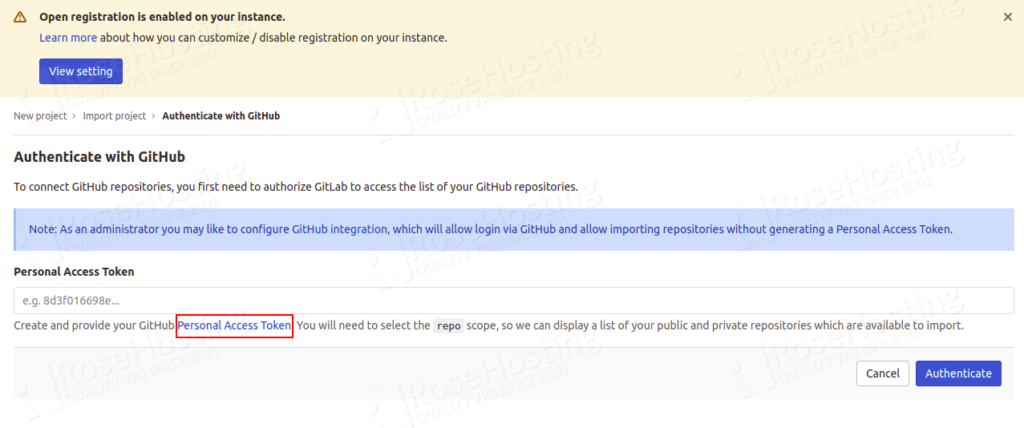
Next, you will need to generate Personal Access Token from your GitHub account. To do so, click on Personal Access Token. You will be redirected to your GitHub page as shown below:
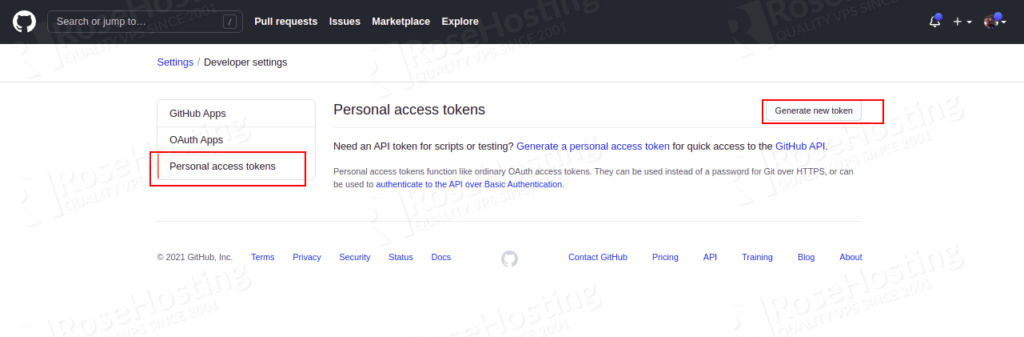
Click on Generate new token. You should see the following screen:
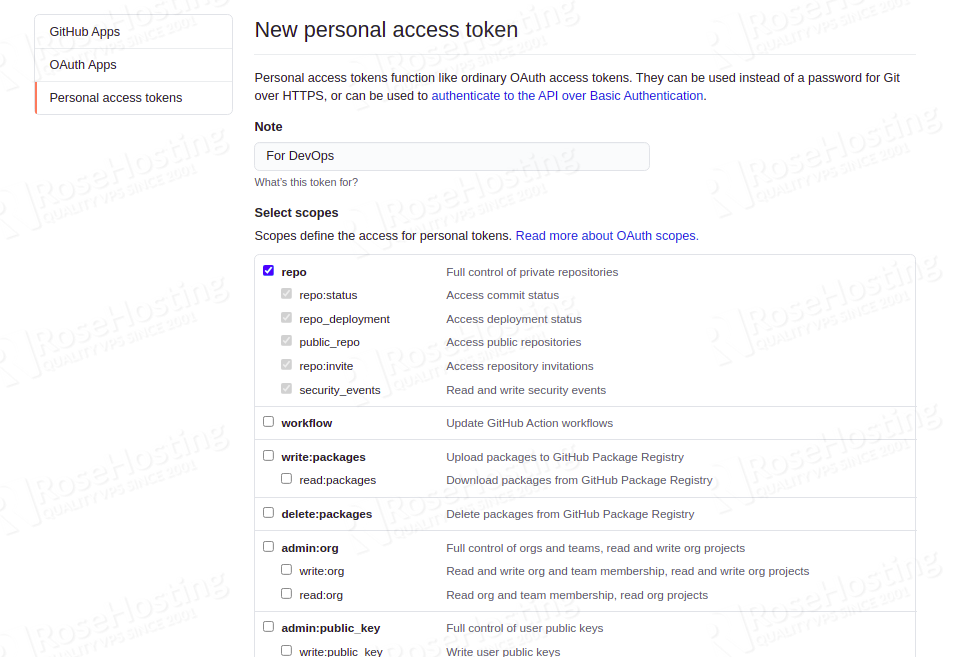
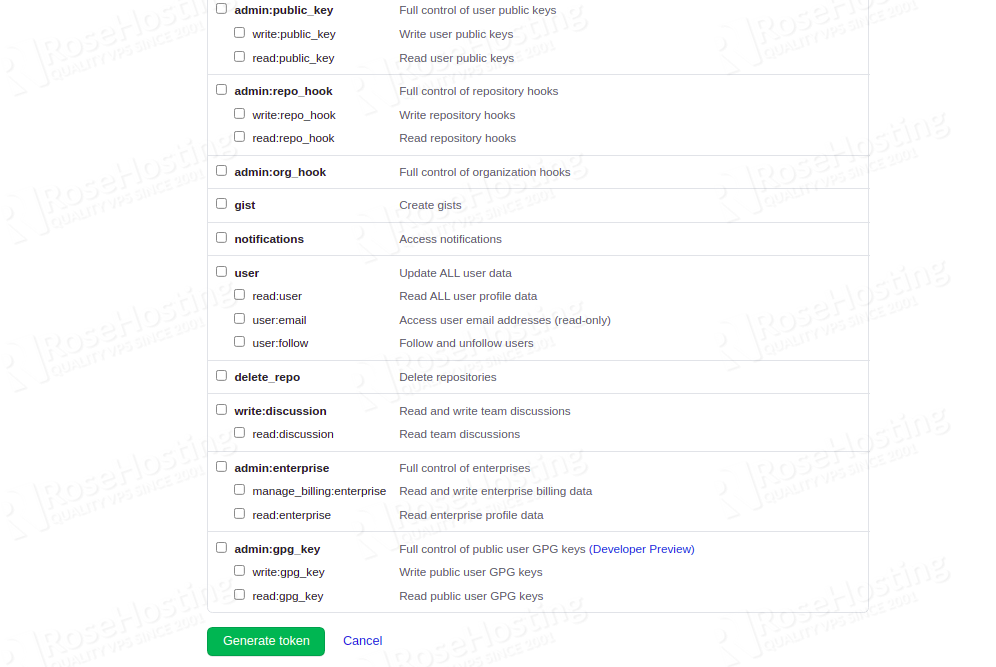
Choose the required scopes and click on Generate token button. You should see your generated token on the following screen:
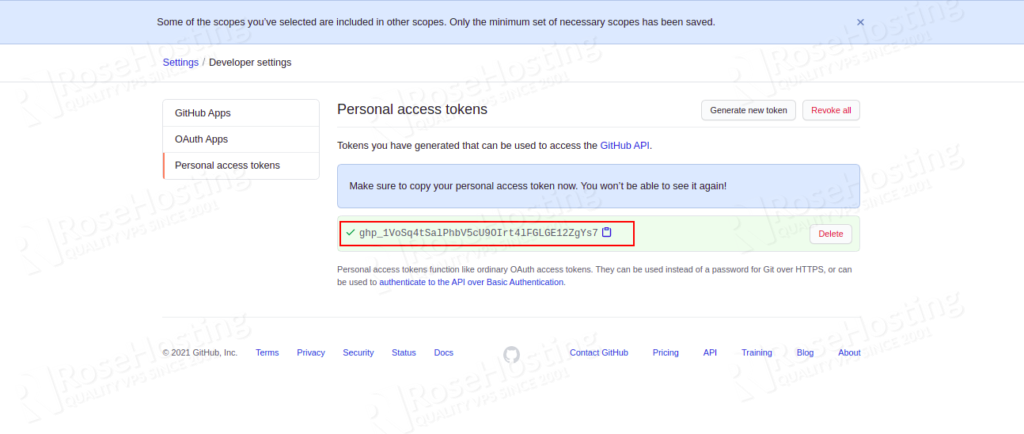
Copy the generated token and go back to Authenticate with GitHub page:
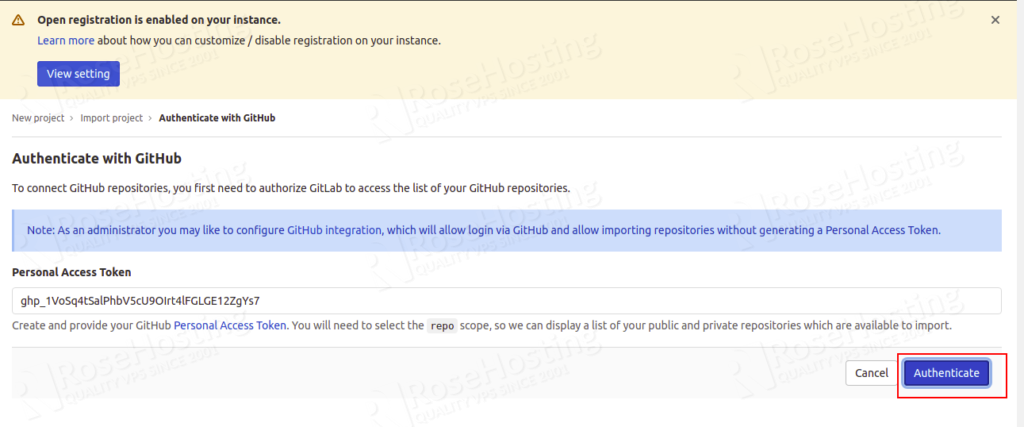
Paste the token in the required field and click on the Authenticate button. You should see the following screen:
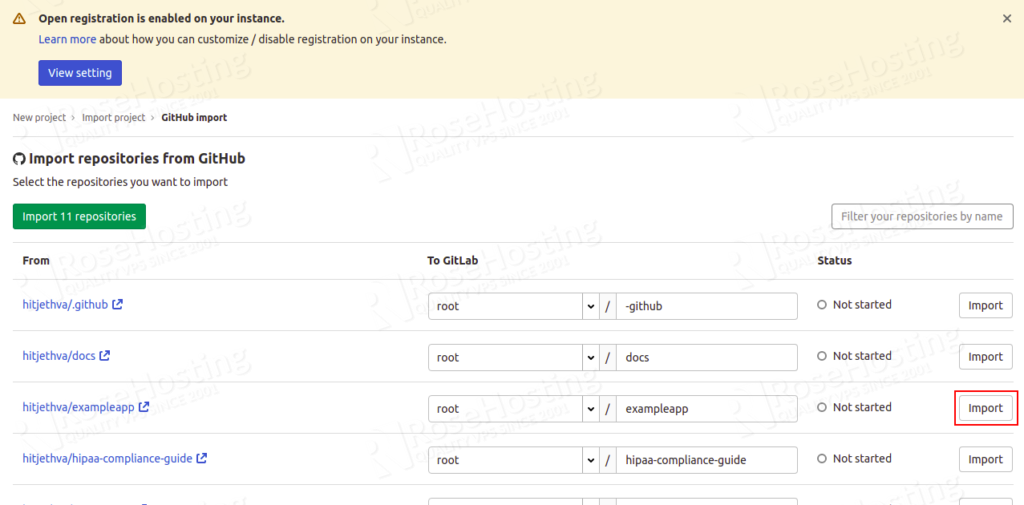
Now, select the repository that you want to import and click on the Import button.
Next, go back to your GitLab server home page. You should see your imported repository on the following screen:
Docker Registry Access
GitLab server package also provides a private Docker registry. In order to access the Docker registry, go to the GitLab server => Menu => Projects => Create new project. You should see the following screen:
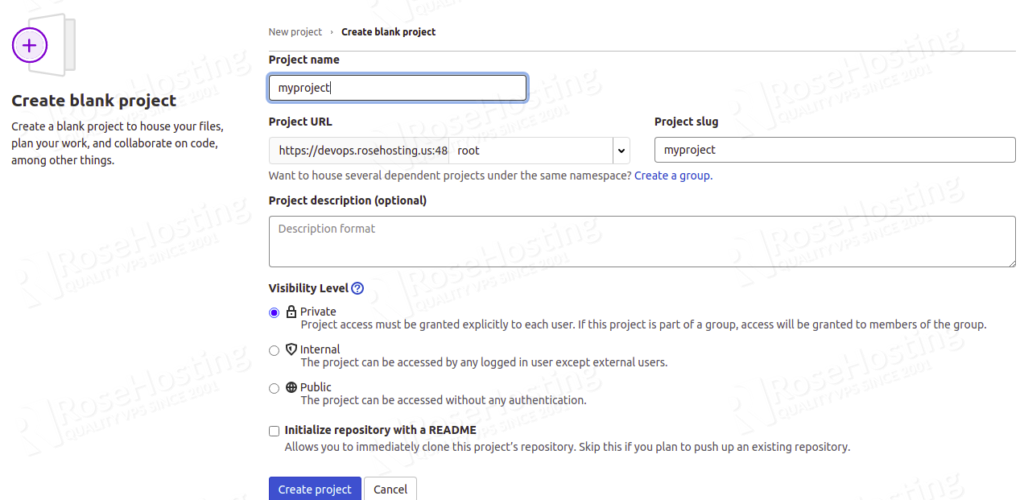
Provide your project name and other required details then click on the Create project button. You should see the following screen:
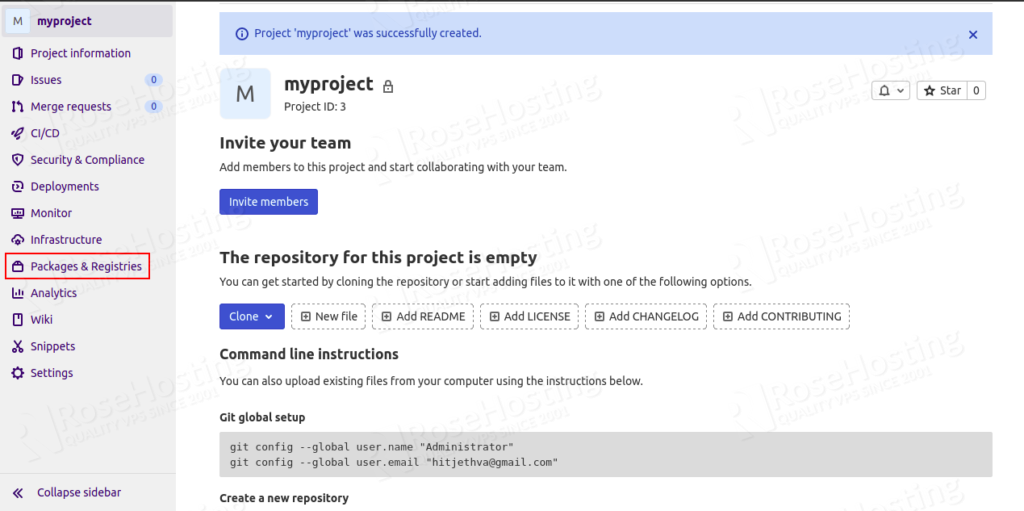
Now, click on the Packages & Registries => Container Registry. You should see the following screen:
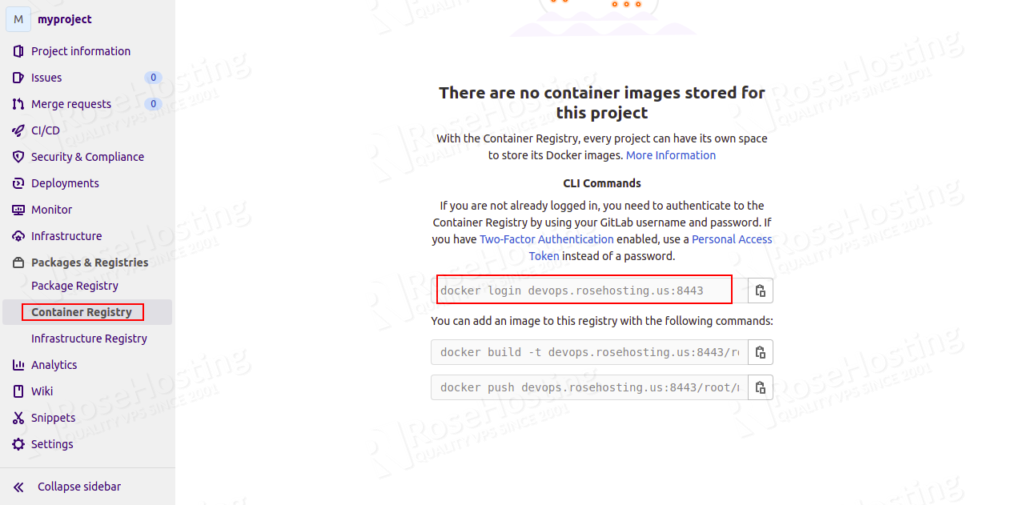
From here, you can use the following command to login into Registry from the command-line interface:
docker login devops.rosehosting.us:8443
Custom Domain and Let’s Encrypt SSL
You can also install the Let’s Encrypt add-on to generate an SSL certificate and bind it with your custom domain.
First, go to the RoseHosting Environment as shown below:
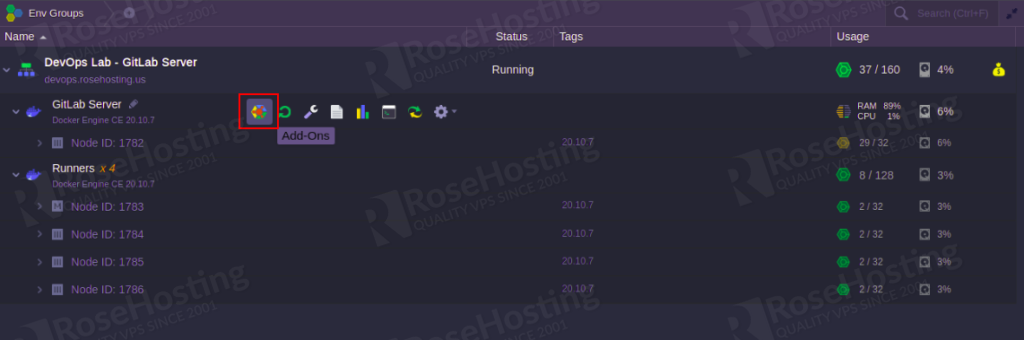
Click on the Add-Ons in the GitLab Server. You should see the following screen:
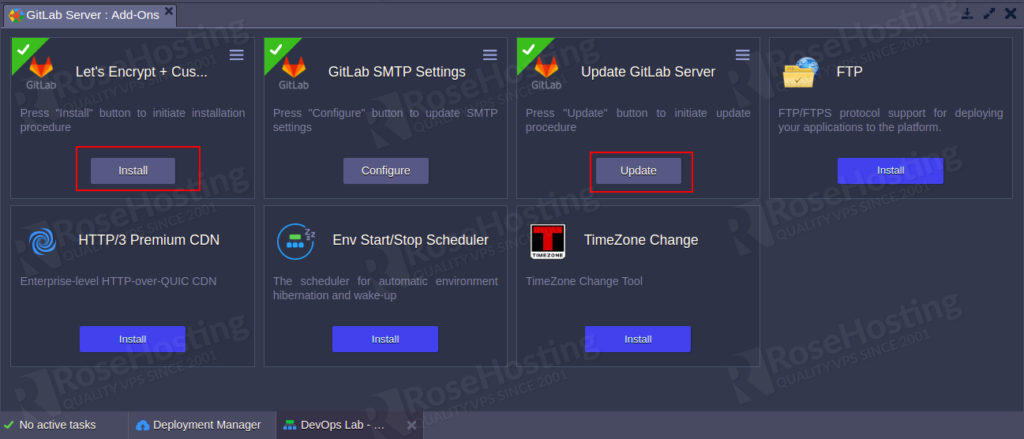
Now, click on the Update button to update your GitLab server then click on the Install button to install the Let’s Encrypt add-ons. After the installation, you should see the following screen:
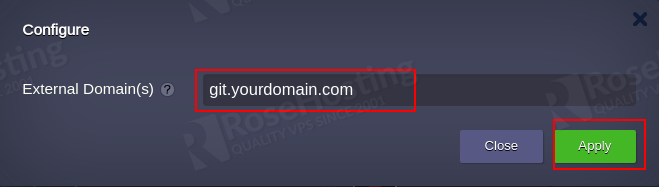
Here, specify your custom domain name and click on the Apply button to update the changes.
Congratulations! you have successfully installed the DevOps Lab-Gitlab server on the RoseHosting Cloud platform.
You really don’t need to install any of this if you are using our managed cloud hosting, in which case you can simply ask one of our system admin to install and configure the DevOps Lab-Gitlab server for you. They are available 24/7/365
If you liked this post, please share it with your friends via the social media networks.