Getting Started with UFW (Uncomplicated Firewall) on Ubuntu 22.04
UFW or Uncomplicated Firewall is an application to manage an iptables-based firewall on Ubuntu. UFW is the default firewall configuration tool for Ubuntu Linux and provides a user-friendly way to configure the firewall. The UFW command is just like English, so the commands are easy to remember. The UFW firewall supports IPv4 and IPv6.
UFW also provides a GUI application. If you use a GNOME desktop, you can install gufw; if you use a KDE desktop, you can install kcm-ufw.
Prerequisites
- Ubuntu version between 16.04 and 22.04. Newer Ubuntu versions should work as well.
- root privileges
What is covered in this tutorial?
- Installation of UFW.
- The Basic UFW Command Syntax.
- The UFW Allow and Deny Command.
- Advanced UFW Commands.
- Deleting a rule in UFW.
- Disable and Reset UFW.
Installation of UFW
By default, UFW should already be installed on ubuntu 20.04. You can test this with the command:
which ufw

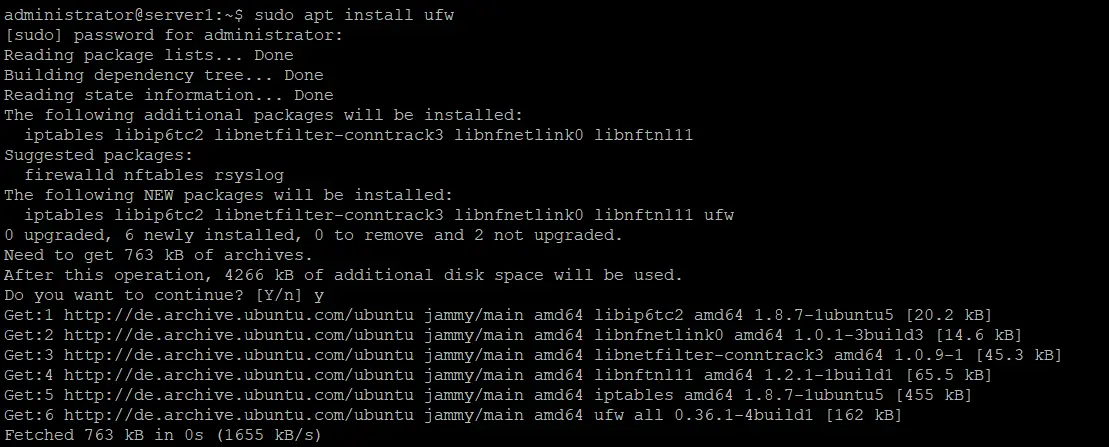
If it does not return the path to the command as shown above, then install UFW with the following apt command:
sudo apt install ufw
Then run the following command to enable UFW:
sudo ufw enable

Result:
Command may disrupt existing ssh connections. Proceed with operation (y|n)? y
Firewall is active and enabled on system startup
The Basic UFW Command
The "ufw enable" command will turn on UFW with the default the rules. You can verify that UFW is running by issuing this command:
sudo ufw status verbose
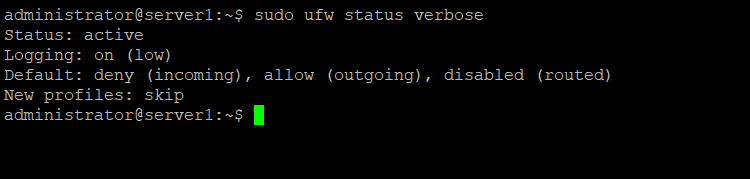
Result:
Status: active
Logging: on (low)
Default: deny (incoming), allow (outgoing), disabled (routed)
New profiles: skip
If you like to disable or turn off UFW, you can use:
sudo ufw disable
Result:
Firewall stopped and disabled on system startup

The UFW Allow and Deny Command
1. UFW Allow Command
UFW will deny all incoming connections after you turn it on. So the first thing you should do is to allow SSH access for the server if you like to manage the system remotely. The command "ufw allow sshport" allow access by SSH, replace SSHPORT with the port of the SSH service, the default SSH port is 22.
sudo ufw allow 22
Result:
Rules updated
Rules updated (v6) #For IPv6
If you like to allow incoming connections on port 22 for TCP only, add at the end of command "/tcp" like shown in the following example.
sudo ufw allow 22/tcp
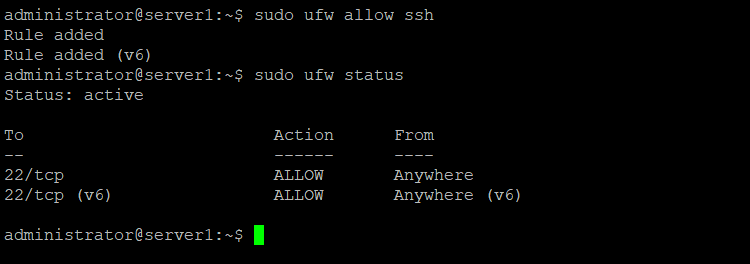
When the service that you want to allow access to is listening on its default port, then you can use the service name instead of the port number. This makes it easier to open the port as you might not know the port. UFW will look up the correct port number in /etc/services for you.
This command will open the default SSH port:
sudo ufw allow ssh
Now check the rule with:
sudo ufw status
2. UFW Deny Command
The "deny" command works similar to the "allow" command and is used to close a port in the firewall:
Deny with Port option:
sudo ufw deny 80
Result:
Rule updated
Rule updated (v6)

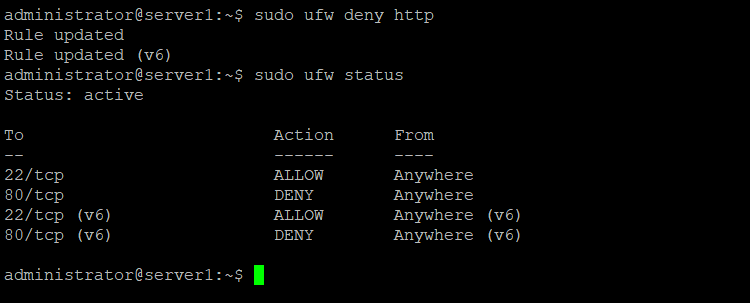
Example for "deny" with service name. In this example, I will block http port/80:
sudo ufw deny http
Note:
All ports and their service names are listed in the file "/etc/services".
Advanced UFW Commands
Now we will dig deeper into the UFW command syntax, learn how to allow part ranges (e.g., for the FTP passive ports), and access from one IP or subnet only.
1. Allow a Port Range
You can allow a range of ports in UFW. Some services like FTP or IRC use a range of ports to communicate with its clients.
For this example, we will allow the port range that is used by ircd on my server. The range is port 6660 to 6670:
sudo ufw allow 6660:6670/tcp
sudo ufw allow 6660:6670/udp
The command will allow connections to ports 6660-6670 via TCP and UDP protocol.
2. Allow a specific IP Address
And you can add a specific IP to allow access to all services by adding the "from" option. This is e.g. useful if you have a static IP at home or in office and want to allow access to all services on your server from there. The command below will allow the IP 192.168.1.106 to access all ports on the server:
sudo ufw allow from 192.168.1.106
Result:
Rule added
3. Allow Subnet
If you want to allow all IP addresses on your subnet, you can add the IP subnet (range of IP addresses) to the UFW command like this:
sudo ufw allow from 192.168.1.1/24
Result:
WARN: Rule changed after normalization
Rule added
4. Allow access from a specific IP address to one port
If you like allowing access to one port from a specific IP only, you can combine the UFW commands we learned above.
For example, only IP 192.168.1.106 can access ssh port 22 TCP, and other IPs will be rejected from that port, you can use the following command:
sudo ufw allow from 192.168.1.106 proto tcp to any port 22
Result:
Rule added
5. Allow all Incoming Traffic to a specific Port
If you like to allow all traffic on port 80, you can use this command:
sudo ufw allow to any port 80
Deleting a UFW Firewall Rule
In this section, you will learn how to Delete a rule that is saved in UFW. You can use the "delete" command to delete the ufw rule. Please type the command "ufw delete" followed by the option that you want to be deleted, allow or deny.
Here are some examples:
Deleting the allow SSH rule with service name:
sudo ufw delete allow ssh
Result:
Rule deleted
Rule deleted (v6)
That command will delete the rule "allow ssh". be careful, don't lock yourself out of the server.
Delete the "deny" rule on port 80:
sudo ufw delete deny 80
Result:
Rule deleted
Rule deleted (v6)
If you have a complex rule then there is a simple way to identify and delete the rule by its rule ID. Run the following command to get a list of all rules with their ID's:
sudo ufw status numbered
Result:
Status: active

     To                         Action      From
     --                         ------      ----
[ 1] 22/tcp                     ALLOW IN    Anywhere
[ 2] 22/tcp (v6)                ALLOW IN    Anywhere (v6)
Now delete the SSH rule for IPv6 only by using the number of the rule:
sudo ufw delete 2
Disable and Reset UFW
If you want to turn off UFW without deleting your rules, you can use "disable" command:
sudo ufw disable
Result:
Firewall stopped and disabled on system startup
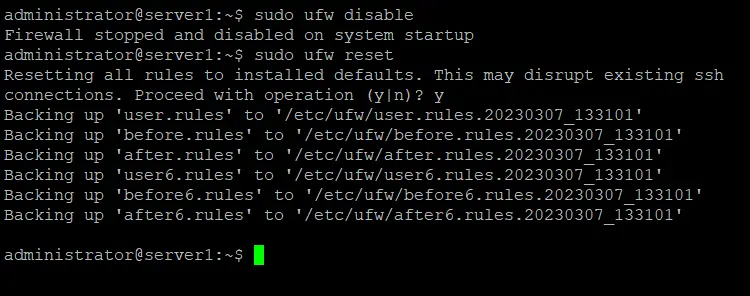
If you want to turn off UFW completely and delete all the rules, you can use "reset" command:
sudo ufw reset
Result:
Resetting all rules to installed defaults. This may disrupt existing ssh
connections. Proceed with operation (y|n)? y
Backing up 'after6.rules' to '/etc/ufw/after6.rules.20150918_190351'
Backing up 'user.rules' to '/lib/ufw/user.rules.20150918_190351'
Backing up 'after.rules' to '/etc/ufw/after.rules.20150918_190351'
Backing up 'before.rules' to '/etc/ufw/before.rules.20150918_190351'
Backing up 'before6.rules' to '/etc/ufw/before6.rules.20150918_190351'
Backing up 'user6.rules' to '/lib/ufw/user6.rules.20150918_190351'
Conclusion
UFW (Uncomplicated Firewall) is the default firewall configuration tool in Ubuntu. UFW commands are similar to English, making them easy to use and remember. This UFW tutorial is a guide to get started with this nice firewall tool if you want to know more about UFW, you can go to the ubuntu wiki or ufw-manpage.

