How to Create Locally Trusted SSL Certificates with mkcert on Ubuntu 20.04
Mkcert is a free, simple, and very useful tool that allows you to create a locally trusted certificate without buying it from the real CA. Developers usually work on the local system and it is always impossible to use the trusted certificate from CA on localhost. Mkcert allows you to manage your own certificates without any hassle.
In this post, we will show you how to create a trusted SSL certificate for local development using Mkcert on Ubuntu 20.04.
Prerequisites
- A system running Ubuntu 20.04 Desktop.
- A root password is configured on the server.
Getting Started
First, update the system packages to the updated version by running the following command:
apt-get update -y
Once all the packages are updated, you can proceed to the next step.
Install Mkcert
Before installing the Mkcert utility, you will need to install the required packages to your server. You can install it with the following command:
apt-get install wget libnss3-tools
Once all the packages are installed, download the latest version of Mkcert from Github.
wget https://github.com/FiloSottile/mkcert/releases/download/v1.4.3/mkcert-v1.4.3-linux-amd64
After downloading Mkcert, move the downloaded binary to the system path:
mv mkcert-v1.4.3-linux-amd64 /usr/bin/mkcert
Next, set the execution permission to the mkcert:
chmod +x /usr/bin/mkcert
Next, verify the Mkcert version with the following command:
mkcert --version
You should see the following output:
v1.4.3
Generate Local CA
Now, run the following command to generate a local CA certificate:
mkcert -install
You should see the following output:
Created a new local CA ????
The local CA is now installed in the system trust store! ??
The local CA is now installed in the Firefox and/or Chrome/Chromium trust store (requires browser restart)! ????
You can check the path of the CA certificate using the following command:
mkcert -CAROOT
You should see the following output:
/root/.local/share/mkcert
Generate a Certificate for Local Website
Next, you can generate the certificate and key file for your locally hosted website using the following command:
mkcert app.example.com localhost 127.0.0.1 ::1
You should see the following output:
Created a new certificate valid for the following names ????
 - "app.example.com"
 - "localhost"
 - "127.0.0.1"
 - "::1"

The certificate is at "./app.example.com+3.pem" and the key at "./app.example.com+3-key.pem" ?

It will expire on 1 November 2023 ????
Configure Nginx to Use the Generated Certificate
Next, you will need to configure the Nginx webserver to use the generated certificates.
First, copy the generated certificate files to the /etc/ssl/ directory:
cp app.example.com+3* /etc/ssl/
Next, set proper ownership to the Nginx web root directory:
chown -R www-data:www-data /var/www/html/
Next, create an Nginx virtual host configuration file with the following command:
nano /etc/nginx/conf.d/app.conf
Add the following lines:
server {
   listen 80;
   server_name app.example.com;
   root /var/www/html;
}

server {
   listen *:443 ssl;
   root /var/www/html;
   server_name app.example.com;
   ssl_certificate /etc/ssl/app.example.com+3.pem;
   ssl_certificate_key /etc/ssl/app.example.com+3-key.pem;
}
Save and close the file when you are finished then verify the Nginx for any syntax error:
nginx -t
You should see the following output:
nginx: the configuration file /etc/nginx/nginx.conf syntax is ok
nginx: configuration file /etc/nginx/nginx.conf test is successful
Next, restart the Nginx service to apply the changes:
systemctl restart nginx
Next, edit the /etc/hosts file and bind your app.example.com to your system IP address:
nano /etc/hosts
Add the following lines:
your-server-ip app.example.com
Verify SSL for Your Domain
Now, open your web browser and type the URL https://app.example.com. You should see that your domain is secured with Mkcert.
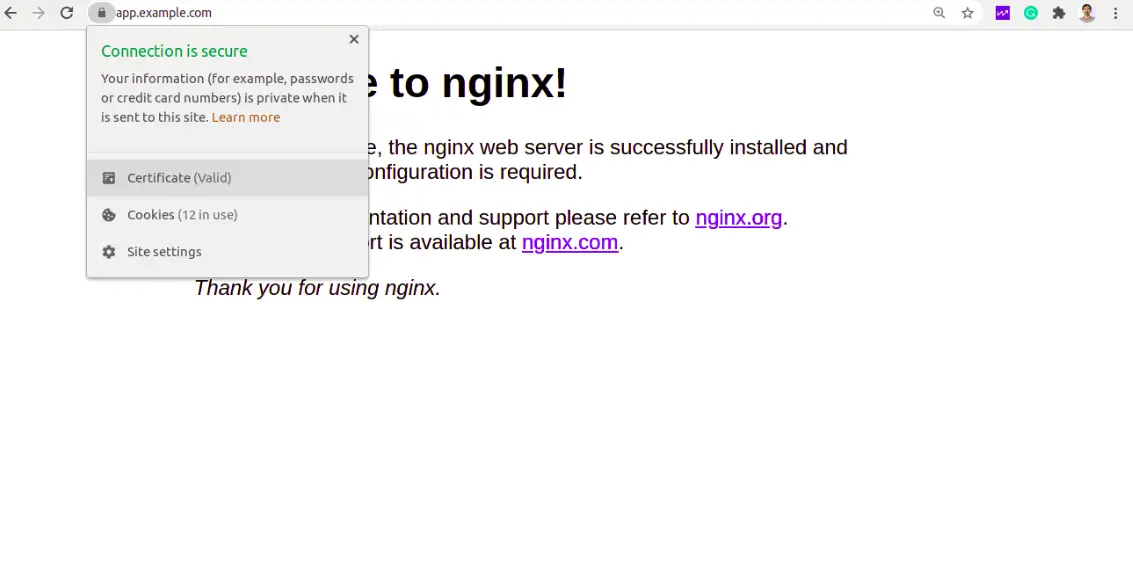
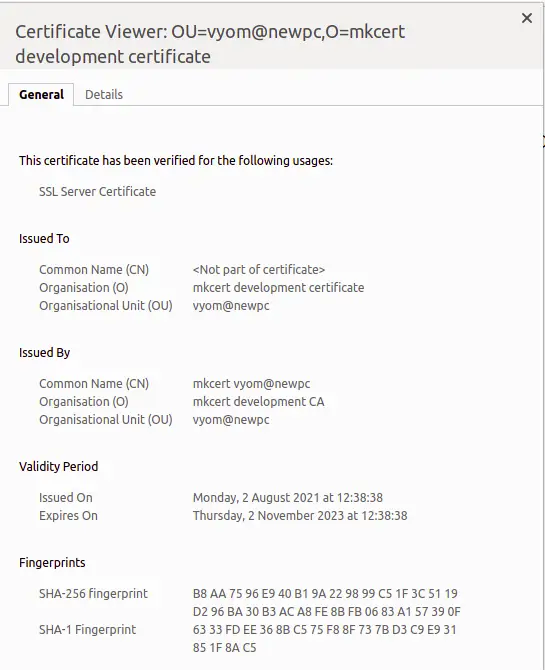
Now, click on the Lock icon. You should see the information about your certificate on the following page:
Conclusion
Congratulations! you have successfully installed Mkcert and create a trusted CA certificate for your local development. I would recommend using Mkcert only for the development environment. It is not recommended for the production environment.

