How to Install Yarn NPM Package Manager on Ubuntu 20.04
This tutorial exists for these OS versions
- Ubuntu 22.04 (Jammy Jellyfish)
- Ubuntu 20.04 (Focal Fossa)
On this page
Yarn is a fast, secure, and reliable NODE package manager that enables you to automate the installation, configuring, updating, and removing of npm packages. Yarn parallelizes the system operations to enhance resource utilization and it caches downloaded packages to save bandwidth. Yarn is secure, it verifies the integrity of each installed package by using checksums before executing its code. It is very reliable due to its detailed but concise lock file format, it ensures that an install that works on a machine will exactly perform in the same way on another machine.
In this tutorial, I will explain the installation procedure of Yarn on Ubuntu 20.04 distribution. Moreover, we will also discuss the yarn basics and some useful commands.
Prerequisites
Superuser or root privileges are needed to install yarn on Ubuntu 20.04 system.
Installation of Yarn on Ubuntu 20.04
The following steps are needed to implement on the system while installing yarn on Ubuntu 20.04 distribution:
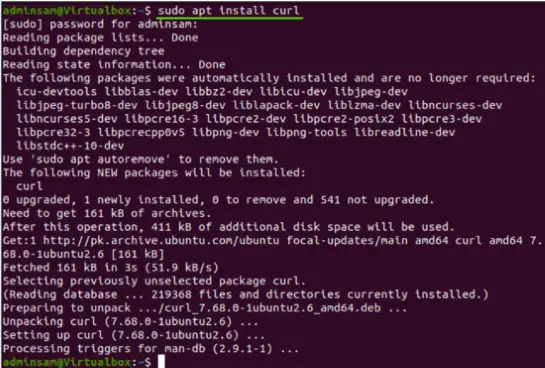
Step 1: Install Curl
The curl command-line tool helps to import the yarn repository’s GPG on your system. By default, the curl is not installed on Ubuntu 20.04 system. So, open the terminal using keyboard short by pressing ‘Ctrl+Alt+t’ and install curl by executing the following command with root privileges:
$ sudo apt install curl
Step 2: Import the GPG key
Once the curl is installed, import the repository’s GPG key on your Ubuntu system to verify the availability of yarn packages. By executing the following command, import the repository’s GPG key:
$ curl -sL https://dl.yarnpkg.com/debian/pubkey.gpg | sudo apt-key add -
Step 3: Add and Enable official Yarn repository
Before installing yarn, add and enable the official yarn Apt repository on your Ubuntu 20.04 system by running the below-mentioned command:
$ echo "deb https://dl.yarnpkg.com/debian/ stable main" |
sudo tee /etc/apt/sources.list.d/yarn.list

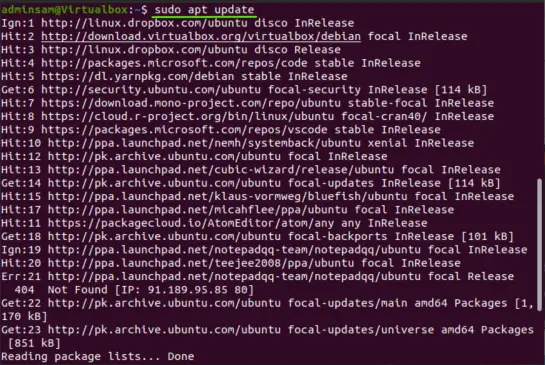
Step 4: Update system cache
Update or refresh the system’s apt repository by executing the following command:
$ sudo apt update
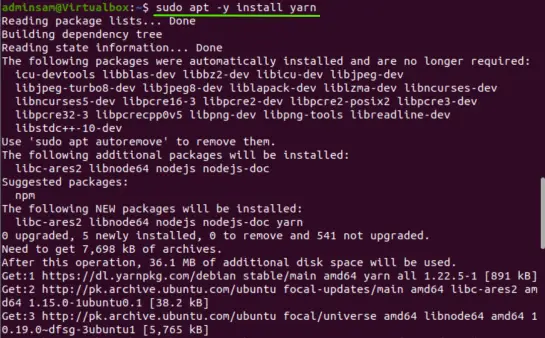
Step 5: Install Yarn
Once apt repository packages are updated, run the below-given command to install yarn on Ubuntu 20.04 system:
$ sudo apt -y install yarn
After executing the above-mentioned command, the new packages of yarn including node js will install on this system as follows:
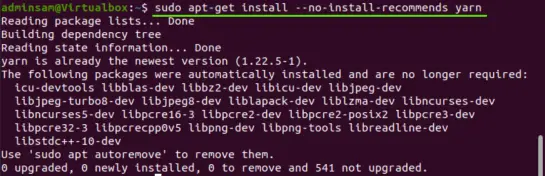
If you already installed node js using the nvm then, skip the installation of node js packages and use the following command to install yarn:
$ sudo apt install --no-install-recommends yarn
After completing the yarn installation, by executing the following terminal command, check the installed Yarn application version:
$ yarn --version
The installed yarn version shows on the terminal as follows:
![]()
Congratulations! Installation of yarn is completed on Ubuntu 20.04 system.
Uninstall Yarn from Ubuntu 20.04
After using this software, you can uninstall it from your Ubuntu system by executing the below-given command:
$ sudo apt remove the yarn
In the next article section, we will explain how to use yarn on the Ubuntu 20.04 system.
Using Yarn on Ubuntu 20.04
Once you install yarn on the Ubuntu 20.04 system, you can use and explore more useful yarn commands on your system. Let’s discuss some useful yarn commands which are given below:
Create a new project and initialize Yarn
First, create a new project directory for your software application and navigate into the directory by running the below-mentioned commands:
$ mkdir ~/yarn_project && cd ~/yarn_project
![]()
Now, using the following ‘yarn init’ command, create a new project:
$ yarn init yarn_project
The following number of questions shows on the terminal window, enter the required information as prompted on the screen or leave them as default:
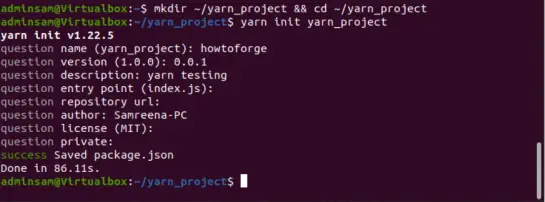
Once you have provided the information, the script automatically creates a ‘package.json’ file that contains the above-mentioned information. You can access and make changes to this file at any time on your system.
Add dependency in a project using yarn
By the use of the following command, add a new project dependency followed by the name o:
$ yarn add [package-name]
For example, to install react package as a dependency using yarn, use the following command:
$ yarn add react
The following output shows that react is installed successfully on your system. The ‘package.json’ and ‘yarn. lock’ will also update after running the above-mentioned command.
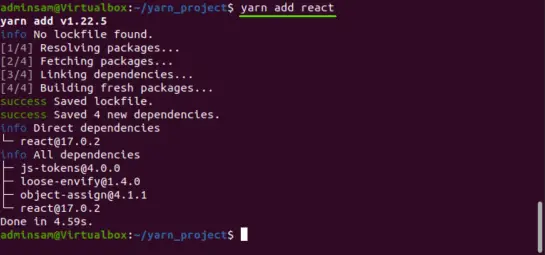
When a user gives only the package name, Yarn will install the latest version of that package by default. To install a specific project dependency, follow the following syntax:
$ yarn add [package-name]@[package-version]
Upgrade Project dependency
By using the following commands, you can upgrade the project dependency or packages:
$ yarn upgrade
$ yarn upgrade [package-name]
$ yarn upgrade [package-name]@[version]
If the user will not provide the name of the package then, it will automatically upgrade all project packages to the latest version according to the specified range that will be given in the ‘package.json’ file. Otherwise, only those packages will upgrade those that are specified with the package name.
Remove Package or dependency
Using the following yarn command, you can easily remove the installed project dependency from your application:
$ yarn remove [package-name]
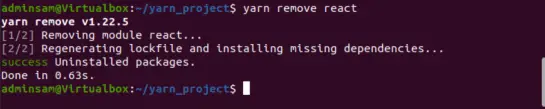
For example, to remove the react package from the project, the above command will change into the following form:
$ yarn remove react
The above command will not only remove the specified package from your project. The ‘package.json’ and ‘yarn. lock’ files will also update in the project.
Install all project dependencies
Execute the following command, to install complete project dependencies of a project that are mentioned in the ‘package.json’ file:
$ yarn install
Or
Just type the ‘yarn’ command on the terminal window to install all project dependencies.
Conclusion
That’s all about the installation of Yarn on Ubuntu 20.04 distribution. You learned how to install the yarn package dependency manager on an Ubuntu system using the command-line. We also explained how to manage project dependencies using yarn. To explore more about the yarn, visit the yarn official documentation on the internet. I hope you learned a lot from this tutorial. Thanks!

