When it comes to using the MySQL/MariaDB Relational Database Management System (RDBMS), not all of us are nerds of the Linux terminal environment. Okay, we could all be command-line environment nerds, however, the feeling of knowing more than one way of achieving something on a Linux environment is a supreme upgrade.
phpMyAdmin is a problem solver for Linux users that want both flexibility and an alternative to interacting with their MySQL/MariaDB databases. You only need a functioning and updated web browser to accommodate the use of phpMyAdmin.
This article guide takes you through safely installing and securing phpMyAdmin as an ideal MySQL/MariaDB database manager in Linux.
Prerequisites
How to Install phpMyAdmin in Linux
The installation of phpMyAdmin alongside the following dependencies is necessary for its normal function as a database manager.
Install phpMyAdmin in Debian, Ubuntu & Mint
$ sudo apt install apache2 ghostscript libapache2-mod-php mysql-server php php-bcmath php-curl php-imagick php-intl php-json php-mbstring php-mysql php-xml php-zip phpmyadmin
Install phpMyAdmin in Fedora, RHEL & CentOS
$ sudo yum install apache2 ghostscript libapache2-mod-php mysql-server php php-bcmath php-curl php-imagick php-intl php-json php-mbstring php-mysql php-xml php-zip phpmyadmin
Install phpMyAdmin in Rocky Linux and AlmaLinux
$ sudo yum install apache2 ghostscript libapache2-mod-php mysql-server php php-bcmath php-curl php-imagick php-intl php-json php-mbstring php-mysql php-xml php-zip phpmyadmin
Install phpMyAdmin in Arch Linux
$ sudo pacman -S apache2 ghostscript libapache2-mod-php mysql-server php php-bcmath php-curl php-imagick php-intl php-json php-mbstring php-mysql php-xml php-zip phpmyadmin
Install phpMyAdmin in openSUSE
$ sudo zypper install apache2 ghostscript libapache2-mod-php mysql-server php php-bcmath php-curl php-imagick php-intl php-json php-mbstring php-mysql php-xml php-zip phpmyadmin
On my end, all these dependencies are already installed, I will jump into installing the phpMyAdmin package.
$ sudo apt install phpmyadmin
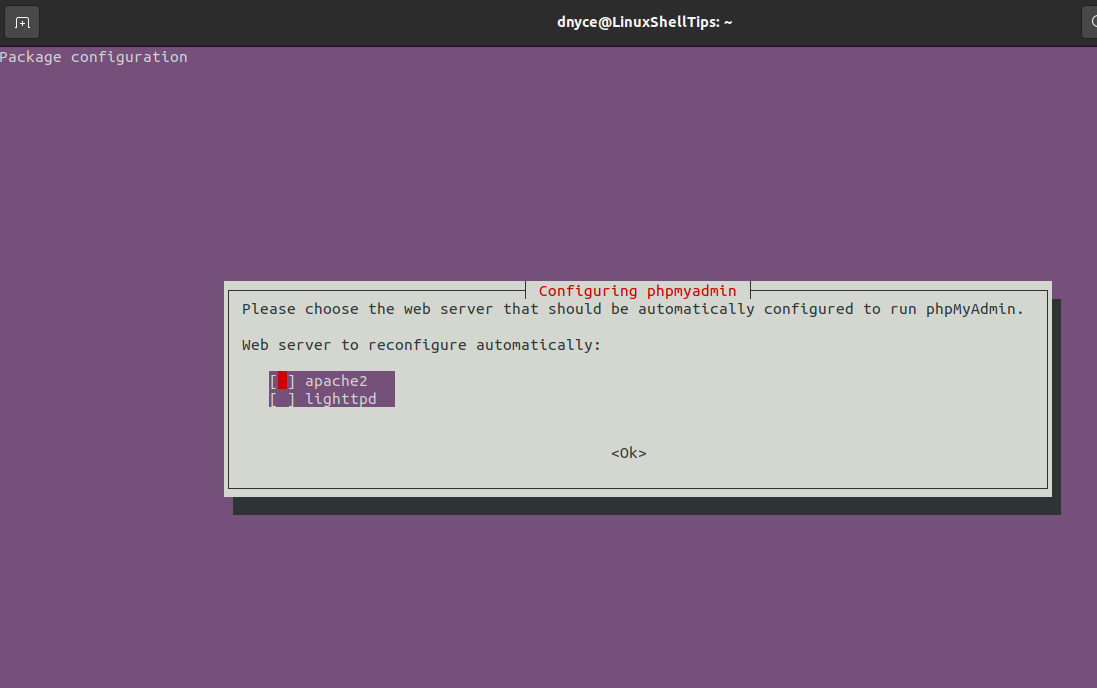
The next installation prompt relates to the automatic setup of the webserver to be used alongside phpMyAdmin. Make sure your choice is Apache2 and hit [Enter] on your keyboard.
PhpMyAdmin will then take some time to configure itself with the Apache2 web server.
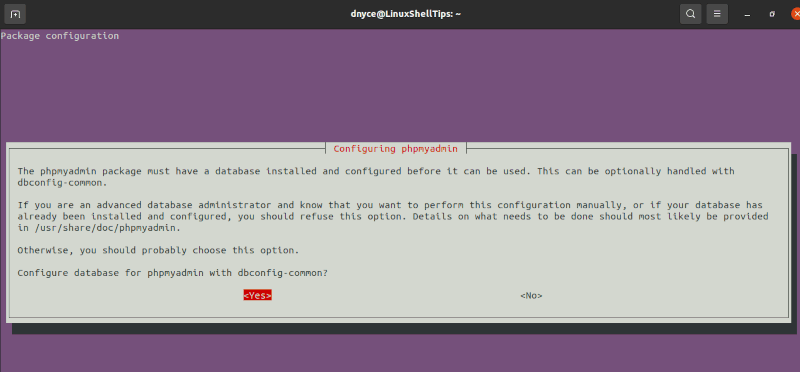
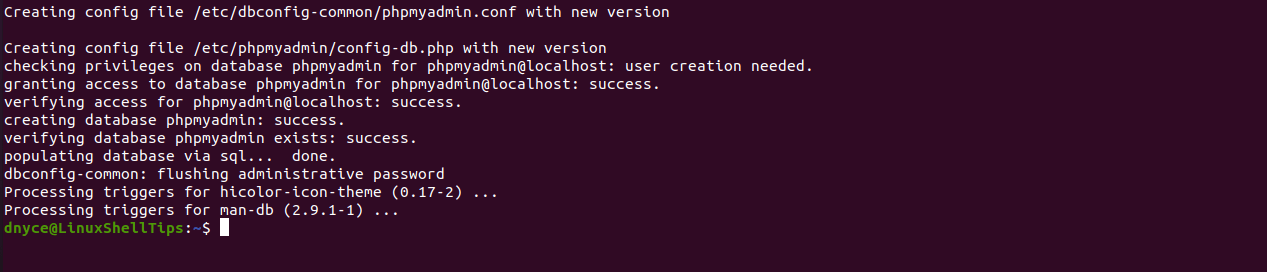
The next step is the configuration of a phpMyAdmin database. PhpMyAdmin must have a database configured for it to act as a frontend DB manager. Choose yes to enable the database configuration steps and press [Enter] on your keyboard to initiate the process.
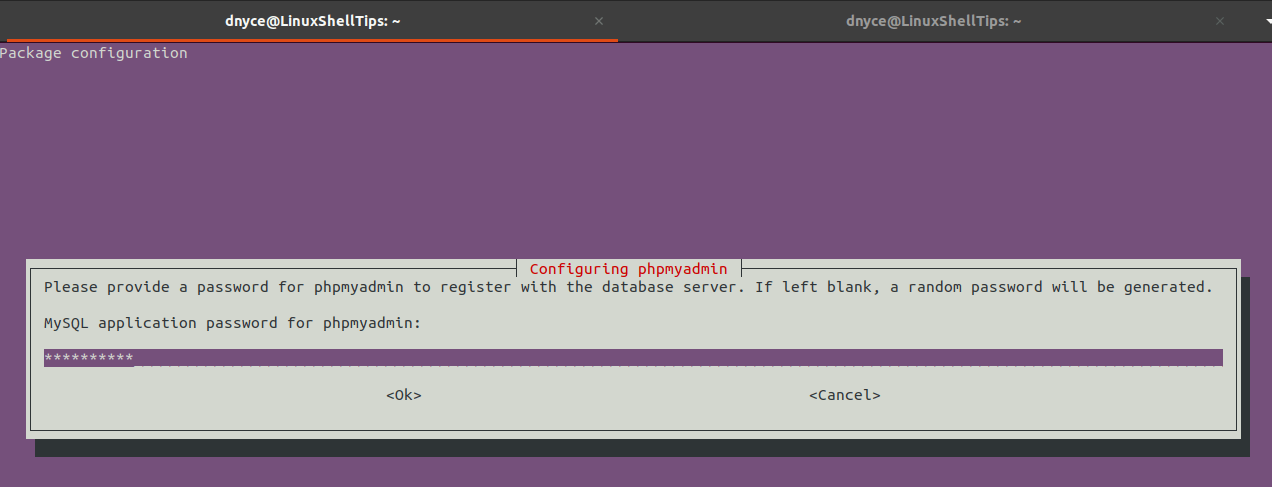
If in case, during this step of setting up your phpMyAdmin MySQL/MariaDB password, you might run into the following error:
ERROR 1045 (28000): Acces denied for user 'root'@'localhost' (using password: NO)
It only implies that you need to temporarily disable the root user password of your MySQL database.
The first step would be to login to your MySQL/MariaDB database from the command line:
$ mysql -u root -p
Afterward, execute the SQL query below to disable the root user password:
SET PASSWORD FOR root@localhost=PASSWORD('');
From here, you should be able to comfortably restart or continue with your phpMyAdmin installation without running into any errors while executing this step.
Afterward, you should use the above SQL query command to re-enstate the MySQL root user with a password credential.
From here, the phpMyAdmin installation process should continue smoothly to completion.
You will need to enable the php module mbstring and reload the apache2 service.
$ sudo phpenmod mbstring
$ sudo systemctl reload apache2
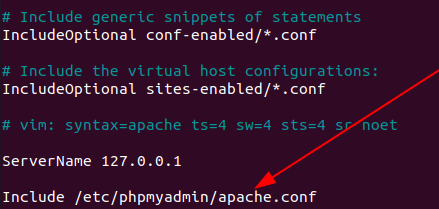
One final step before testing our phpMyAdmin access is making sure that Apache can access the phpMyAdmin site.
$ sudo nano /etc/apache2/apache2.conf
Make sure the entry “Include /etc/phpmyadmin/apache.conf” is present.
Restart the Apache2 service.
$ sudo systemctl restart apache2
Accessing phpMyAdmin from Web Browser
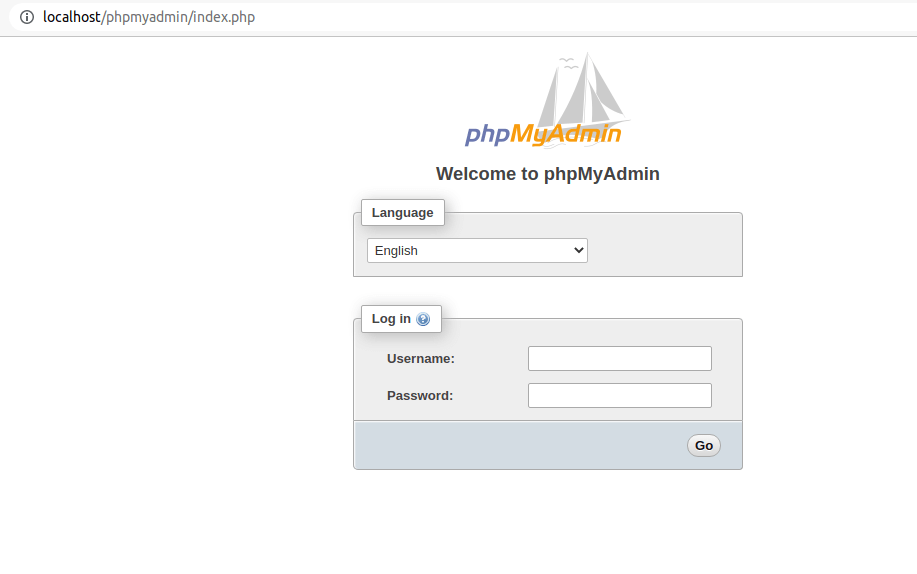
Depending on your domain name, you should access the phpMyAdmin site in the following manner:
http://domain_name_or_ip_address/phpmyadmin
In my case:
http://localhost/phpmyadmin
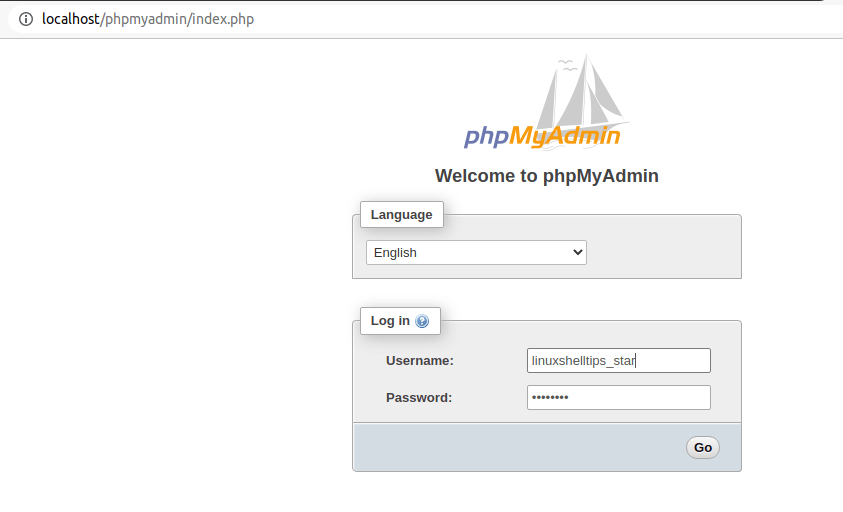
Since the MySQL root user has privileged access to all the databases and their associated actions, we can use it to access the phpMyAdmin site. However, it is advisable to have another dedicated MySQL user for accessing the phpMyAdmin site.
$ mysql -u root -p
MariaDB [(none)]> CREATE USER 'linuxshelltips_star'@'localhost' IDENTIFIED BY 'Pa55word';
MariaDB [(none)]> GRANT ALL PRIVILEGES ON *.* TO 'linuxshelltips_star'@'localhost' WITH GRANT OPTION;
Time to log in to the phpMyAdmin site with this new dedicated user.
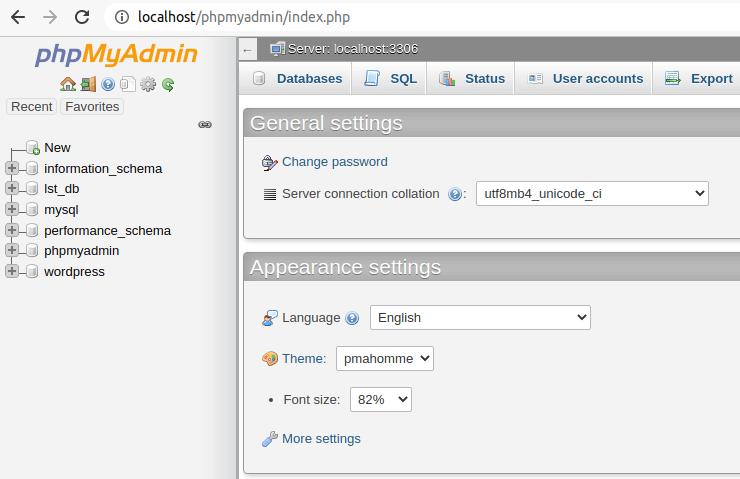
You can now interact with the phpMyAdmin web interface and perform all the database admin actions you would have executed on a MySQL/MariaDB command-line shell
phpMyAdmin adds to your database management experience the use of interactive graphical icons. Your SQL queries are translated into visible button clicks. It is an ideal tool for a database manager that needs a day off.