

This guide will demonstrate how to install Opera Browser on Ubuntu 24.04, 22.04, or 20.04 LTS. It utilizes the command-line terminal with the official Opera APT repository to install the latest version and ensures easy future upgrades. Instructions for installing stable, beta, and developer builds are also covered.
Opera Browser stands out as a feature-rich, efficient web browser favored for its speed, security, and array of built-in tools. Unlike other browsers, Opera offers a free integrated VPN, an ad blocker, and a battery-saving mode, making it a top choice for users seeking a blend of functionality and privacy. Its user-friendly interface and customization options cater to both new and experienced users, making web navigation seamless across various devices.
Here’s what makes Opera stand out:
- Speed: Opera is engineered for efficiency, offering fast load times for all types of web content.
- Security: Opera prioritizes user privacy and security with a free, integrated VPN and ad blocker.
- Customization: Tailor your browsing experience with extensive themes and extensions.
- Cross-platform: Available on multiple operating systems, ensuring a consistent user experience.
- Battery Saver: A unique feature that extends laptop battery life while browsing.
- Free VPN: Enhances privacy by masking your online activities.
- Ad Blocker: Built-in ad blocker to improve webpage load times and eliminate distractions.
- Developer Friendly: Offers a developer version with cutting-edge features.
Transitioning from the introduction to the technical how-to, the following sections will guide you step-by-step through the installation process, making it straightforward and accessible for all users.
Import Opera Browser APT Repository on Ubuntu
Update the Ubuntu System Before Installing Opera Browser
Before diving into the process, ensuring that your Ubuntu system is current with all available packages is essential. This ensures compatibility and reduces potential conflicts during the installation of the Opera Browser.
Open your terminal and run the following command:
sudo apt updateAfter checking for updates, proceed to upgrade any packages that might be outdated:
sudo apt upgradeSetting Up Required Packages for Opera Browser Installation
Now, it’s time to ensure your system has the necessary dependencies for Opera Browser:
sudo apt install dirmngr ca-certificates software-properties-common apt-transport-https curl -yThese packages are foundational and frequently found across many Linux distributions.
Importing Opera Browser’s GPG Key
To ensure the authenticity of the Opera Browser packages, we’ll import its GPG key with the following command:
curl -fsSL https://deb.opera.com/archive.key | gpg --dearmor | sudo tee /usr/share/keyrings/opera.gpg > /dev/nullThis security measure ensures that the software you’re installing is genuine and hasn’t been tampered with.
Adding Opera Browser APT Repository to Your Ubuntu System
Finally, we’ll add the Opera Browser’s APT repository to our system:
echo deb [arch=amd64 signed-by=/usr/share/keyrings/opera.gpg] https://deb.opera.com/opera-stable/ stable non-free | sudo tee /etc/apt/sources.list.d/opera.listThis lets your system recognize and fetch Opera Browser packages directly from its official source.
Install Opera Browser on Ubuntu via APT Commands
Update and Install Opera Browser – stable build (recommended)
First, update your apt repository index to reflect the new repository changes. This is done with the following apt update command:
sudo apt updateNow install the software with the following command:
sudo apt install opera-stableDuring installation, you might notice a prompt asking if you wish to configure and allow for more recent version upgrades by adding Opera’s repository file to the “/etc/apt/sources.list.d/” directory.
Note: You must not select ‘yes’ and instead select ‘no’. You’ve already imported the necessary repository list earlier. The method employed by Opera is a standard procedure for matching the GPG key with the repository to ensure the software’s authenticity and integrity.
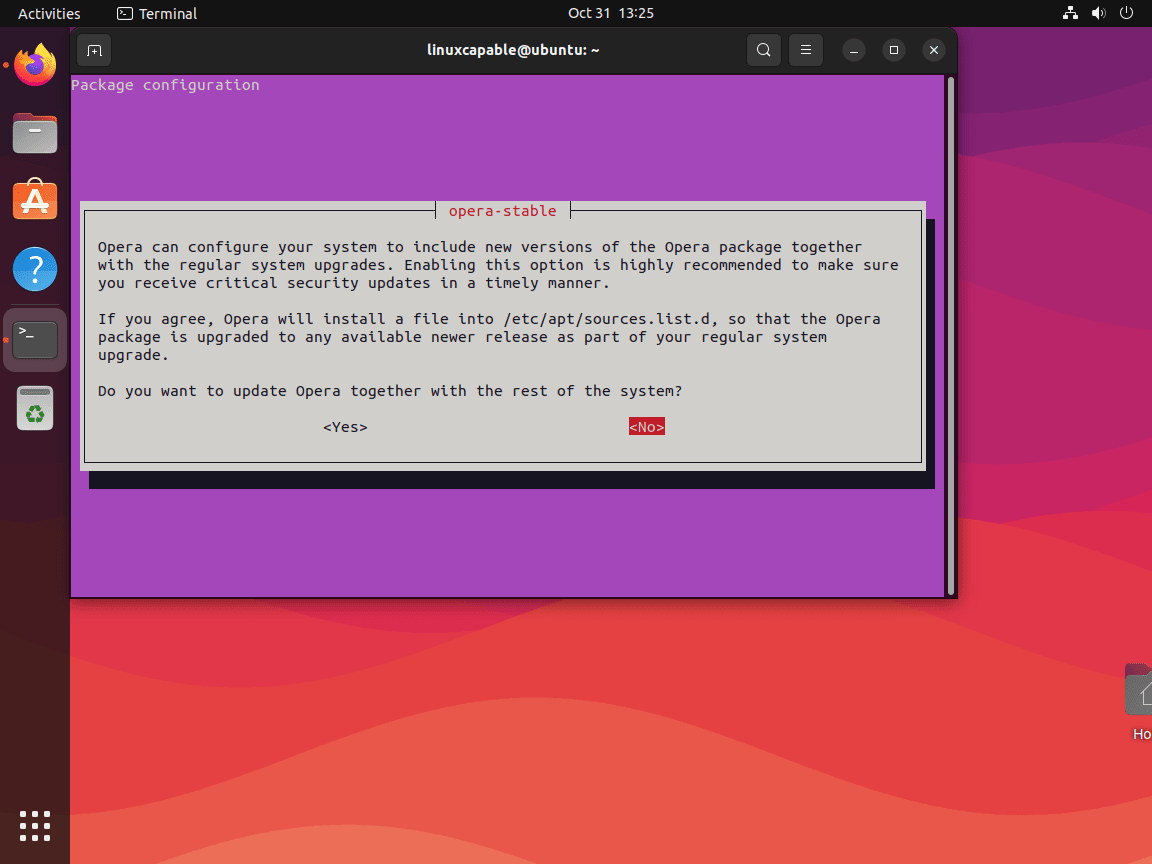
Note: You will be prompted to do this for each version stable, beta, and developer, so select no every time.
Once installed, confirm the version of Opera Browser installed:
opera --versionThis will also verify the installation was successful.
Install Opera Browser Beta and Developer Builds
If you’re interested in exploring the cutting-edge features of Opera, you might want to consider installing its Beta or Developer builds. These builds are designed for users who wish to test the latest functionalities before rolling out to the general public. One of the great things about Opera’s various builds is that they coexist independently. This means you can install and use the Stable, Beta, and Developer builds concurrently on the same system without conflicts.
Install Opera Browser Beta Build
To get started with the Beta build, execute the following command:
sudo apt install opera-beta After installation, you might want to check the installed version to confirm that everything went smoothly. To do this, run:
opera-beta --versionInstall Opera Browser Developer Build
For those eager to experience the absolute latest features and developments from the Opera team, the Developer build is the way to go. To install it, use the following command:
sudo apt install opera-developerJust as with the Beta build, you can verify the successful installation of the Developer build by checking its version:
opera-developer --versionLaunch Opera Browser on Ubuntu via GUI or CLI Methods
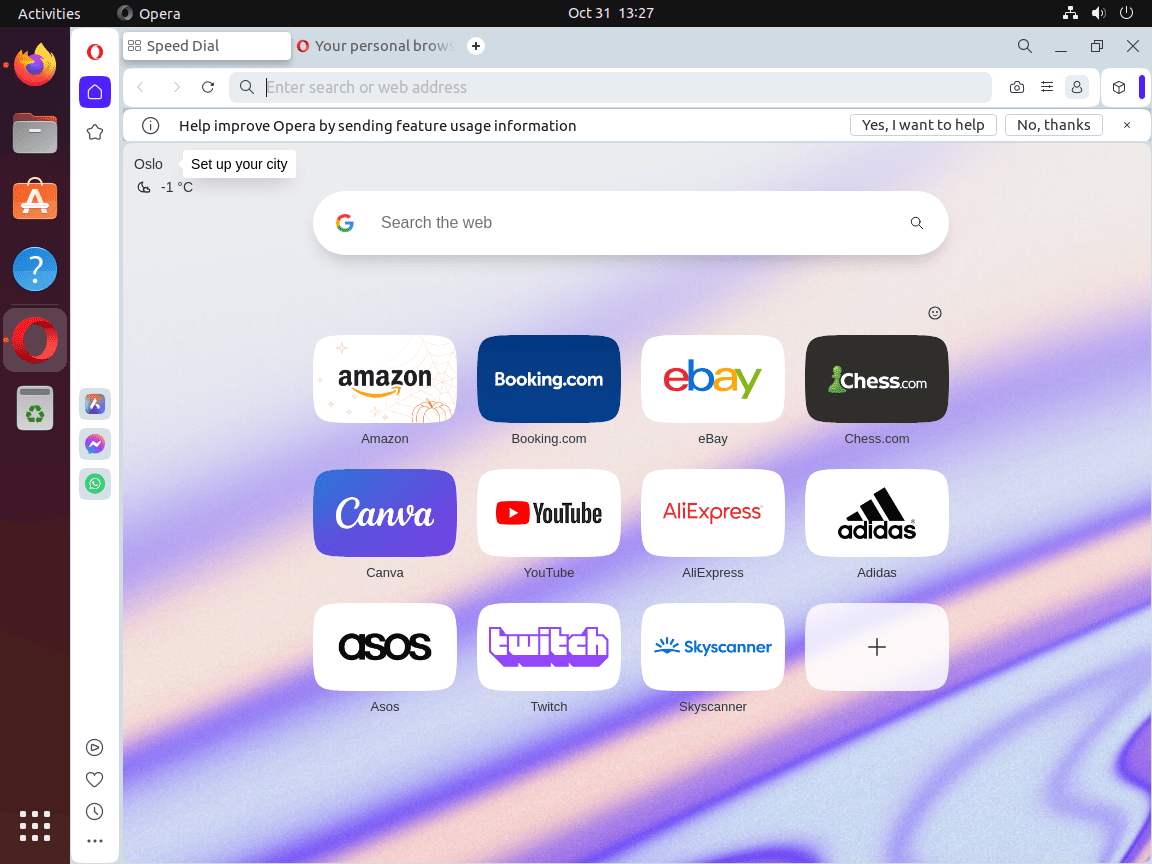
Now that you’ve successfully installed the Opera Browser on your Ubuntu Linux system let’s discuss how to launch it. Understanding the different ways to access your newly installed browser can enhance your user experience.
Terminal Commands for Launching Opera Browser
If you’re already in the terminal and wish to launch the Opera Browser, input the relevant command based on the version you installed:
operaFor the beta version:
opera-betaAnd for the developer version:
opera-developerWhile using the terminal is efficient for some, it might not be the most convenient method for daily use.
Accessing Opera from the Desktop
For a more direct approach, especially if you’re not working in the terminal, you can easily find and launch the Opera Browser from your desktop environment:
Navigate to Applications, use the Search function, and then select Opera {version} from the list of applications.
This method provides a straightforward way to access Opera, ensuring you can browse seamlessly without diving back into the terminal.
First-Time Tips with Opera Browser on Ubuntu
Now that you have successfully installed Opera Browser on Ubuntu, diving into its features and customization options can significantly enhance your browsing experience. Tailoring Opera to fit your preferences and understanding its unique capabilities will ensure you get the most out of your new browser. Here are essential tips organized into four sections to guide you through this process:
Maximizing Efficiency with Opera on Ubuntu
Optimizing your workflow is crucial for a productive browsing experience. Here are some tips to help you maximize efficiency:
- Utilize Workspaces: Opera allows the creation of multiple workspaces, enabling you to organize tabs by category (e.g., Work, Personal, Research). This helps in managing various projects without cluttering your browser.
- Custom Keyboard Shortcuts: Customize keyboard shortcuts through
Settings > Advanced > Browser > Shortcuts. Tailoring shortcuts for frequently used actions can save time and enhance your browsing speed. - Speed Dial Customization: Opera’s Speed Dial feature acts as a customizable homepage, allowing quick access to your favorite sites. You can add, organize, and group sites based on your preferences.
- Mouse Gesture Navigation: Enable mouse gestures under
Settings > Advanced > Browser > Shortcutsfor quicker navigation, such as back, forward, open new tab, etc., without relying on buttons or keyboard shortcuts.
Enhancing Security and Privacy in Opera on Ubuntu
Opera includes several built-in features to improve your online security and privacy:
- Activate the Free VPN: Opera comes with a built-in VPN that can be enabled under
Settings > Advanced > Features > VPN. This enhances your privacy by hiding your IP address and encrypting your network data. - Use the Ad Blocker: Enable Opera’s built-in ad blocker from
Settings > Advanced > Features > Block adsto not only speed up your browsing by eliminating ads but also reduce the risk of malware and tracking. - Manage Cookies and Site Data: Control your privacy by managing cookies and site data under
Settings > Privacy & Security. Here, you can decide which cookies to keep, block, or delete upon exiting the browser. - Private Browsing Mode: Use Opera’s Private Browsing mode when you want to surf the web without leaving a trace on your computer.
Optimizing Opera for Performance on Ubuntu
Ensure Opera runs smoothly on Ubuntu with these optimization tips:
- Disable Unnecessary Extensions: While extensions add functionality, they can also slow down your browser. Manage your extensions under
Extensions > Manage Extensionsand disable those you do not frequently use. - Manage Background Tabs: Opera’s background tab management can help conserve resources. You can put inactive tabs to sleep, reducing their resource usage, under
Settings > Advanced > Features > Battery saver. - Enable Hardware Acceleration: If you have a compatible system, enabling hardware acceleration under
Settings > Advanced > System > Use hardware acceleration when availablecan improve performance.
Leveraging Opera’s Unique Features on Ubuntu
Opera is packed with unique features that can enhance your browsing experience:
- Snapshot Tool: Quickly capture screenshots of web pages directly from the browser using the Snapshot tool, accessible from the sidebar or via keyboard shortcuts.
- Integrated Messengers: Opera includes built-in support for messengers like WhatsApp, Telegram, and Facebook Messenger, directly accessible from the sidebar for easy multitasking.
- Video Pop-out: Watch videos in a floating window while you continue to browse other tabs with the video pop-out feature.
- Personal News: Customize your news feed in Opera for a personalized news experience, accessible directly from the browser’s start page.
Exploring and utilizing these tips, you can tailor Opera Browser on Ubuntu to fit your needs perfectly, making your web browsing more efficient, secure, and enjoyable.
Management Commands for Opera Browser on Ubuntu
Update Opera Browser
To start, open your terminal. Here, you’ll execute the APT update command. This command scans your system for any available updates, ensuring all your installed applications are up-to-date.
sudo apt updateYou can upgrade your system once the update command has completed its scan. To do this, run:
sudo apt upgradeThis command will upgrade all outdated packages on your system. However, if you prefer to update the Opera Browser package specifically, you can do so by running the following command:
sudo apt upgrade opera-stableNote that if you have installed other versions of Opera Browser, such as Beta or Developer, you can upgrade them by appending “-beta” or “-developer” to the command, respectively.
Remove Opera Browser
Opera Browser APT Remove Commands
First, identify the version of Opera Browser you have installed. Once you’ve determined the version, run the corresponding command to remove it:
sudo apt remove opera-stablesudo apt remove opera-betasudo apt remove opera-developerRemove Opera APT Repository and GPG Key
After removing the Opera Browser package, delete the Opera APT repository from your system. This step is significant if you no longer wish to install or re-install Opera Browser in the future. Run the following command to remove the repository:
sudo rm /etc/apt/sources.list.d/opera.listOptionally, you can also delete the GPG key associated with the Opera Browser package:
sudo rm /usr/share/keyrings/opera.gpgThis step is optional and depends on your future plans for using Opera Browser on your system.
Fixing Multiple Opera Sources.list on Ubuntu
Identifying and Resolving Duplicate Sources.list Entries
If you chose “YES” while installing Opera Browser, you might have inadvertently imported multiple sources.list files. This situation becomes evident when you run an update command and notice your terminal cluttered with duplicate sources. Although this doesn’t hinder the update process, addressing the issue with a cleaner system is preferable.
Clearing Opera Browser Duplicate Entries
To rectify this, begin by removing the additional entries, ensuring to retain the original:
sudo rm /etc/apt/sources.list.d/opera*Re-Adding Single Opera Repository
Next, re-introduce the single, necessary repository:
echo deb [arch=amd64 signed-by=/usr/share/keyrings/opera.gpg] https://deb.opera.com/opera-stable/ stable non-free | sudo tee /etc/apt/sources.list.d/opera.listExecuting this command re-installs all three versions of the browser: stable, beta, and developer. This step assumes you initially installed all three during the tutorial.
Refresh APT Index Cache
Finally, ensure to update your system to apply the changes:
sudo apt updateFollowing these steps, you resolve the issue of duplicate sources, leading to a cleaner update process. Moreover, updates for all three Opera Browser versions will be received from a single source.list instead of three. In the event of accidental deletion of the original entries, refer back to this tutorial to copy the necessary import directory code.
Resolving Opera Browser’s Language Switching Issue
Many users who prefer languages other than English face difficulties when changing the language in Opera Browser. This is because the browser tends to exhibit issues with language switching. I’ve received several personal emails addressing this concern.
Setting the Opera Browser Language
To resolve this issue, you must set the browser’s language and include a launch command in the application file, which requires modification. Depending on the language and the version of Opera you are using (if it’s the English version), you might need to install additional language packs. Below is a comprehensive guide to help you through this process.
Modifying the Application File
Open your terminal and use the following command as an example:
sudo sed -i 's/Exec=opera %U/Exec=opera --lang={LANGUAGE CODE} %U/g' /usr/share/applications/opera.desktopIn this command, replace {LANGUAGE CODE} with the appropriate code for your desired language (e.g., ‘de’ for German, ‘es’ for Spanish, ‘ja’ for Japanese, etc.). This modification is for the Opera stable version. If you have installed the beta or developer versions, you need to adjust their application files similarly:
- For Opera beta:
/usr/share/applications/opera-beta.desktop - For Opera developer:
/usr/share/applications/opera-developer.desktop
Installing Language Packs (If Necessary)
If you have installed the English version of Opera and are experiencing difficulties in switching languages, you might need to install additional language packs using the following command:
sudo apt install $(check-language-support -l {language extension})Here’s an example for German:
sudo apt install $(check-language-support -l de)Applying Language Settings
Below, I’ve provided commands for some of the most popular languages for easy copy-pasting. Please note that these commands are for the Opera stable version. As mentioned earlier, you need to adjust the commands for the beta or developer versions. Ensure that you’ve also added the language on the browser’s GUI side.
German
sudo sed -i 's/Exec=opera %U/Exec=opera --lang=de %U/g' /usr/share/applications/opera.desktopFrench
sudo sed -i 's/Exec=opera %U/Exec=opera --lang=fr %U/g' /usr/share/applications/opera.desktopItalian
sudo sed -i 's/Exec=opera %U/Exec=opera --lang=it %U/g' /usr/share/applications/opera.desktopJapanese
sudo sed -i 's/Exec=opera %U/Exec=opera --lang=ja %U/g' /usr/share/applications/opera.desktopKorean
sudo sed -i 's/Exec=opera %U/Exec=opera --lang=ko %U/g' /usr/share/applications/opera.desktopSpanish
sudo sed -i 's/Exec=opera %U/Exec=opera --lang=es %U/g' /usr/share/applications/opera.desktopPortuguese
sudo sed -i 's/Exec=opera %U/Exec=opera --lang=pt %U/g' /usr/share/applications/opera.desktopPolish
sudo sed -i 's/Exec=opera %U/Exec=opera --lang=pl %U/g' /usr/share/applications/opera.desktopConclusion
Throughout this guide, we’ve walked you through the steps to install Opera Browser on Ubuntu, covering everything from utilizing the official Opera APT repository for the latest, stable, beta, and developer builds to a range of tips aimed at enhancing your browsing experience on Ubuntu. We tackled fixing multiple source issues and even explored how to install additional language packages, ensuring you’re fully equipped to customize Opera to your liking. As a final note, remember that diving into Opera’s settings and features can greatly improve your browsing efficiency and security. Give those customizations a go, and don’t shy away from experimenting with different settings to see what works best for you. Opera on Ubuntu offers a flexible and feature-rich browsing experience, and now you’re all set to make the most of it.