
Redis is an open-source, in-memory data structure store widely used as a database, cache, and message broker. Its high performance and flexibility make it a popular choice in various tech sectors. If you want to install Redis on Debian 12 Bookworm, Debian 11 Bullseye, or Debian 10 Buster, this guide is for you.
Key Features of Redis
- Fast Data Access: Redis stores data in memory, resulting in quick retrieval. This makes it ideal for caching applications.
- Multiple Data Structures: Unlike traditional tables-based databases, Redis supports various data structures like strings, hashes, lists, and sets.
- Real-Time Messaging: Redis offers Publish/Subscribe messaging patterns, enabling real-time application communication.
- Data Persistence: While primarily an in-memory database, Redis allows for periodic data saving on disk, offering a balance between speed and durability.
- Scalability and Availability: Features like replication, sharding, and Redis Sentinel ensure high availability and scalability across multiple nodes.
Common Use-Cases for Redis
- Caching: Redis is commonly used to cache frequently accessed data, speeding up data retrieval times.
- Session Storage: It’s well-suited for storing user session data, especially in high-traffic web applications.
- Message Queuing: The pub/sub capabilities make Redis an excellent choice for message queuing systems.
Understanding Redis’s capabilities can significantly enhance your technology stack. The upcoming guide will detail how to install Redis on Debian 12 Bookworm, Debian 11 Bullseye, or Debian 10 Buster. We’ll cover two installation methods: one using Debian’s default repository and another using the official Redis repository for the latest version. Both methods will use Command Line Interface (CLI) commands. Stay tuned for the step-by-step instructions.
Pre-installation Steps with Redis Installation on Debian
Step 1: Update Debian System Packages
Before installing Redis or any other software, the initial step is to ensure your system’s packages are up-to-date. This critical preliminary step helps mitigate potential conflicts during the subsequent installation process. It ensures that all system dependencies are current, minimizing potential issues arising from outdated software packages.
In a Debian system, you can do this by running the following command in the terminal:
sudo apt update && sudo apt upgradeLet’s break this command down:
sudo: This prefix allows you to execute commands with superuser or root privileges. Essentially, it’s saying, “execute the following command as an administrator”.apt update: This command updates the list of available packages and their versions but doesn’t install or upgrade any packages.&&: This logical operator in the Bash shell allows you to execute multiple commands in one line. The second command will only run if the first command is successful.apt upgrade: This command installs newer versions of the packages you have. After updating the list of available packages withapt update, you can upgrade them withapt upgrade.
Step 2: Install Required Packages for Redis Installation on Debian
Once the Debian system packages are up-to-date, you’ll need to install specific software packages necessary for the Redis installation.
You can install these packages by running the following command:
sudo apt install software-properties-common apt-transport-https curl ca-certificates -yLet’s dissect this command to understand it better:
sudo apt install: This command is used to install packages on your Debian system.software-properties-common: This package provides specific scripts for securely managing software and source code.apt-transport-https: This package is necessary for the apt package manager to retrieve packages over the ‘https’ protocol.curl: This is a command-line tool for transferring data using various network protocols. It helps download files, among other things.ca-certificates: This package is necessary to verify the security of websites. It provides a set of Certifying Authority (CA) certificates.-y: This option automatically answers ‘yes’ to any prompts during installation.
To recap, this command uses root privileges (sudo) to install (apt install) the necessary software packages, ensuring smooth and secure data transfer (curl and apt-transport-https) and secure website verification (ca-certificates), all while managing software and source code securely (software-properties-common).
Install Redis on Debian 12, 11 or 10
Option 1: Install Redis with APT Debian Repository
While Debian includes Redis in its default software offering, the version may not be the most recent. Debian favors stability and generally provides security or significant updates only. This may make the Redis version on Debian older but arguably more stable. This might be the perfect route if your intended usage of Redis doesn’t demand the most recent features.
To install Redis via this method, you’ll need to execute the following command in your terminal:
sudo apt install redisThe sudo command provides superuser privileges, while apt install redis installs the Redis software package onto your Debian system.
Option 2: Install Redis with Redis.io APT Repository
The second method might be more appealing for those requiring or desiring the most up-to-date version of Redis. It involves importing the APT repository from the official Redis.io repository. This repository regularly receives bug fixes, security patches, and feature updates.
Step 1: Import the Redis.io Repository on Debian
First, import the GPG key. GPG, or GNU Privacy Guard, helps with secure communication and data storage. The GPG key verifies the data source and ensures no one altered it during download.
Use this command to import the GPG key:
curl -fsSL https://packages.redis.io/gpg | sudo gpg --dearmor -o /usr/share/keyrings/redis-archive-keyring.gpgNext, we import the repository with the following command:
echo "deb [signed-by=/usr/share/keyrings/redis-archive-keyring.gpg] https://packages.redis.io/deb $(lsb_release -cs) main" | sudo tee /etc/apt/sources.list.d/redis.listStep 2: Update Packages Index After Redis.io APT Import
With the new repository added, you’ll need to update your system’s package index to know the packages available from the new source. Do this by running the following command:
sudo apt-get updateStep 3: Install Redis via APT Command on Debian
With everything set up, you can install Redis from the Redis.io repository. If you already had Redis installed from the Debian repository, you may see an upgrade instead. The following command installs Redis, along with the Redis server and tools:
sudo apt install redis redis-server redis-toolsStep 4: Verify Redis Installation
After installing, it’s always a good idea to verify the installation. You can do this with the apt-cache policy command, confirming that you have installed the Redis.io version. Here’s how to use it:
apt-cache policy redis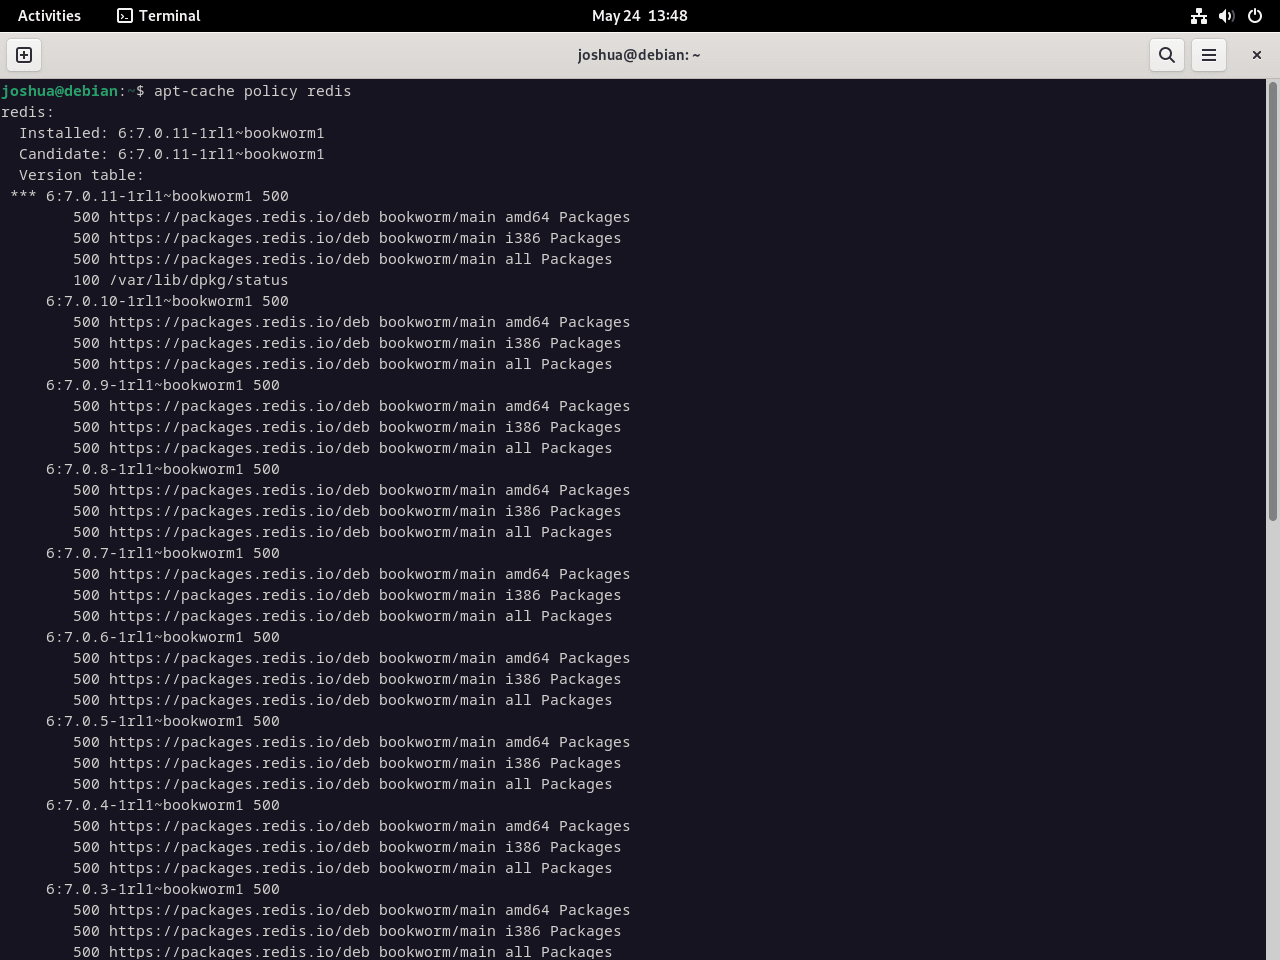
Use the following command to activate the Redis instance and set it to start during system boot:
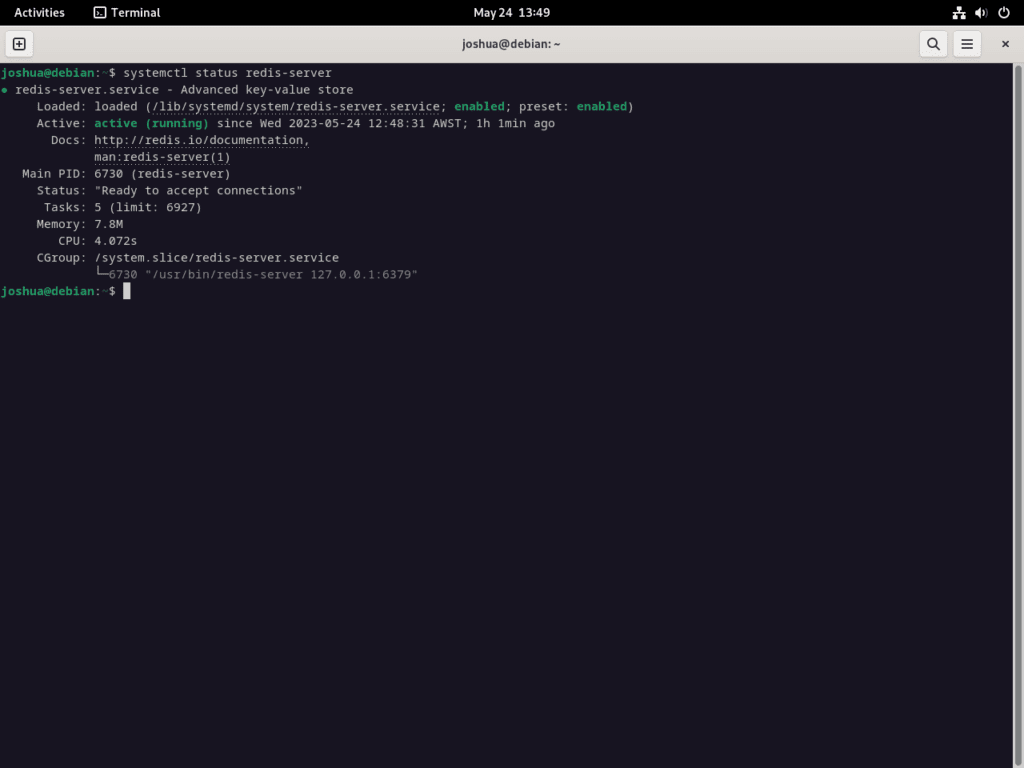
sudo systemctl enable redis-server --nowTo verify that Redis is running without errors, use this command:
systemctl status redis-serverThis command provides information about the redis-server service, which should now be running.
Inspecting Redis: Post-installation Verifications on Debian
Listening Ports
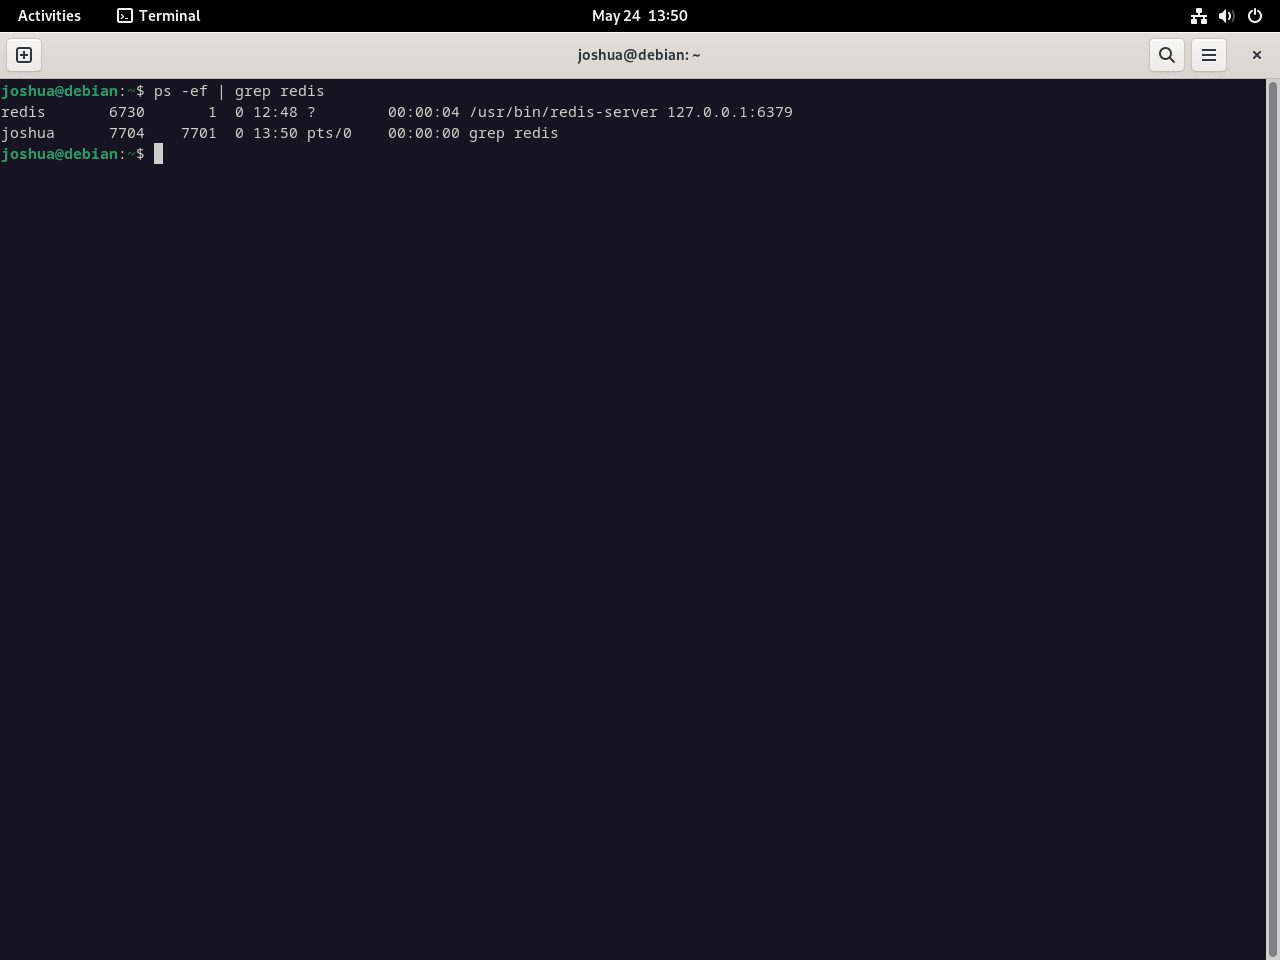
By default, Redis listens on localhost using port 6379. To ensure that Redis is indeed actively listening as expected, use the following command:
ps -ef | grep redisThis command displays running processes involving Redis, which should reflect the listening status of Redis on port 6379.
Ping Testing the Redis Service
A ping test is one of the simplest ways to verify that your Redis service is operational. This will establish a connection to your Redis service, verifying that it’s up, running, and ready to respond to commands.
First, connect to the Redis service with the following command:
redis-cliAfter running this command, your terminal should display 127.0.0.1:6379, indicating that you’re connected to Redis on the localhost. Now, you can ping the Redis service as follows:
ping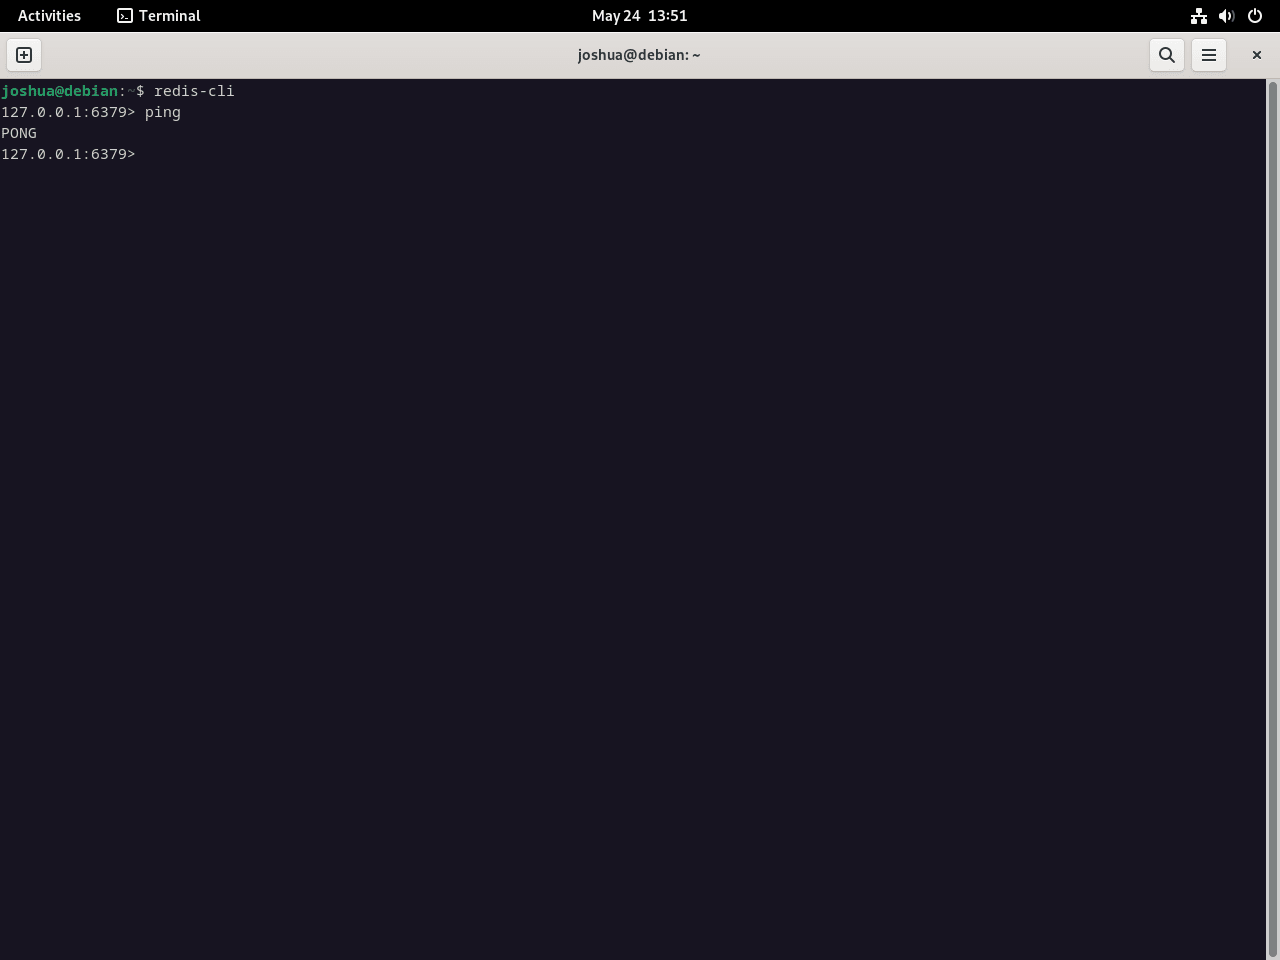
Exiting the Redis Instance
After you complete the verification checks and confirm Redis works correctly, exit the Redis instance by typing:
exitWe have successfully installed Redis on a Debian system, either using the Debian APT repository or the official Redis.io APT repository.
Configure and Setup Redis on Debian 12, 11 or 10
Redis stands out because of its flexibility and ability to fit various needs. This section guides you on adjusting Redis for caching, network access, and adding a password for increased security.
Step 1: Accessing the Redis Configuration File
The journey of tailoring Redis begins with the Redis configuration file located at /etc/redis/redis.conf. You’ll need to open this file using a text editor like nano.
Run the following command to do:
sudo nano /etc/redis/redis.confStep 2: Designating Maximum Memory for Caching
A popular use case for Redis is caching data to boost application performance. To designate a specific quantity of memory for this purpose in Redis, append the following lines after the configuration file:
maxmemory 500mb
maxmemory-policy allkeys-lru
In this scenario, we’ve allocated 500 MB of memory for Redis. Feel free to adjust this quantity based on your server’s specifications and your application’s requirements.
Once the assigned memory reaches capacity, Redis will remove keys following the Least Recently Used (LRU) policy.
Step 3: Setting up Network Access
Redis is set to listen only on the localhost interface by default. You can change this setting for Redis to listen on all interfaces or specific IP addresses/subnets.
First, find line 69 in the configuration file.
Option 1: Listening to All Network Interfaces
To have Redis listen on all network interfaces, you can comment out the bind line by adding a # at the start:
# bind 127.0.0.1 ::1Option 2: Binding to a Specific IP Address or Subnet
To bind Redis to a specific IP address or subnet, replace the bind line with your preferred IP or subnet:
bind 0.0.0.0/0or
bind 192.150.5.0/24When binding Redis to an IP address or subnet, it is strongly recommended to enforce a password for heightened security.
Step 4: Enforcing Password Authentication
To add an extra layer of protection to your Redis instance, you can set a password for authentication.
Search for the line starting with # requirepass (around line 507), uncomment it, and set a strong password:
requirepass YourStrongPasswordHereReplace YourStrongPasswordHere with a sturdy password that includes a mix of uppercase and lowercase letters, numbers, and special symbols.
Step 5: Committing Changes and Restarting Redis
After you’ve made the necessary adjustments to the configuration file, save your changes by pressing Ctrl + O, and then exit the nano editor by pressing Ctrl + X.
Finally, restart the Redis service to enact the new settings:
sudo systemctl restart redisThis command requests the system to halt the Redis service and immediately start it up again, thus ensuring that Redis operates under the new configuration parameters you’ve set.
To ensure that the Redis service was restarted successfully and is running correctly, you can check the status of the service by executing the following command:
sudo systemctl status redisThis command will return information about the Redis service, including its status (active or inactive), uptime, and log messages you may have seen earlier when confirming the installation.
Configure a Firewall for Redis with UFW on Debian 12, 11 or 10
Securing your Redis server requires setting up a robust firewall. Redis doesn’t include a firewall by default. Also, Debian doesn’t offer an out-of-the-box firewall solution unless you’re proficient with iptables. But there’s a straightforward method you can use, even if you’re a beginner. This method involves the Uncomplicated Firewall (UFW), a user-friendly firewall tool.
Step 1: Ensuring UFW is Installed on Debian
First, check if your Debian server has UFW. If it doesn’t, use the following command to install it:
sudo apt install ufw -yIn this command, sudo is used to execute the command with root privileges, apt install is the command to install a package, ufw is the package to be installed, and -y is an option that automatically answers yes to any prompts, thereby allowing the installation to proceed without further user input.
Step 2: Enabling UFW
Once UFW is installed, it must be enabled to start functioning and protecting your system. You can enable UFW with this command:
sudo ufw enableThis command tells UFW to activate and apply any rules you have set or will set.
Step 3: Configuring UFW Rules for Redis on Debian 12, 11 or 10
Now that UFW is activated, you can configure it to protect your Redis server. You might need to set up different firewall rules depending on your specific situation and whether your Redis installation is a standalone server or part of a cluster.
For an Additional Network IP Server Instance
If you have a standalone Redis server that you want to protect with UFW, use this command:
sudo ufw allow proto tcp from <ip address> to any port 6379Here, you replace <ip address> with the IP address of the server from which you want to allow connections. This command tells UFW to allow TCP connections from that IP address to any system on port 6379, the default port for Redis.
For a Cluster Network with Multiple Instances
If you are working with a cluster of Redis servers, you can allow connections from an entire subnet. To do this, use the following command:
sudo ufw allow proto tcp from <ip address>/24 to any port 6379In this command, replace <ip address> with the IP address of the subnet from which you want to allow connections. Note that this command implies significant trust in all the devices on this subnet, as it opens up the Redis server to all of them. Therefore, only use this command if you are sure that your internal network is secure.
Step 4: Verifying the UFW Configuration
After configuring your UFW rules, confirming that they work as intended is essential. Just as you pinged your Redis server at the beginning of this guide to ensure it was operational, you can also test your new firewall rules. You can do this using the redis-cli command:
redis-cli -h <ip address> pingAgain, replace <ip address> with the IP address of your Redis server. If your firewall rules have been set up correctly and the Redis server is operating as it should, the output from this command should be a simple pong.
In this command, redis-cli is the command-line interface for Redis, -h specifies the host (your server’s IP address), and ping is a command to check connectivity to the Redis server.
Step 5: Interpreting the Output
The output from the redis-cli command will help you confirm if the firewall rules are working as expected.
pongThis output is a good sign. A pong response indicates that the Redis server is accessible and ready to accept commands. It confirms that the firewall rules you’ve set up in UFW work correctly, allowing the server to communicate as intended.
Additional Redis Configuration Examples on Debian 12, 11, or 10
As discussed earlier, Redis is a flexible in-memory data store with many features. It can be used for caching and messaging. Changing its configuration file allows you to make Redis work how you want. Here, we will show more configuration options for Redis.
Step 1: Setting the Key-Value Expiration Policy
To set a default time-to-live (TTL) for keys in Redis, change the maxmemory-policy and maxmemory-samples settings in the configuration file. Use the following command to open the file:
sudo nano /etc/redis/redis.confLook for the maxmemory-policy setting and configure it to your liking. For instance, if you wish to establish a policy that expires keys according to the Least Recently Used (LRU) algorithm, update the configuration as such:
maxmemory-policy volatile-lruNext, locate the maxmemory-samples setting. This will dictate the number of samples that Redis should review to arrive at the eviction decision:
maxmemory-samples 5Step 2: Enabling TCP Keepalive
Activating TCP keepalive can aid in detecting and closing idle connections, which in turn releases valuable system resources. Locate the tcp-keepalive setting in the /etc/redis/redis.conf file to enable it:
tcp-keepalive 300In this example, we set the keepalive interval to 300 seconds. You should adjust this figure according to your server’s requirements and conditions.
Step 3: Setting up Slow Log Monitoring
Slow logs provide a valuable mechanism for pinpointing performance issues. They do so by logging queries that exceed a specified duration. Find the slowlog-log-slower-than and slowlog-max-len settings in the /etc/redis/redis.conf file to configure slow logs:
slowlog-log-slower-than 10000
slowlog-max-len 128
The above example sets the slowlog threshold to 10,000 microseconds (equivalent to 10 milliseconds). The slow log will maintain the 128 most recent entries. You should adjust these values to match your specific requirements and conditions.
Step 4: Enabling Redis Event Notifications
Redis can create notifications for specific events, providing a powerful tool for monitoring and debugging. To activate event notifications, locate the notify-keyspace-events setting in the /etc/redis/redis.conf file:
notify-keyspace-events ExAHere, we configure Redis to dispatch notifications for expired and evicted keys. The official Redis documentation is a comprehensive resource for more information on event notifications and available choices.
Step 5: Adjusting the Redis Logging Level
To better troubleshoot and monitor Redis, change its logging level. You can do this in the /etc/redis/redis.conf file by adjusting the loglevel setting:
loglevel noticeWe’ve set the logging level to ‘notice’, the default. Other options are ‘debug’, ‘verbose’, ‘notice’, and ‘warning’. Choose the level that suits your needs best.
sudo systemctl restart redis-serverThis command restarts Redis, and the changes will be active.
Closing Thoughts
We’ve covered how to install and configure Redis on Debian 12, 11, or 10 servers. This includes the initial installation, firewall configuration for security, and other customization options. Redis has many configuration choices, letting you adjust its performance and behavior to fit your needs.