How to Install Docker on Rocky Linux 8
Docker is a virtualization platform that allows you to create isolated development containers. Introduced in 2013, Docker provides the ability to easily run your applications on any machine regardless of operating system or platform. Today, many developers use Docker for testing and deploying their apps within containers. Containers are resource-isolated virtual instances that provide the ability to run several isolated systems on a single host machine.
Why Docker?
Docker makes it easy for you to create, deploy, and run applications on various platforms without the risk of incompatibilities between development and production environments. It also allows you to manage your infrastructure in a more efficient way.
There are two editions of Docker: the community edition (Docker CE) and the enterprise edition (Docker EE). Docker EE is an enterprise-ready container management solution.
You can download Docker container images from official repositories called registries, which include public registries like Docker Hub or private ones like Registry Hub. You can also create your own customized images using docker commit.
In this guide, you will learn how to install and use Docker on Rocky Linux 8.
Prerequisites
To complete this article, you will need the following:
- A fresh installation of Rocky Linux 8
- You must have at least 2GB of RAM installed in your system. You can optionally allocate more than 2GB depending upon your needs. 2 vCPU / CPU cores and a minimum of 20GB system disk space for Docker, plus additional free space depending on how many container images you want to create.
- A user with sudo privileges is configured on the server
Updating the Server
First, make sure your Server is up-to-date by using the following commands:
sudo dnf update -y
If previous versions of Docker are installed on your system, you must remove them using the following commands:
sudo dnf remove docker*
Installing Docker
First, add the official Docker repository by using the following command:
sudo dnf install -y dnf-utils
sudo dnf config-manager --add-repo https://download.docker.com/linux/centos/docker-ce.repo

Update the system repos by using the following command:
sudo dnf update -y
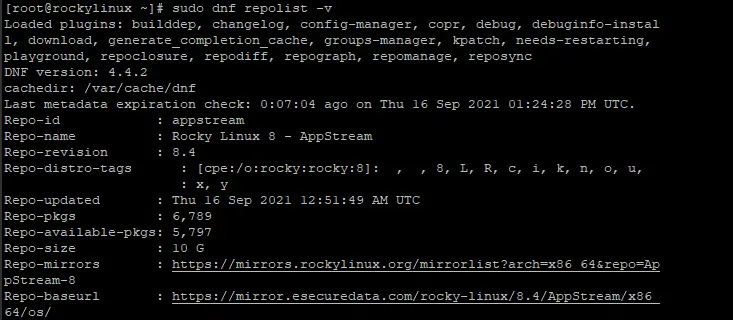
You can list newly added repo by using the following command:
sudo dnf repolist -v
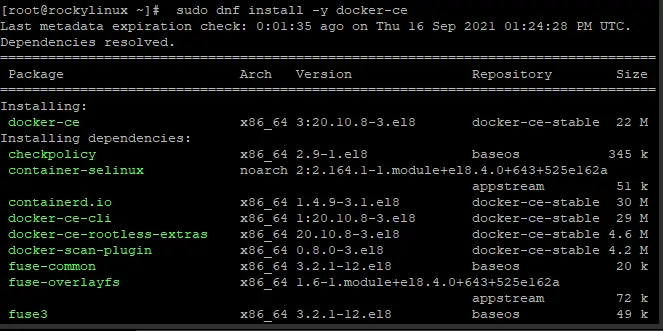
Install Docker CE on your system as follows:
sudo dnf install -y docker-ce
After you've installed it, you can verify the version of Docker Enterprise Edition by using the following command:
docker --version
You should see output similar to the following:

Start the Docker service and set it to start automatically when the system boots.
sudo systemctl start docker
sudo systemctl enable docker

Check the docker service status.
sudo systemctl status docker
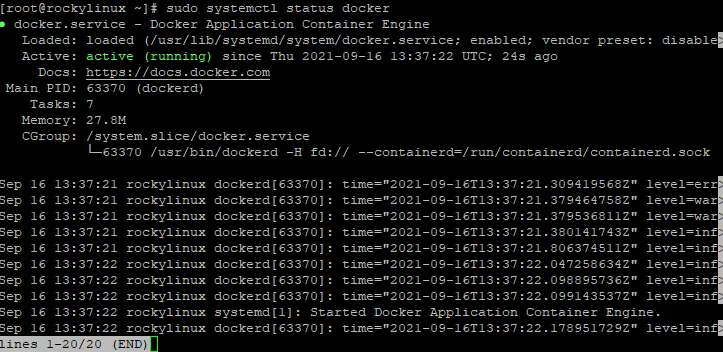
You can see the active(running) in green color. If you see the output like this one then your installation of Docker is successful. Hit q to exit back to command prompt.
Allowing non-root access
If you run Docker as standard user, you may get an error like "Error starting daemon". To allow docker command run without prefixing it with sudo, add your current system user to the Docker group using the following command:
sudo usermod -aG docker $USER
Where $USER is the name of your system user. Log out and log back in for this change to take effect.
Verifying Docker Installation
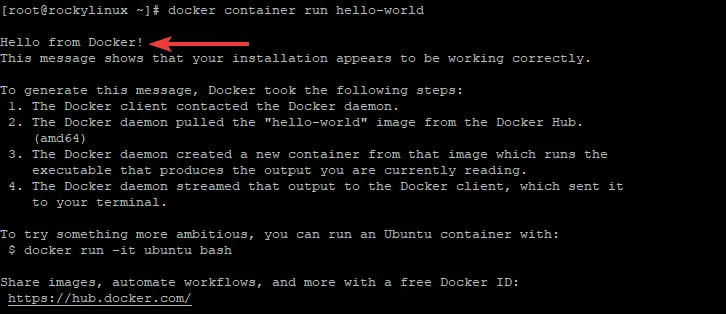
You can verify that Docker is installed correctly by pulling the docker image hello-world from the docker hub. Docker hub is a public registry that contains useful docker images. You can build your own images or pull already built and shared images from the docker hub.
docker container run hello-world
If the hello-world image is not found on the host, Docker will automatically discover it and download it from Docker Hub. After the image has been downloaded, the docker daemon instantiates a new container from it and runs the program inside to print out "Hello from Docker!"
Using Docker Commands
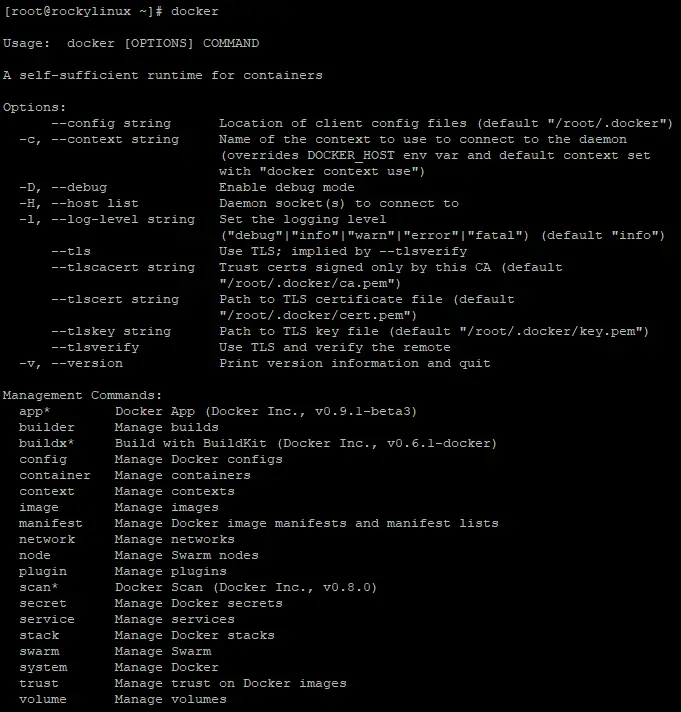
Now Docker is installed and working, let’s look at how to use it. You can list all the docker commands by simply typing:
docker
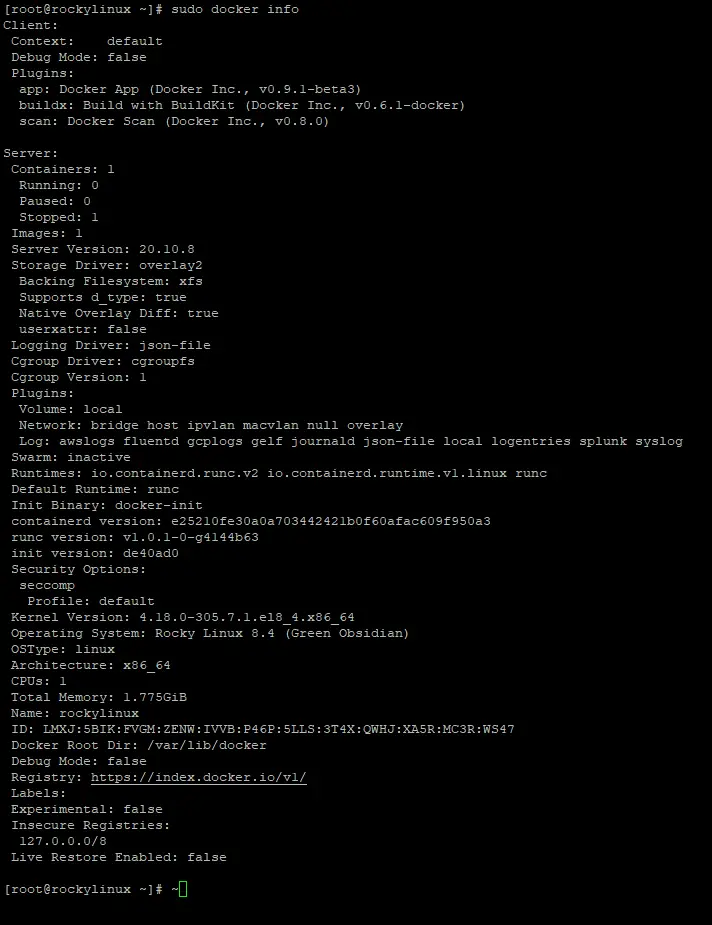
To get information such as OSType, Architecture, CPUs, Total Memory run the command info with docker.
sudo docker info
To search images available on Docker Hub, you can the search command with docker command. For example to search centos image, type
sudo docker search centos
The script will crawl Docker Hub and return matching images. You can see the list of images available for centos below.
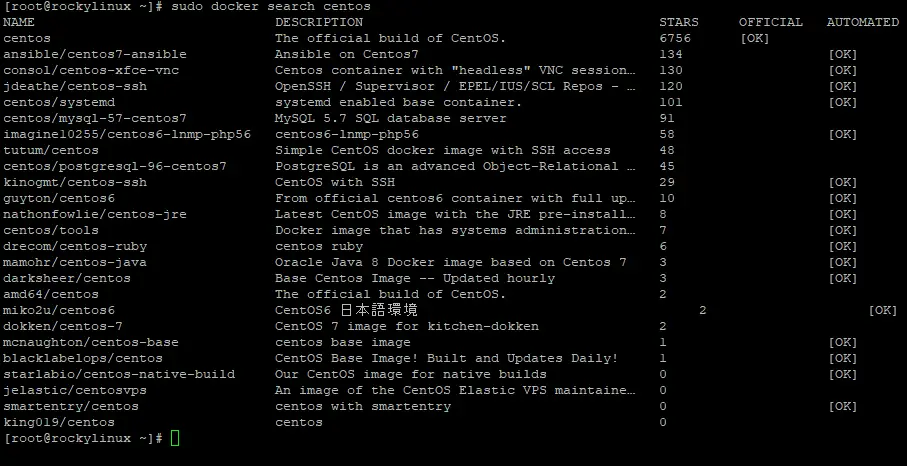
You can see the OK status in the OFFICIAL column which indicates that those images are supported by the company behind the project.
With the pull command, you can download an image to your computer after identifying the one you would like to use.
sudo docker pull centos
This command will pull most recent version of Centos image to your computer. To view the list of images on your system, type:
sudo docker images
The output should look similar to the following:

Running a Docker Container
You can run a Docker container by using the docker run or docker create command. With docker run, you can create a new container interactively or you can pass a pre-existing image from your local file system, registry, or docker hub.
The docker run command-line syntax as follows:
sudo docker run [OPTIONS] IMAGE [COMMAND] [ARG…]
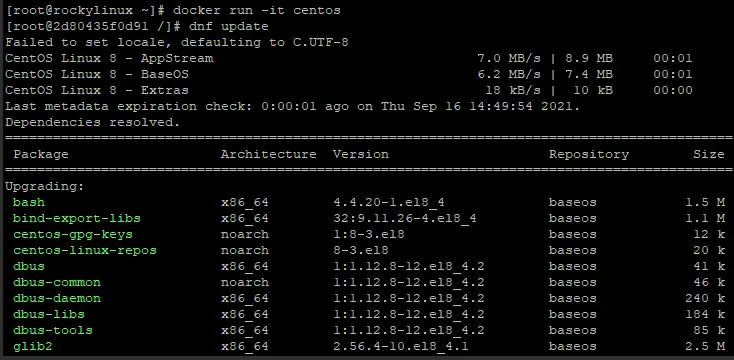
As an example, let's run a container using the latest image of centos we pulled from Docker hub above.
sudo docker run centos
You are now inside the container with a container ID. In this example, it's 2d80435f0d91. You should have a command prompt which looks like this:
![]()
Within the container, any command can be run without using sudo because you are a root user. For example, you can run the dnf update command to update the packages inside the centos image:
dnf update
Any changes you made inside a container, those changes only affect that container. You can exit the container by typing exit at the prompt.
![]()
Conclusion
In this tutorial learned how to install Docker on your server, how to work with images and containers. Once you have familiarized yourself with these basic concepts, you can move on to more advanced topics on the Docker official documentation.

