
In DevOps and continuous integration, GitLab is a formidable tool developers worldwide trust. For those operating on Debian systems, integrating GitLab can significantly enhance their development workflow. This guide is tailored to demonstrate how to install GitLab on Debian 12 Bookworm, Debian 11 Bullseye, or Debian 10 Buster, ensuring you harness the full potential of this comprehensive platform.
GitLab Community Edition’s Hallmarks:
- All-in-One DevOps Solution: GitLab encapsulates the entire software development lifecycle under one unified platform, from ideation to deployment.
- Collaborative Excellence: GitLab’s suite of tools, including code reviews, merge requests, and issue tracking, fosters a collaborative environment, ensuring seamless teamwork.
- Seamless CI/CD Integration: With its integrated CI/CD pipeline, GitLab automates the processes of testing, building, and deploying code, optimizing development workflows.
- Adaptable Interface: GitLab offers a customizable user experience, allowing you to adjust project templates, workflows, and the interface to align with your preferences.
- Open-Source Ethos: GitLab Community Edition’s open-source nature empowers developers to contribute, modify, and shape its evolution.
GitLab’s Enterprise Editions provide enhanced security, in-depth analytics, and robust disaster recovery solutions for those seeking advanced features.
With a grasp of GitLab’s capabilities, it’s time to delve into its implementation. As we progress, this guide will elucidate the steps to seamlessly install GitLab on your Debian system, setting you on a path to streamlined development and collaboration.
Install Gitlab on Debian 12, 11, or 10 via Gitlab CE APT
Step 1: Update Debian Before Gitlab Installation
Keeping your Debian operating system up to date is crucial to maintain its stability and security. To ensure that all existing packages on your Debian system are up to date, performing an update is recommended to provide the latest security updates and bug fixes, ensuring your system’s stability and reliability. You can easily update your Debian operating system by running the following command:
sudo apt update && sudo apt upgrade Step 2: Install Required Packages for GitLab on Debian
Ensuring that all dependencies for GitLab are installed is a critical step in the installation process. These dependencies are necessary components that GitLab relies on to function correctly. Fortunately, installing these dependencies is a simple process. You can easily install them by opening the terminal and running the following command:
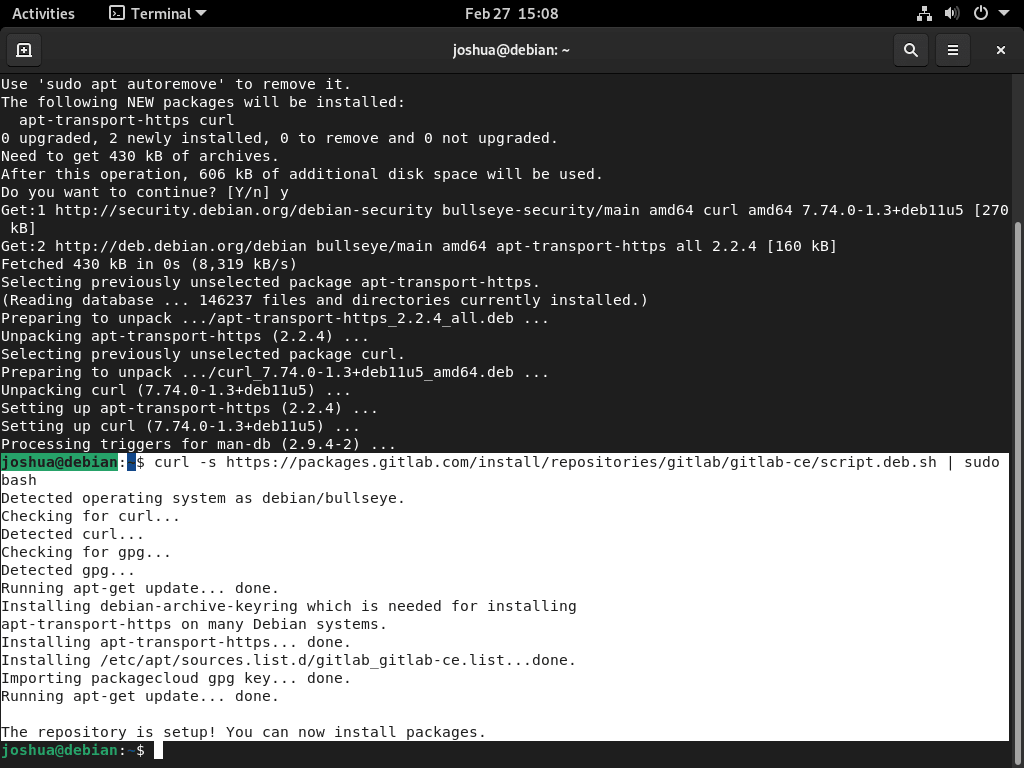
sudo apt install curl ca-certificates apt-transport-https tzdata perlStep 3: Import GitLab CE APT Repository on Debian
By default, GitLab is not available in Debian’s default repositories. This means you must create a repository manually to install GitLab. However, GitLab provides an APT script to help with this process, making it easier for users to install the platform. With this script, you can create a GitLab repository and enable you to install GitLab using the standard APT package manager.
To download the script, enter the following command in your terminal:
curl -s https://packages.gitlab.com/install/repositories/gitlab/gitlab-ce/script.deb.sh | sudo bashOnce you execute this command, the script will download and add the GitLab repository to your Debian system. It will also update the package list, enabling you to install GitLab using the standard APT package manager.
Step 4: Install GitLab on Debian via APT Command
The next step is to install GitLab. Remember that the script has already used the “apt update” command to synchronize the newly created and modified repository. With that done, you can now proceed to execute the installation command by running the following:
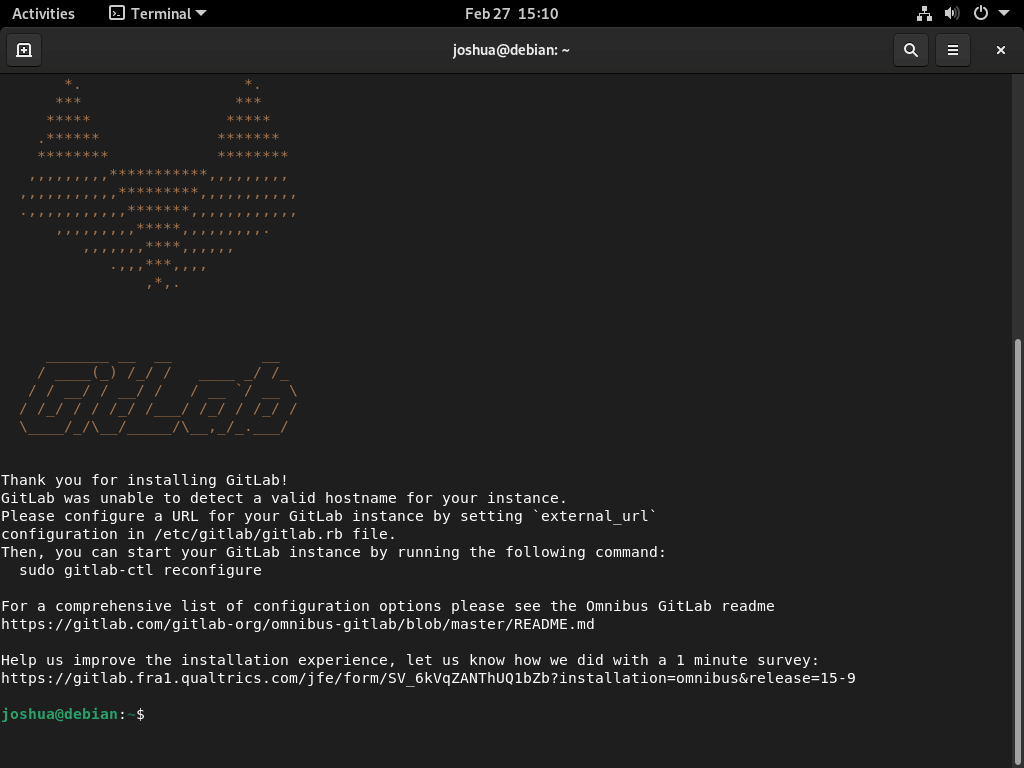
sudo apt install gitlab-ceThis command will install the GitLab Community Edition (CE), the free and open-source version of GitLab. The installation process may take some time, depending on your internet speed and system specifications.
Example output if GitLab installation is successful on Debian:
Configure GitLab on Debian 12, 11, or 10
To configure GitLab on Debian, several steps must be followed carefully. This section will describe the process step-by-step, including configuring the hostname, setting up the firewall, and configuring email settings.
Configure the Hostname
To access your GitLab instance, it’s crucial to configure the hostname for your GitLab server, so choose a name that’s easy to remember and access. Follow these steps to configure the hostname:
Open the GitLab configuration file using a text editor:
sudo nano /etc/gitlab/gitlab.rbLocate the external_url setting and replace the example URL with your desired hostname:
external_url 'https://gitlab.example.com'Save the file and exit the text editor.
Now reconfigure GitLab to apply the changes:
sudo gitlab-ctl reconfigureSetup UFW Firewall for Gitlab
GitLab uses port 80 for HTTP and port 443 for HTTPS by default. It’s crucial to configure your firewall to allow traffic on these ports to ensure that your GitLab instance is accessible.
Follow these steps to set up the firewall:
First, install the UFW firewall, as this does not come installed on Debian by default, with the following command:
sudo apt install ufwNext, once the installation is complete, enable the UFW firewall with the following command:
sudo ufw enableOpen the firewall configuration file using a text editor:
sudo nano /etc/ufw/applications.d/gitlabCopy and paste the following lines into the file:
[GitLab]
title=GitLab
description=GitLab application
ports=80,443/tcp
Save the file and exit the text editor.
Enable the GitLab application in the firewall:
sudo ufw app update GitLab
sudo ufw allow GitLab
Configure Email Settings
GitLab uses email notifications to inform users about project activities, such as new issues, merge requests, and comments.
Follow these steps to configure email settings:
Open the GitLab configuration file using a text editor:
sudo nano /etc/gitlab/gitlab.rbLocate the gitlab_rails[‘smtp_enable’] setting and set it to true:
gitlab_rails['smtp_enable'] = trueAdd the following lines to the file to configure the SMTP server settings for your email provider, such as Gmail:
gitlab_rails['smtp_address'] = "smtp.gmail.com"
gitlab_rails['smtp_port'] = 587
gitlab_rails['smtp_user_name'] = "example@gmail.com"
gitlab_rails['smtp_password'] = "your_password"
gitlab_rails['smtp_domain'] = "smtp.gmail.com"
gitlab_rails['smtp_authentication'] = "login"
gitlab_rails['smtp_enable_starttls_auto'] = true
Save the file and exit the text editor.
Reconfigure GitLab to apply the changes:
sudo gitlab-ctl reconfigureIt’s important to note that after executing the “gitlab-ctl reconfigure” command, you may observe that the terminal output concludes with the following message:
Notes:
Default admin account has been configured with following details:
Username: root
Password: You didn't opt-in to print initial root password to STDOUT.
Password stored to /etc/gitlab/initial_root_password. This file will be cleaned up in first reconfigure run after 24 hours.
To view the root (GitLab) password, execute the following command in your terminal:
sudo cat /etc/gitlab/initial_root_password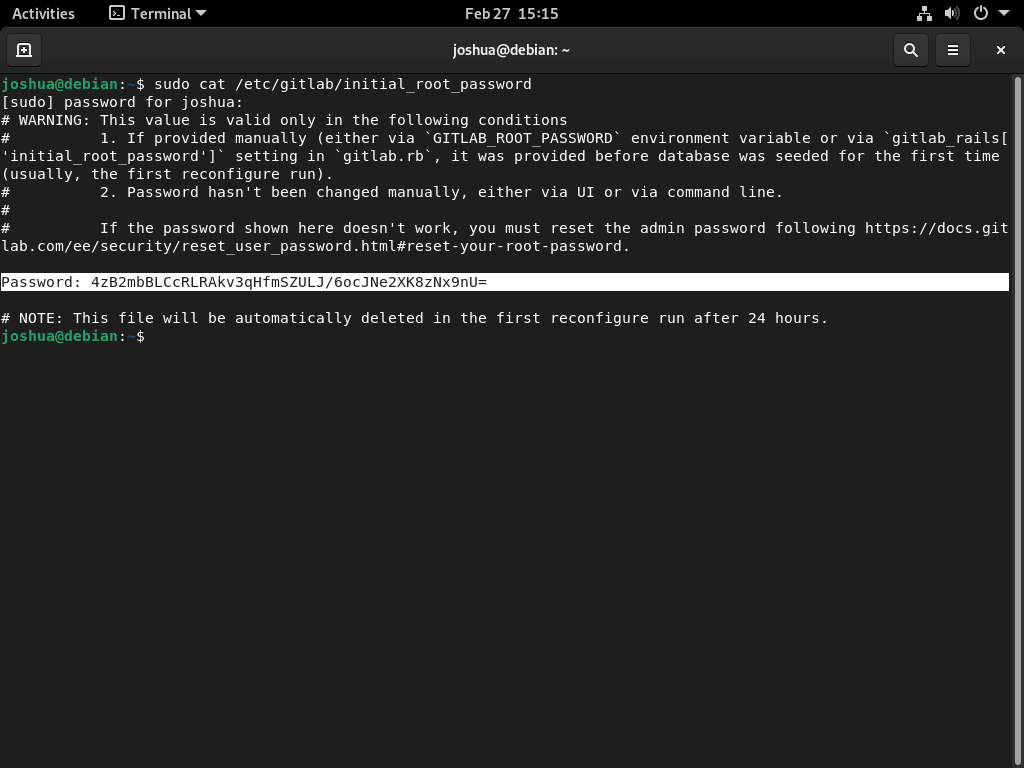
Executing this command will display the root password in the terminal. It’s crucial to keep this password secure and not share it with unauthorized users.
If you need to reset the root password, you can use the following command:
sudo gitlab-rake "gitlab:password:reset[root]"After executing this command, the root password will be reset to a random string displayed in the terminal output. It’s essential to remember that resetting the root password will invalidate all existing and personal access tokens, so users must create new ones after resetting the password.
For security reasons, it’s recommended that you change the root password to a strong and unique one as soon as possible after the initial setup and avoid using the default password. You can change the root password by logging in to the GitLab web interface, going to “User Settings”> “Account,” and selecting the “Change Password” option.
Access GitLab User Interface on Debian 12, 11 or 10
Once the backend configuration is complete, it’s time to log in to and access GitLab. To achieve this, open the domain path assigned to GitLab in the configuration file.
https://gitlab.example.comNext, use the username “root” and the password you received during installation to log in to GitLab. As mentioned in the previous section’s password printout, the guide’s password was “4zB2mbBLCcRLRAkv3qHfmSZULJ/6ocJNe2XK8zNx9nU=” in the image.

You have successfully logged in as the root account and will arrive at the default landing page.
Additional Tips
Below are some recommendations for securing, customizing, or any other general first-time tips when you first log in to the GitLab user interface:
- Change the default password: To enhance the security of your GitLab instance, it’s crucial to change the root user’s default password. Log in to GitLab using the default username and password, navigate to “User Settings”> “Password,” and enter your new password.
- Set up two-factor authentication (2FA): Adding an authentication factor, such as a code sent to your phone or generated by an app, to the login process is an additional security layer provided by 2FA. To enable 2FA in GitLab, navigate to “User Settings”> “Account”> “Two-Factor Authentication” and follow the instructions.
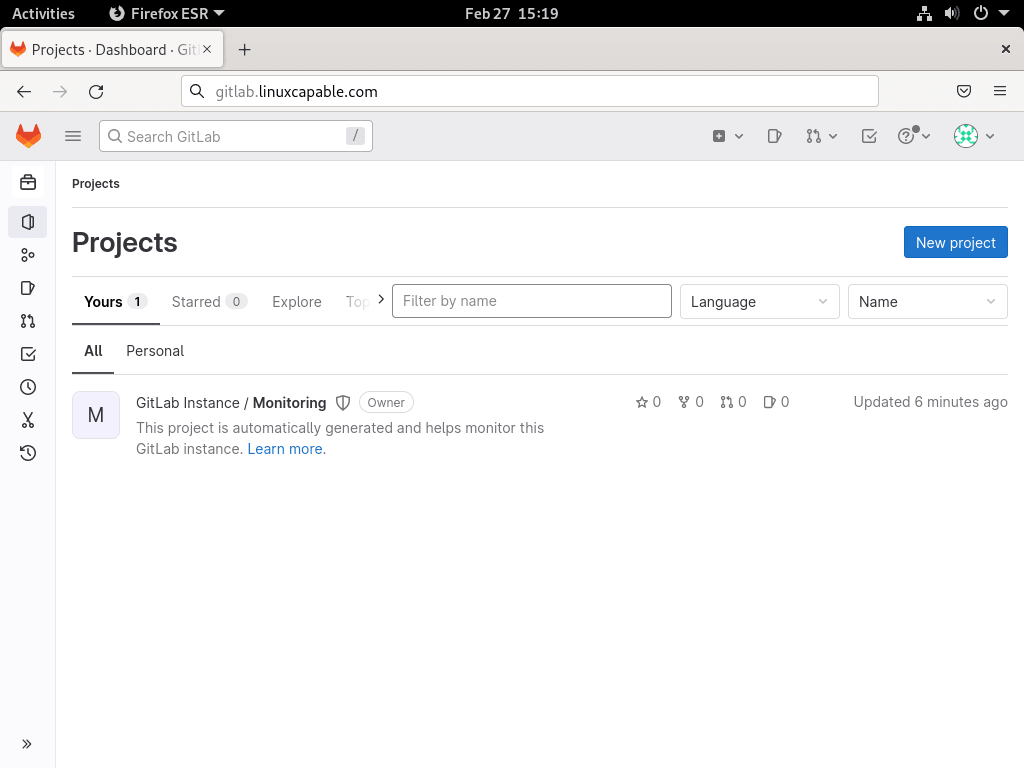
- Create a project: To create a new project in GitLab, go to the “Projects” page and click the “New Project” button. You can create an empty project or import an existing project from a Git repository.
- Customize the user interface: GitLab allows several customization options, such as changing the theme, adding a custom logo, and configuring the navigation bar. Navigate to “Admin Area”> “Settings” and select the appropriate options to customize the user interface.
- Configure access control: GitLab’s powerful access control features allow you to control who can access your projects and what they can do. Navigate to “Project Settings”> “Members” and add or remove members with different access levels to configure access control.
- Use GitLab CI/CD: GitLab’s powerful CI/CD capabilities automate the testing and deployment of your code. Configure CI/CD pipelines by creating a “.gitlab-ci.yml” file in your project’s root directory and defining the stages and jobs for your pipeline.
- Set up GitLab Runner: GitLab Runner is a lightweight agent that runs CI/CD jobs and sends the results back to GitLab. Follow the instructions in the GitLab documentation to install and configure GitLab Runner on your Debian system.
- Back up your GitLab instance: Regularly back up your GitLab instance to prevent data loss in case of hardware failure or other disasters. Run the “gitlab-rake gitlab:backup:create” command in your terminal to back up your GitLab instance.
Create Cronjob for GitLab Auto Backup on Debian 12, 11, or 10
Setting up a cronjob for GitLab auto-backup on Debian is vital to ensure the safety and security of your data. A cronjob is a scheduled task that automatically runs at specific intervals to perform a backup of your GitLab instance. Follow these steps to create a cronjob for GitLab auto-backup on Debian.
Create a Gitlab Backup Script
The first step is to create a backup script to carry out your GitLab instance’s backup. Follow these steps:
Using a text editor, create a new file for your backup script. Here’s an example:
sudo nano /usr/local/bin/gitlab-backup.shPaste the following code into the file:
#!/bin/bash

BACKUP_DIR=/var/opt/gitlab/backups
TIMESTAMP=$(date +%s)

sudo gitlab-rake gitlab:backup:create

sudo cp ${BACKUP_DIR}/$(ls -t ${BACKUP_DIR} | head -1) ${BACKUP_DIR}/gitlab_backup_${TIMESTAMP}.tar
- Save the file and exit the text editor.
This script will generate a backup of your GitLab instance by running the gitlab-rake gitlab:backup:create command. After creating the backup, it will duplicate the latest backup to a new file with a timestamp in the file name.
Setting Permissions and Ownership
The subsequent step is establishing the appropriate permissions and ownership for the backup script to ensure the cronjob can execute it. Follow these steps:
Set the owner of the backup script to the user associated with GitLab:
sudo chown git:git /usr/local/bin/gitlab-backup.shSet the permissions of the backup script to enable execution:
sudo chmod +x /usr/local/bin/gitlab-backup.shCreating a Cronjob
To schedule the backup script to run at regular intervals, the next step is to create a cronjob. Follow these steps:
To open the crontab configuration file for the GitLab user, follow these steps:
sudo crontab -u git -eTo schedule the backup script to run every day at 1:00 AM, add the following line to the crontab configuration file for the GitLab user:
0 1 * * * /path/to/backup/script.sh
Save the file and exit the text editor.
This cronjob will automatically execute the backup script every day at 1:00 AM, resulting in a new backup file with a timestamp in the file name.
Testing the Cronjob
You can verify the cronjob functions correctly by manually executing the backup script and ensuring the backup file is generated without errors. To perform this test, enter the following command in your terminal:
sudo /usr/local/bin/gitlab-backup.shThis command will generate a new backup file in the directory”/var/opt/gitlab/backups”. The filename will include a timestamp to indicate when the backup was created.
GitLab Terminal Commands on Debian Linux
GitLab-ctl is a command-line tool that allows you to manage GitLab on Debian. It provides a set of terminal commands that you can use to start, stop, restart, and manage GitLab services, among other things. Here is a detailed section on GitLab-ctl terminal commands, along with example commands and outputs with explanations.
Starting and stopping GitLab services
To start and stop GitLab services, use the following commands:
Start all GitLab services:
sudo gitlab-ctl startStop all GitLab services:
sudo gitlab-ctl stopRestart all GitLab services:
sudo gitlab-ctl restartReload GitLab services:
sudo gitlab-ctl reloadThese commands will start, stop, restart, or reload all GitLab services. The output will indicate which services are being started or stopped and whether the operation was successful.
Checking the status of GitLab services
To check the status of GitLab services, use the following command:
sudo gitlab-ctl statusThese commands will start, stop, restart, or reload all GitLab services. After executing the command, the output will show which services are affected and whether the operation succeeded.
Backing up and restoring GitLab data
You can create a backup of GitLab data by using the following command:
Create a backup of GitLab data:
sudo gitlab-rake gitlab:backup:createThe provided command will create a backup file that contains all the GitLab data, such as repositories, user data, and configuration files. The backup file will be stored in the directory: “/var/opt/gitlab/backups”.
Restore a backup of GitLab data:
sudo gitlab-rake gitlab:backup:restore BACKUP=<backup_file>Using this command, you can restore a backup of GitLab data from a specific backup file. The backup file must be in the “var/opt/gitlab/backups” directory, or you can indicate the full path to the backup file.
Checking the GitLab configuration
You can use the following command to check the configuration of GitLab:
sudo gitlab-rake gitlab:checkThis command can scan for errors or warnings in the GitLab configuration, including outdated versions, missing dependencies, and misconfigured settings. The output will summarize the scan results and detailed information about any detected issues.
Checking GitLab logs
Here is how to check GitLab logs using the following commands:
View the GitLab logs:
sudo gitlab-ctl tail gitlab-rails/production.logYou can use the following command to view the last ten lines of the GitLab production log, which details user actions, warnings, and errors.
View the GitLab NGINX logs:
sudo gitlab-ctl tail nginx/gitlab_access.logThis command will show the last ten lines of the GitLab NGINX access log that contains details regarding HTTP requests and responses.
View the GitLab PostgreSQL logs:
sudo gitlab-ctl tail postgresql/currentThis command will display the last ten lines of the GitLab PostgreSQL log, which contains information about database queries and transactions.
Conclusion
In conclusion, setting up GitLab on Debian Linux involves multiple essential steps. These include configuring the firewall, adjusting SMTP server settings, establishing automatic backup cronjobs, and handling GitLab services via GitLab-ctl commands. Further enhancing your GitLab experience can be done by securing, customizing, and leveraging its features, such as project creation, using GitLab CI/CD, and setting up access control. Following this guide and tapping into GitLab’s robust tools can create a secure and efficient code management and collaboration environment.