If you are reading this article on the chgrp command, there is a high chance you have explored all the depths of Linux’s chown command and chmod command.
Consider the ownership and permission settings of the following file:
$ ls -l new_data.txt
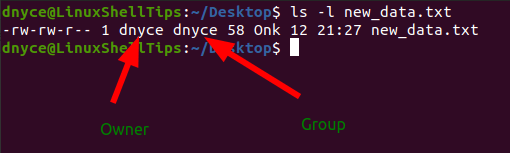
This file belongs to owner dnyce and group dnyce. The chown command can be used to change the user and group ownership of this file to another user and/or group existing on this Linux system.
As for the chgrp command, it is only effective in changing the group ownership of an existing file and not the user ownership.
Chgrp Command Examples in Linux
The usage of the chgrp command applies to the user group’s access to existing files and directories. The following is the standard syntax for this command.
$ sudo chgrp [OPTION] [Path_to_Group_File]
You need to be a sudoer user or have sudo privileges to correctly execute it.
Changing the Group Ownership of File/Directory
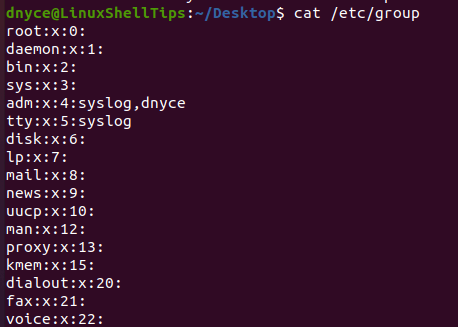
Let us go back to the demo file we mentioned earlier and change its group ownership from dnyce to something else, we have to make sure the targeted user group exists:
$ cat /etc/group
Let us now try to switch the file group ownership from dnyce to root.
$ sudo chgrp root new_data.txt
$ ls -l new_data.txt

As per the above screen capture, the file now belongs to the group root.
Dealing with Files Associated with Symbolic Links
Symbolic links make it easy to deal with files whose directory paths require a user to go through too many navigation routes before applying the needed Read, Write, and Execute file operations. They act as shortcuts and provide direct access to files within a directory tree.
The above demo file is on the Linux Desktop path (~/Desktop). Let us create a symbolic link to it on the Linux Home directory path (~).
The syntax for creating a Symbolic link to a file is as follows:
$ ln -s path_to_source_file name_of_symbolic_link
The command for creating the new_data.txt file’s symbolic link inside the Linux Home directory is as follows:
$ ln -s /home/dnyce/Desktop new_data_link
As for the ownership and permission settings of the created symbolic link file:
$ ls -l new_data_link

We can now use this symbolic link file existing on the Linux Home directory to make the needed group ownership changes to the source file new_data.txt on the Linux Desktop directory. We can achieve this objective with the standard chgrp syntax reference.
$ sudo chgrp dnyce new_data_link

The chgrp command has zero effect on Symbolic link files’ group ownership. The applied changes will be on the source file (new_data.txt).
$ ls -l new_data_link
$ ls -l new_data.txt
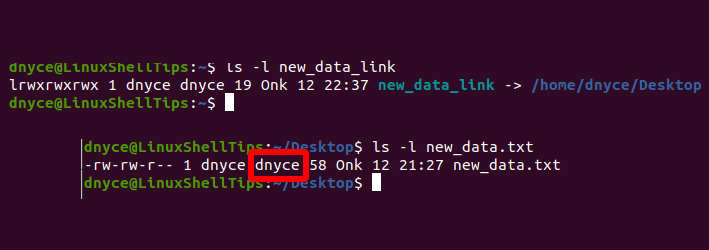
As per the screen capture, we have reverted the filegroup ownership from root back to dnyce.
Using Another Filename as a Reference Instead of a Group Name
If you want your file to have the same group ownership as another existing file, you could reference that file without mentioning the targeted group name on the chgrp command.
$ sudo chgrp --reference=passwd new_data.txt

Making Recursive Group Ownership Changes
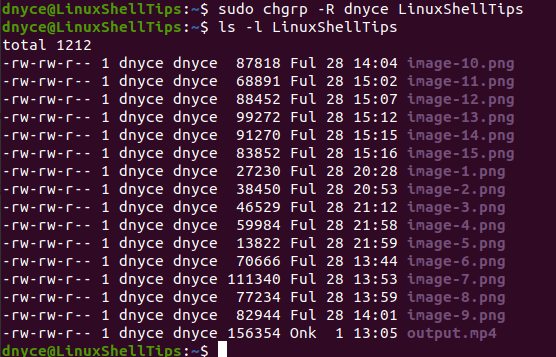
If you want all the files within a particular directory to belong to a specific user group (dnyce), use the chgrp command with the -R option:
$ sudo chgrp -R dnyce LinuxShellTips
The chgrp command is not only easy to implement but also a safe command especially when you are in a production server environment. To new Linux users, it is less risky in comparison to the chown command.