How to create an SQS Queue on AWS
On this page
Amazon Simple Queue Service (SQS) is a managed message queuing service of AWS which enables us to decouple and scale microservices, distributed systems, and serverless applications. Using SQS, we can send, store, and receive messages between software components at any volume, without losing messages. Standard queues offer maximum throughput, best-effort ordering, and at least-once delivery. FIFO queues are designed to guarantee that messages are processed exactly once, in the exact order that they are sent.
SQS Eliminates administrative overhead, provides Reliably delivery of messages, keeps sensitive data secure, and scales elastically and cost-effectively.
Security, Durability, Availability, Scalability, Reliability, Customization are a few of the benefits of using SQS.
There are 2 types of SQS Queues on AWS.
- Standard Queue
- FIFO Queue
- Standard Queue:
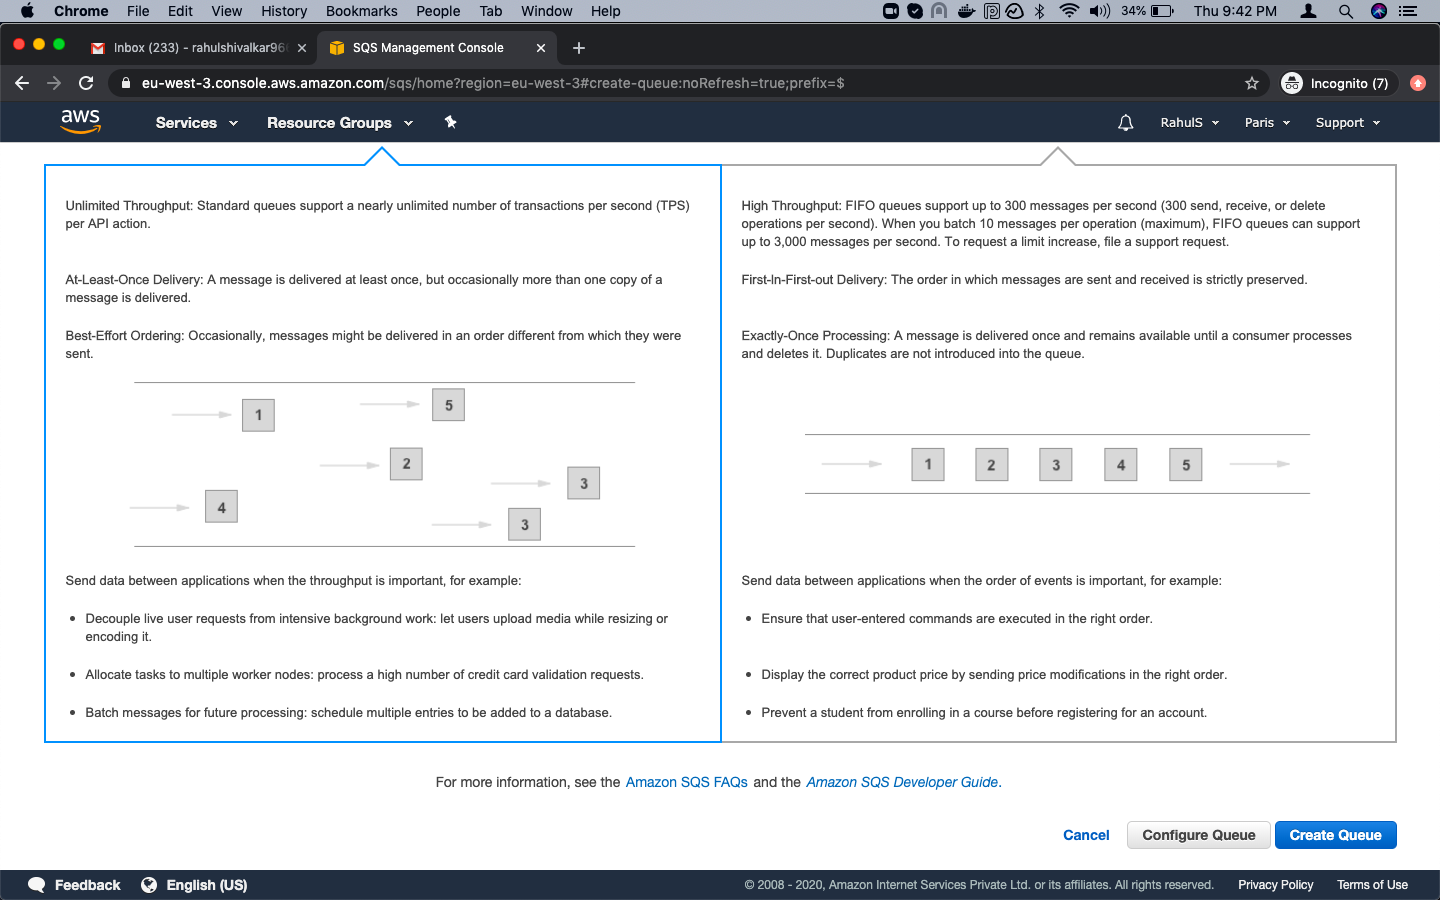
Supports a nearly unlimited number of transactions per second (TPS) per API actionA message is delivered at least once, but occasionally more than one copy of a message is delivered. Occasionally, messages might be delivered in an order different from which they were sent. - FIFO Queue:
FIFO queues support up to 3,000 messages per second (TPS), per API actionA message is delivered once and remains available until a consumer processes and deletes itThe order in which messages are sent and received is strictly preserved.
To know more about the SQS Queues, click here.
For SQS we pay only for what we use, there is no minimum fee. To know more about the pricing of AWS SQS click here
In this article, we will see the steps to create a Standard and FIFO Queue, send messages to them, delete messages and delete Queues.
Pre-requisites
- AWS Account (Create if you don’t have one).
What will we do?
- Login to AWS.
- Create SQS Queues and Send Message
- View and delete Messages from the queues
- Delete the Queues
Login to AWS
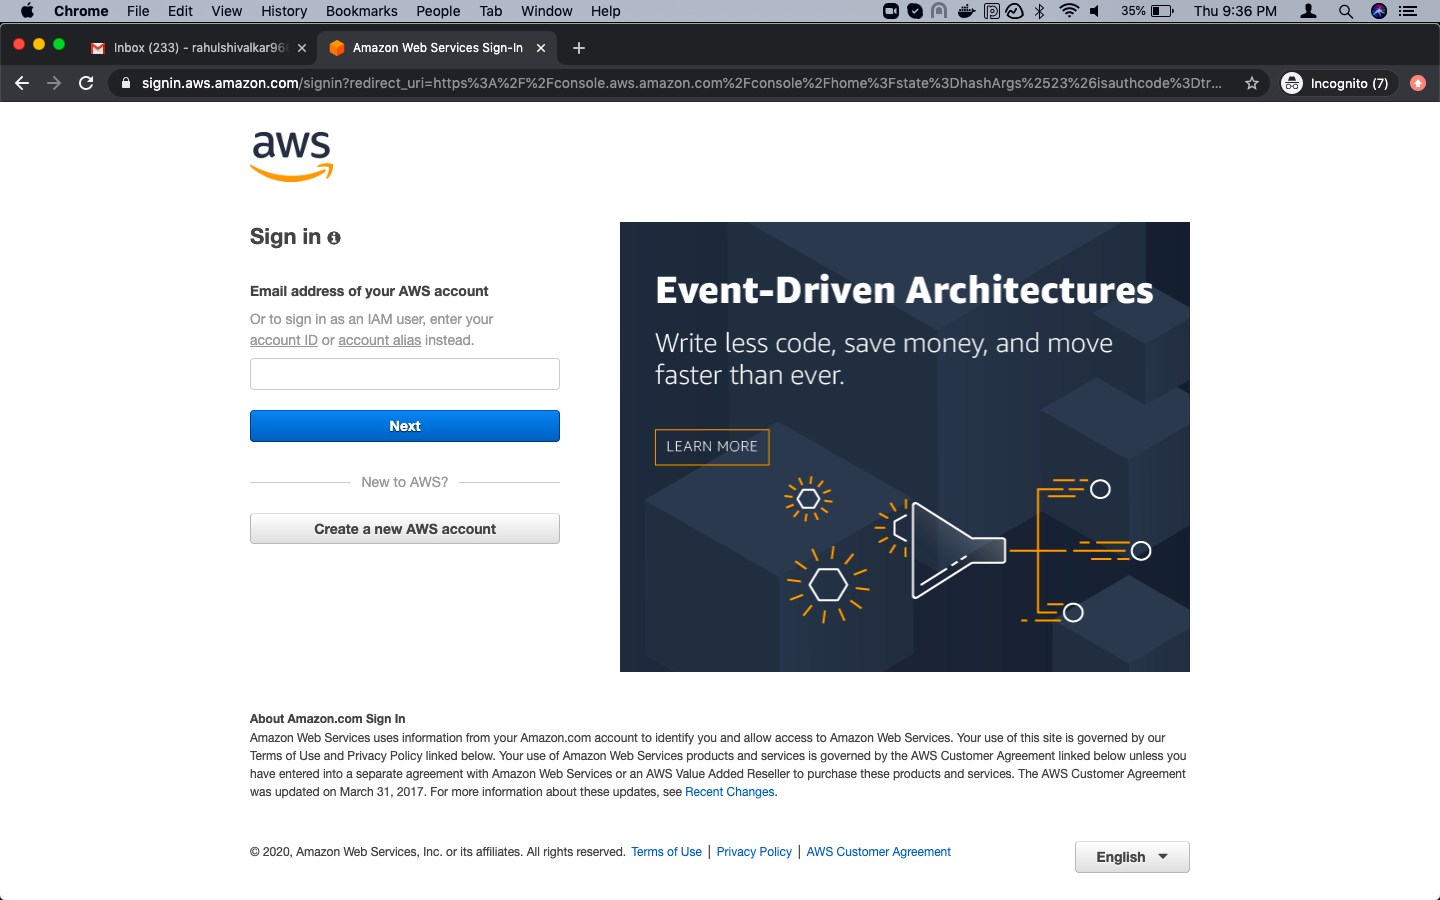
- Click here to go to AWS Login Page.
When we hit the above link, we will see a web page as follows where we are required to login using our login details.
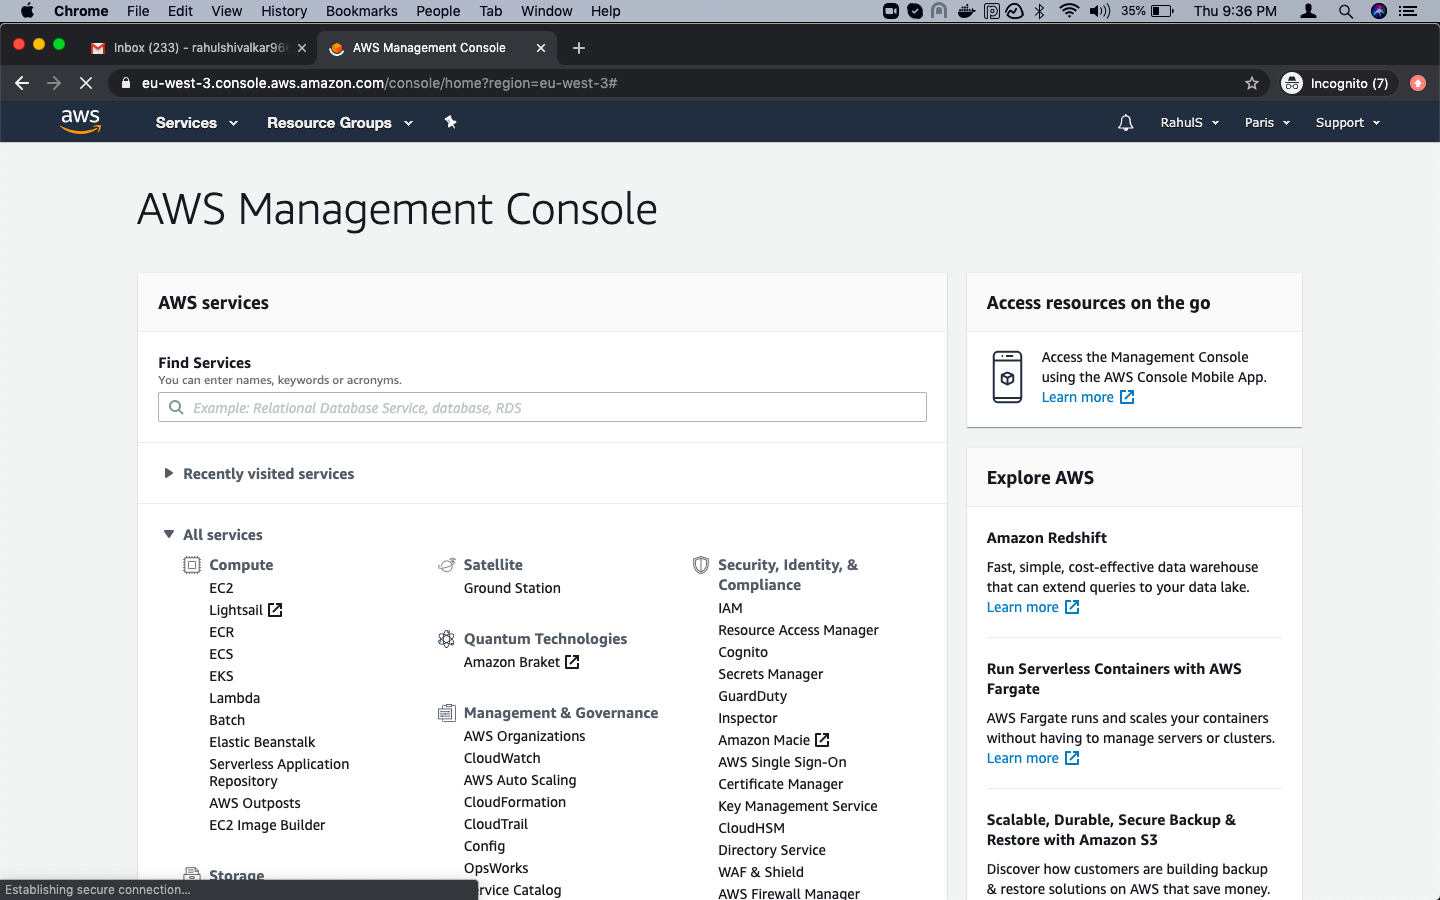
Once we login into AWS successfully, we will see the main console with all the services listed.
Create SQS Queues
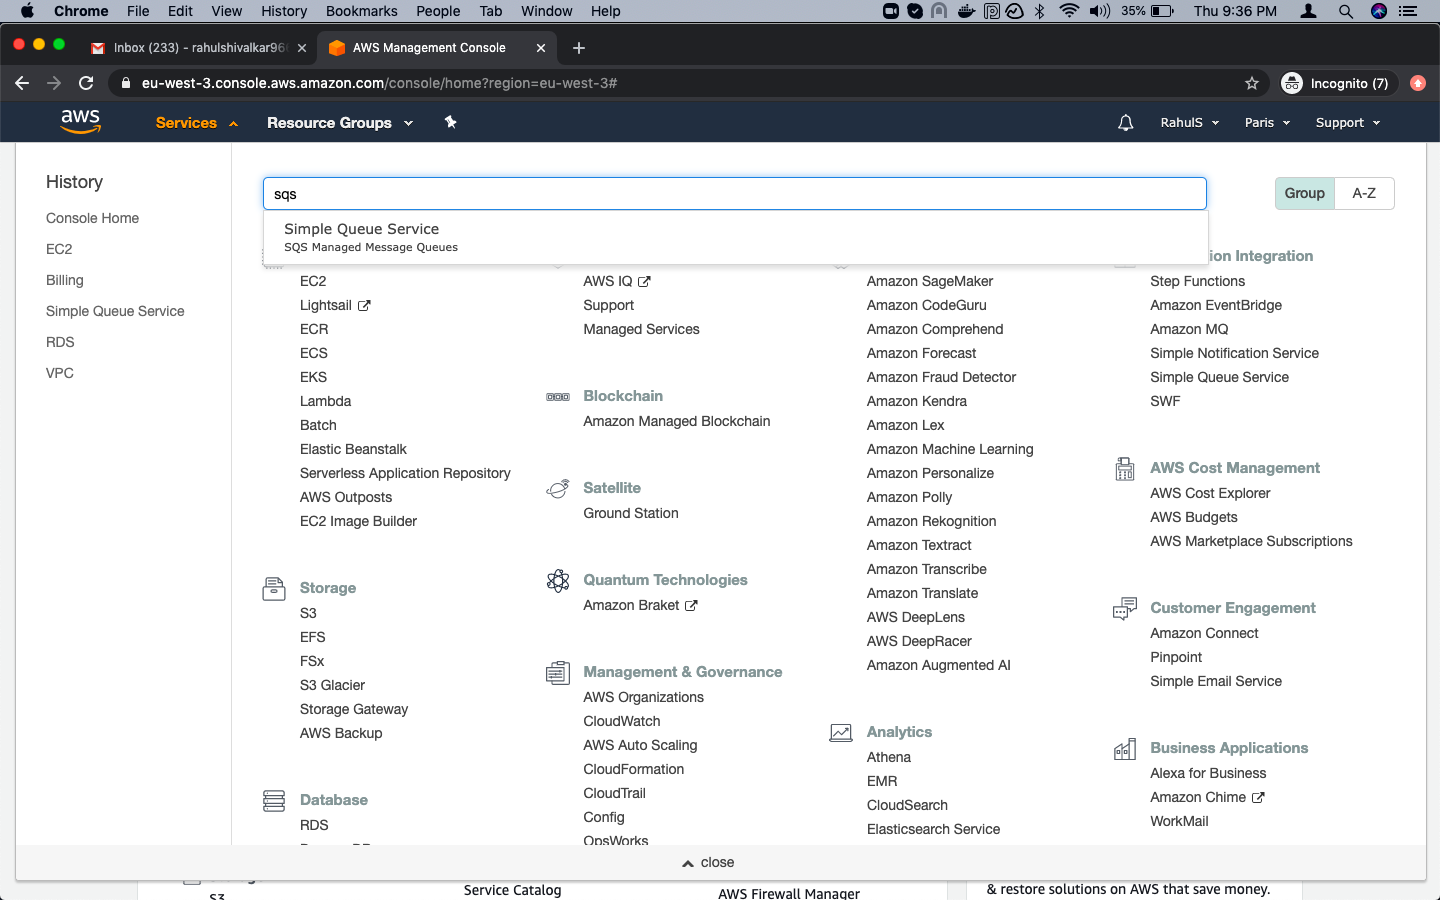
Click on “Services” in the top left and search for “SQS” and click on “Simple Queue Service”.
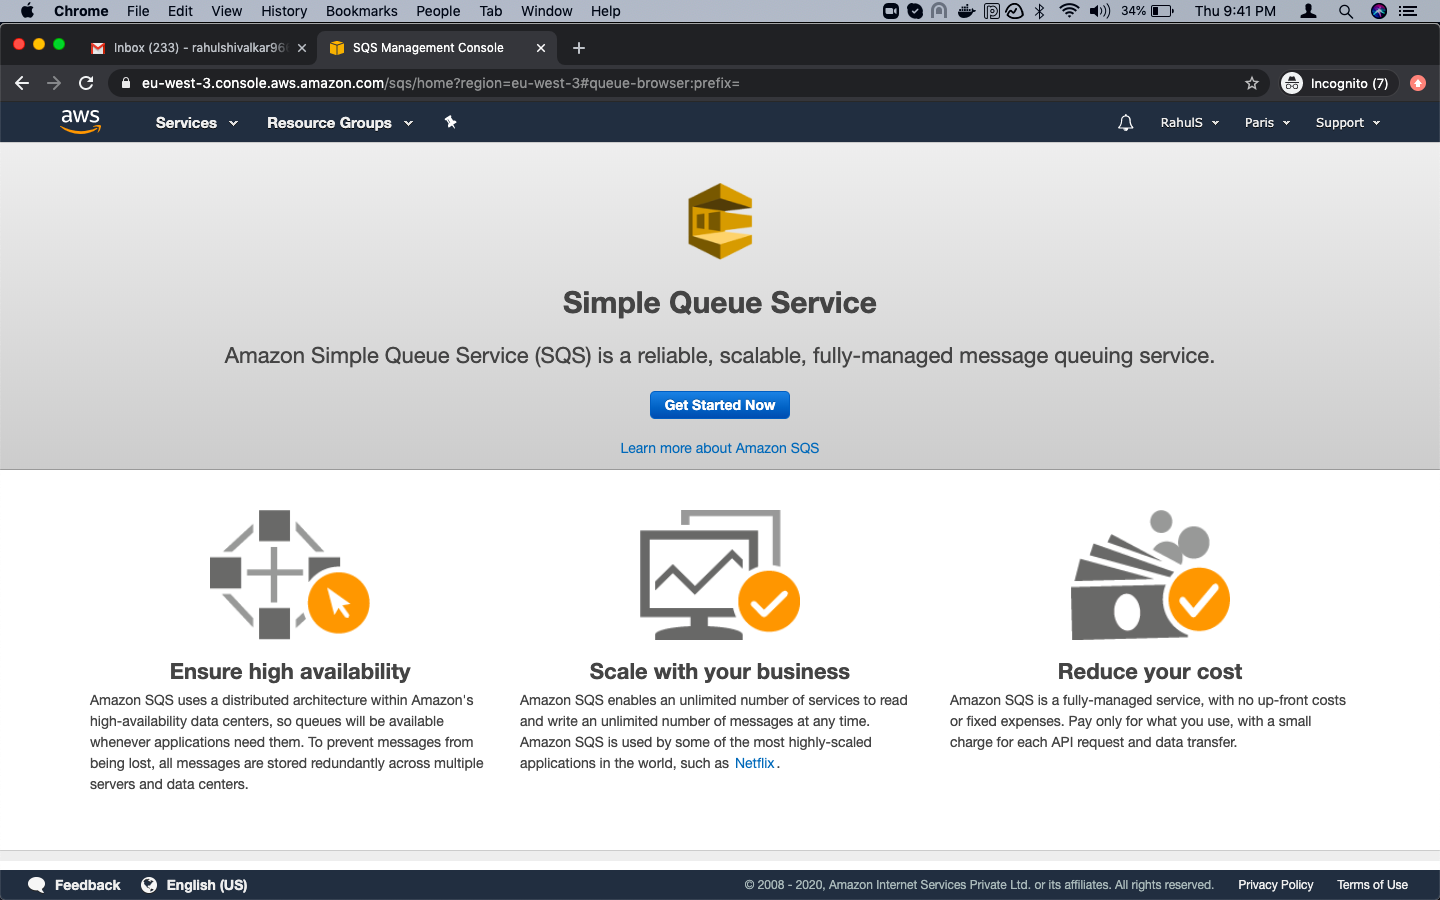
You will see the Main Page, here click on “Get started Queue”.
On the “Create New Queue” page, give a name to Standard Queue and scroll down the page.
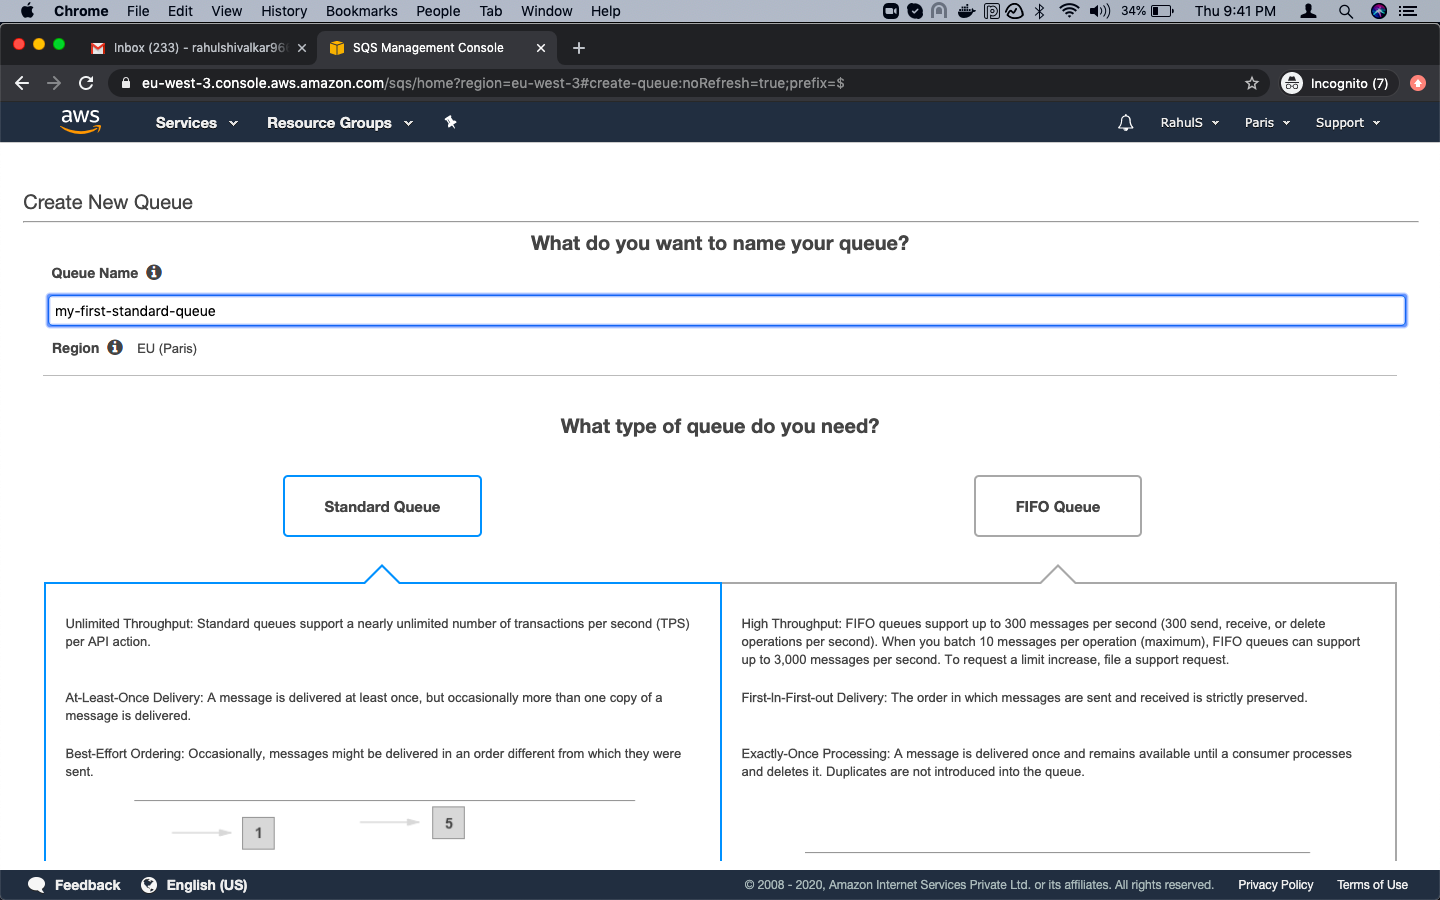
After giving a name to the Standard Queue, click on “Create Queue” button in the bottom left.
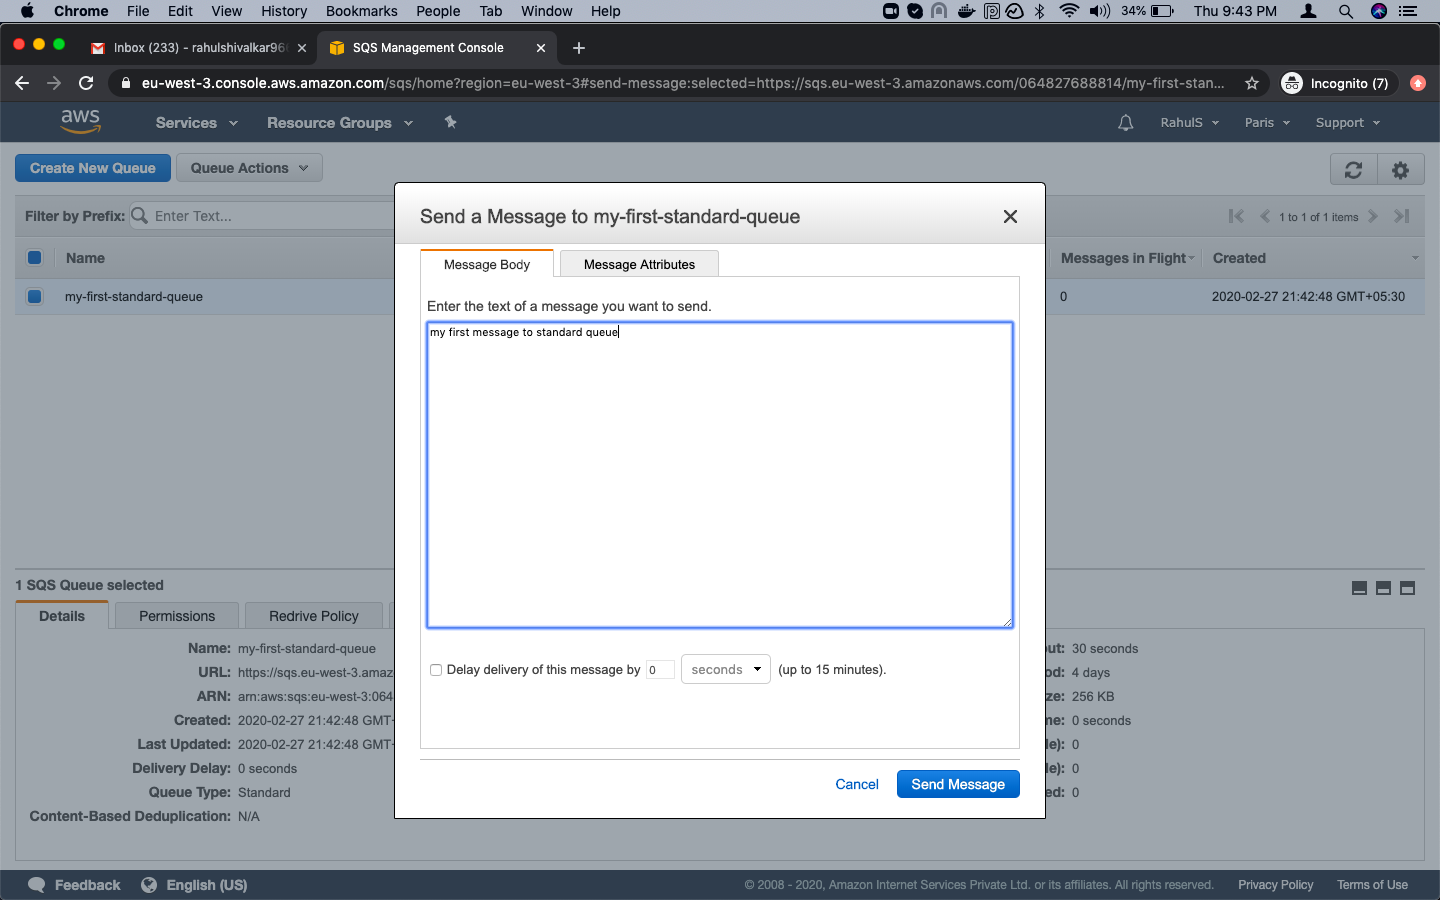
Once the Standar Queue gets created, select the Queue and click on “Queue Actions” and “Send a Message”.

Type a message that you want to send and click on the “Send Message” button.
You will get the following screen where you will be asked to send another message, send another message or click on “Close”.

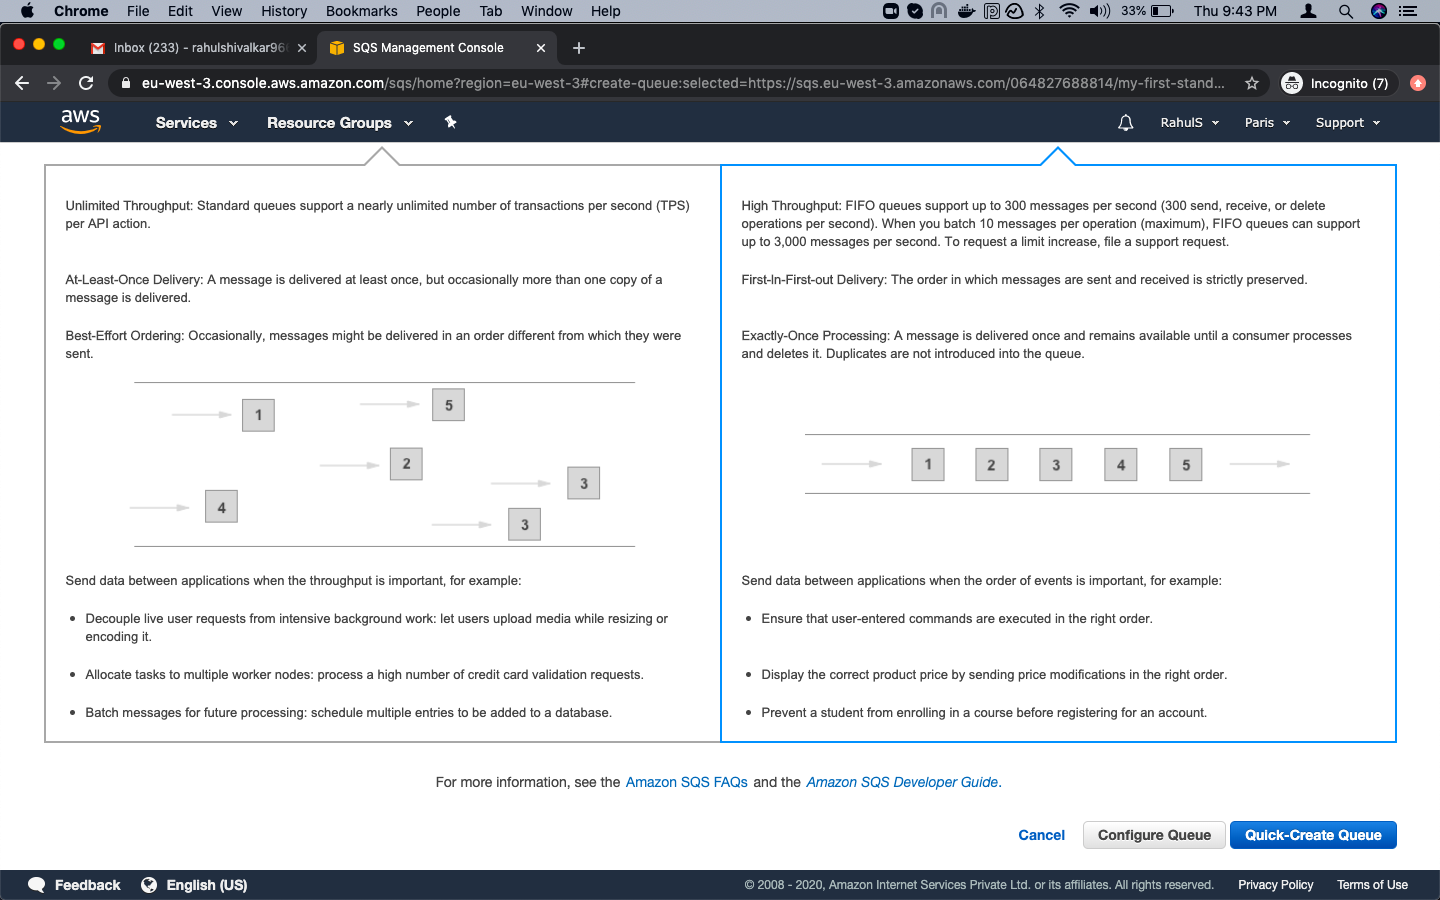
To create a FIFO Queue, select “FIFO Queue” and give a name to it. After giving a name to the FIFO Queue, scroll down the page.

Here, click on “Quick- Create Queue”.
Once the FIFO Queue gets created, select the Queue and click on “Queue Actions” and “Send a Message”.

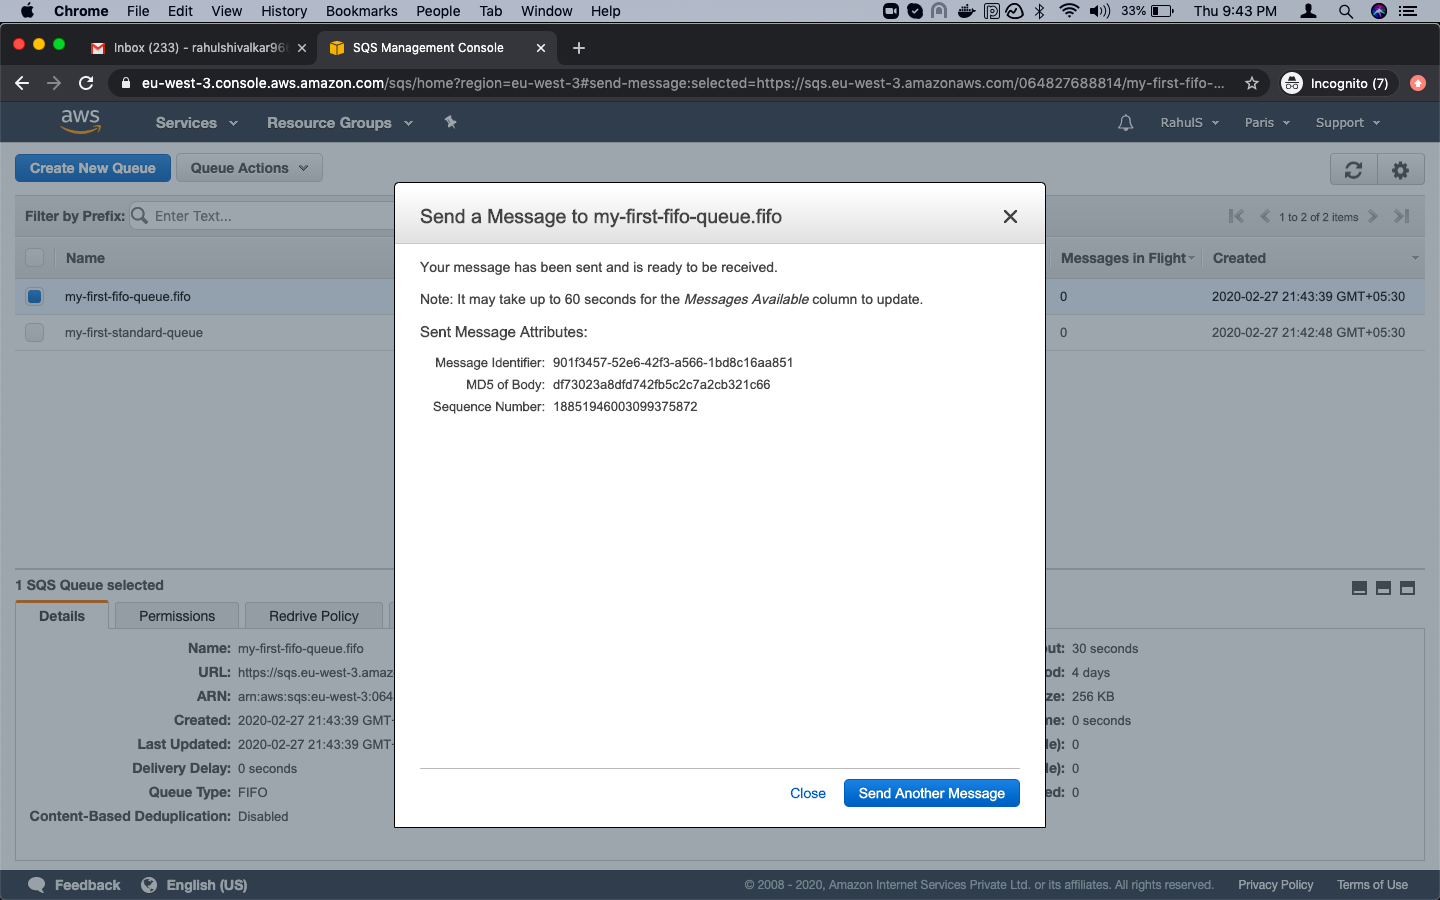
Here, type a message that you want to send to the FIFO Queue and give Message Group ID and Message Duplication ID and click on “Send Message”.

Here also, you will get the following screen where you will be asked to send another message, send another message or click on “Close”.
View and Delete Message from the Queue
Select the Queue Name from which you want to read the message sent in the above steps.
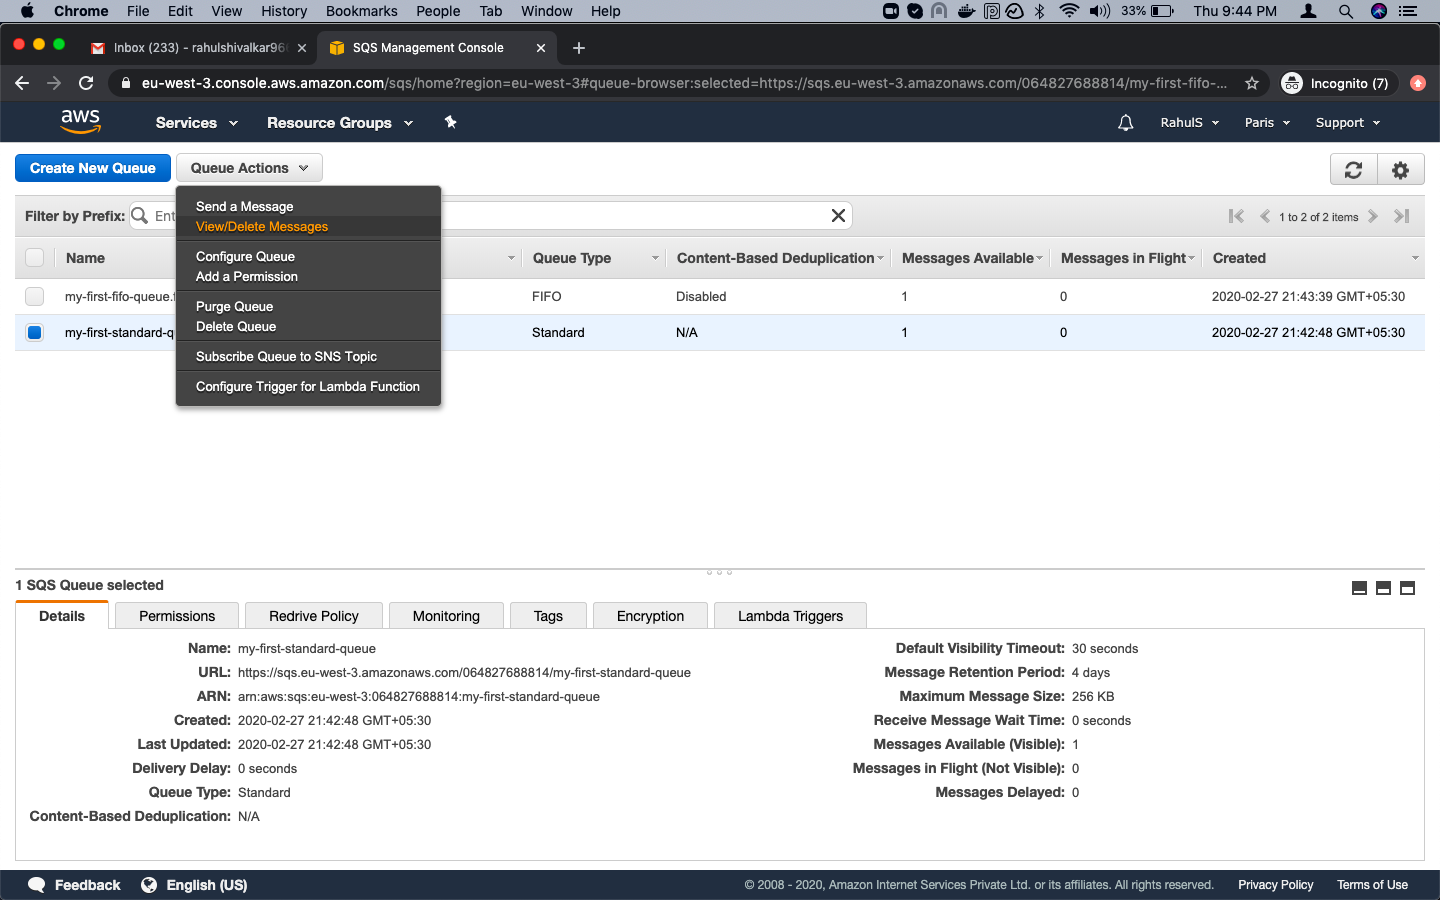
I have selected the Standard Queue here, click on “Quick Actions” -> View/Delete Messages.
Here, click on “Start Polling for Messages”.

Now, you can see the message that you sent in the previous step.
To delete the same, select the message and click “Delete 1 Message”.

In the confirmation box, click on “Yes, Delete Checked Messages” to delete the selected message/s.

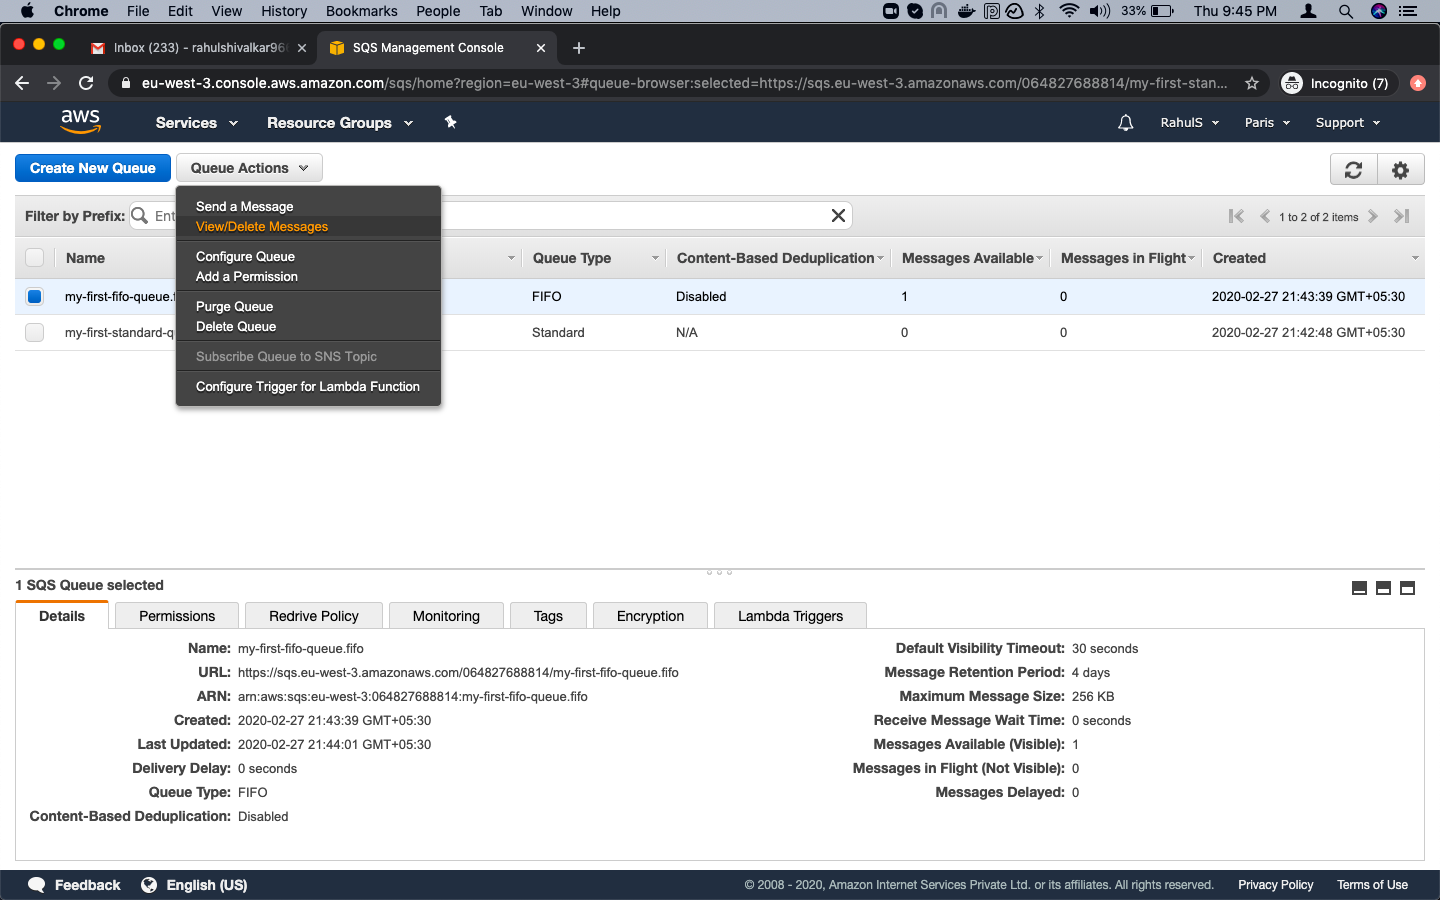
In the same way, you can view/delete messages sent to FIFO Queue. Select the FIFO queue, click on “Quick Actions” -> "View/Delete Messages".
Here, click on “Start Polling for Messages” to view the messages sent in the previous step.

Once you get a list of message/s, select that particular message to delete it and click on “Delete 1 Message”.

In the confirmation box, click on “Yes, Delete Checked Message”.

Delete Queues
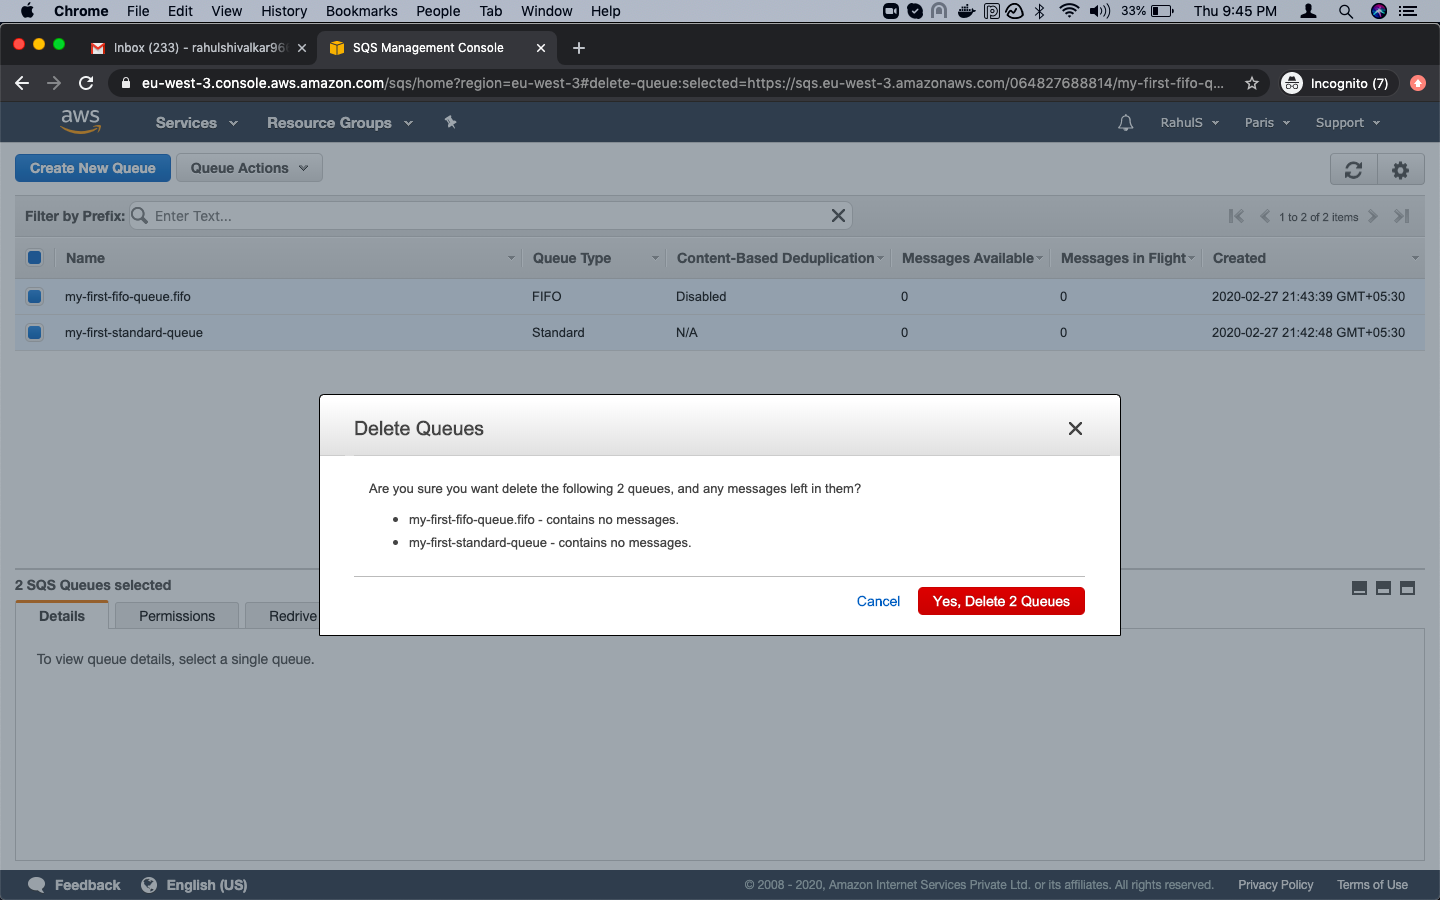
You can delete Queues by selecting them, click on “Quick Actions” and “Delete Queues”.

On the confirmation page, click on “yes, Delete 2 Queus.”
Conclusion
In this article, we saw the steps to create standard and FIFO queues, send messages to them, read them and delete the same. We also saw the steps to delete the Queues.

