How to Set up Pritunl VPN Server on Rocky Linux 8
On this page
Pritunl is an open-source VPN and IPsec server with user management and horizontal scaling for small and large organizations. It gives the user a choice to use OpenVPN and Wireguard protocols. It comes with an easy to use GUI interface and supports clients on most devices and platforms. All the traffic between clients and the server is encrypted. Pritunl is built on MongoDB, a reliable and scalable database that can be quickly deployed and with built-in support for replication, making deploying the Pritunl cluster easy.
This tutorial will teach you about how to install the Pritunl VPN server on Rocky Linux 8. We will also explore how to connect to the VPN using a Linux Client.
Prerequisites
-
A system running Rocky Linux 8 for hosting Pritunl server.
-
A non-root user with sudo privileges.
-
A domain name pointed to the server.
-
A system running Rocky Linux 8 as a client.
-
Make sure everything is updated.
$ sudo dnf update
-
Install any prerequisites.
$ sudo dnf install nano
Step 1 - Configure Firewall
Rocky Linux uses Firewalld Firewall. Check the firewall's status.
$ sudo firewall-cmd --state
running
This indicates it is up and running successfully.
The firewall works with different zones and the public zone is the default one, which we will use. List all the services and ports active on the firewall.
$ sudo firewall-cmd --permanent --list-services
It should show the following output.
dhcpv6-client mdns ssh
Allow HTTP and HTTPS ports.
$ sudo firewall-cmd --permanent --add-service=http
$ sudo firewall-cmd --permanent --add-service=https
Recheck the status of the firewall.
$ sudo firewall-cmd --permanent --list-all
You should see a similar output.
public
  target: default
  icmp-block-inversion: no
  interfaces:
  sources:
  services: cockpit dhcpv6-client http https ssh
  ports:
  protocols:
  masquerade: no
  forward-ports:
  source-ports:
  icmp-blocks:
  rich rules:
Reload the firewall to enable the changes.
$ sudo firewall-cmd --reload
Step 2 - Install MongoDB
Pritunl is built on MongoDB Database, so first, we need to install that. Rocky Linux doesn't ship with MongoDB, so we need to use MongoDB's official repository.
Note: MongoDB 5.0 only works on newer processors. If your server is running on older hardware, you should opt for an older version of MongoDB or switch to a newer server.
Create and open the file /etc/yum.repos.d/mongodb-org-5.0.repo for editing.
$ sudo nano /etc/yum.repos.d/mongodb-org-5.0.repo
Paste the following code in it.
[mongodb-org-5.0]
name=MongoDB Repository
baseurl=https://repo.mongodb.org/yum/redhat/$releasever/mongodb-org/5.0/x86_64/
gpgcheck=1
enabled=1
gpgkey=https://www.mongodb.org/static/pgp/server-5.0.asc
Save the file by pressing Ctrl + X and entering Y when prompted once finished.
Install MongoDB.
$ sudo dnf install mongodb-org
Enable and start the MongoDB service.
$ sudo systemctl enable mongod --now
Step 3 - Install Pritunl Server
The first step is to create the official repository for Pritunl. Create and open the file /etc/yum.repos.d/pritunl.repo for editing.
$ sudo nano /etc/yum.repos.d/pritunl.repo
Paste the following code in it.
[pritunl]
name=Pritunl Repository
baseurl=https://repo.pritunl.com/stable/yum/centos/8/
gpgcheck=1
enabled=1
Save the file by pressing Ctrl + X and entering Y when prompted once finished.
Install Epel repository first which is required by Pritunl.
$ sudo dnf install epel-release
Add and Import the GPG keys needed for Pritunl.
$ gpg --keyserver hkp://keyserver.ubuntu.com --recv-keys 7568D9BB55FF9E5287D586017AE645C0CF8E292A
$ gpg --armor --export 7568D9BB55FF9E5287D586017AE645C0CF8E292A > key.tmp; sudo rpm --import key.tmp; rm -f key.tmp
Install Pritunl.
$ sudo dnf install pritunl
Check the Pritunl version.
$ pritunl version
pritunl v1.30.2960.4
Enable and start the Pritunl service.
$ sudo systemctl enable pritunl --now
Increase Open File Limit
Run the following commands to increase the open file limit on the server. This will prevent any connection issues in case of high load. If you have installed MongoDB on a separate server, you need to run these commands on that server.
$ sudo sh -c 'echo "* hard nofile 64000" >> /etc/security/limits.conf'
$ sudo sh -c 'echo "* soft nofile 64000" >> /etc/security/limits.conf'
$ sudo sh -c 'echo "root hard nofile 64000" >> /etc/security/limits.conf'
$ sudo sh -c 'echo "root soft nofile 64000" >> /etc/security/limits.conf'
Step 4 - Access and Configure Pritunl
You can launch Pritunl by entering http://<serverIP>/ in your browser. Modern-day browsers try to access the HTTPS version of every site, so you will need to bypass the Privacy error thrown by the browser.
You will get the following screen when you first launch the URL.
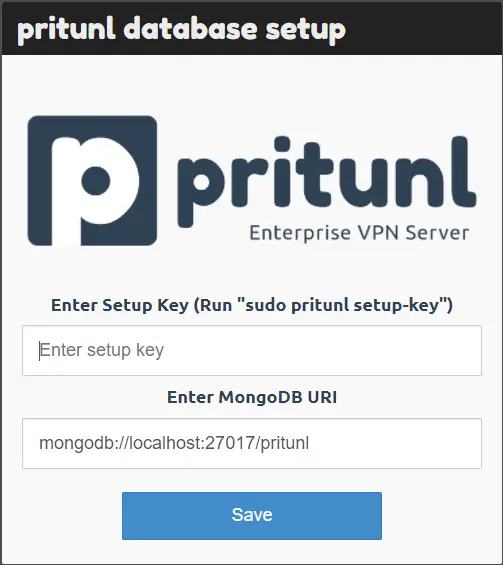
It grabs the MongoDB URI automatically. For the setup key, run the following command.
$ sudo pritunl setup-key
eacbd641982048fd9a60cdf09f7ebaa3
Enter the generated key on the website and click the Save button. It will upgrade the database and open the login screen.
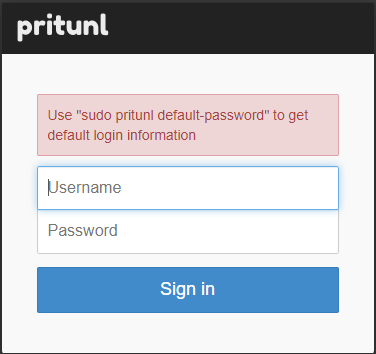
Run the following command to generate default login information.
$ sudo pritunl default-password
[undefined][2021-11-08 22:34:55,255][INFO] Getting default administrator password
Administrator default password:
  username: "pritunl"
  password: "krZQLlH9U7P1"
Enter the login information and sign in. You will get the following setup screen.
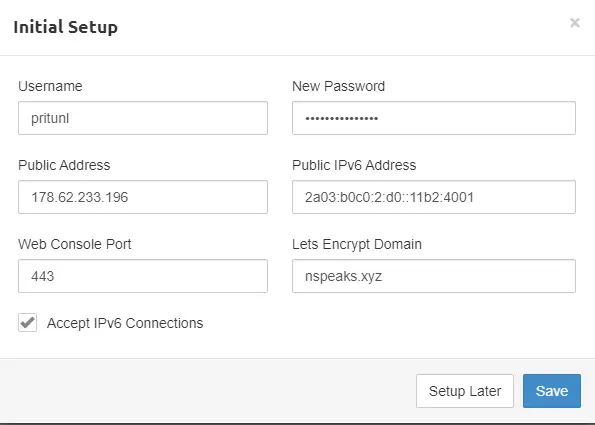
Enter a strong password to replace the default one. Enter a domain under the Lets Encrypt Domain field. Pritunl will generate and set up an SSL certificate automatically for the domain.
You can now launch the server using the domain name by typing https://pritunl.example.com in your browser.
Step 5 - Add an Organization, Server and Users
The next step is to add an Organization for your VPN. Click on the Users tab and click on the Add Organization button.


Click the Add button to proceed.
The next step is to add a user. There are two options. You can either add users one by one or add them in bulk. We are going to add a single user for now. Click on the Add User button.
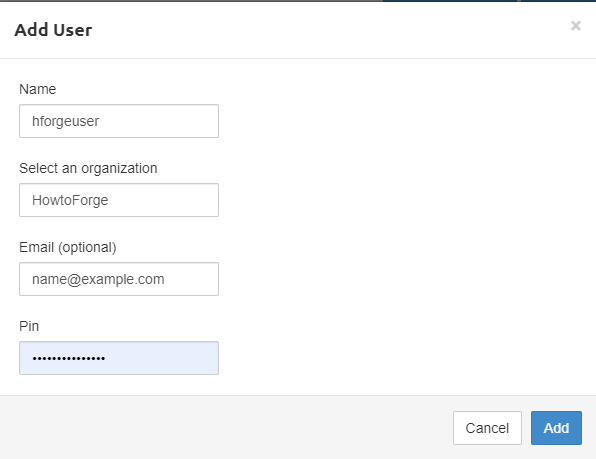
PIN field is optional and is used if you are going to use Two-factor authentication. The PIN is composed of numbers only.
Once the organization and the users have been set, go to the Servers tab and click the Add Server button.

Port: You can add any port that the server will use. Make sure the port which you specified is open to all inbound traffic in the Security Group.
DNS: You can add either Google DNS or OpenDNS.
Virtual Network: You can add private IP in this field, but make sure any other resource does not use this. Clients will be allotted IP addresses from this range.
Virtual WG Network: WireGuard Network Addresses for the private network that will be assigned to WireGuard clients. It should have the same CIDR Block as Virtual Network.
Enable WireGuard: If checked, it will use WireGuard instead of OpenVPN. We will, however, be using OpenVPN for our tutorial, so leave it unchecked.
WG Port: This port will be used for the WireGuard Connections. It is to be used only when we have enabled the WireGuard option.
Enable Google Authenticator: To use two-step verification, enable this option. If this option is enabled on the server all clients under that server, need to verify the OTP before connecting to VPN every time.
Enable IPv6: Enables IPv6 DNS servers. Clients are given private IPv6 addresses.
Click the Add button to finish.
Click on the Add Organization button to link the organization with the newly created server.

Click on the Start Server button to start the VPN.
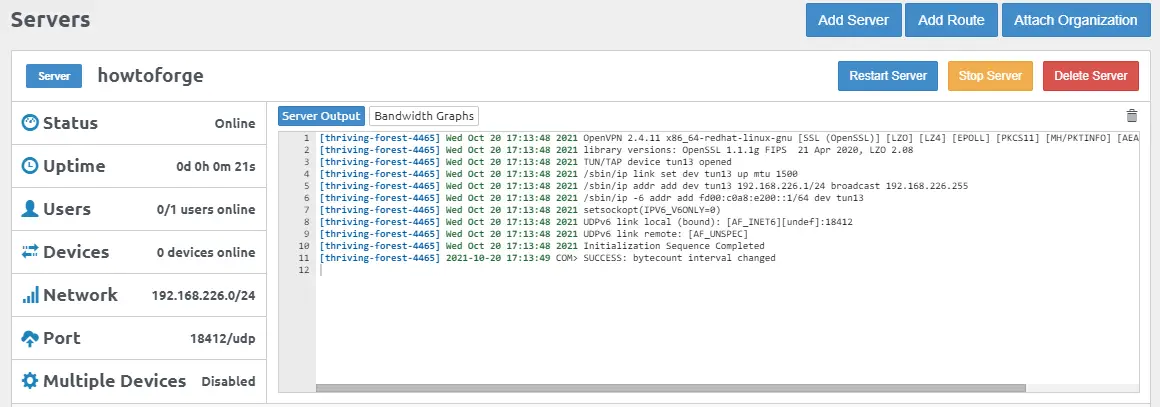
Enable Port in Firewall
To accept the connections from the client over the VPN port, we need to enable it through our firewall.
$ sudo firewall-cmd --permanent --add-port=18412/udp
$ sudo firewall-cmd --reload
Step 6 - Install Pritunl Client
Now that our server is up and running, it's time to install a client and connect to the VPN. Pritunl offers two types of clients - a Command line and a GUI Client.
For our tutorial, we will use the command-line client. You can only install one type of client on a system.
Install the EPEL repository needed by the Pritunl client.
$ sudo dnf install epel-release
Add the official Pritunl repository to your Rocky Linux system.
$ sudo tee -a /etc/yum.repos.d/pritunl.repo << EOF
[pritunl]
name=Pritunl Stable Repository
baseurl=https://repo.pritunl.com/stable/yum/centos/8/
gpgcheck=1
enabled=1
EOF
Add and Import the GPG keys.
$ gpg --keyserver hkp://keyserver.ubuntu.com --recv-keys 7568D9BB55FF9E5287D586017AE645C0CF8E292A
$ gpg --armor --export 7568D9BB55FF9E5287D586017AE645C0CF8E292A > key.tmp; sudo rpm --import key.tmp; rm -f key.tmp
Install the command-line client.
$ sudo dnf install pritunl-client
Step 7 - Connect from Client to the Server
From the users' tab of the Pritunl server site, get the temporary profile link to connect to the client.
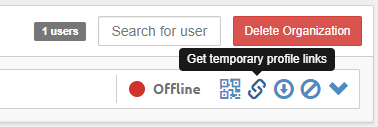
Copy the temporary URI link from the last entry.
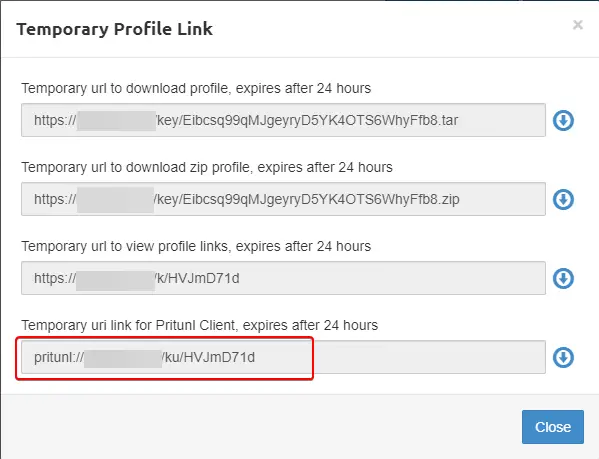
Enter the following command on the client terminal to add the profile.
$ pritunl-client add pritunl://example.com/ku/2hd6S6Ug
Make sure you add the profile link copied earlier after add in the command.
Check the list of the profiles added.
$ pritunl-client list
+----------------------------------+-------------------------+--------------+----------------+----------------+
|                ID                |          NAME           |  ONLINE FOR  | SERVER ADDRESS | CLIENT ADDRESS |
+----------------------------------+-------------------------+--------------+----------------+----------------+
| wkinhnnjyz3ybektjbavy8qpecafqp1e | hforgeuser (howtoforge) | Disconnected | -              | -              |
+----------------------------------+-------------------------+--------------+----------------+----------------+
Run the following command to connect to the profile. You don't need to use the full profile ID in the command. Just use the first 3 letters of the profile ID to refer to it.
$ pritunl-client start wki --mode=ovpn --password=PINOTP
- To specify OPVN mode, add the flag
--mode=ovpnin the command. - If you have enabled the Google Authenticator option, you need to configure it using a Google Authenticator or Authy client.
- To specify the pin and the two-factor authentication code, use the flag
--password=PINOTPin the command. For example, if the pin is 54321 and the OTP code is 456789, then use the flag--password=54321456789in the command above. If you are only using PIN, then use the flag--password=PIN.
Run the list command again to check whether the connection is working.
$ pritunl-client list
+----------------------------------+-------------------------+------------+----------------+----------------+
|                ID                |          NAME           | ONLINE FOR | SERVER ADDRESS | CLIENT ADDRESS |
+----------------------------------+-------------------------+------------+----------------+----------------+
| wkinhnnjyz3ybektjbavy8qpecafqp1e | hforgeuser (howtoforge) | 6 secs     | 178.62.233.196 | 192.168.238.2  |
+----------------------------------+-------------------------+------------+----------------+----------------+
You have made a successful connection to the Pritunl VPN.
Pritunl Command-line
Pritunl server comes with a command-line tool that you can use to perform some basic operations.
Repair Database
You can use Pritunl to repair the database and allow recovering a corrupted or inconsistent database.
First, stop the Pritunl server.
$ sudo systemctl stop pritunl
Repair the database.
$ sudo pritunl repair-database
Restart the Pritunl service.
$ sudo systemctl start pritunl
The repair-database command will clear all the logs, reset all user static virtual IP addresses, and put all servers in the stopped state.
Reset Credentials
The following command will reset the administrator username and password back to pritunl. It will also remove any single sign-on and two-step authentication settings for the administrator user if enabled.
$ sudo pritunl reset-password
Change the Web Console Port
By default, Pritunl runs on port 443. If you want to change it, use the following command.
$ sudo pritunl set app.server_port 8443
Pritunl runs a web server on port 80 for Let's Encrypt verification and redirects HTTP requests to HTTPS. You can turn off the redirection using the following command. This will also prevent the use of Let's Encrypt certificates.
$ sudo pritunl set app.redirect_server false
Conclusion
This concludes our tutorial on setting up and using the Pritunl VPN server on a Rocky Linux 8 server. If you want to learn more about Pritunl, you can follow its official documentation. If you have any questions, post them in the comments below.

