Arduino is an open-source electronics platform. Originally created for educational purposes, it has since expanded its range of boards for makers as well as some commercial use.
Some Arduino boards have a small form factor and are ideal for wearable projects. Let's take a look at some wearables made with the Arduino.
1. Arduino Lightsaber

Make your own lightsaber with an Arduino, or an Arduino clone. At the heart of this project is an Arduino MKR Zero, which the maker notes was used as it has the ability to charge LiPo batteries directly. It also has a built-in I2S DAC for audio output from an SD card.
In addition, there’s an on-board SD connector to hold more music files with no external hardware required. Included in the build is a NeoPixel LED ring, color sensor, speakers, battery-charging circuit based on the PowerBoost 500C board, and a LiPo battery. Other parts include jumper wires, veroboard, switches, AA batteries, and a 2 x AA battery holder.
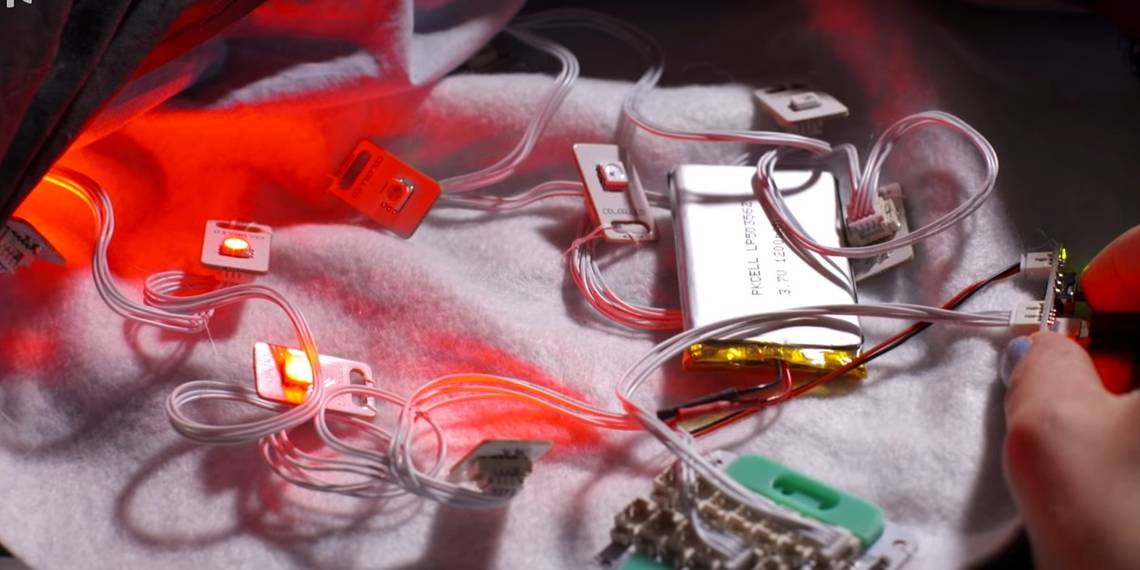
2. Arduino Apple Watch

Show notifications from an iPhone and synchronize the time. At the front of the watch are touch buttons which sense when a finger is placed on them. The maker cleverly made direct use of safe-to-touch wires for this touch capability, giving the front a subtle, striped interface while avoiding the need for specialty parts, or even standard buttons at all.
Just as clever, they provide their own models for 3D printing their case, but also leave it open to customization–the only essential is the inner housing. Add in how the maker notes during the build common mistakes to avoid, and we have a project with the massive appeal of the iPhone plus the customization and personality of DIY.
This build starts with an Arduino Pro Mini 328, also needing a BLE 4.0 module, (importantly!) a Li-Po charging unit, and from there various typical parts for circuit work as well as improvised pieces fitted to purpose. The use of 3D printing presents the only real specialty need.
3. Arduino 101: Intel Curie Pattern Matching Dress

The brainchild of an artist and engineer Kitty Yeung, this dress build combines high creativity and the steps of a very practical mind. Multiple skill sets are used here (including sewing), but the creator’s comments on alternative parts and methods are strides in making this a friendly project to attempt yourself, regardless of what you have available.
Using the Pattern-Matching Engine (PME) on Intel’s Curie module via an Arduino 101, makers can get some experience using machine learning, which can be an intimidating topic for newcomers, in a visually intriguing way. Additionally, the build is super-adaptable to other patterns and uses, as its creator elaborates. They even provide a video on training the neurons, and additional ideas on their own website.
This project is a sure-win for those looking to learn, then expand on principles of machine learning… and have something to show for it!
4. Arduino-Powered Robot Controlled with The Tactigon

Time for some dedicated Arduino hardware: this project makes use of an Arduino Uno adapted using the Tactigon ONE for comfortable motion control designed for use in wearable projects.
The creator provides step-by-step instructions on the relevance of each line of code, starting with the actual example code of the Alphabot2. This makes the project quite easy to adapt to for beginners, as they can start with a basic framework and learn from each step the effects of modifications as they go.
Furthermore, experienced makers can try adapting the Tactigon for various other uses; if it has BLE connectivity, this versatile control module can typically connect with ease, and the possibilities expand from there. This project has great promise as a beginning—not simply due to the ease of making it, but due to the many next steps you can take from there.
5. Arduino Wearable Keyboard Glove

A keyboardless keyboard, typing from a glove—sounds “high tech”, “futuristic”, or “expensive”, right? What if we told you this project was the work of a creator without a computer science background?
The project was an initial proof of concept for a non-technical module at university. Essentially, it is a gesture-based input device. Create a T9-based input system to type, or set it up for MIDI control! It’s built with an Arduino Leonardo, two protoboards, resistors, push-buttons, flex sensors, and a pair of gloves.
6. Music Sync RGB Wearable Spike

The RGB Spike was inspired by the LED Stego Flex Spike Hoodie by Becky Stern on Adafruit. Customize the colors and sync it with your music to make it even more interactive. Each spike was printed in transparent filament to diffuse the LED.
To build your own, get some WS2801 RGB LED strips, an Arduino, back-strap, double-sided tape, hot glue, USB battery pack, a single-core cable, and DuPont line. To set up a music syncing system for your build, you’ll need capacitors, resistors, an audio jack, audio jack splitter, and an MP3 device or phone.
7. Wearable for Christmas

As its name suggests, this is a wearable made just for Christmas! It's a sparkly shirt that glows in the presence of another human or object that has crossed paths with the user, detected using the passive infrared sensor attached to the shirt.
All you need to make this is an Arduino Uno, a string of LEDs, a PIR sensor, and 9V battery. To fix the string of LEDs to the shirt, the maker used sticky tape. They also suggest connecting the LEDs to a PWM-capable pin on the Arduino Uno, such as Pin 5.
8. Arduino-Based Blinking Santa Hat

Pair your light-up shirt with a light-up pom-pom Santa hat! These lights are controlled by an Arduino Mini Pro (3V) and a SparkFun FTDI Basic Breakout for programming it.
To power the entire device, two AA batteries are held in a battery holder. Hook-and-loop fasteners are recommended. For the lighting circuit, the maker simply used four red LEDs with 100 ohm resistors. Other miscellaneous parts include stranded hookup wire, hot glue, soldering kit, and a needle and white thread.
9. Low-Cost Vitals Monitoring Wearable

Wearable technology including smartwatches and fitness trackers has become commonplace. Now, with affordable electronics and beginner-friendly development platforms like the Arduino, makers can hack their own wearables together!
This is a low-cost wearable that can measure real-time heart rate and inter-beat interval (IBI) as well as body temperature. The data is plotted on a graph on the display, and is sent to a mobile device via Bluetooth. The maker notes that this data can even be sent to a doctor for further analysis, as well as connected up to the cloud.
Project components include an Arduino Pro Mini 328, pulse sensor, thermistor, rechargeable battery, and HC-05 Bluetooth module. If you’ve ever wanted to build your own low-cost wearable to help with early detection of COVID-19, check it out!
10. Flowers: Arduino Nano, CrazyCircuits, DFRobot

While there are plenty of Arduino LED projects around, this project combines a wearable dress with LEDs. The maker crafted this dress with paintings of flowers. Underneath it is an Arduino Nano, a heart-rate sensor, and LEDs programmed to be blinked based on sensor data.
Rather than a fitness wristband, the maker wanted to embed sensors into daily wear. Tulle fabric was combined with cut-out pieces of the dress. The lighting circuit was prototyped with large LEDs and coin cell holders and conductive tape.
Which Wearable Project Is For You?
In this article, we’ve looked at ten wearable projects made with an Arduino. Most of these projects use e-textiles, LEDs or LED strips, as well as 3D printing technology. Others utilize custom circuit boards such as the Tactigon ONE.
Before trying out any of these wearables projects, you may want to check out the documentation and technical specifications of various boards on Arduino's official website.