When I was young, my mother asked me not to open the door unless the door knocked in a series of four which was only known to us. I think you all have done in their childhood or later.
That same concept I want to use in my Linux system, you are pondering what he is speaking? How and where will be a door on my system, and how to knock? I do not understand it; explain to me this abstract concept.
Yes, I’m going to explain & implement all in a while with an exact scenario. After that, you can also configure knockd on the server and protect your system from intruders.
Table of Contents
What is Port Knocking?
I believe you all know what is a port and what it does? As you know default SSH service runs on port number 22. If it is blocked by some firewall configurations, you will not be able to access it.
Port knocking provides an extra layer of security to avoid system compromise using a set of sequences that are only known to authorize or legit users to disable firewall rules and allow an uninterrupted connection.
In the next paragraph, you will see how to install & configure port knockd on your remote server and client system.
Knockd Installation
Install knockd on server
To move ahead, we need to install knockd. I’m performing all the steps on Debian 11, and the installation for other Ubuntu/Debian distributions is identical.
Before passing the below command, make sure to update the repository to fetch a newer version of applications.
$ sudo apt install -y knockd Configure knockd configuration file
After installation, we need to configure knockd on the server. You need to configure knockd.conf file, which is stored in the /etc directory. To modify, you can use any editor with sudo privileges for modifications:
$ sudo nano /etc/knockd.conf
The above configuration file is self-explanatory. If you go through the file, it has a group with the following number of actions needed to follow.
Now in detail, you will get what all the default options mean. The first group is [options] under that, we see UseSyslog it depicts all the logs that should save into /var/log/messages.
If you don’t wish to save the log at the default location, you may change it by passing the below line under [options] group.
logfile = /var/log/knockd.logThe next group is [openSSH] and [closeSSH] it has multiple rules like sequence, seq_timeout, command, tcpflags .
sequence: This is the main key, don’t share with anyone and change it perodically.seq_timeout: You should enter sequence under the following time limit.tcpflags: syn is identical for SSH packets.command: What command should execute once the sequence passed sucessfully, knockd useiptableto enable or disable certain ports with multiples flags.
The command flags need special attention over others. In the [openSSH] group, you may overwhelm if it is your first encounter. Believe me, iptable is more than packet filtering.
Let’s make it simpler for you:
command = /sbin/iptables -A INPUT -s %IP% -p tcp --dport 22 -j ACCEPT/sbin/iptables: Command location-A: Append-s: %IP% address of source-p: Pass the type of protocol e.g. tcp, udp--dport: Enter the destination port number.-j: What action should perform when the target match, e.g.ACCEPT,DROP, orRETURN
Ultimately now you understand what [closeSSH] will do, for -D parameter use manual to know.
I haven’t modified the default knock sequence for the sake of this tutorial.
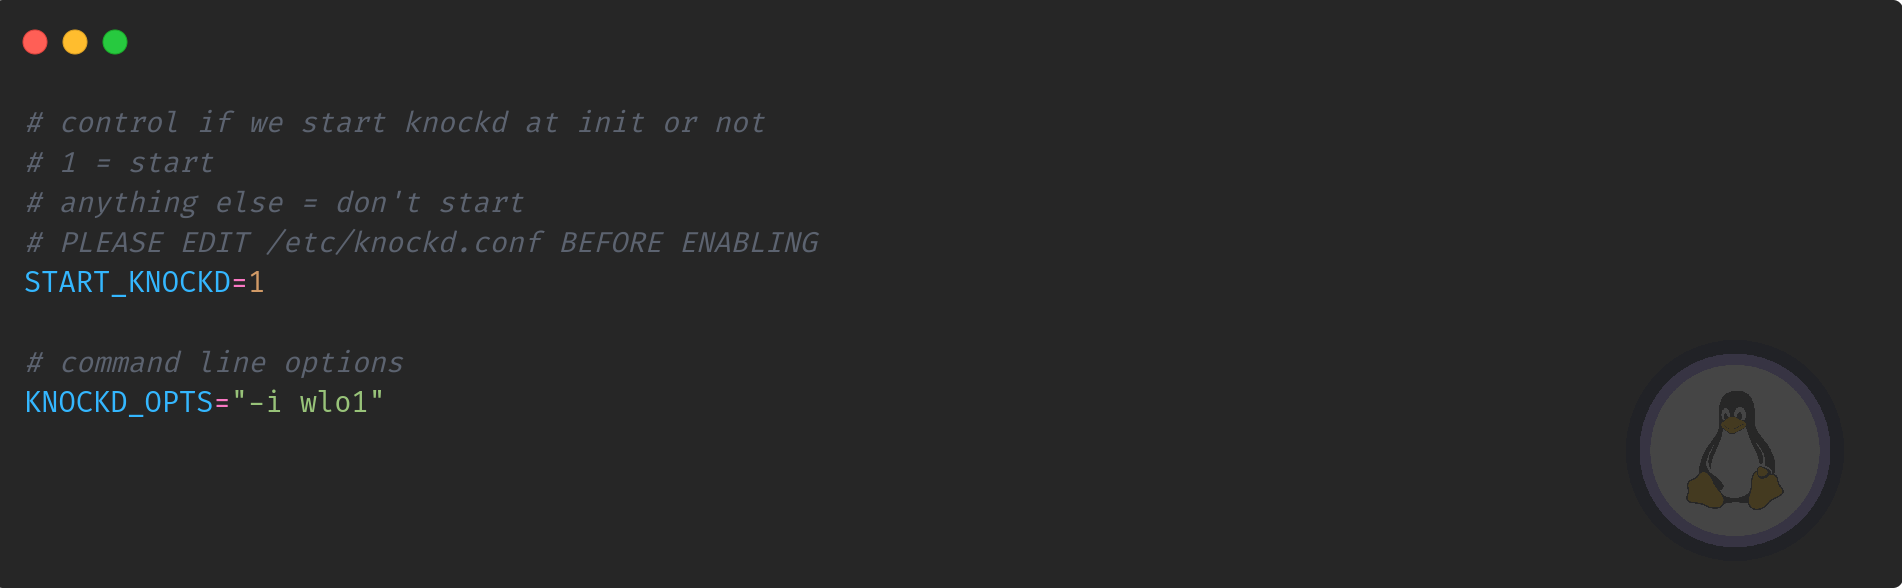
Before getting to the next step, we need to modify /etc/default/knockd to start knockd, go to the terminal, and copy-paste the below command:
$ sudo /etc/default/knockdFirst of all, uncomment START_KNOCKD=1 and KNOCK_OPTS=”-i etho”, once it is done, modify the default network interface name with active system interface.
I’m using a wireless card so that the network interface name will be different:
Once all the done, pass the below command to enable & start knockd service:
$ sudo systemctl enable knockd && sudo systemctl start knockd
$ sudo systemctl status knockd
Enable Firewall
Without a firewall, it’s impossible to check whether the knockd is working as per our intend. I’m using UFW Firewall in my Debian server. Let me show you how to block SSH connections.
In the case of Ubuntu, you may find UFW preinstalled, but for Debian, you need to install, do copy-paste the below command:
$ sudo apt install ufwOnce the installation is complete, check the status of the firewall:
$ sudo ufw status If it is disabled, please enable it, and check status:
$ sudo ufw enable
$ sudo ufw status
You are all done. If you have already configured UFW, please remove the SSH block or allow rules to avoid further conflict.
Install knockd on client
It’s time to install knockd on your client system to knock, you can perform the same using Nmap too, but knockd utilities are much convenient.
To install knockd pass the following command as per your Linux distributions:
$ sudo apt install -y knockd         [Ubuntu/Debian Based]
$ sudo dnf install -y knock          [Fedora/AlmaLinux/RHEL]
$ sudo pacman -Sy knockd             [Manajaro-Linux,Arch Based]
Get ready to knock on your server port
The installation and configuration part is over, and now you are left to test your installation. Open your host terminal screen and pass the following command with the KEY sequence.
$ knock -v [SERVER-IP] [SEQUENCE-KEY]- -v:- Verbose to print command output
- [SERVER-IP]:- Enter the server ip address
- [SEQUENCE-CODE]:- Over here pass the seceret sequence KEY
$ knock -v 192.168.43.182 7000 8000 9000Once the knocking is successful, try to do login; make sure to knock with the correct sequence KEY; otherwise, you may get the error of time-out.
$ ssh [email protected]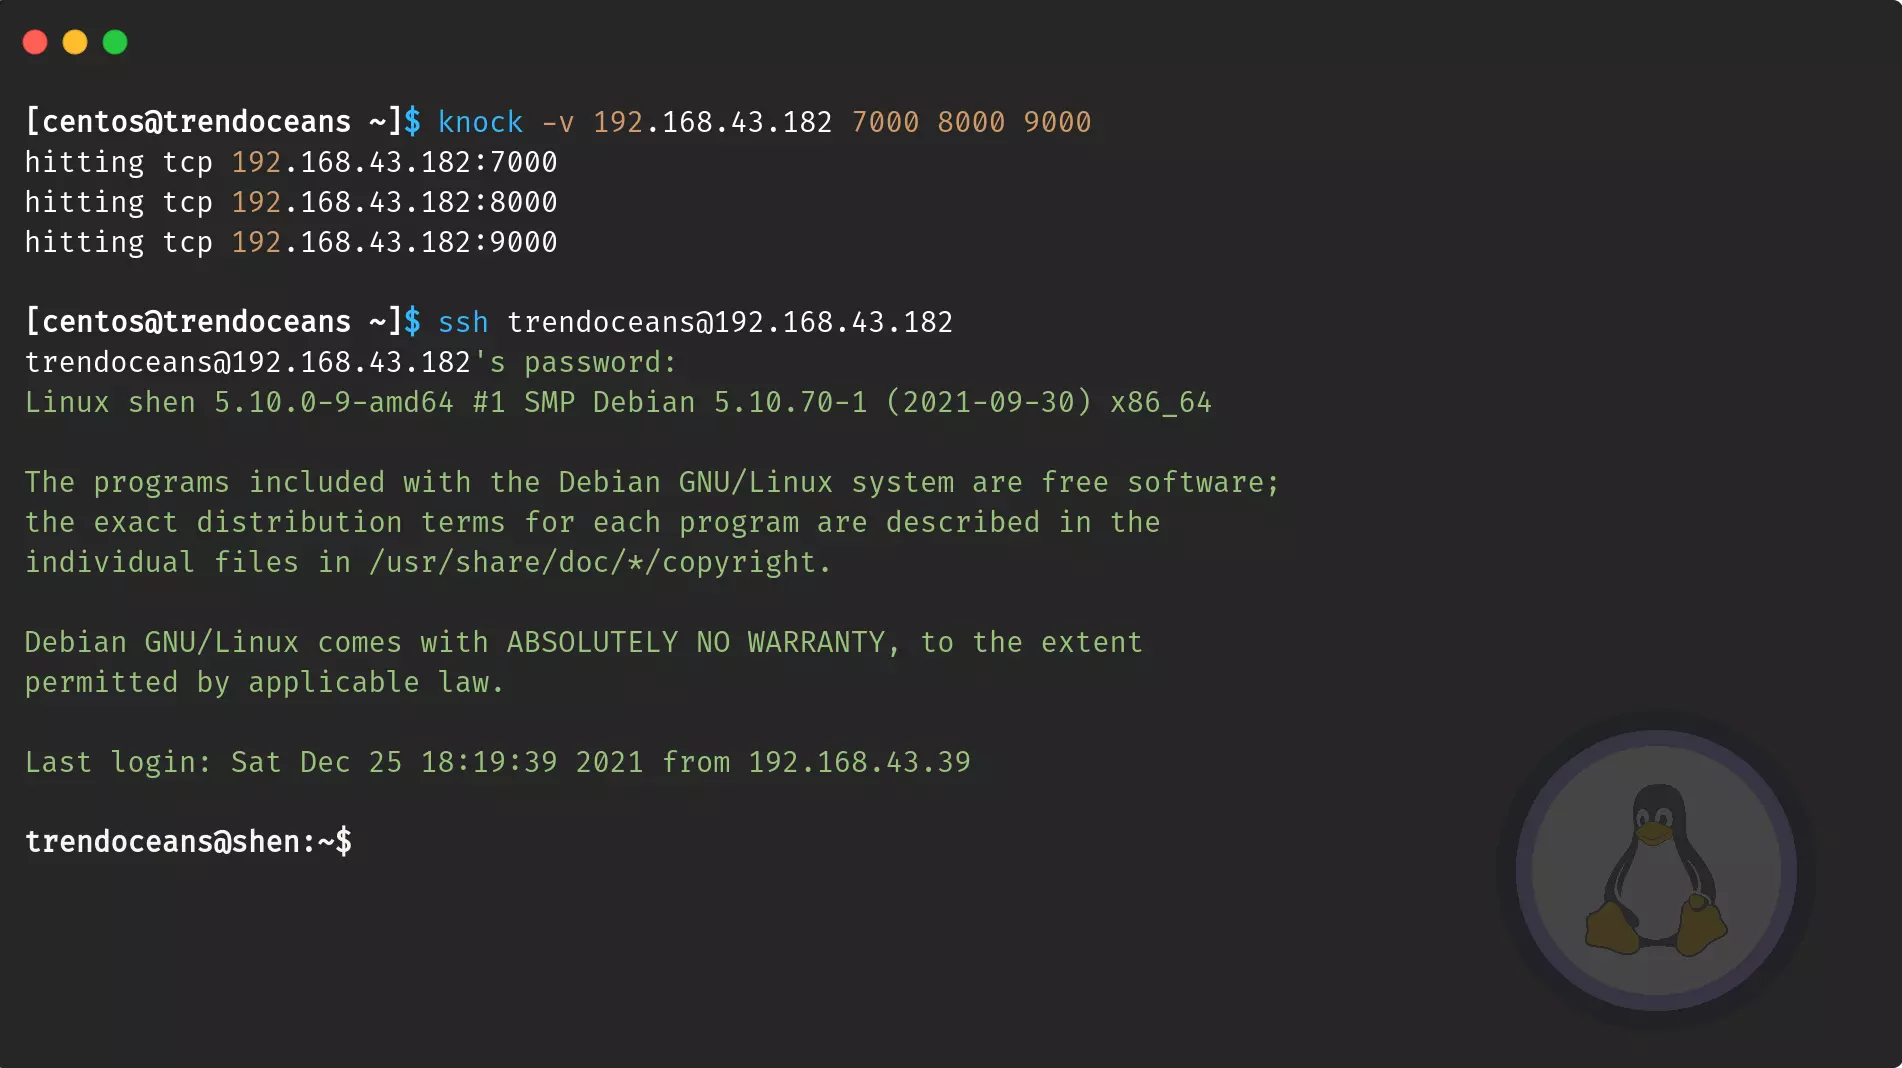
After that, only legit users can do log into your server. Once you are work done, follow the same step to close an open port.
$ knock -v 192.168.43.182 9000 8000 7000Wrap up
That’s all to install knockd on Ubuntu/Debian-based machines. After installation, you may wish to learn more about this tool. I suggest you to check the manual or the official website.
While following the article, make sure to first test on Virtual machines before implementing on a server. It might lock your system.
If you found this article helpful, let us know in a comment section.

A man with a tech effusive who has explored some of the amazing technology stuff and is exploring more. While moving towards, I had a chance to work on Android development, Linux, AWS, and DevOps with several open-source tools.