
LEMP, a renowned software stack, integrates Linux, NGINX, MariaDB, and PHP to provide a robust foundation for web servers. For those aiming to install LEMP on Debian 12 Bookworm, Debian 11 Bullseye, or Debian 10 Buster, understanding its core components and their synergistic functionalities is essential. LEMP’s versatility stems from its meticulously chosen components, each offering distinct advantages.
Key Components of LEMP:
- NGINX: Unlike the LAMP stack that uses Apache, LEMP incorporates NGINX, known for efficiently handling high-traffic sites. Its event-driven architecture ensures optimal CPU and memory usage. Additionally, NGINX supports load balancing, reverse proxy, mail proxy, and HTTP cache, fortifying its server capabilities.
- MariaDB: An open-source relational database system, MariaDB offers a broader feature set than MySQL. It ensures high performance, robustness, and user-friendliness. With superior replication modes and a commitment to open-source values, MariaDB is a top choice for developers.
- PHP-FPM: This advanced PHP FastCGI implementation enhances PHP’s performance. PHP-FPM manages pools of workers responding to PHP requests, offering adaptive process spawning and the ability to start workers with varied abilities. Its integration with NGINX accelerates the processing of PHP files, delivering dynamic content swiftly.
The LEMP stack’s strength lies in the seamless integration of these components, resulting in a high-performance, secure, and scalable server environment tailored for diverse web applications.
The subsequent guide will provide a comprehensive walkthrough on how to install the LEMP stack on Debian 12 Bookworm, Debian 11 Bullseye, or Debian 10 Buster, equipping you with the tools to optimize your web server setup.
LEMP Part 1: Install Nginx on Debian 12, 11 or 10
Step 1: Update the Debian System Before the LEMP Installation
Before you start the LEMP stack installation, ensure your Debian system is up-to-date. Keeping your system current helps prevent package conflicts and ensures the smooth functioning of upcoming installations. This also equips your system with the latest security fixes and software enhancements. To update your system, run:
sudo apt update && sudo apt upgradeThe sudo apt update fetches the list of available packages, and sudo apt upgrade installs the latest versions.
Step 2: Proceed to Install Nginx on Debian for LEMP
NGINX, a renowned open-source HTTP server and reverse proxy, is the foundation of the LEMP stack. To install NGINX on your Debian system, use:
sudo apt install nginxAfter installing NGINX, it typically starts automatically. However, to ensure it’s running without issues, check the service status:
systemctl status nginx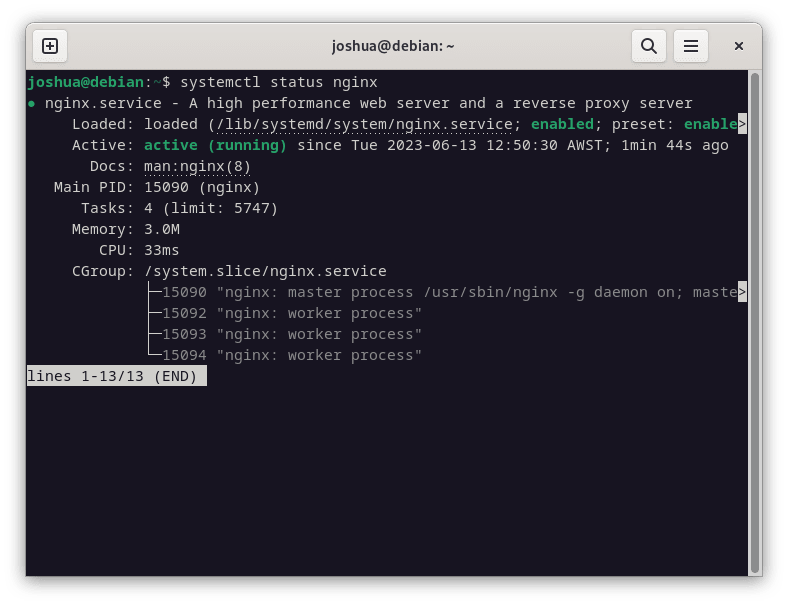
You should see an output that displays the NGINX service as active and running, indicating that NGINX is up and functioning.
If, for some reason, NGINX hasn’t started, use the following command to initiate it and also set it to start automatically during system boot:
sudo systemctl enable nginx --nowThis command activates the NGINX service and ensures it starts immediately.
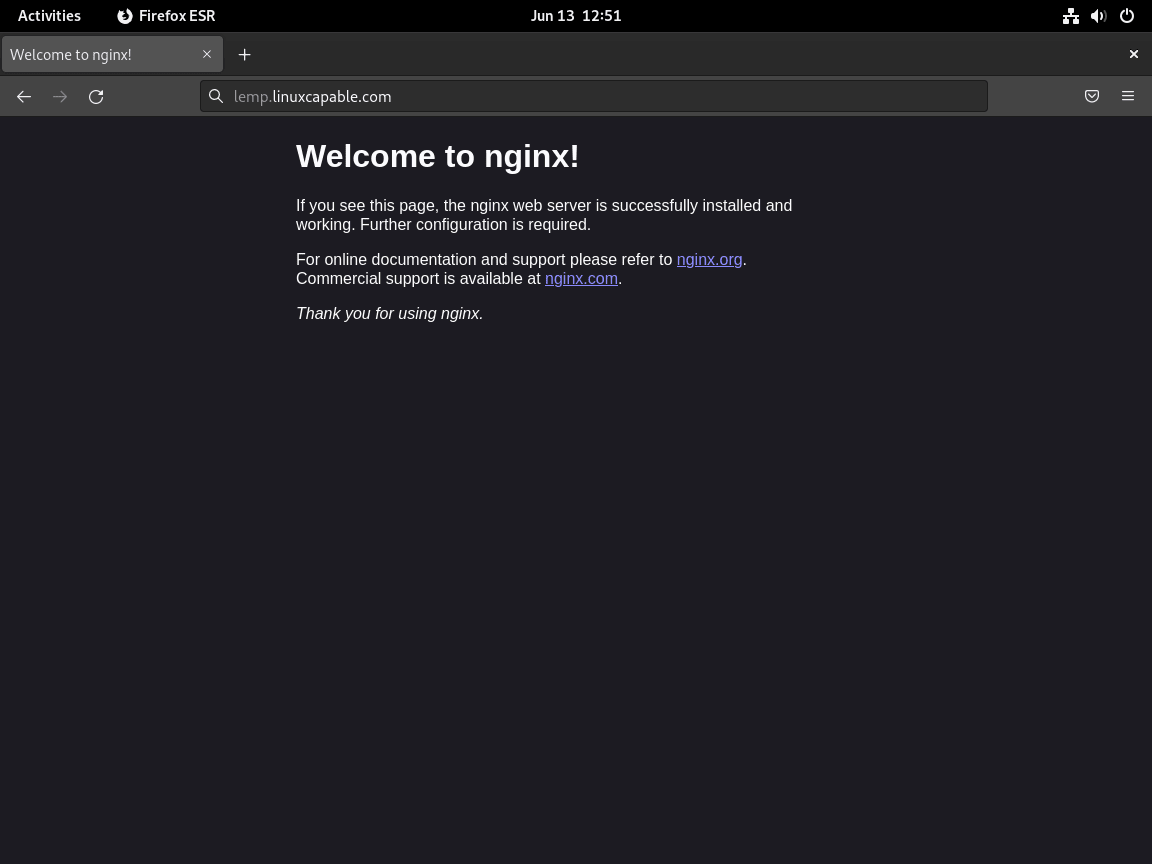
Optionally, to visually confirm that NGINX is working correctly, you can visit your server’s IP address. You should see a test page like this:
For users interested in installing the latest NGINX mainline or stable version directly from NGINX’s APT repository, refer to our comprehensive guide: Install NGINX Mainline on Debian Linux. This resource offers a step-by-step walkthrough, arming you with the information to optimize your server’s capabilities further.
LEMP Part 2: Install MariaDB on Debian 12, 11 or 10
For the LEMP stack setup, the next step is the installation of MariaDB. Due to its performance and additional features, MariaDB preferred over MySQL in the LEMP setup, can be installed using Debian’s repositories.
If your requirements are specifically inclined towards a distinct version from MariaDB.org’s official libraries, you may refer to our exclusive guide on installing MariaDB on Debian. Find it here: How to Install MariaDB on Debian
Step 1: Proceed with MariaDB Installation on Debian for LEMP
To install MariaDB, use this command:
sudo apt install mariadb-server mariadb-clientStep 2: Post-Installation Check of the MariaDB Service
After the installation, it’s essential to verify that the MariaDB service runs correctly:
systemctl status mariadb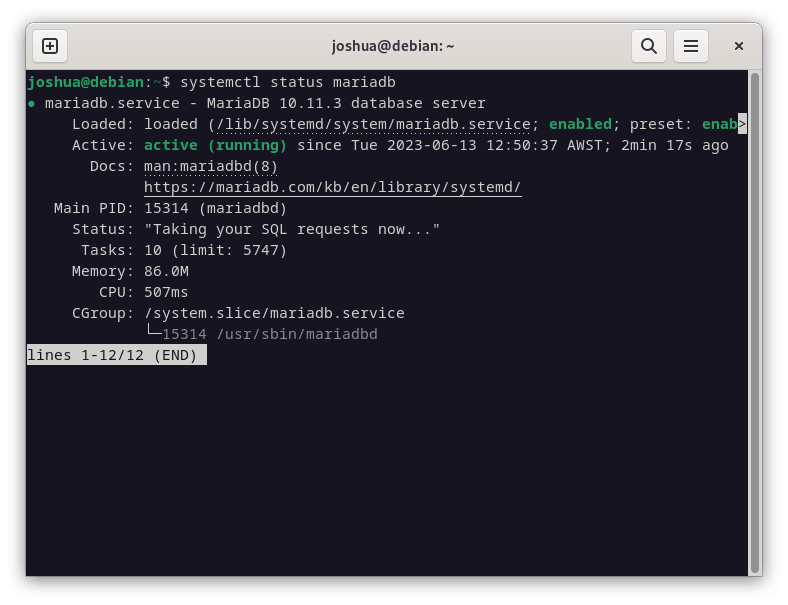
If the server isn’t running, use this command to start MariaDB immediately and ensure it starts with each system reboot:
sudo systemctl enable mariadb --nowStep 3: Secure the MariaDB Installation
For a reliable database, security is paramount. After installing MariaDB, it’s recommended to run its security script. This script improves MariaDB’s default settings to protect your system better.
To execute the MariaDB security script:
sudo mysql_secure_installationWhen you run this script, you’ll adjust settings, including setting up the root password, restricting remote access, deleting anonymous user accounts, and removing the test database.
Here is a quick rundown:
- Starting the Process:
- Run the
mysql_secure_installationscript. - It will prompt for the current root password.
- Recommendation: If it’s a fresh MariaDB installation, press ENTER.
- Run the
- Enabling Unix_Socket Authentication:
- The script will ask if you want to enable unix_socket authentication.
- Recommendation: Type ‘Y’ and press ENTER. This ensures only those with the right permissions can access the MariaDB root user.
- Update the Root Password:
- You’ll get an option to change the root password.
- Recommendation: If you want a stronger password, type ‘Y’ and press ENTER.
- Remove Anonymous Users:
- The script will ask about removing anonymous users.
- Recommendation: Type ‘Y’ and press ENTER for better security. Anonymous users can pose security risks.
- Deny Remote Root Logins:
- You’ll be prompted about preventing root logins from remote locations.
- Recommendation: To enhance security, type ‘Y’ and press ENTER. This step prevents unauthorized external attempts to access your database.
- Delete the Test Database:
- The script will ask if you want to delete the ‘test’ database accessible to all users.
- Recommendation: For increased security, type ‘Y’ and press ENTER to remove this potential vulnerability.
LEMP Part 3: Install PHP on Debian 12, 11 or 10
PHP is the last component in the LEMP stack. It connects Nginx to MariaDB and processes dynamic content.
In case you prefer installing a different version of PHP, you can follow our guide on how to install PHP on Debian Linux, which elucidates the installation of a specific PHP version tailored to your needs.
Step 1: PHP and PHP-FPM Installation
Install PHP, PHP-FPM, and other essential modules on your Debian system with this command:
sudo apt install php-fpm php php-cli php-mysql php-curlStep 2: Verifying PHP Service Status
After installing, ensure that PHP is running correctly. You can confirm the PHP service’s status, just as you did with MariaDB. For our example, we are using PHP 8.2. Use the following command:
systemctl status php8.2-fpm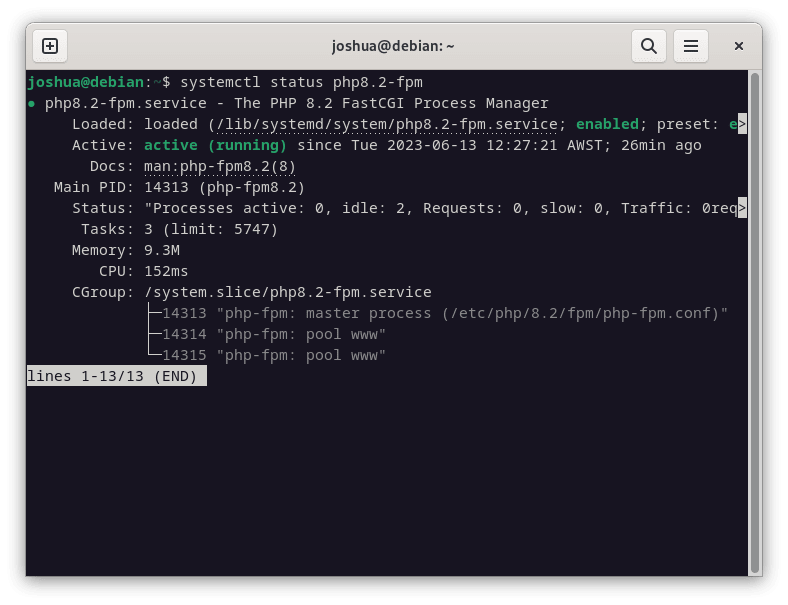
Step 3: Activating PHP-FPM Service For LEMP
Ensure that PHP-FPM runs whenever you start your system. If it’s not active, use this command:
sudo systemctl enable php-fpm --nowThis action starts the PHP-FPM service and sets it to launch automatically during system start-ups.
Configure PHP-FPM with Nginx Server Block on Debian 12, 11, or 10
To ensure Nginx works effectively with PHP, you must adjust the Nginx server block configuration file. By doing so, Nginx will correctly interact with PHP-FPM, allowing for smooth PHP file processing.
Step 1: Modifying Nginx Server Block
First, locate the Nginx server block file and add the lines shown below:
location ~ \.php$ {
  fastcgi_pass unix:/run/php/php8.2-fpm.sock;
  fastcgi_param SCRIPT_FILENAME $document_root$fastcgi_script_name;
  include fastcgi_params;
  include snippets/fastcgi-php.conf;
  fastcgi_buffer_size 128k;
  fastcgi_buffers 4 128k;
  fastcgi_intercept_errors on;
}
This configuration directs Nginx to pass PHP requests to the PHP-FPM service. The fastcgi_pass line specifies the Unix socket that the PHP-FPM service uses.
If you need more examples or a more comprehensive understanding of server blocks, please refer to our guide on how to install WordPress with LEMP on Debian Linux.
Step 2: Validating Nginx Configuration
After making changes, it’s crucial to validate them to prevent syntax errors. Run the command below to test your Nginx configuration:
sudo nginx -tThis command scans your Nginx configuration for syntax errors. If it finds any, it will display them, helping you address them promptly.
Step 3: Restarting Nginx Service
After ensuring your configuration is error-free, restart the Nginx service. Restarting applies the changes you’ve made to the configuration file. Here’s how:
sudo systemctl restart nginxOnce you execute this command, the Nginx service will reboot. After this, PHP-FPM will begin its collaboration with Nginx.
Create a PHP Test Landing Page with LEMP Stack
Preparation for Testing
Before creating the test site, ensure you’ve correctly configured Nginx and PHP-FPM. This guide will help you create a basic index.html for validation.
Create a Web Directory
First, make a web directory to hold your website files. If you haven’t set one up yet, do so now:
sudo mkdir -p /var/www/html/example.com/Configure Directory Permissions
Adjust the permissions of this directory to ensure it’s accessible. Set the ownership of the directory to the user currently logged in:
sudo chown -R $USER:$USER /var/www/html/example.com/For public access, adjust the permissions of the directory:
sudo chmod -R 755 /var/wwwCreate a Test HTML File
Now, let’s make a straightforward index.html file:
sudo nano /var/www/html/example.com/index.htmlInsert the following basic HTML content, meant just for testing:
<html>
  <head>
    <title>You have reached Example.com!</title>
  </head>
  <body>
    <h1>Congratulations! The server block is active! Linuxcapable.com</h1>
  </body>
</html>
Save and exit: CTRL+O then CTRL+X.
Activate the Nginx Server Block
Link the server block configuration file from the sites-available directory to the sites-enabled directory:
sudo ln -s /etc/nginx/sites-available/example.com.conf /etc/nginx/sites-enabled/example.com.confValidate the Nginx Server Block
Before taking further actions with your Nginx service, ensure your server block configuration is correct. This step is particularly essential if you’re working in a live setting:
sudo nginx -tIf you’ve done everything right, you should see:
nginx: the configuration file /etc/nginx/nginx.conf syntax is ok
nginx: configuration file /etc/nginx/nginx.conf test is successful
Finally, test your setup: open your web browser and type in your domain (e.g., example.com). If all goes well, you’ll see the test page you created.
Create a Let’s Encrypt SSL Certificate For Your LEMP Stack
Setting up an SSL certificate for your website ensures server security and builds user trust. By implementing this, you’ll run your Nginx server over HTTPS, which encrypts the connection between your server and its users.
For this task, we’ll utilize Let’s Encrypt, an Internet Security Research Group (ISRG) service that offers free and automated SSL certificates.
Installation of Certbot
To set up the SSL certificate, first install the certbot package. Certbot streamlines obtaining and using SSL certificates from Let’s Encrypt. To install certbot, run:
sudo apt install python3-certbot-nginx -yGeneration and Deployment of SSL Certificate
After you’ve installed certbot, it’s time to create your SSL certificate. Use the following command to both generate and attach an SSL certificate to your Nginx server:
sudo certbot --nginx --agree-tos --redirect --hsts --staple-ocsp --email you@example.com -d www.example.comHere’s a breakdown of the command features and their purpose:
--nginx: Allows certbot to auto-configure Nginx for SSL.--agree-tos: Confirms your acceptance of Let’s Encrypt’s terms.--redirect: Instructs certbot to add a 301 redirect from HTTP to HTTPS.--hsts: Activates the HSTS header, guiding browsers to always utilize HTTPS.--staple-ocsp: Turns on OCSP Stapling. This involves the server checking the certificate’s status with the issuer’s servers at regular intervals.
Ensure that you replace you@example.com and www.example.com with your actual email address and domain name.
With these configurations, users can now access your website securely via https://www.example.com. Any attempts to use the HTTP version will redirect users to the HTTPS version, maintaining secure connections consistently.
Conclusion
In this guide, we’ve successfully navigated setting up a LEMP stack on a Debian Linux distribution. We’ve integrated Nginx for web serving, utilized MariaDB for our database needs, and incorporated PHP for dynamic web content. Moreover, we’ve fortified our server’s security by adding Let’s Encrypt’s SSL certificate. This combination ensures a robust foundation for any web application hosting needs.
It’s paramount to grasp the intricacies of each LEMP component. Such understanding bolsters your proficiency as a system administrator and empowers you to tackle any unexpected issues confidently. Remember, the beauty of the LEMP stack lies in its adaptability, allowing customization to meet specific project demands.