When working in a Linux terminal, we often use various commands. We typically use the ifconfig command to perform network configuration.
However, another command, ip, can be used for network configuration, which is considered a replacement for the ifconfig command. It has much more capabilities than the ifconfig command.
Using the ip command, we can perform various tasks, such as changing the network configuration by modifying its interface and assigning or checking the IP address on a network interface.
We can also enable or disable a network interface. This is not an exhaustive list but some of the activities we can perform with the ip command.
Some other activities that we can perform include:
- View neighboring objects
- View the ARP table
- Configure the network interface status
In this tutorial, we will cover how to use the ip command to display or configure information about network interfaces, routing, and IP addresses.
Table of Contents
- Using the ip Command
- Check the IP addresses on the Network Interfaces
- Listing All Network Interfaces
- Show Network Interface Information
- Verify the Network Statistics
- Disable and Enable a Network Interface
- View the Routing Table
- Adding a Route in the Routing Table
- Deleting a Route in the Routing Table
- Adding an IP Address
- Deleting an IP Address
- Conclusion
Using the ip Command
The ip command has a variety of use cases, which we will be exploring as we move ahead. In a nutshell, we can safely assume that the entire network interface configuration can be managed and modified using the ip command.
The syntax is:
ip [OPTIONS] OBJECT {COMMAND | help}
Let’s get started by executing the following command.
ip
The output displays the help, which contains the configurable parameters for the ip command.
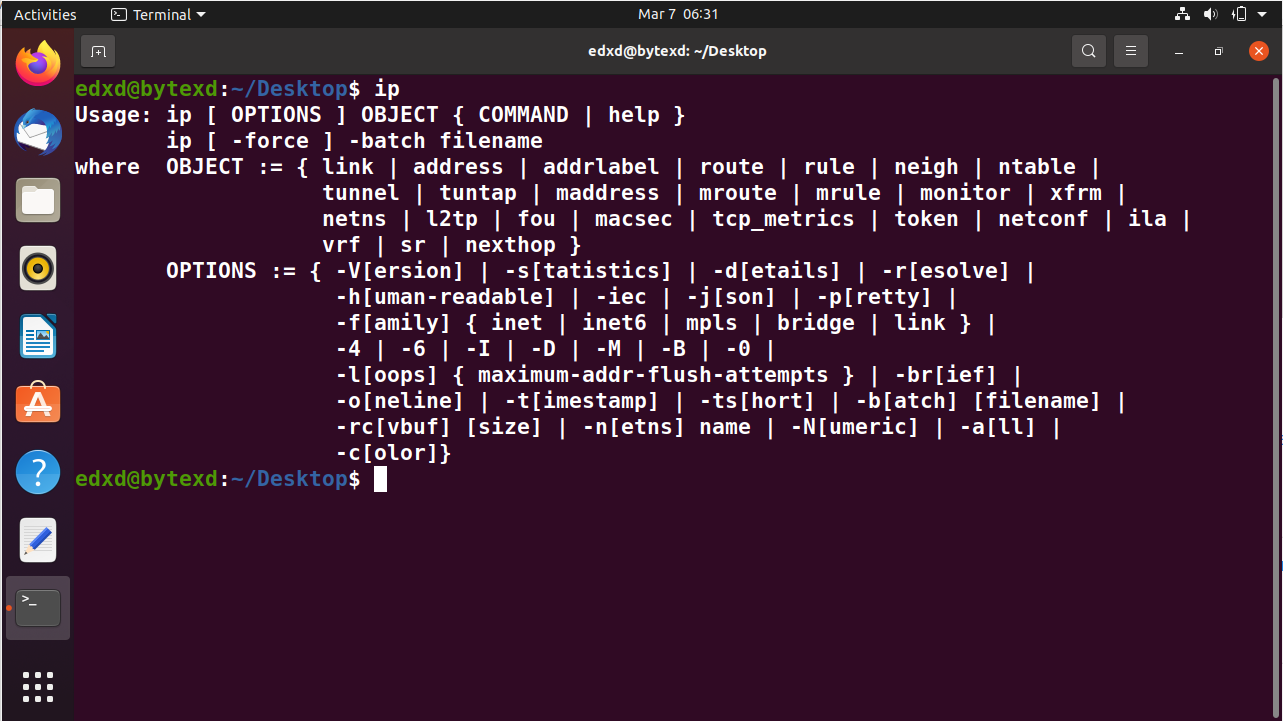
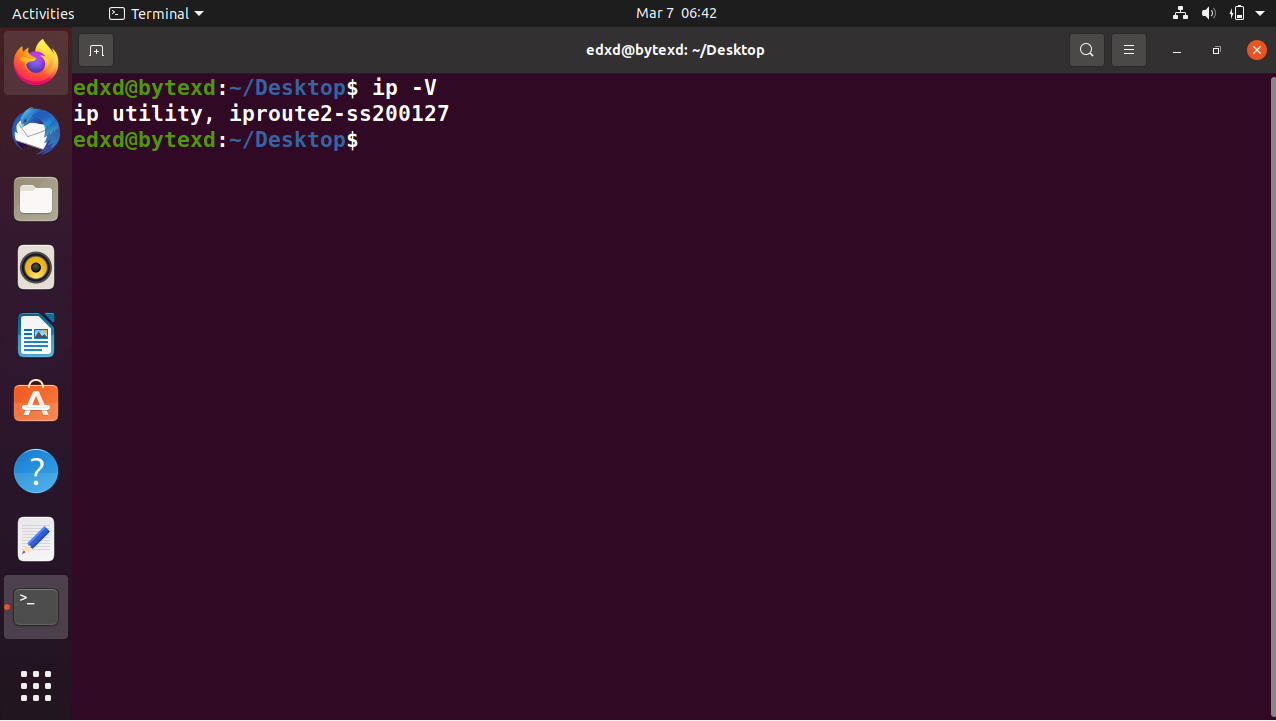
Notice that there are OPTIONS and OBJECT. The OPTIONS can be used independently with the ip command. For example, if we want to check the version of the ip command, we can type the following command:
ip -V
The output displays the version of the ip command.
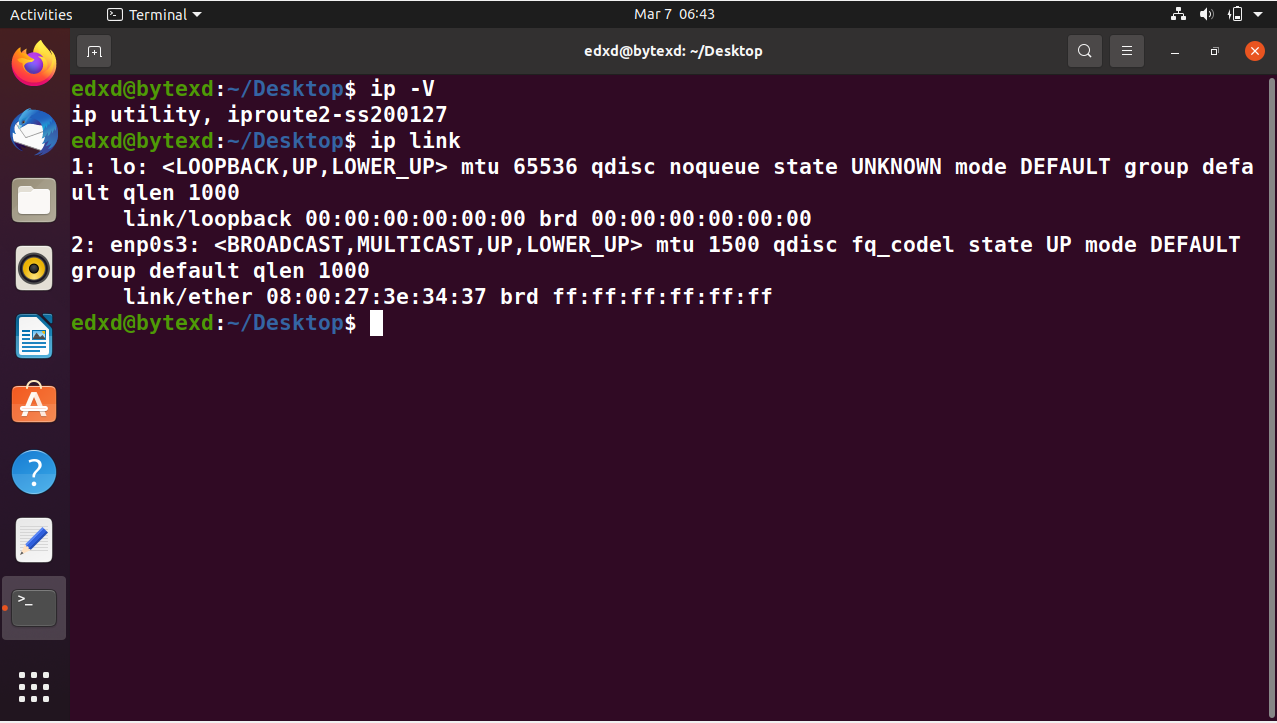
Similarly, OBJECT is like a subcommand that can extract a variety of information. For example, we can use the link object to extract the information on the available network interfaces. To do this, we type the following command:
ip link
The output displays the available network interfaces within the system.
Check the IP addresses on the Network Interfaces
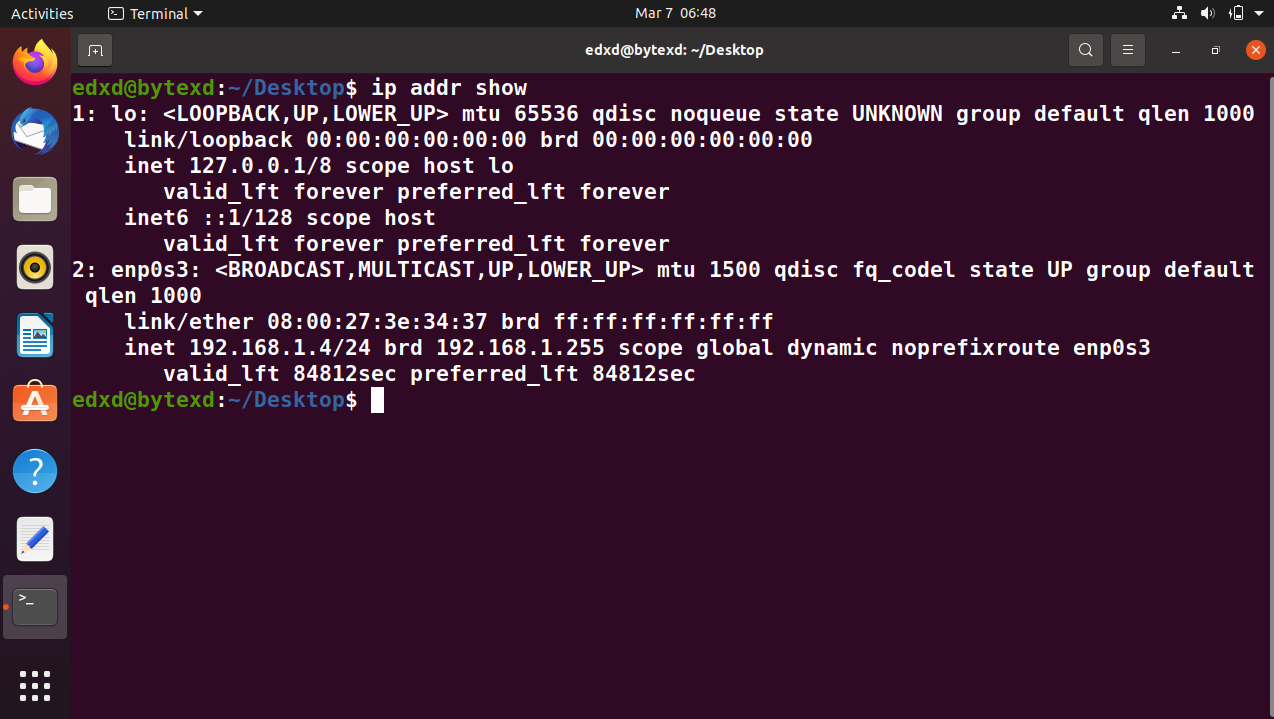
We can also check the IP addresses assigned to all available network interfaces within a system. We need to type the following command:
ip addr show
In this output, we can see two network interfaces, enp0s3 and lo. The ip addresses of both the network adapters are displayed along with the other configuration.
Listing All Network Interfaces
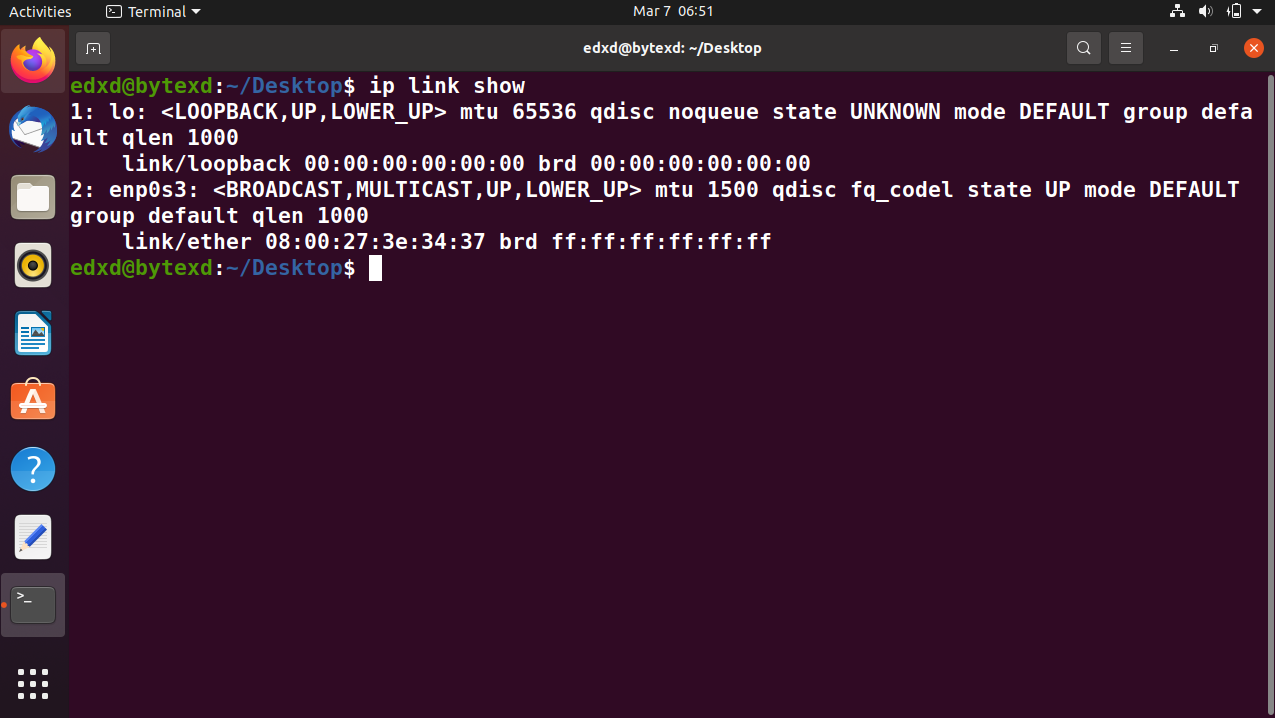
We can also list all the configured network interfaces using the following command:
ip link show
This output shows the outcome. The lo network interface is always available. Therefore, the system has only one network interface named enp0s3, for which the statistics are displayed.
Show Network Interface Information
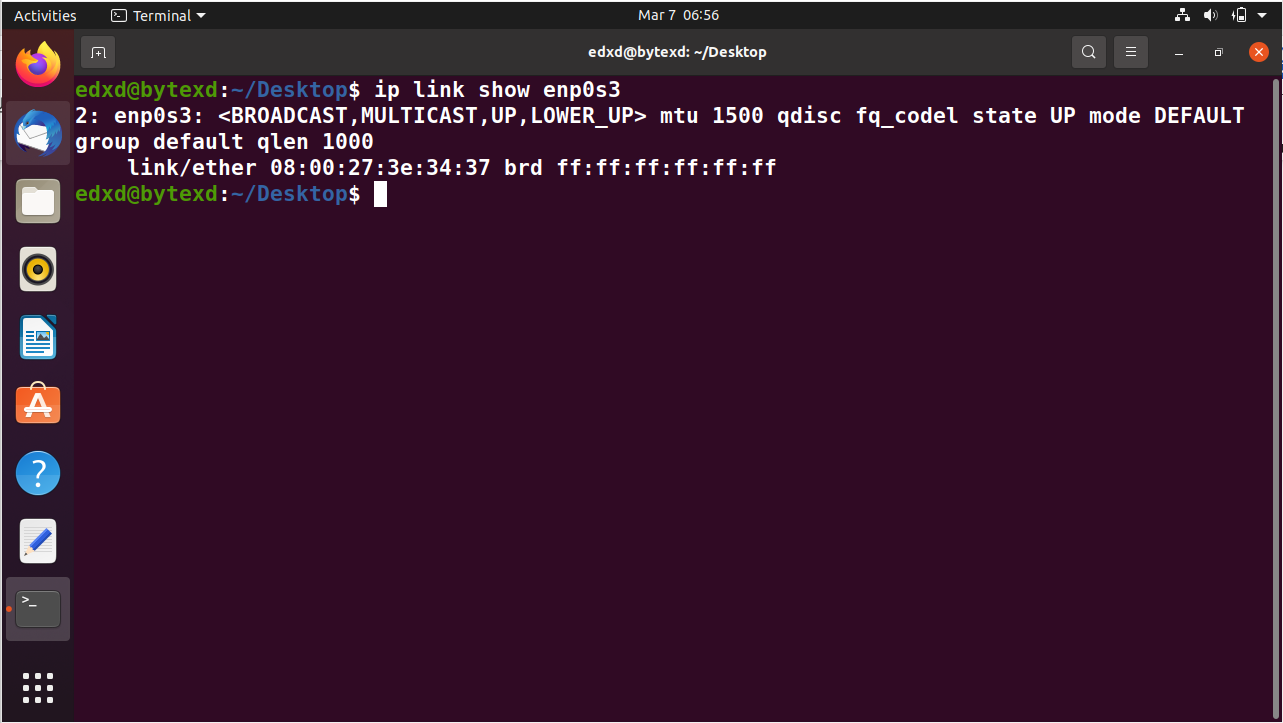
We can also show specific network interface information, such as enp0s3. To do this, we need to execute the following command:
ip link show enp0s3
The output displays a lot of information, such as network connection name, hardware address, MAC address, mtu, state, mode, group, and queue length.
Verify the Network Statistics
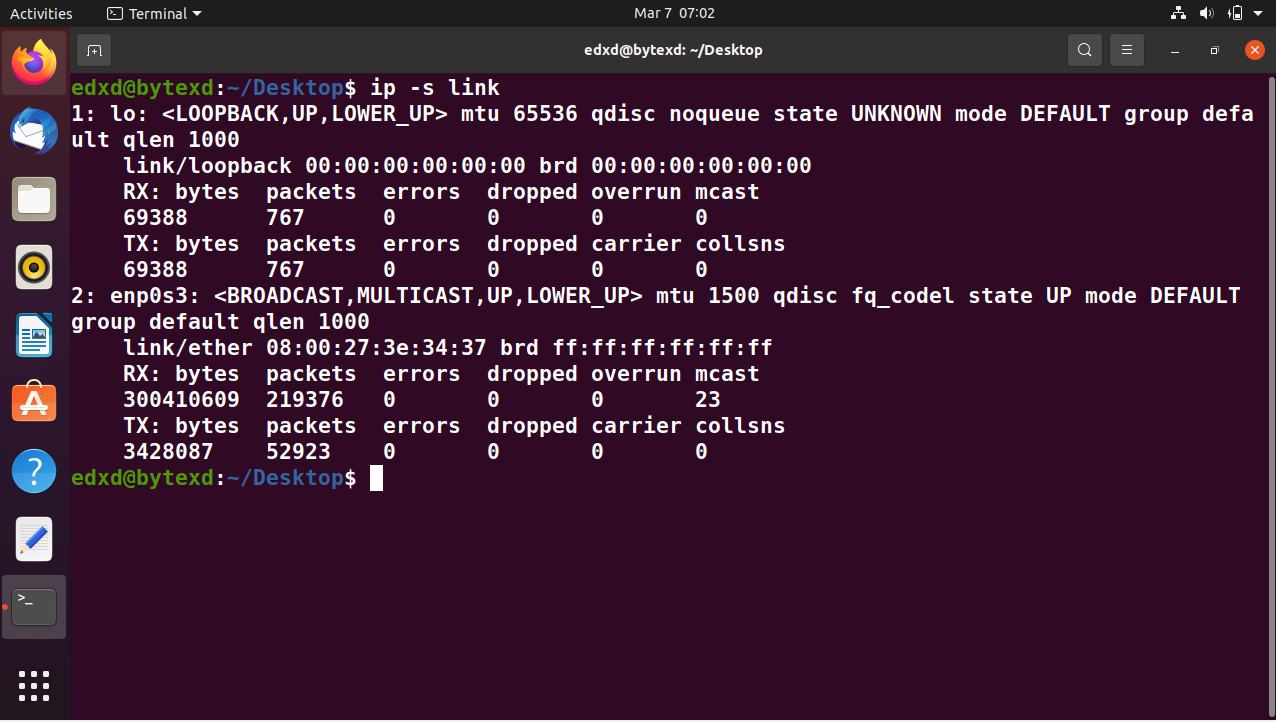
We can check network statistics on the existing network interfaces. To do this, we can execute the following command:
ip -s link
The output displays the transferred or dropped packets and errors, if there are any.
Disable and Enable a Network Interface
We can also enable or disable a network interface. Previously, we checked the status of the network interfaces. Since we know that the network interface, enp0s3, is up, which means that it is enabled, we will go ahead and disable it first.
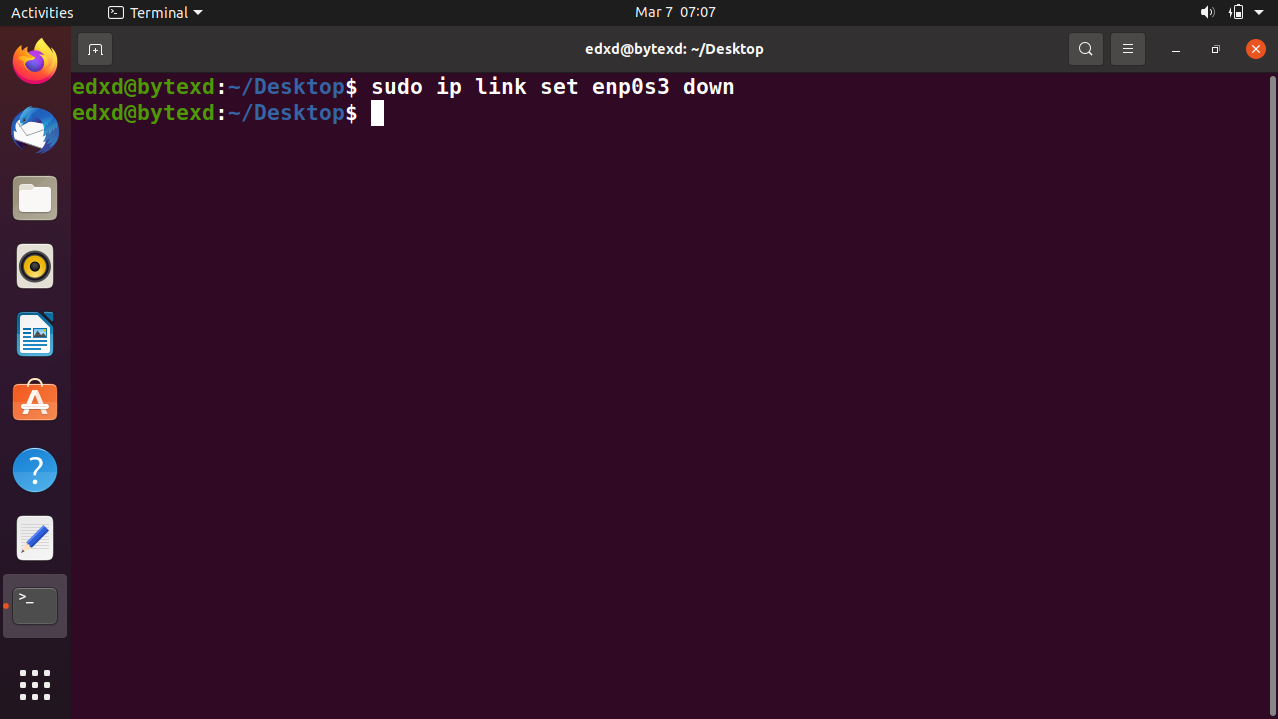
To do this, we need to execute the following command:
sudo ip link set enp0s3 down
With the given command, we will first disable the network interface, which will show the status as down.
Notice that we have used sudo in this command. Since this is a system-level change, it requires administrative privileges.
Also, the command does not return any output, which is indicative of its successful execution. To do this, we go ahead and use the sudo command.
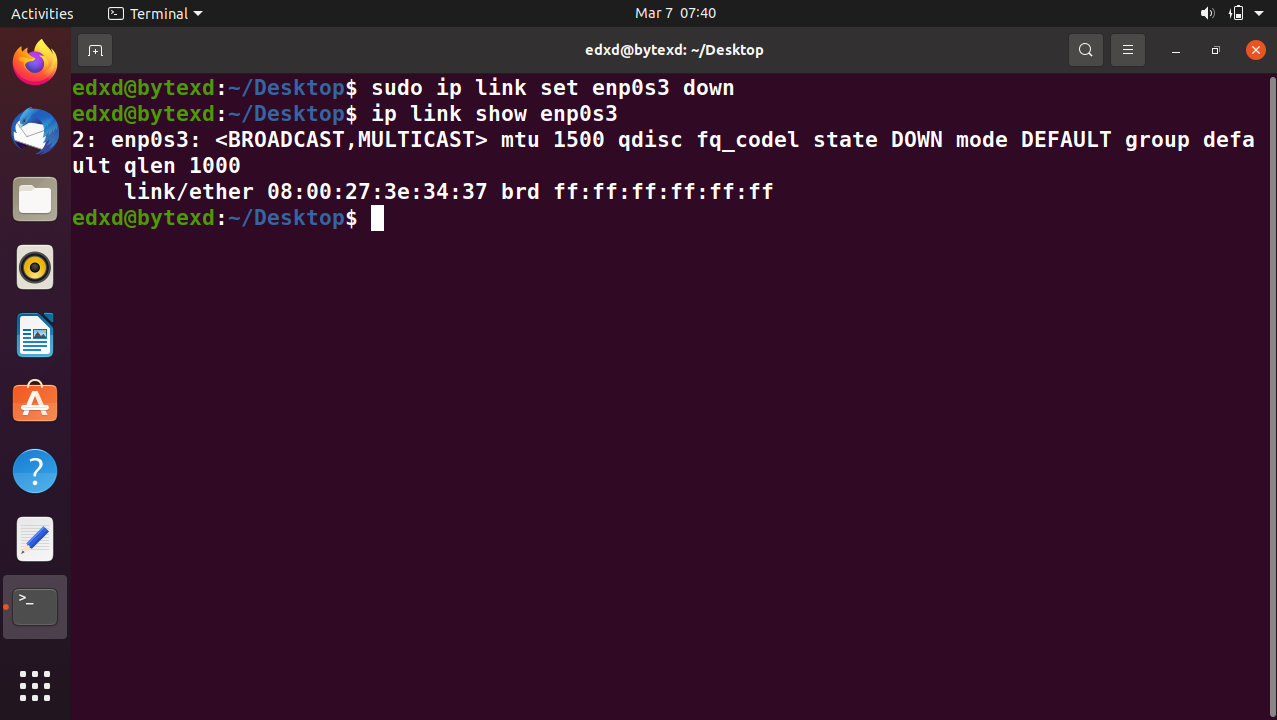
Let’s now view the connection status of enp0s3.
To do this, we need to use the show parameter. Execute the following command:
ip link show enp0s3
The output displays that the network interface is down.
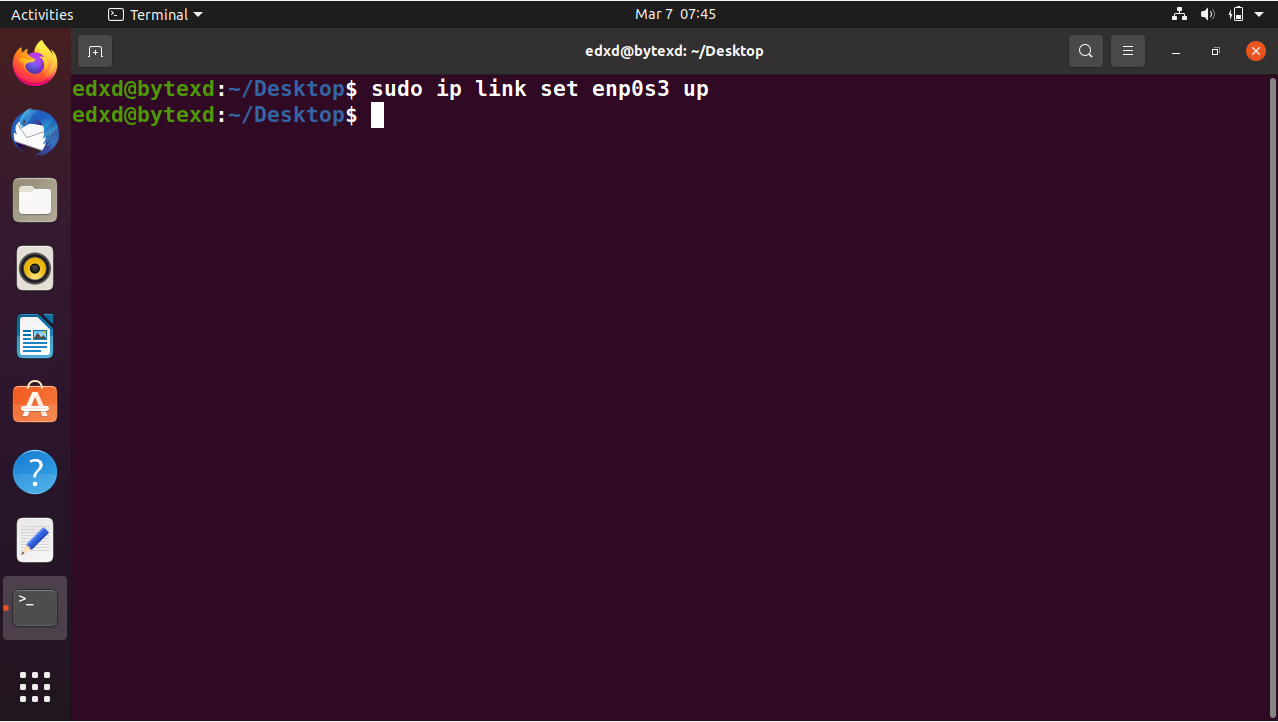
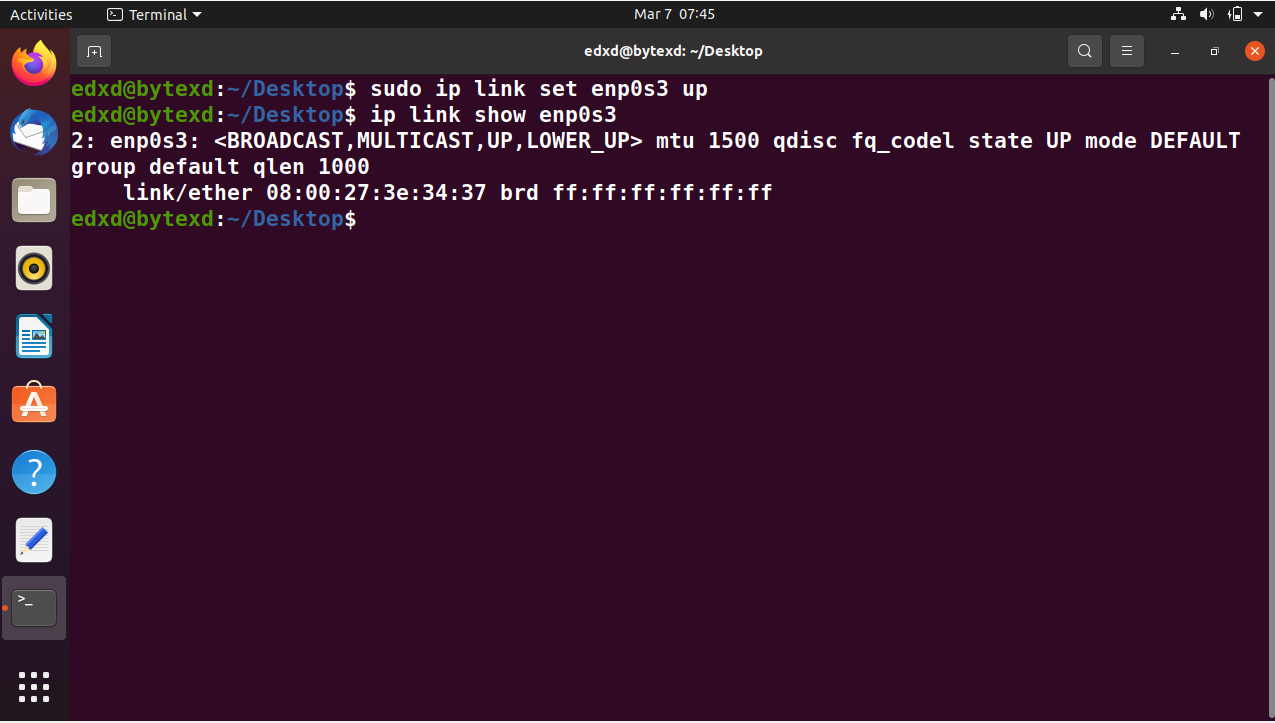
Let’s go ahead and enable the network connection. To do this, we need to set the enp0s3 interface to the Up state using the following command:
sudo ip link set enp0s3 up
No output is returned, indicating that the command is successful.
Let’s verify the status, and we should see the network interface in the Up state. Execute the following command:
ip link show enp0s3
The output displays that the network interface is UP.
View the Routing Table
Each system connected to a network maintains a routing table, which is used to send out information to the other hosts on the network.
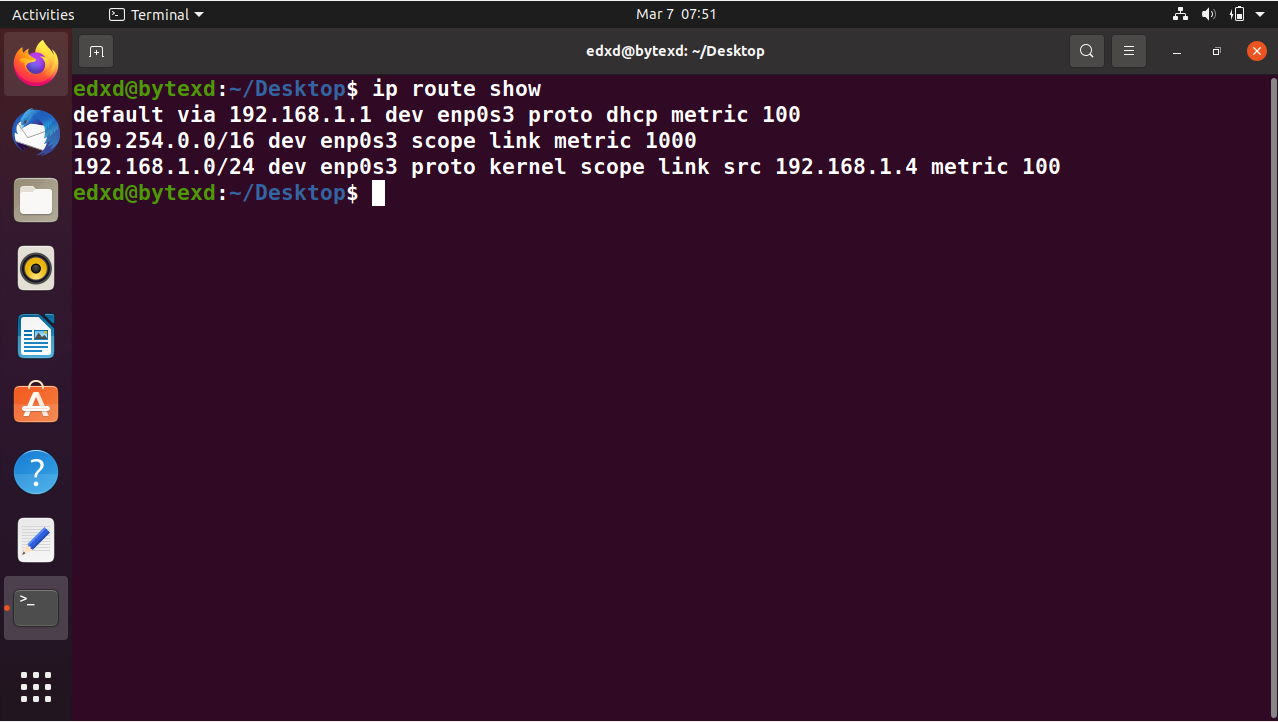
To view the routing table, we can use the following command:
ip route show
The output displays the routing table.
Adding a Route in the Routing Table
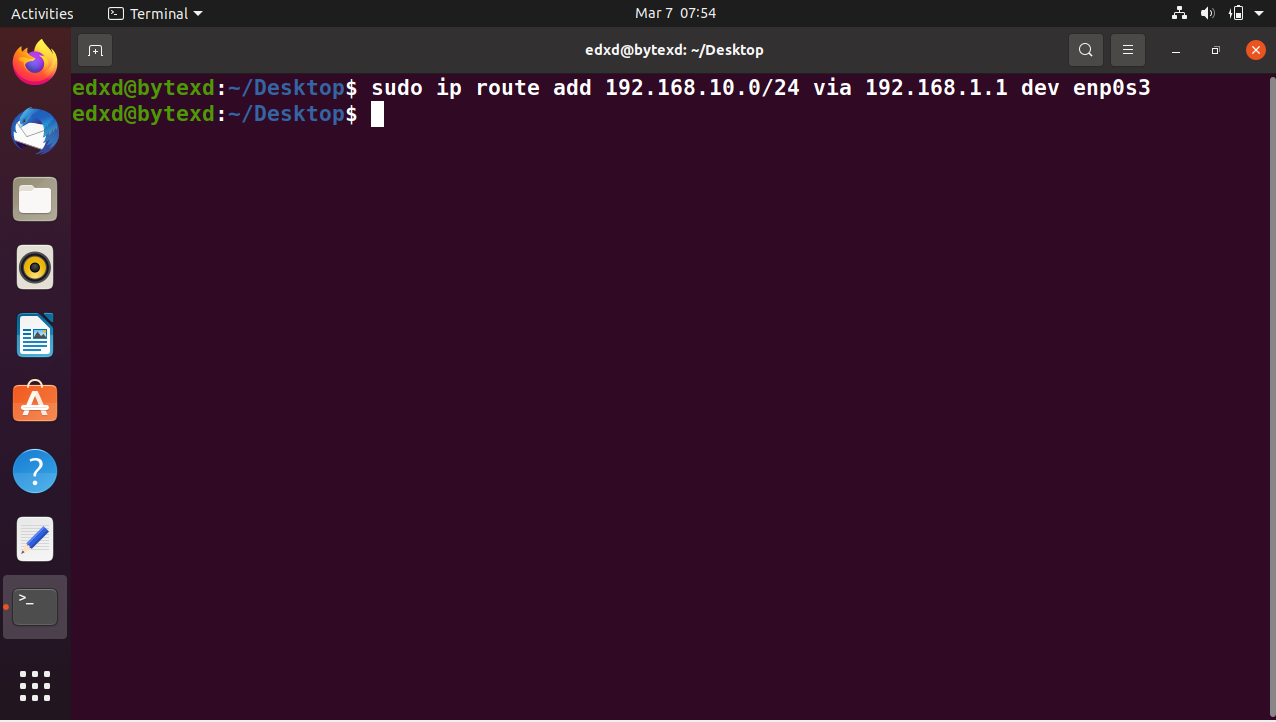
Even though a system learns the route on its own, we can still add a static route if we need to connect to another network. We can do this by using the following command:
sudo ip route add 192.168.10.0/24 via 192.168.1.1 dev enp0s3
The output adds a new route in the routing table. The important thing to note is that 192.168.1.1 is the default gateway for the system. All traffic must be sent through this default gateway.
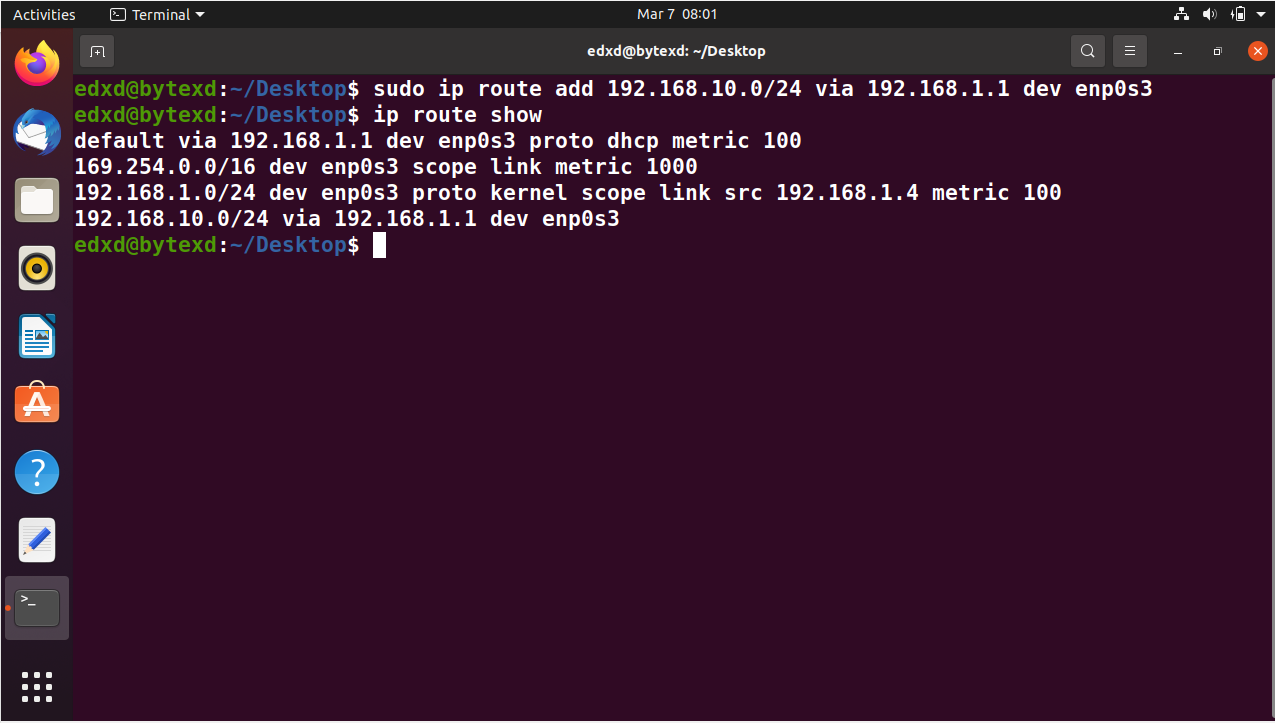
We can go ahead and verify the route using the following command:
ip route show
The output displays the routing table. Notice in the image below that a new route has been added. However, remember that even though it is a static route, it is temporary. When we reboot the system, this route will be deleted.
If we need to make this a persistent or permanent static route, we must edit the /etc/network/interfaces file. We would need to add the same entry in the following manner:
up ip route add 192.168.10.0/24 via 192.168.1.1 dev enp0s3
After adding the route in the interfaces file, we need to restart the network services using the following command:
systemctl restart NetworkManager.service
After this, we will get a persistent or permanent static route in our system. This route will remain until it is manually removed from the interfaces file.
Deleting a Route in the Routing Table
If we need to delete a route from the routing table, we must replace the add parameter with the del parameter.
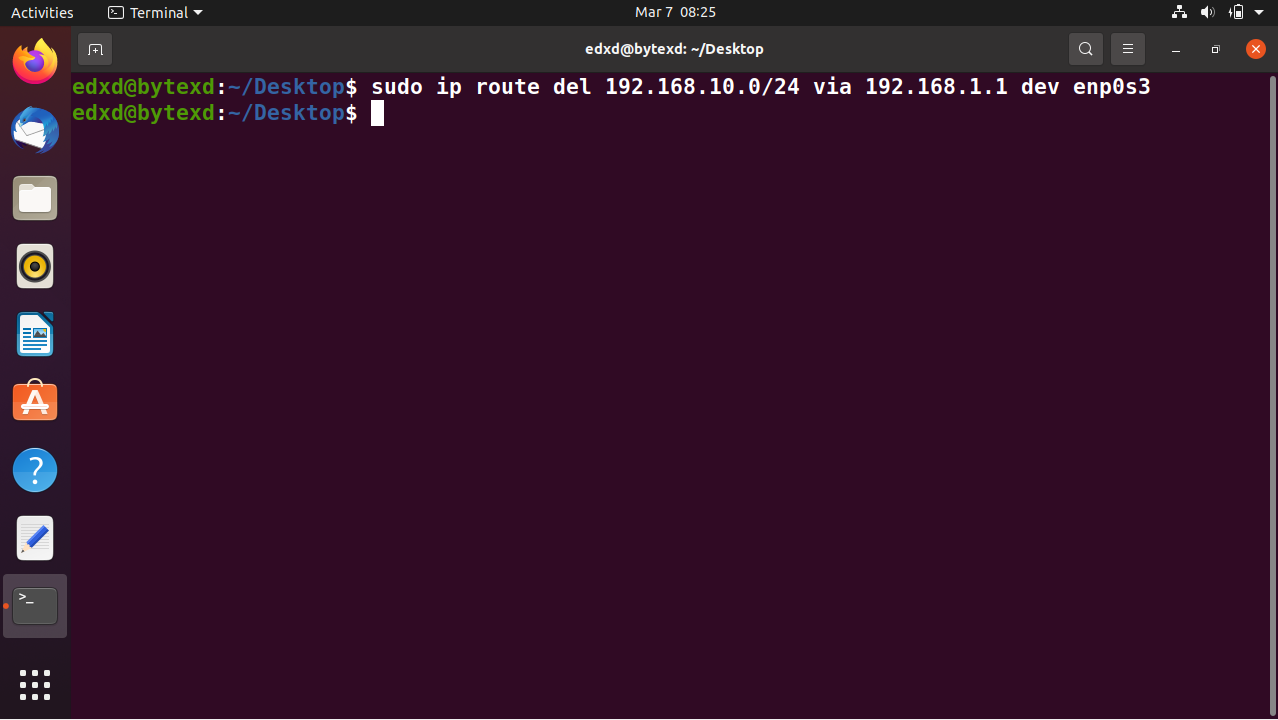
To delete a route, we use the following command:
sudo ip route del 192.168.10.0/24 via 192.168.1.1 dev enp0s3
No output of this command is returned.
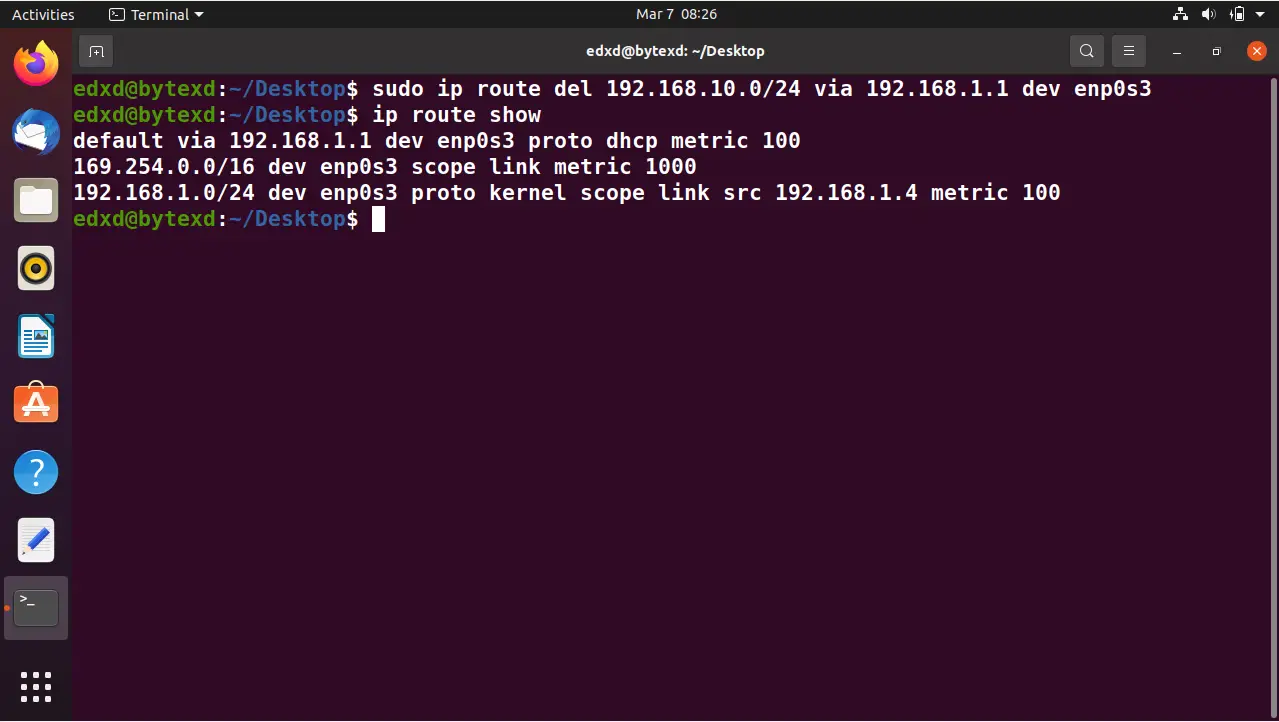
We can quickly verify the routing table once again.
ip route show
The output displays the routing table. Notice that a new route has been deleted.
Adding an IP Address
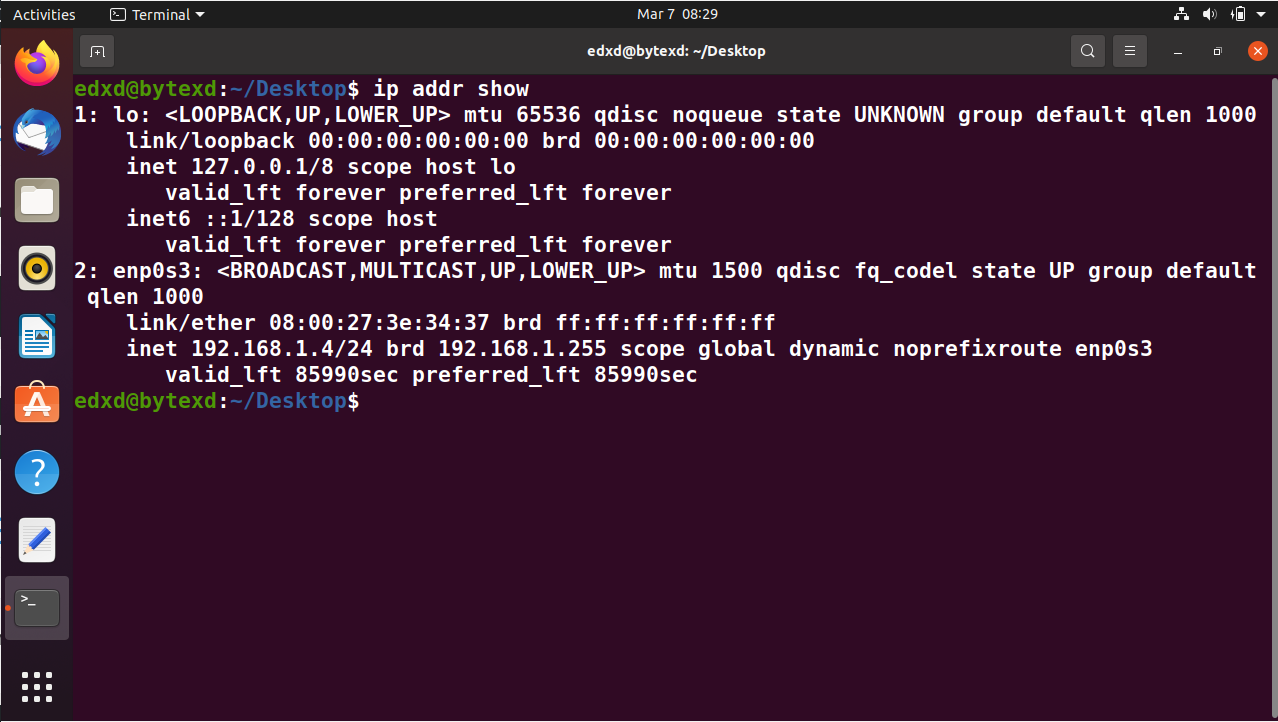
Initially, we had viewed the IP address in this system using the following command:
ip addr show
The IP addresses of the loopback and enp0s3 network interface cards are displayed. Notice that the enp0s3 network interface has the IP address of 192.168.1.4.
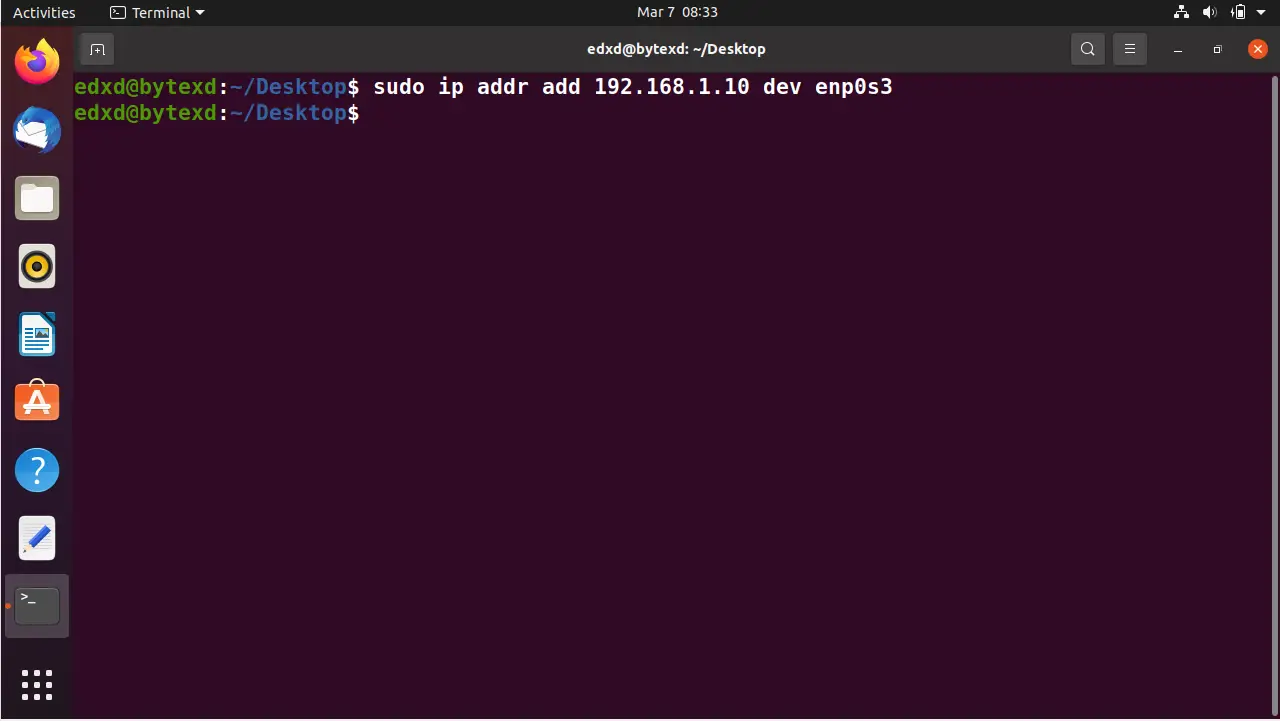
We will now add another IP address on enp0s3. To do this, execute the following command:
sudo ip addr add 192.168.1.10 dev enp0s3
No output is returned. The new IP address is now added to the enp0s3 interface.
Let’s quickly verify the IP address. Notice that there are two IP addresses assigned on enp0s3.
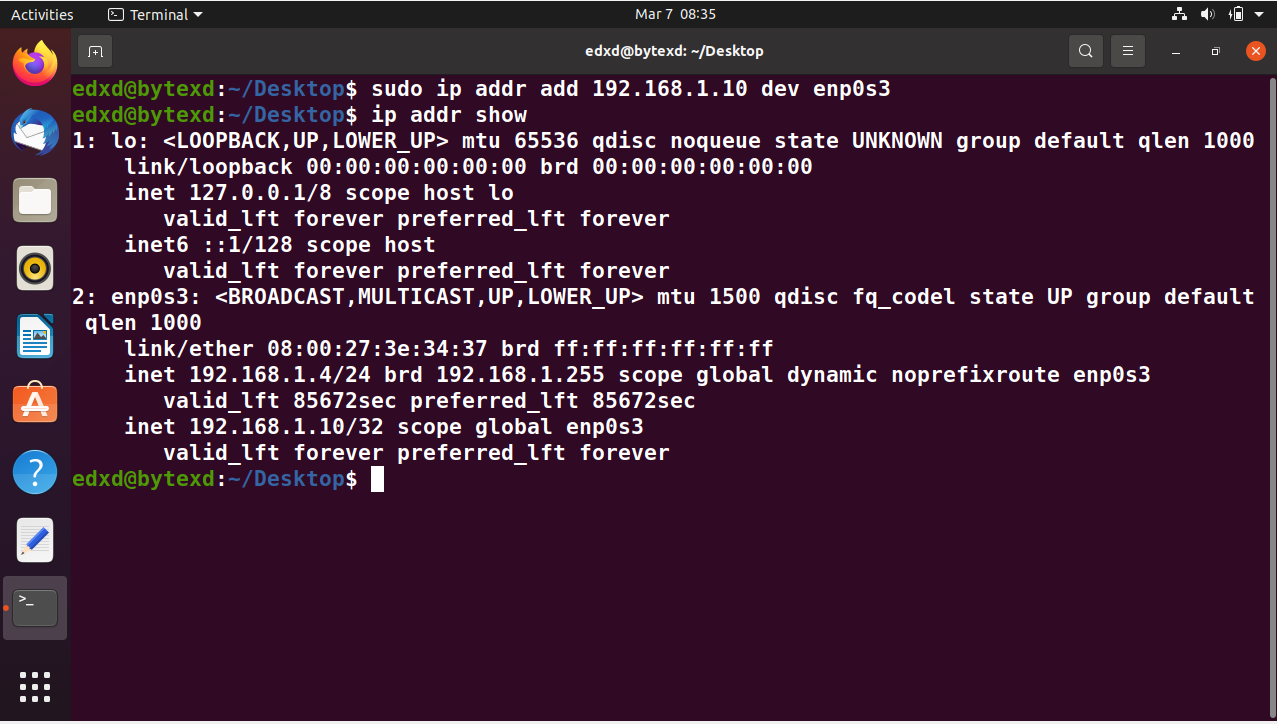
However, do remember that it is not a permanent assignment. Even though we have manually added this IP address to the enp0s3 interface, it is temporary. When we boot the system, this IP address will disappear. We need to add the IP address to the /etc/network/interfaces file to make it permanent.
Deleting an IP Address
To add an IP address, we had used the add parameter. To delete an IP address, we will use the del parameter instead.
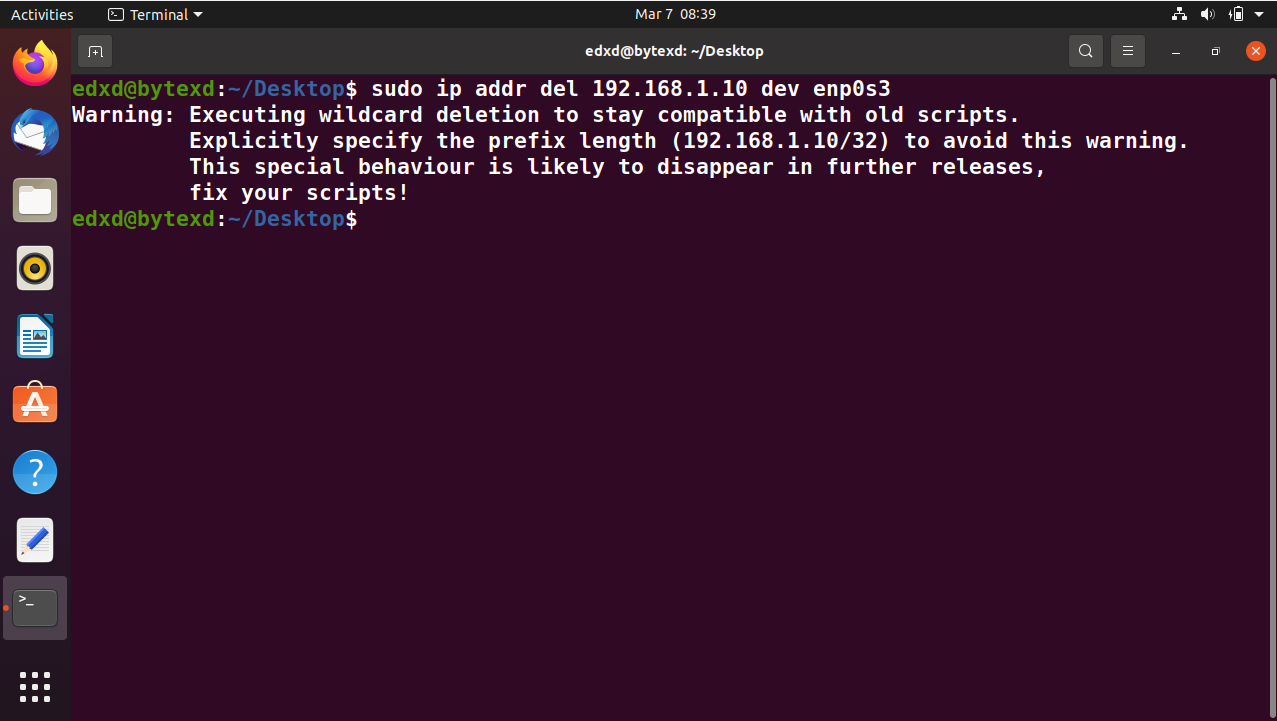
sudo ip addr del 192.168.1.10 dev enp0s3
A warning message is displayed, but we can ignore this message for the time being.
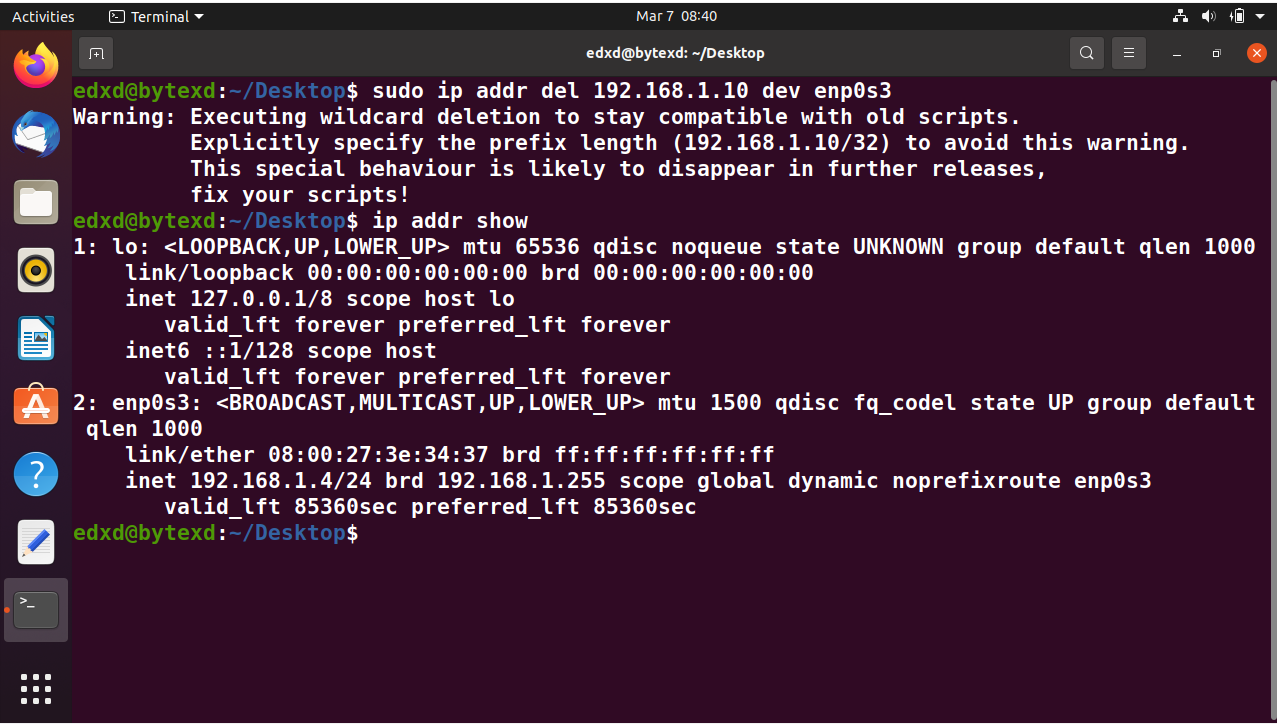
Let’s quickly verify the IP address. Notice that there is only one IP address assigned on enp0s3. The IP address, 192.168.1.10, is now deleted.
Conclusion
Well done. Hopefully, this tutorial helped you learn to use the ip command in Linux. If you encounter any issues please feel free to leave a comment and we’ll get back to we as soon as we can.
![Working with the ip Command in Linux with Examples 1 ip Command Featured Image with ip command syntax - ip [OPTIONS] OBJECT {COMMAND | help}](https://bytexd.com/wp-content/uploads/2022/03/Working-with-the-ip-Command-in-Linux-with-Examples-800x500.png)

![8 Ways to Count Lines in a File in Linux 62 wc -l < [filename] on a green background](https://bytexd.com/wp-content/uploads/2022/06/8-Ways-to-Count-Lines-in-a-File-in-Linux-380x220.png)
