How to use Screen Command on Linux
Screen is a very useful command which gives us the ability to use multiple Shell(SSH) Sessions from a single SSH session. It means you do not need to explicitly open different SSH sessions to perform multiple operations parallelly.
Screen also helps you continue the process even if the connection to the SSH session breaks. For example, if you have started a particular process and the connection breaks the process stops but if you start that process inside the screen and detach it from that screen the process would still be running and you can attach back to the screen and see your process running.
You can create as many screens as OS supports from a single SSH session. You can list the screens available, attach to any one of them and stop as well.
Pre-requisites
- Ubuntu Server or Desktop
- Sudo Access
What we will do
- Install Screen
- Know Screen Shortcuts
- See Usage of Screen Command
Install Screen
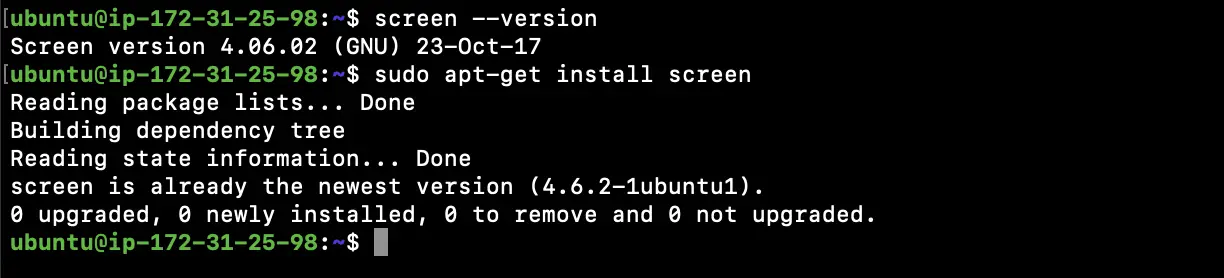
Installing a screen command is pretty simple. To install the screen on Ubuntu server use the following command. Usually screen comes by default with Ubuntu 18.04.
sudo apt-get install screen
To verify if the screen is available on the systems or not and to check its version use the following command.
screen --version
Know Screen Shortcuts
To know about the shortcuts available inside the screen simply execute the 'screen' command, this will open up the screen session
screen
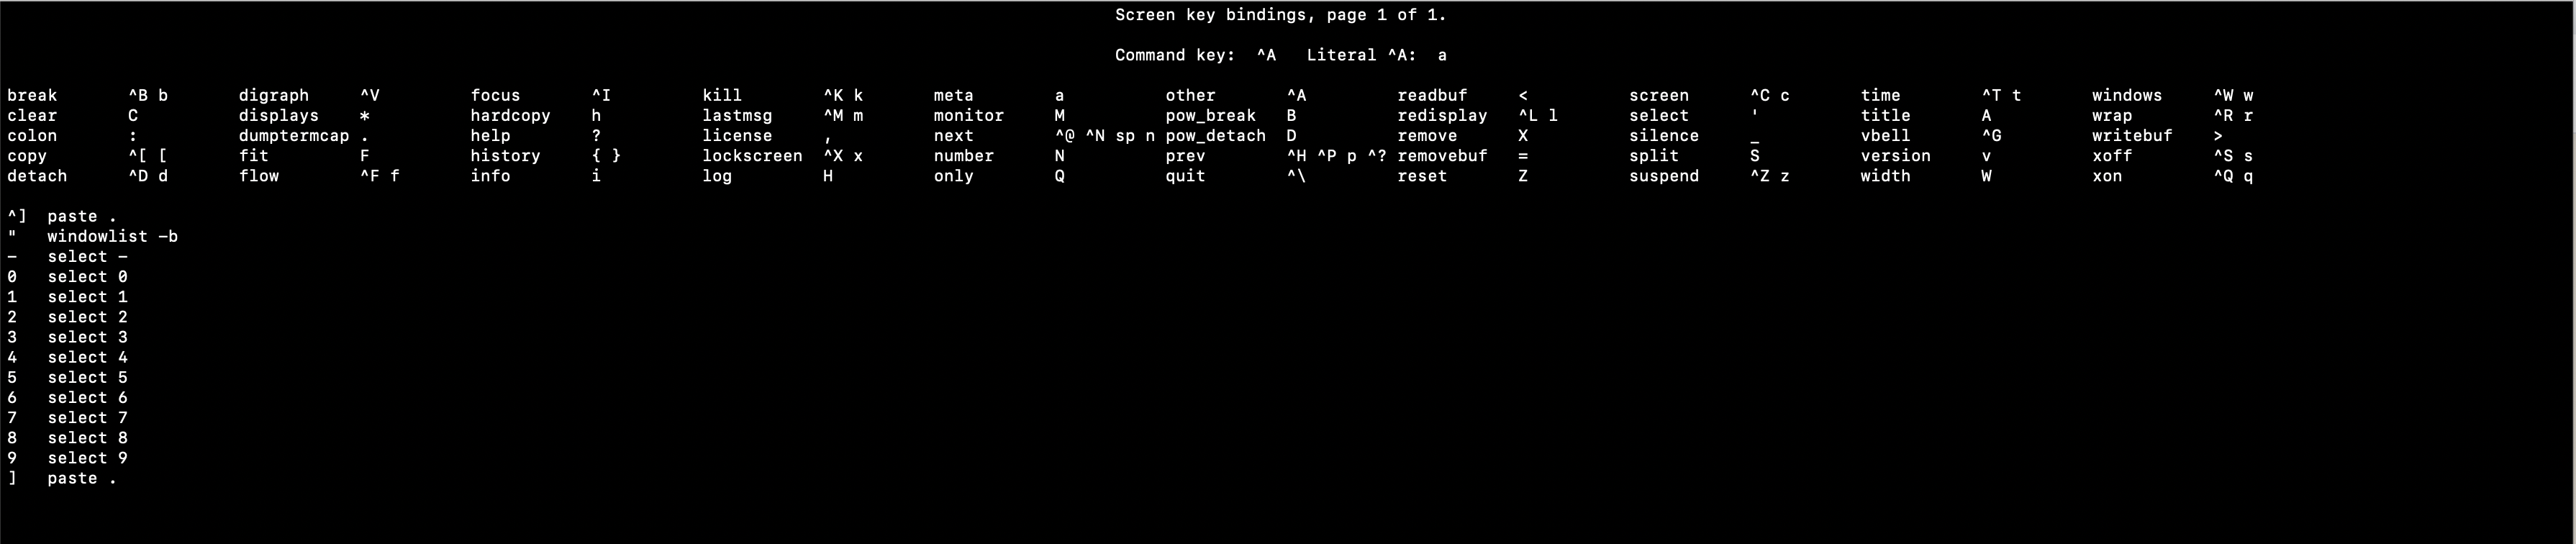
Then press the "control" button and "a" button together and then the "?" button. This will give you a screen where all the shortcuts are mentioned.
control+a ?
Shortcuts:
- control+a c --> To clear the screen
- control+a control+t -- > To display the time
- control+a v --> Check Screen Version
Now press "space bar" to go back to the screen.
See Usage of Screen Command
To create your first screen use the following command
screen -S my-first-screen
To detach the screen without retaining it type "exit" command
exit
Can use the following command to list the screens which are available
screen -ls
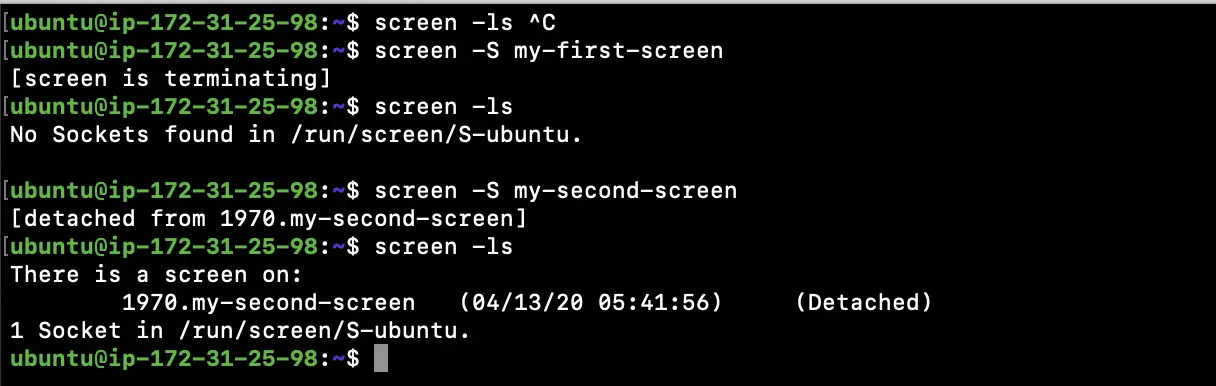
Now let's create our second screen which we will retain so that we can attach back to it.
Use the following command to create your second screen.
screen -S my-second-screen
Now if you run any process inside this screen and detach from it, your process will still be running and available when you attach back to it. To test this scenario you can execute "top" command in this screen.
To detach the screen so that it will be available and we can again attach back to it use the following combination, press the "control" button and "a" button together and then "d" button. This time you have just detached from the screen and the screen will be available for you to attach back to it.
control+a d
List the screens and you can see that your first screen was terminated and your second screen has detached. This means that you cannot attach back to the terminated screen but you can attach back to the detached screen. Now if you attach back to the second screen you will still see that the "top" is running.
screen -ls
Now let's create multiple screens and try to attach to anyone of them.
screen -S 1
screen -S 2
screen -S 3
You can use the following command to attach to the screen if there is only one screen available.
If there are multiple screens available then the following command will not work.
screen -r
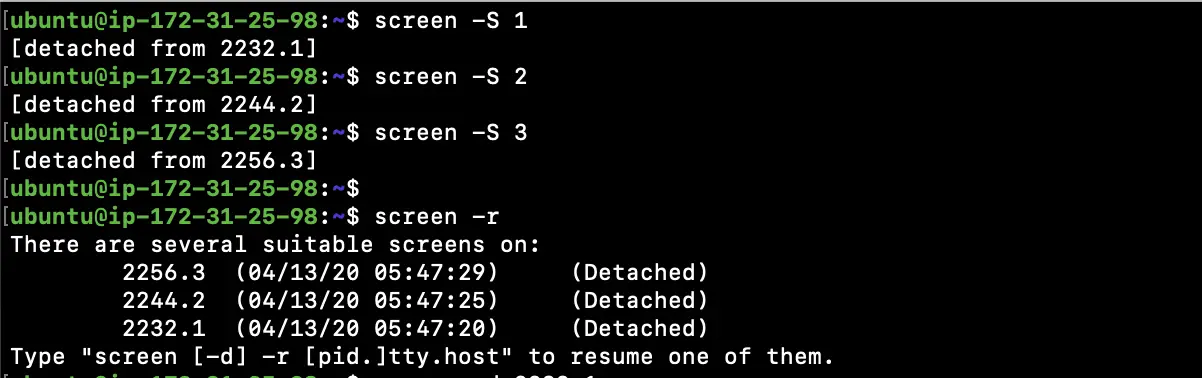
To attach to a particular screen from the multiple screens, you need to pass the ID/Name of the screen along with the "screen -r" command.
screen -r 2232.1

Now if you want to kill a particular screen you can use the following command.
screen -XS screen-id.screen-name quit
But if you kill the screen by process ID the screen will be dead and you can still see it when you list the screens, but you cannot attach back to the dead screens.
kill -9 screen-process-id
To remove the dead screens you can use "-wipe" as an option to the screen command as follows.
screen -wipe
To terminate or kill all the screens you can use the following command.
killall screen
Conclusion
In this article we learned how the screen command can be installed on our system, also we saw the usage of the screen command with practical examples.

