JasperReports is an open-source Java reporting tool, a stand-alone and embeddable reporting server. JasperReports is a Java class library, Java developers who need to add reporting capabilities to their applications use this tool. It provides reporting and analytics and is capable of generating professional reports including images, charts, and graphs. Some of the major JasperReports features include:
- Exporting Capabilities
- Multiple Datasources
- Multiple Ways to Present Data
- Multiple Ways to Supply Data
- Subreports
- Watermarks
In this tutorial, we are going to show you how to install the Jasper Reports server on Ubuntu 20.04.
Table of Contents
Prerequisites
- Ubuntu 20.04 with at least 4GB of RAM
- SSH root access or a normal system user with sudo privileges
Step 1. Login to the server
First, log in to your Ubuntu 20.04 server through SSH as the root user:
ssh root@IP_Address -p Port_number
You will need to replace ‘IP_Address‘ and ‘Port_number‘ with your server’s respective IP address and SSH port number. Additionally, replace ‘root’ with the username of the system user with sudo privileges.
You can check whether you have the proper Debian version installed on your server with the following command:
$ lsb_release -a
You should get this output:
No LSB modules are available.
Distributor ID: Ubuntu
Description: Ubuntu 20.04.3 LTS
Release: 20.04
Codename: focal
Before starting, you have to make sure that all Ubuntu OS packages installed on the server are up to date. You can do this by running the following commands:
$ sudo apt update -y
$ sudo apt upgrade -y
Step 2. Install Dependencies
In order to install Jasper Reports for a production server, we are going to install it manually instead of using the installer. To proceed with this, we need to have at least Java version 8 to be able to run Tomcat 9 which we are going to install in the next step. Let’s run the command below to install default JDK version 11, which is available on the built-in Ubuntu 20.04 repositories by using the following command:
$ sudo apt install default-jdk unzip wget -y
Step 3. Create a System User
It is not recommended to run Tomcat as root, so for security reasons, we will create a new system user to run Tomcat.
$ sudo useradd -r tomcat -m -d /opt/tomcat --shell /bin/bash
Check the path of Tomcat’s home by running this command:
Step 4. Install MariaDB
Next, we will install MariaDB server from the repository. To do this, simply run the following command:
$ sudo apt install mariadb-server
MariaDB will be running upon installation, now let’s create a MySQL user with full privileges.
MariaDB [(none)]> grant all on *.* to master@localhost identified by 'm0d1fyth15';
MariaDB [(none)]> flush privileges;
Step 5. Install Tomcat
In this step, we are going to install Tomcat and run it under the user ‘tomcat’ we created earlier. When writing this tutorial, the latest stable Tomcat to download is version 9.0.62. You can go to https://tomcat.apache.org/download-90.cgi and check if they release the more recent version. To proceed with the installation, let’s download the binary distribution file first.
$ su - tomcat
$ wget https://dlcdn.apache.org/tomcat/tomcat-9/v9.0.62/bin/apache-tomcat-9.0.62.tar.gz -O tomcat-9.0.62.tar.gz
Tomcat will be installed in the directory /opt/tomcat, the directory itself has already been created when we were creating user ‘tomcat’ in the previous step. Let’s extract the downloaded file now.
$ tar -xzvf tomcat-9.0.62.tar.gz -C /opt/tomcat --strip-components=1
Now, exit from user ‘tomcat’ and go back to the root or your sudo user.
$ exit
Let’s create systemd service file for Tomcat.
$ sudo nano /etc/systemd/system/tomcat.service
Paste the following into the systemd service file, then save it.
[Unit]
Description=Apache Tomcat
After=network.target

[Service]
Type=forking

User=tomcat
Group=tomcat

Environment=JAVA_HOME=/usr/lib/jvm/java-1.11.0-openjdk-amd64
Environment=CATALINA_PID=/opt/tomcat/tomcat.pid
Environment=CATALINA_HOME=/opt/tomcat
Environment=CATALINA_BASE=/opt/tomcat
Environment="CATALINA_OPTS=-Xms512M -Xmx1024M -server -XX:+UseParallelGC"

ExecStart=/opt/tomcat/bin/startup.sh
ExecStop=/opt/tomcat/bin/shutdown.sh

ExecReload=/bin/kill $MAINPID
RemainAfterExit=yes

[Install]
WantedBy=multi-user.target
Save the file and reload systemd.
$ sudo systemctl daemon-reload
We are not going to start Tomcat now, so let’s not run Tomcat at this moment.
Step 6. Download and Deploy JasperReports
In this step, we will download the Jasper Reports server zipped file and install it manually. When writing this article, the latest available version is 8.0.0. You can check if they have the more recent version at https://sourceforge.net/projects/jasperserver/files/JasperServer/.
$ su - tomcat
$ wget https://sourceforge.net/projects/jasperserver/files/JasperServer/JasperReports%20Server%20Community%20edition%208.0.0/TIB_js-jrs-cp_8.0.0_bin.zip/download -O jasperreports_8.0.0.zip
Once downloaded, we can extract it directly.
$ unzip jasperreports_8.0.0.zip
Jasper Reports server supports PostgreSQL, MySQL, Oracle, DB2, and SQL servers. In this article, we are going to use MySQL (MariaDB) and we already installed it. To proceed with the Jasper Report configuration file, let’s copy the sample configuration file first.
Let’s copy /opt/jasperreports-server-cp-8.0.0-bin/buildomatic/sampe-conf/mysql.master_properties to buildomatic as default_master.properties
$ cp jasperreports-server-cp-8.0.0-bin/buildomatic/sample_conf/mysql_master.properties jasperreports-server-cp-8.0.0-bin/buildomatic/default_master.properties
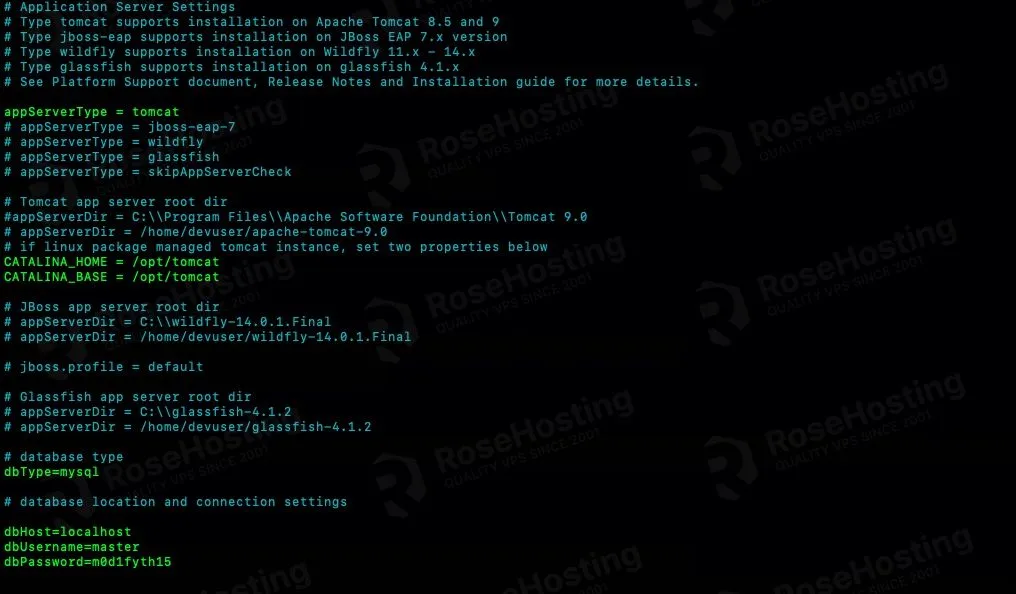
In this file, we need to set or modify the existing setting with the following values.
CATALINA_HOME = /opt/tomcat
CATALINA_BASE = /opt/tomcat

dbHost=localhost
dbUsername=master
dbPassword=m0d1fyth15

encrypt = true
Save the file then exit. Make sure the MySQL database user and password are correct. It should look like this.
Next, let’s enter the buildomatic directory and run the js-install-ce.sh executable file. Prior to running this executable file, make sure Tomcat is NOT running.
$ cd jasperreports-server-cp-8.0.0-bin/buildomatic/
$ ./js-install-ce.sh
This will create databases and deploy the jasperserver in Tomcat.
Then, let’s edit /opt/tomcat/conf/catalina.policy file.
$ nano /opt/tomcat/conf/catalina.policy
Insert the following into the file.
grant codeBase "file:/groovy/script" {
    permission java.io.FilePermission "${catalina.home}${file.separator}webapps${file.separator}
    jasperserver-pro${file.separator}WEB-INF${file.separator}classes${file.separator}-", "read";
    permission java.io.FilePermission "${catalina.home}${file.separator}webapps${file.separator}
    jasperserver-pro${file.separator}WEB-INF${file.separator}lib${file.separator}*", "read";
    permission java.util.PropertyPermission "groovy.use.classvalue", "read";
};
Save the file then exit.
Then, we also need to edit applicationContext.xml file.
$ nano /opt/tomcat/webapps/jasperserver/WEB-INF/applicationContext.xml
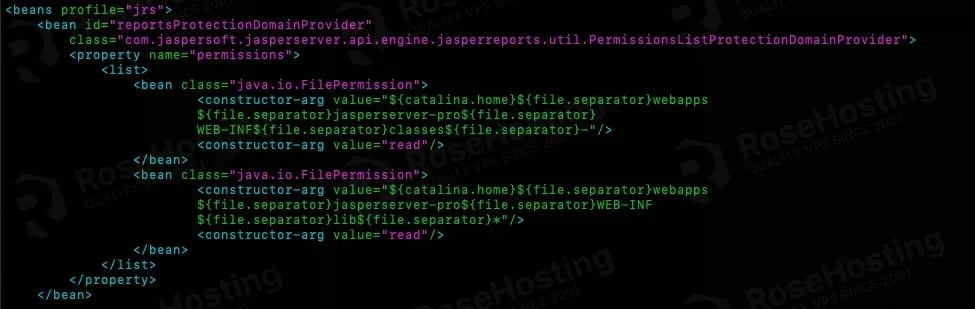
Insert these into the reportsProtectionDomainProvider list.
<bean id="reportsProtectionDomainProvider" class="com.jaspersoft.jasperserver.api.
engine.jasperreports.util.PermissionsListProtectionDomainProvider">
<property name="permissions">
<list>
    <bean class="java.io.FilePermission">
        <constructor-arg value="${catalina.home}${file.separator}webapps
        ${file.separator}jasperserver-pro${file.separator}
        WEB-INF${file.separator}classes${file.separator}-"/>
        <constructor-arg value="read"/>
    </bean>
    <bean class="java.io.FilePermission">
        <constructor-arg value="${catalina.home}${file.separator}webapps
        ${file.separator}jasperserver-pro${file.separator}WEB-INF
        ${file.separator}lib${file.separator}*"/>
        <constructor-arg value="read"/>
    </bean>
</list>
</property>
</bean>
It should look like in the picture below.
Once completed, you can start Tomcat and wait for a few moments until everything is running.
$ sudo systemctl start tomcat
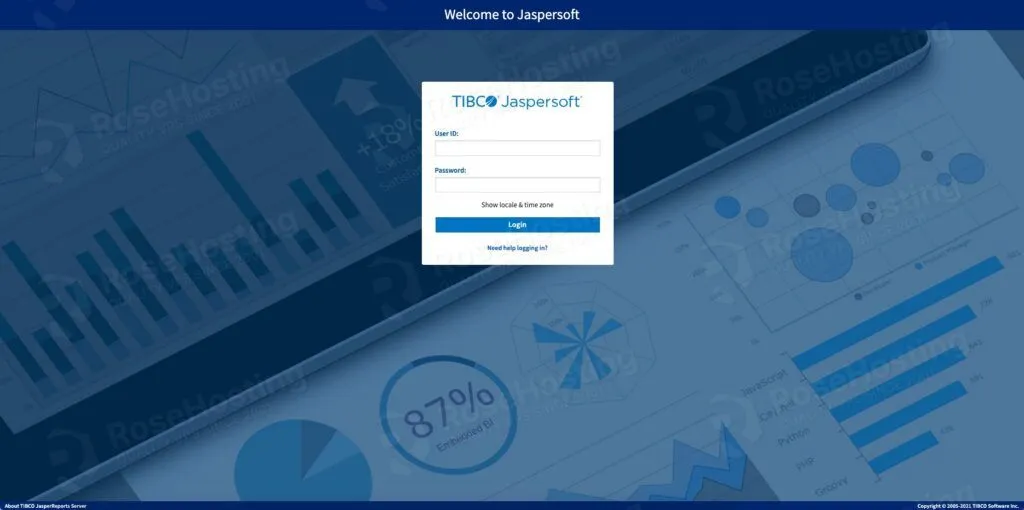
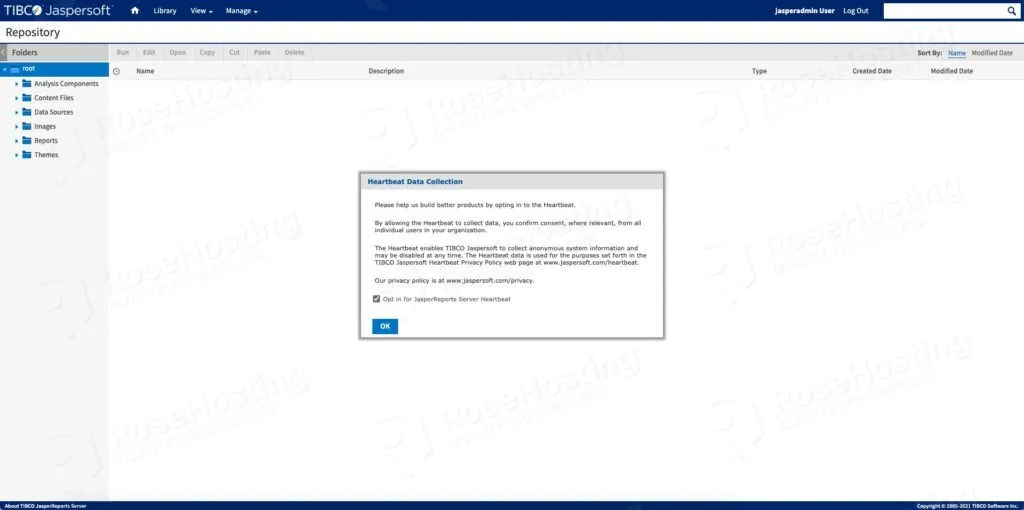
Then, you can navigate to http://YOUR_SERVER_IP_ADDRESS:8080/jasperserver/ to access JasperReports Server using the default login credentials.
username: jasperadmin
password: jasperadmin
Step 7. Configure Reverse Proxy
Since Tomcat is running on its default port 8080, we need to configure a reverse proxy to be able to access it on port 80 or 443. In this step, we are going to install nginx and configure it as a reverse proxy to the Jasper Reports server.
$ sudo apt install nginx
In Ubuntu 20.04, nginx will start running upon installation. Now, it’s time to create a server block for our Jasper Reports server.
$ sudo nano /etc/nginx/conf.d/jasperreports.conf
Insert the following configuration into the file.
upstream tomcat {
    server 127.0.0.1:8080 weight=100 max_fails=5 fail_timeout=5;
    }

server {
    server_name jasperserver.rosehosting.com;

location = / {
    return 301 http://jasperserver.rosehosting.com/jasperserver/;
    }

location / {
    proxy_set_header X-Forwarded-Host $host;
    proxy_set_header X-Forwarded-Server $host;
    proxy_set_header X-Forwarded-For $proxy_add_x_forwarded_for;
    proxy_pass http://tomcat/;
    }
}
Now, restart nginx service. Do not forget to test the configuration prior to restarting it.
$ sudo nginx -t
If no error is found, we are ready to restart it.
$ sudo systemctl restart nginx
Step 8. Install SSL certificate
This step is optional but highly recommended to complete. In this modern era, websites should run in HTTPS instead of HTTP. The following steps will show you how to install SSL certificates from Let’s Encrypt.
$ sudo apt install certbot python3-certbot-nginx -y
Once installed, edit your Jasper Report website nginx server block and replace the server_name with your actual domain or subdomain pointed to your server IP address. Make sure the domain or subdomain DNS record is already pointed to your server prior to issuing the SSL certificate.
If you make changes to the nginx server block, make sure to test the nginx configuration before restarting it:
$ sudo nginx -t
$ sudo systemctl restart nginx
Now, we are ready to install the SSL certificate, run this command:
$ sudo certbot
You would need to provide your email address, accept the Let’s Encrypt TOS, and whether you want to share your email address with the Electronic Frontier Foundation or not. Then, you need to choose which names would you like to activate HTTPS for. Choose your Django website by typing the number and hitting ENTER. Let’s encrypt will install the certificate and it will ask you whether to configure HTTP to HTTPS redirect or not, you can choose redirect then certbot will create the redirection and reload Nginx if everything is okay.
Now, you should be able to access your Jasper Reports website in HTTPS mode at https://yourjasperreportdomain.com.
Congratulations! You have successfully installed Jasper Reports Server on Ubuntu 20.04.
Of course, if you are one of our Ubuntu Hosting customers, you don’t have to install Jasper Reports Server on Ubuntu 20.04 on your own – simply ask our admins, sit back, and relax. Our admins will Jasper Reports Server on Ubuntu 20.04 for you immediately, along with many useful optimizations that we can do for you. Installing Jasper Reports Server on Ubuntu 20.04 is not just about the work. We can also help you with optimizing your Jasper Reports server if you have a managed VPS with us.
If you liked this post about how to install Jasper Reports Server on Ubuntu 20.04, please share it with your friends on social networks or simply leave a comment in the comments section. Thanks.
that version of jasper report is no longer available for free download
According to their page at https://community.jaspersoft.com/downloads/community-edition the community edition is no longer available