How to Install Gitea using Docker on Ubuntu 22.04
Gitea is a free and open-source self-hosted Git service like GitHub, BitBuacket, and GitLab. It's a community fork of Gogs git service, written in Go with an MIT License. Gitea provides features for collaborative development and team such as bug tracking, wikis, and code review. Gita is a cross-platform application, that can be installed on multiple operating systems such as Linux, macOS, Windows, and ARM.
The main goal of Gitea is to provide the easiest, fastest, and simplest way for creating and deploying Git service on your server. Additionally, Gitea supports multiple authentication methods such as LDAP, PAM, SMTP, and FreeIPA. As for webhook repository events, Gitea supports multiple webhooks such as Slack, Discord, Microsoft Team, Telegram, etc.
In this tutorial, you will learn how to install and configure the self-hosted Git server named Gitea with Docker on the latest Ubuntu 22.04 server. This also covers the installation and configuration of the Nginx web server as a reverse proxy for the Gitea container service.
Prerequisites
- An Ubuntu server - this tutorial uses the latest Ubuntu 22.04 server.
- A non-root user with root privileges - or also you can use the root user.
Installing and Configuring Docker
The first step that you will do is to install and configure Docker on your Ubuntu machine. For this tutorial, you will be installing Docker from the official Docker repository, so you will need to add the Docker GPG key and repository to your system.
Before you get started, run the apt command below to install the basic package dependencies such as gnupg2 and curl.
sudo apt install \
    ca-certificates \
    curl \
    gnupg \
    lsb-release
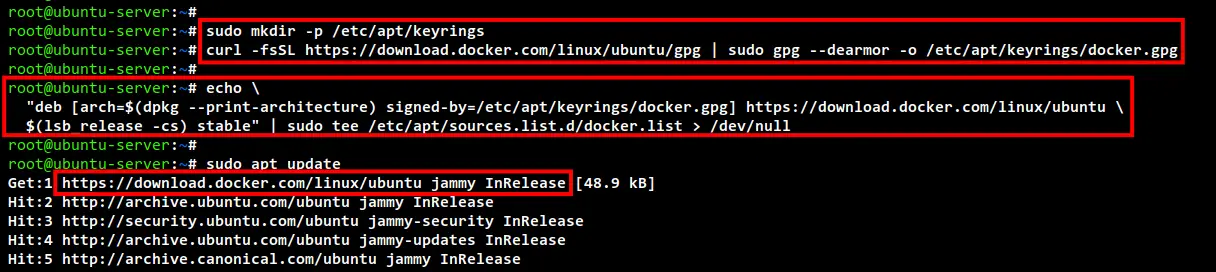
After installation is completed, run the below command to download and add the GPG key to the Docker repository. The GPG key will be stored in the /etc/apt/keyrings directory.
sudo mkdir -p /etc/apt/keyrings
curl -fsSL https://download.docker.com/linux/ubuntu/gpg | sudo gpg --dearmor -o /etc/apt/keyrings/docker.gpg
Next, add the Docker repository using the following command.
echo \
  "deb [arch=$(dpkg --print-architecture) signed-by=/etc/apt/keyrings/docker.gpg] https://download.docker.com/linux/ubuntu \
  $(lsb_release -cs) stable" | sudo tee /etc/apt/sources.list.d/docker.list > /dev/null
After that, update and refresh your Ubuntu repositories using the command below.
sudo apt update
In the below screenshot you can see the Docker repository for Ubuntu 22.04 is added.
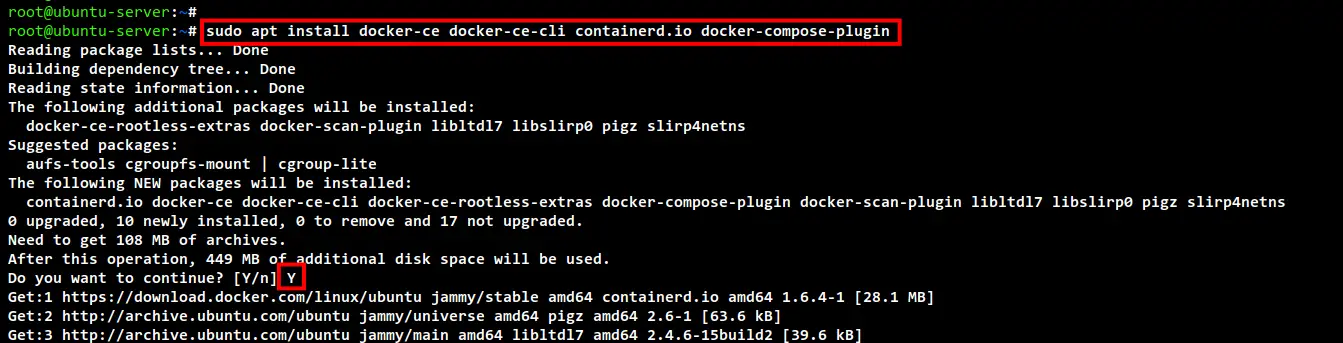
Lastly, you can install the Docker engine to your Ubuntu system using the following command. The package docker-compose plugin is the replacement of the Docker Compose, which now can be used as a plugin for Docker.
sudo apt install docker-ce docker-ce-cli containerd.io docker-compose-plugin
Input Y to confirm the installation and press ENTER to continue. The Docker installation will be starting.
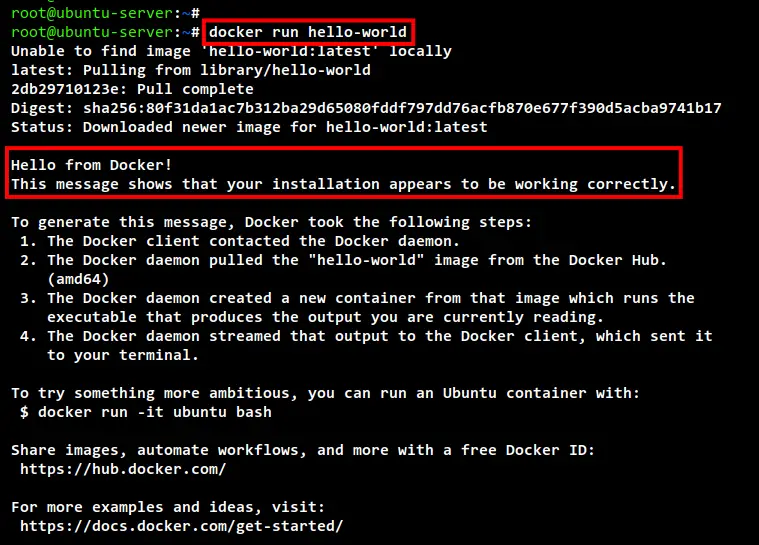
Now run the docker command below to verify your Docker installation.
sudo docker run hello-world
If your Docker installation is successful, you will see the Hello World message from Docker.
Setting up Gitea Deployment Environment
After you have successfully installed Docker, you will now be setting up the Gitea installation environment. In this example, the Gitea container service will be running as a non-root user, so you will need to create a new user on your system and add the user to the group 'docker' to allow the user to execute and run the Docker containers.
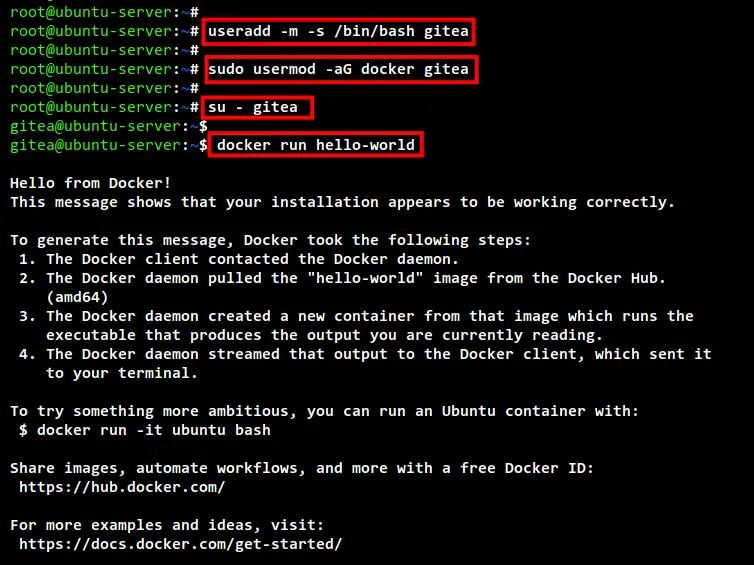
Run the below command to add a new user named gitea. The option -m here is used to automatically a new home directory for the user 'gitea' and the default shell for the new user is /bin/bash.
useradd -m -s /bin/bash gitea
Next, add the user 'gitea' to group 'docker' using the following command. And now the user 'gitea' will be able to run Docker containers.
usermod -aG docker gitea
To verify, log in as user 'gitea' using the following command.
su - gitea
Now run the docker command below to start a new container with the image "hello-world".
docker run hello-world
You should see the Hello-world message from Docker, which means you are ready to start configuring a new project for Gitea installation.
Building Gitea Container Services
After adding a new user for running the Gitea container service, you will now be setting up the Gitea project installation. All commands in this section are running under the new user 'gitea'.
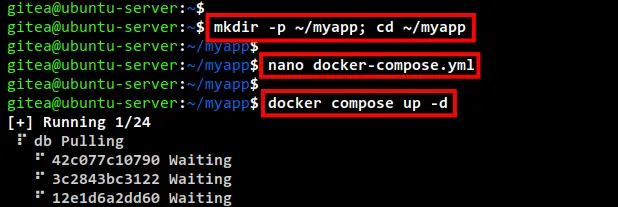
First, create a new project directory with the name "myapp" and change the working directory to it.
mkdir -p myapp; cd myapp/
Create a new docker-compose.yml file using nano editor.
nano docker-compose.yml
Add the following configuration to the docker-compose.yml file.
version: "2"

volumes:
  gitea-data:
    driver: local
  gitea-config:
    driver: local

services:
  server:
    image: gitea/gitea:1.16.8-rootless
    environment:
      - GITEA__database__DB_TYPE=postgres
      - GITEA__database__HOST=db:5432
      - GITEA__database__NAME=gitea
      - GITEA__database__USER=gitea
      - GITEA__database__PASSWD=gitea
    restart: always
    volumes:
      - ./data:/var/lib/gitea
      - gitea-data:/var/lib/gitea
      - ./config:/etc/gitea
      - gitea-config:/etc/gitea
      - /etc/timezone:/etc/timezone:ro
      - /etc/localtime:/etc/localtime:ro
    ports:
      - "3000:3000"
      - "2222:2222"
    depends_on:
      - db

  db:
    image: postgres:14
    restart: always
    environment:
      - POSTGRES_USER=gitea
      - POSTGRES_PASSWORD=gitea
      - POSTGRES_DB=gitea
    volumes:
      - ./postgres:/var/lib/postgresql/data
Save and close the file when you are done.
With these configurations, you will be creating the following resources:
- Two Docker volumes gitea-data and gitea-config for storing Gitea user data and configuration files.
- Two services with the name "server" and "db".
- The Gitea container service will be running with the name "server", based on the Docker image "gitea/gitea:1.16.8-rootless", and export TCP ports 3000 and 2222.
- The Gitea container service will be running with the PostgreSQL database service named "db".
- The "db" service will be running as the database for the Gitea service with the default Docker image PostgreSQL "postgres:14". All data related "db" service will be stored locally on the directory named "postgres".
Next, run the docker command below to start building and starting the Gitea container services.
docker compose up -d
Below you can see the download process of Docker images needed for Gitea.
When all process is completed, you will see the output like the following screenshot.
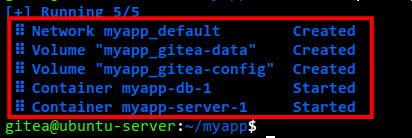
Now run the docker command below to check gitea container services.
docker compose ps
In the following screenshot, you can see the service named "server" and "db" is running, which means Gitea container services deployments are completed and successful.
The Gitea service is running on the localhost with port 3000. And port 2222 can be used for SSH connections.

if you have an error during the installation, you always check the logs of the container services using the below commands.
Check logs from all container services.
docker compose logs
Checking logs for each container services db and server.
docker compose logs db
docker compose logs server
Setting Up Nginx as a Reverse Proxy for Gitea
You have completed the Gitea container services installation, now you will be installing and configuring the Nginx web server as a reverse proxy for the Gitea container service that running on the default port 3000.
In this example, the Gitea container service will be running with the domain name git.hwdomain.io and SSL Letsencrypt enabled. So before you set up the nginx reverse proxy, be sure you have the domain name and the SSL Letsencrypted generated for your domain name.
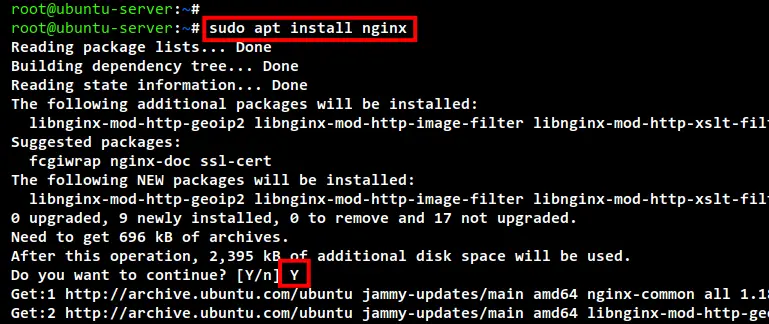
Now install the Nginx package using the apt command below.
sudo apt install nginx
Input Y to confirm the installation and press ENTER to continue.
Next, create a new SSL configuration /etc/nginx/snippets/ssl.conf using nano editor.
sudo nano /etc/nginx/snippets/ssl.conf
Add the following configuration to the file. Also, you will need to change the SSL certificate path.
ssl_certificate /etc/letsencrypt/live/git.hwdomain.io/fullchain.pem;
ssl_certificate_key /etc/letsencrypt/live/git.hwdomain.io/privkey.pem;

# from https://cipherli.st/
# and https://raymii.org/s/tutorials/Strong_SSL_Security_On_nginx.html

ssl_protocols TLSv1 TLSv1.1 TLSv1.2;
ssl_prefer_server_ciphers on;
ssl_ciphers "EECDH+AESGCM:EDH+AESGCM:AES256+EECDH:AES256+EDH";
ssl_ecdh_curve secp384r1;
ssl_session_cache shared:SSL:10m;
ssl_session_tickets off;
#ssl_stapling on;
#ssl_stapling_verify on;
#resolver 8.8.8.8 8.8.4.4 valid=300s;
#resolver_timeout 5s;
# Disable preloading HSTS for now.  You can use the commented out header line that includes
# the "preload" directive if you understand the implications.
#add_header Strict-Transport-Security "max-age=63072000; includeSubdomains; preload";
add_header Strict-Transport-Security "max-age=63072000; includeSubdomains";
add_header X-Frame-Options DENY;
add_header X-Content-Type-Options nosniff;
Save and close the file when you are done.
Next, create a new Nginx server blocks configuration for Gitea reverse proxy /etc/nginx/sites-available/gitea.conf using nano editor.
sudo nano /etc/nginx/sites-available/gitea.conf
Add the following configuration to the file, and make sure t change the domain name git.hwdomain.io with your domain.
server {
    server_name git.hwdomain.io;
    listen 443 ssl http2;
    include snippets/ssl.conf;

    # Log files
    access_log /var/log/nginx/gitea.access.log;
    error_log /var/log/nginx/gitea.error.log;

    location / {
        proxy_pass http://localhost:3000;
        proxy_set_header Host $host;
        proxy_set_header X-Real-IP $remote_addr;
        proxy_set_header X-Forwarded-For $proxy_add_x_forwarded_for;
        proxy_set_header X-Forwarded-Proto $scheme;
    }
}
Save and close the file when you are complete.
Now run the following command to activate the server blocks configuration gitea.conf and verify Nginx configurations.
sudo ln -s /etc/nginx/sites-available/gitea.conf /etc/nginx/sites-enabled/
sudo nginx -t
If your configuration is correct, you will see the output message such as "syntax is ok - test is successful".
Lastly, restart the nginx service to apply the new Nginx server block configuration gitea.conf and the SSL configuration ssl.conf.
sudo systemctl restart nginx
Now you have completed the Nginx configuration as a reverse proxy for the Gitea container service, which is now running on the domain name https://git.hwdomain.io with SSL enabled on top of it.
Start Configuring Gitea Installation
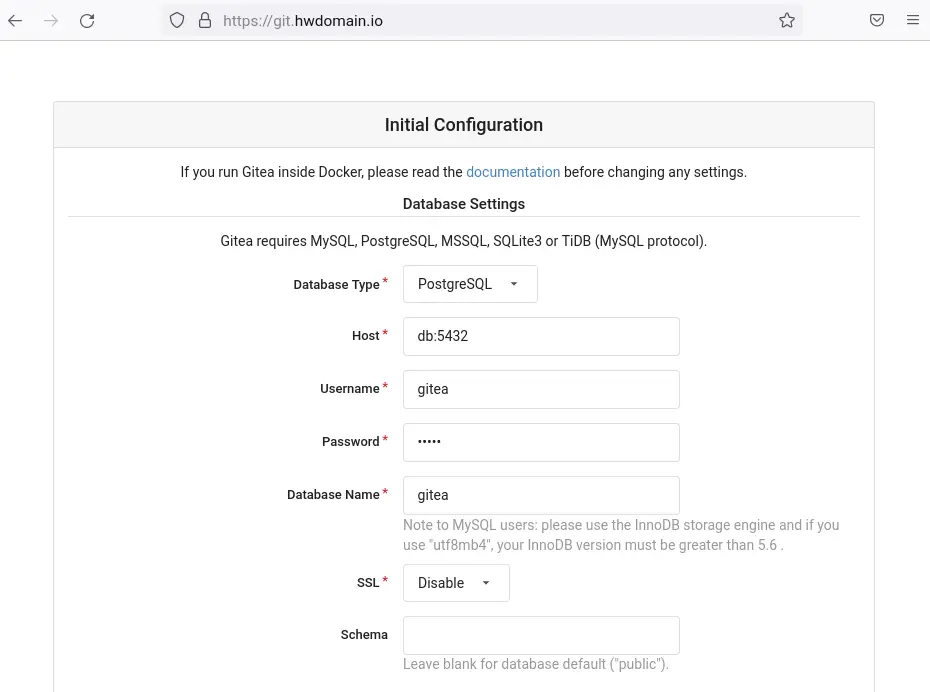
To start the Gitea installation and configuration, open your web browser and visit the gitea domain name for your installation (e.g https://git.hwdomain.io). And now you will see the Gitea installation page.
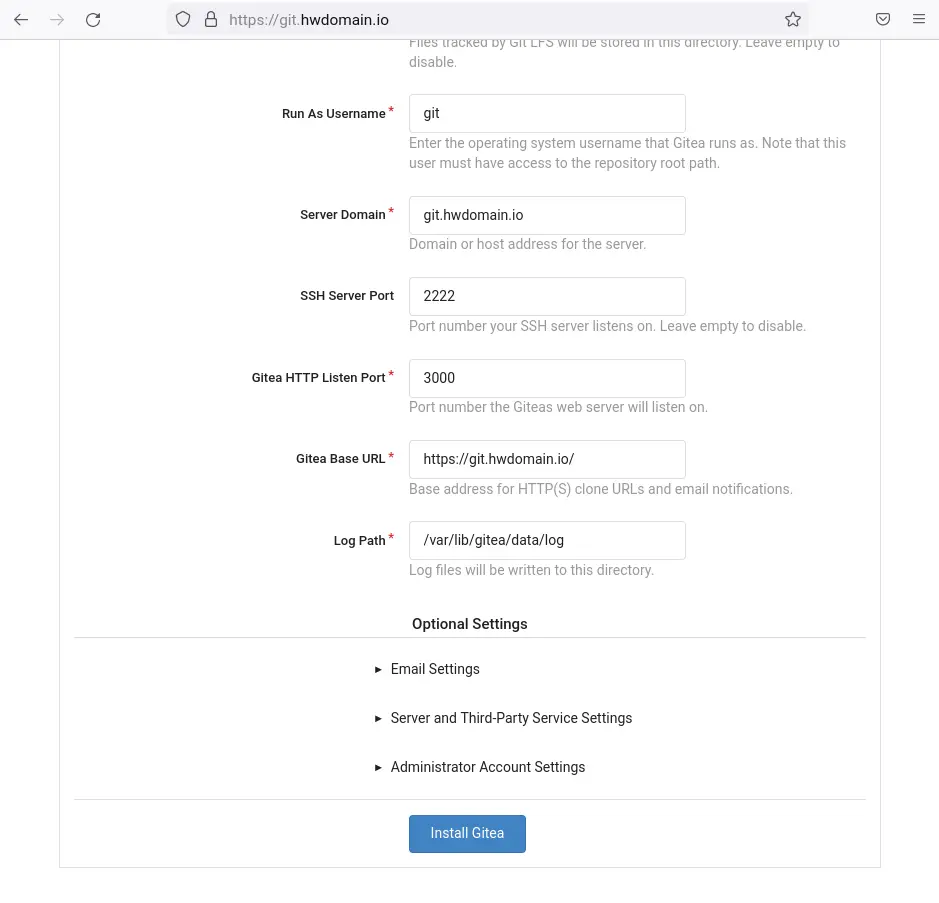
On the Initial configuration section, leave it as default because it automatically filled up with PostgreSQL database credentials from the docker-compose.yml file.
Now change the Gitea "Server Domain" and "Gitea base URL" with your domain installation. In this example the domain name is https://git.hwdomain.io.
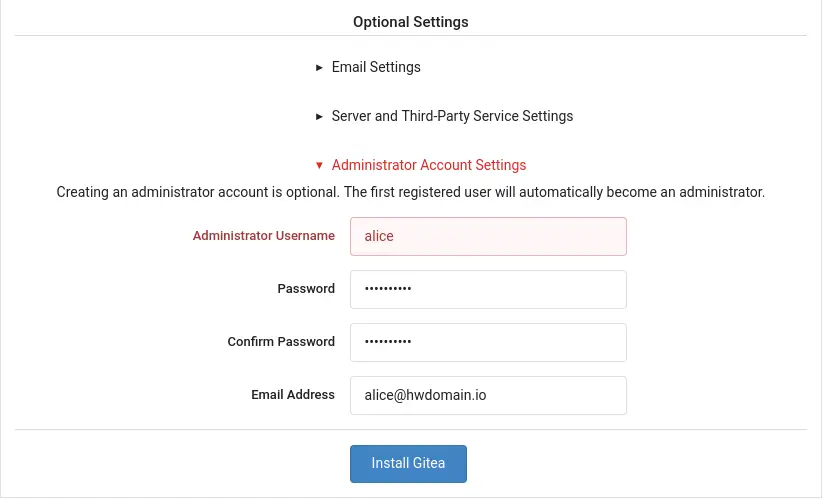
On the "Optional Settings" section, click the arrow on "Administrator Account Settings". Now input the new admin username, password, and email address for your Gitea server and click the "Install Gitea" button.
Once the installation process is completed, you will be redirected to the Gitea home page and logged in as the new user that you just created.
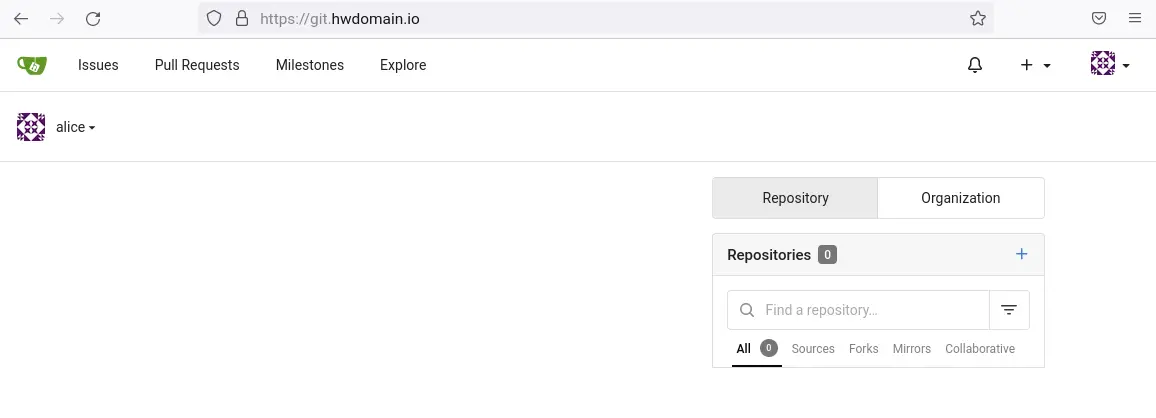
The installation and configuration of Gitea with Docker on the latest Ubuntu 22.04 is completed and successful.
Conclusion
Congratulation! You have now completed the installation of a self-hosted git server named Gitea with Docker on the latest Ubuntu 22.04 server. Also, you have learned the basic configuration of docker-compose.yml for creating container services. Also, you have learned how to set up Nginx as a reverse proxy for a container application, in this example is the Gitea container service.

