Capturing and annotating screenshots effectively requires the right software. Depending on your requirements, Linux has a wide selection of tools for this purpose. However, not all of them include the essential screenshot functions.
Pensela comes in as an exception here. It's referred to as the Swiss army knife of screen annotation tools for its extensive feature set that lets you capture screenshots and annotate them to your liking.
Let's dive in to check out Pensela, its features, and how you can use it to annotate screenshots effectively on Linux.
What Is Pensela?
Pensela is an open-source tool for capturing and annotating screenshots on Linux. It focuses primarily on screenshot annotation and, as such, includes a pretty diverse set of features intended to meet the annotation needs of most people.
Pensela Features
Here's a list of all the features you get on Pensela:
- Ability to add different shapes (rectangle, square, circle, lines, arrows, etc.)
- Custom color picker for shapes and background
- Ability to add custom text
- Stickers (tick and cross)
- Text highlighter
- Built-in screenshot tool to capture full-screen screenshots
- Ability to undo and redo operations
How to Install Pensela on Linux
Pensela works on pretty much all major Linux distros. So depending on the distro you're running on your computer, follow the instructions below to install Pensela.
On Debian and Ubuntu
First, download the DEB package for Pensela on your system. Then, open the terminal and use the cd command and ls command to navigate to the Downloads directory.
Download: Pensela (DEB package)
Here, enter the following command and hit Enter to install the package:
sudo dpkg -i pensela_*.deb
Alternatively, right-click on the package, select Open With GDebi Package Installer, and click on the Install Package button to install Pensela.
On Arch Linux
To install Pensela on Arch Linux, use:
yay -S pensela-bin
On Other Linux Distros
If you're using any other Linux distro on your machine, you can get Pensela using its AppImage.
Download: Pensela (AppImage)
Open the file manager on your computer and go to the Downloads directory. Next, right-click on the AppImage you just downloaded and select Properties. Then, click on the Permissions tab and tick the checkbox for Allow executing file as a program if you're using a Nautilus-based file manager.
Alternatively, if you're using Dolphin, check off the Is executable option and change the Execute dropdown to Anyone if you're on PCManFM. Then, you can simply double-click the AppImage file to launch Pensela.
How to Use Pensela on Linux
After you've installed Pensela on your Linux machine, you're now ready to use it to capture screenshots and annotate existing images.
To do this, launch Pensela from the applications menu. This will bring up the main Pensela window, called Drawing Board, which is basically a toolbar that you'll spend most of your time interacting with to perform various Pensela operations.
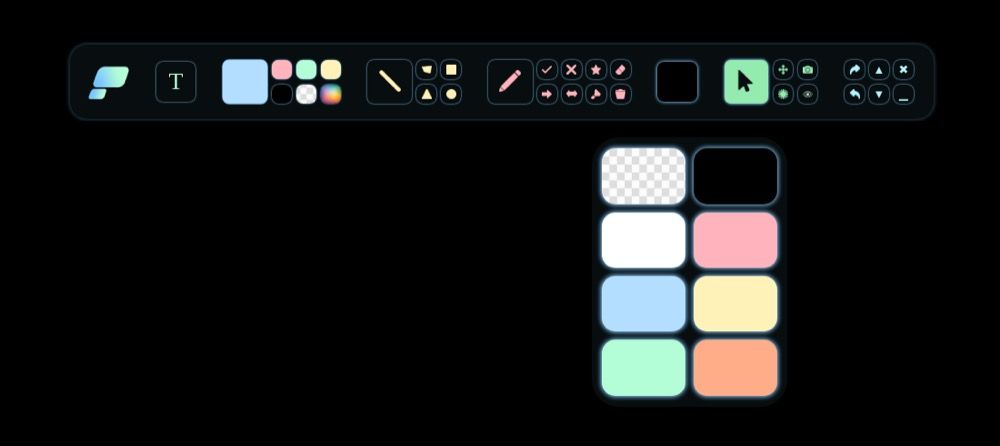
Upfront, the Drawing Board gives you several buttons for various operations and actions, including those for screenshot, annotation, and standard Pensela actions like undo, redo, etc. If you want to move this toolbar around the screen, click on the Pensela logo on the left of the toolbar and drag it to your desired position.
One thing about Pensela you'll notice instantly is that when it's active, you can't interact with any other app on your desktop at all. This is because Pensela is in annotation mode by default, so you need to toggle it off when you want to interact with other apps. To do this, click on the Toggle Visibility button in the second-last button cluster on the toolbar.
Similarly, when you want to minimize or close the toolbar, click on the _ (minimize) or x (close) icons in the icon cluster in the right-hand corner of the toolbar, respectively.
For changing any Pensela preferences or behavior, right-click on the Pensela icon in the taskbar and select Preferences > Configure.
Using Pensela to Capture Screenshots
Pensela has a built-in screenshot tool to let you capture the contents of the screen. However, even though it's pretty functional, this tool has one major flaw: when you hit the screenshot button to capture the screen, the screenshot also includes the Pensela toolbar in the captured image.
As a result, if you wish to use a screenshot captured in Pensela, you need to move the Pensela toolbar to a location on the screen where you can crop it off later and then capture the screenshot. Of course, this wouldn't work for you if you wish to show all the elements on the screen—from the top to the bottom—in the screenshot. Pensela's developer suggests this will be fixed in a future update.
Regardless, if you want to capture a screenshot with Pensela, here's how you do it:
- Open the window or app you want to capture.
- Bring up the Pensela toolbar.
-
Click on the screenshot button—the one with the camera icon—in the Pensela toolbar to take a full-page screenshot of the screen.
If you want to change the background of the captured screenshot, tap on the Choose Background Color button and choose the color you wish to use. Then, click the screenshot button again to capture the screenshot.
Pensela will automatically save the captured screenshot inside the Pensela directory under Pictures.
Use Pensela to Annotate a Screenshot
Coming to screenshot annotation, which is the main functionality of Pensela, the tool gives you a bunch of options to annotate screenshots to your liking. Here's a general idea of how to use them to annotate a screenshot or any image.
Open the file manager on your computer and navigate to the folder containing the screenshot/image you want to annotate.
Now, depending on how you want to annotate your screenshot, click on the relevant action button in the Pensela toolbar. For instance, if you want to add text, click on the T button, or for adding shapes, click on any shape button.
Similarly, you can also add stickers or arrows by clicking on the appropriate button. And when you want to move your annotations around, select the Drag option and drag it to your desired location.
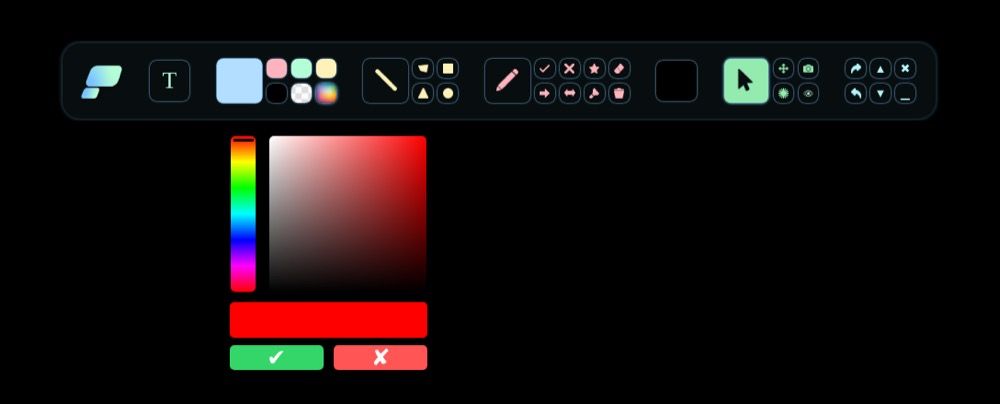
Additionally, to change the color of any shape or sticker, tap on any color to the left of the shapes button cluster. In case you wish to use a custom color, tap the hue picker in the color cluster and drag the slider around to pick your desired color.
For changing the stroke size, click the upward or downward pointing arrow buttons in the last button cluster on the toolbar. To delete a symbol or text, click the eraser icon and rub it over the annotation.
When you want to undo or redo an operation, press the right-hand or left-hand arrow buttons in the last button cluster accordingly. And lastly, to save the annotation, capture the screenshot by pressing the screenshot button in the Pensela toolbar.
As mentioned earlier, before you capture a screenshot, make sure to position the Pensela toolbar on the screen such that you can crop it later.
Annotate Screenshots as You Like on Linux
Pensela offers some really useful annotation options that can suffice most of your annotation requirements. It's easy to use and works without any hiccups. Of course, there are some limitations to it as of now, but the developer has claimed they'd get addressed in future updates.
If you're looking for a more comprehensive screenshot annotation tool, Flameshot is worth checking out.


