In this tutorial, we are going to install Neos CMS on Ubuntu 22.04 OS.
Neos CMS is an open-source Content Management System that allows developers and users to build their websites in a couple of steps quickly. Neos CMS is written in PHP and javascript and uses SQL. In this blog post, we will install Neos CMS with the LAMP stack so you can easily access it via a domain name.
Installing Neos CMS with LAMP stack on Ubuntu 22.04 may take up to 30 minutes. Let’s get things done!
Table of Contents
Prerequisites
- A server with Ubuntu 22.04 as OS
- A valid domain name pointed to the server IP address
- User privileges: root or non-root user with sudo privileges
Step 1. Update the System
Since we have a fresh installation of Ubuntu 22.04 we need to update the package to the latest versions available.
sudo apt-get update -y && sudo apt-get upgrade -y
Step 2. Install Apache Web Server
Apache Web server can be installed with the following command:
sudo apt install apache2 -y
Once installed, start and enable the service.
sudo systemctl enable apache2.service && sudo systemctl start apache2.service
Check if the service is up and running:
sudo systemctl status apache2.service
You should receive the following output:
root@host:~# sudo systemctl status apache2.service
● apache2.service - The Apache HTTP Server
     Loaded: loaded (/lib/systemd/system/apache2.service; enabled; vendor preset: enabled)
     Active: active (running) since Tue 2022-06-21 11:04:28 UTC; 1h 2min ago
       Docs: https://httpd.apache.org/docs/2.4/
   Main PID: 8106 (apache2)
      Tasks: 8 (limit: 4579)
     Memory: 13.3M
        CPU: 958ms
     CGroup: /system.slice/apache2.service
Step 3. Install MariaDB database server
MariaDB database server can be installed with the following command:
sudo apt install mariadb-server -y
Start and enable the MariaDB.service with the following commands:
sudo systemctl start mariadb.service && sudo systemctl enable mariadb.service
Check the status of the mariadb.service
sudo systemctl status mariadb
You should receive the following output:
root@host:~# sudo systemctl status mariadb
● mariadb.service - MariaDB 10.6.7 database server
     Loaded: loaded (/lib/systemd/system/mariadb.service; enabled; vendor preset: enabled)
     Active: active (running) since Tue 2022-06-21 11:09:23 UTC; 41s ago
       Docs: man:mariadbd(8)
             https://mariadb.com/kb/en/library/systemd/
   Main PID: 21540 (mariadbd)
     Status: "Taking your SQL requests now..."
      Tasks: 15 (limit: 4579)
     Memory: 57.1M
        CPU: 3.472s
     CGroup: /system.slice/mariadb.service
             └─21540 /usr/sbin/mariadbd
Step 4. Create Neos CMS database and user
To create a database, user and assign permission to that database, execute the following commands:
 CREATE DATABASE neosdb;
 CREATE USER 'neosdb'@'localhost';
 GRANT ALL PRIVILEGES ON neosdb.* TO 'neosdb'@'localhost' IDENTIFIED BY 'YourStrongPasswordHere';
 FLUSH PRIVILEGES;
 EXIT;
Step 5. Install PHP8 with extensions
PHP8 with extensions and can be installed with the following commands:
sudo apt-get install php8.1 php8.1-cli php8.1-common php8.1-imap php8.1-redis php8.1-snmp php8.1-xml php8.1-zip php8.1-mbstring php8.1-curl libapache2-mod-php php8.1-mysql -y
Step 6. Install Composer
We need Composer to install the Neos CMS requirements. Composer can be installed with the following command:
curl -sS https://getcomposer.org/installer | php -- --install-dir=/usr/bin --filename=composer
Check the Composer installation:
composer
You should receive the following output:
root@host:~# composer
Do not run Composer as root/super user! See https://getcomposer.org/root for details
Continue as root/super user [yes]? yes
______
/ ____/___ ____ ___ ____ ____ ________ _____
/ / / __ \/ __ `__ \/ __ \/ __ \/ ___/ _ \/ ___/
/ /___/ /_/ / / / / / / /_/ / /_/ (__ ) __/ /
\____/\____/_/ /_/ /_/ .___/\____/____/\___/_/
/_/
Composer version 2.3.7 2022-06-06 11:43:28
Step 7. Install Neos CMS
Once the composer is installed, go into the default Apache document root and execute the command below:
cd /var/www/html/

git clone https://github.com/neos/neos-base-distribution.git .

composer install
Once the installation is completed, set the right permissions:
chown -R www-data:www-data /var/www/html/

find . -type d -exec chmod 755 {} \;

find . -type f -exec chmod 644 {} \;
The next step is to enter the database credentials into two files, one for Production and one for Development, just in case.
First we need to go into the /var/www/html/Configuration/Development directory and rename the file Settings.yaml.example to Settings.yaml.example
cd /var/www/html/Configuration/Development

mv Settings.yaml.example Settings.yaml
Open the file, enter the database name, database user, and database password, save it and close the file.
backendOptions:
        dbname: 'neosdb'       # adjust to your database name
        user: 'neosdb'             # adjust to your database user
        password: 'YourStrongPasswordHere'         # adjust to your database password
Repeat the same procedure for the Production directory.
cd /var/www/html/Configuration/Production

mv Settings.yaml.example Settings.yaml
Open the Settings.yaml file and paste the database credentials. Save the file and close it.
Step 8. Create Apache Virtual Host file
Go into the Apache directory and create a configuration file for the Neos CMS.
cd /etc/apache2/sites-available/

touch neos.conf
Open the file, paste the following lines of code, save the file and close it.
<VirtualHost *:80>
ServerName yourdomain.com
DocumentRoot /var/www/html/Web

<Directory /var/www/html/Web>
AllowOverride All
</Directory>

ErrorLog ${APACHE_LOG_DIR}/error.log
CustomLog ${APACHE_LOG_DIR}/access.log combined

<Directory /var/www/html/Web/>
            RewriteEngine on
            RewriteBase /
            RewriteCond %{REQUEST_FILENAME} !-f
            RewriteRule ^(.*) index.php [PT,L]
</Directory>

</VirtualHost>
Enable the Apache configuration for Neos CMS and rewrite the module.
sudo a2enmod rewrite

sudo a2ensite neos.conf
Check the syntax:
apachectl -t
You should receive the following output:
root@vps:~# apachectl -t
Syntax OK
If the syntax is OK, restart the Apache service.
systemctl reload apache2.service
Once the Apache service is restarted, you can finish the Neos CMS installation at http://yourdomain.com.
Step 9. Finish Neos CMS Installation
On the first window, click on the “Go to setup” button.

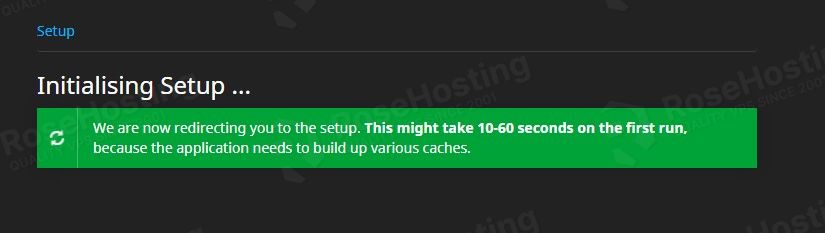
The setup will start with initializing.
Enter the password only one time, which is located in the directory explained in the picture.
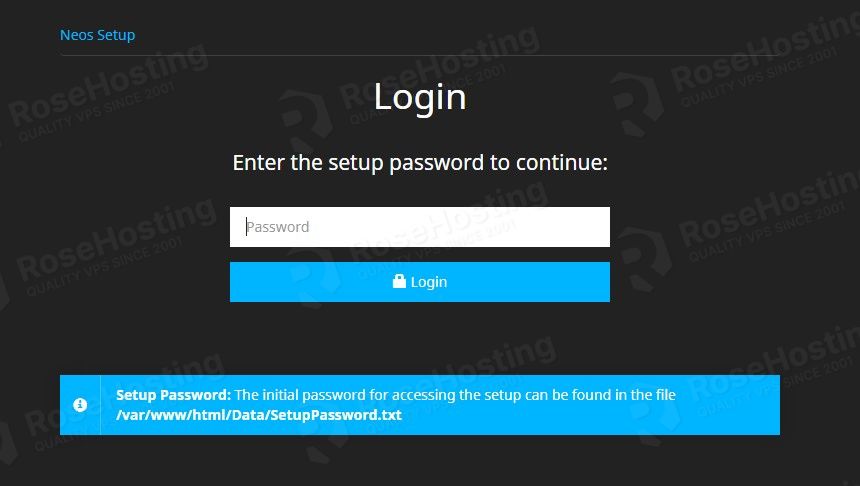
You need to execute the following command on your server:
cat /var/www/html/Data/SetupPassword.txt

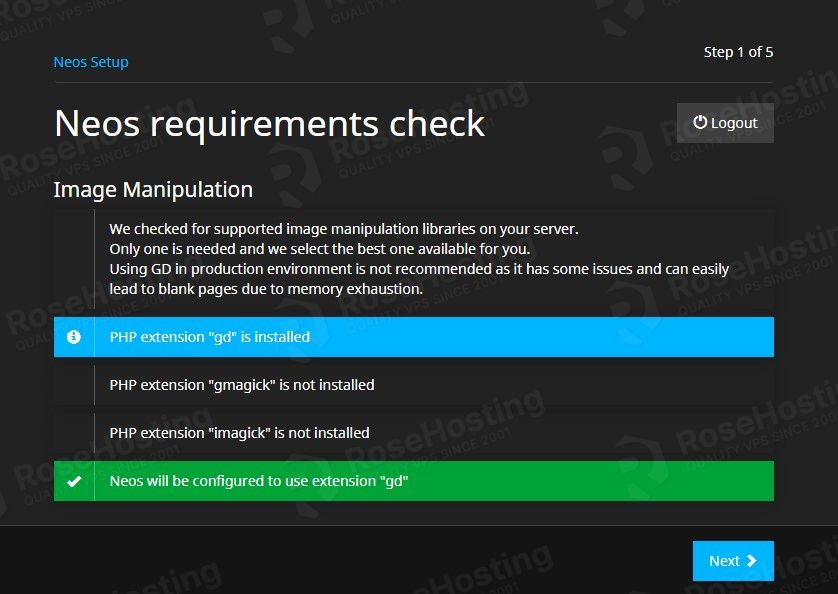
In the next window, you need to check for the installed extensions. If everything is OK, it will be in green.
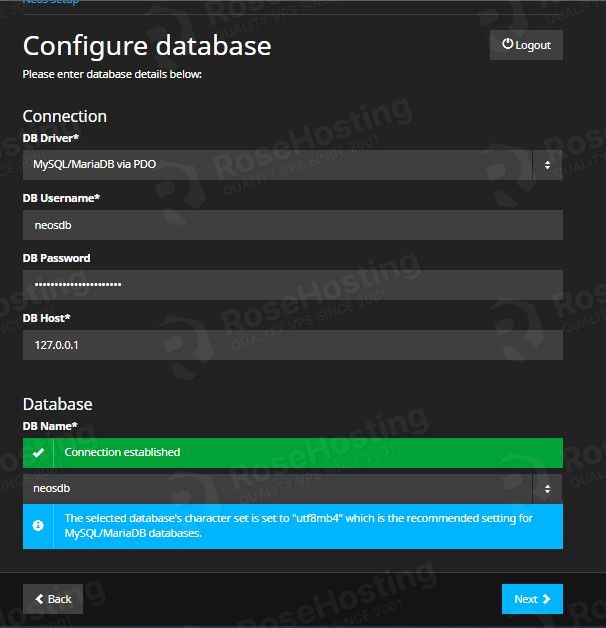
In the next window, you need to enter the database credentials.
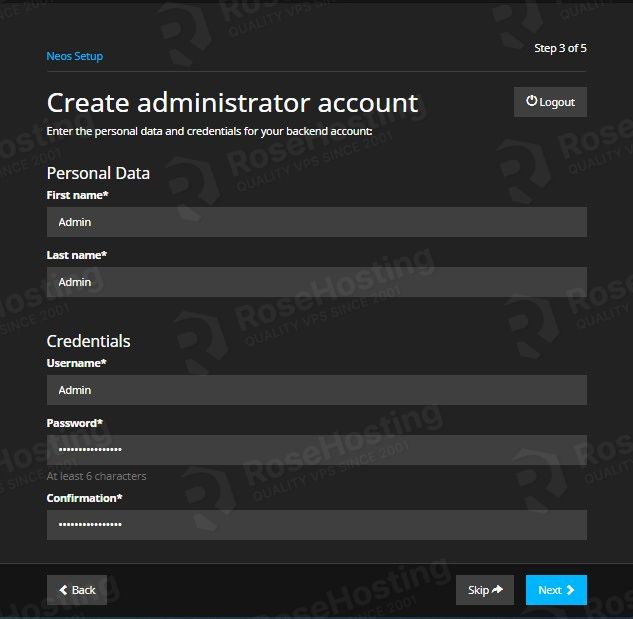
In the next window, you need to set up the Administrator account.
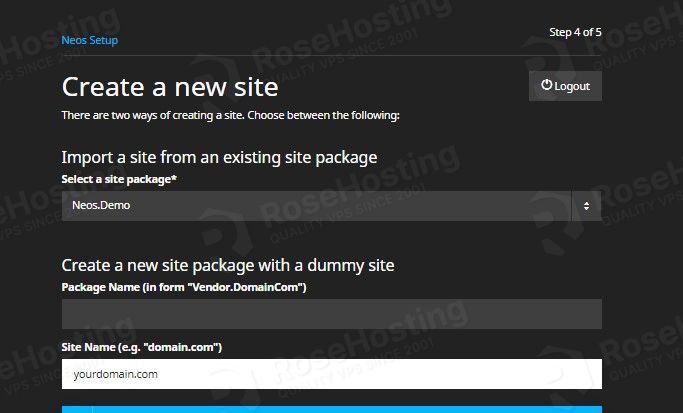
Next is to enter your website name and choose Neos.Demo package.
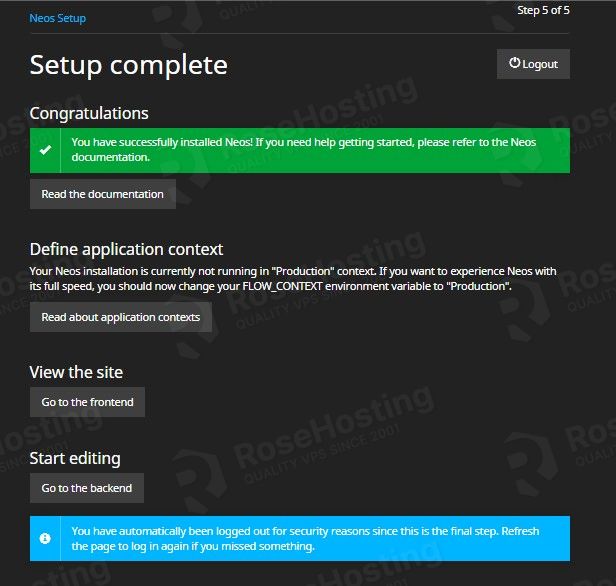
Once the setup is complete, go to the backend.
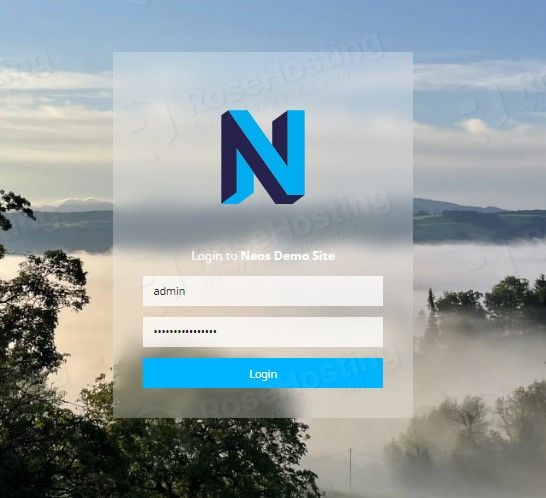
Enter the Admin credentials you set before and click on the Login button.
You will be redirected to the following screen.
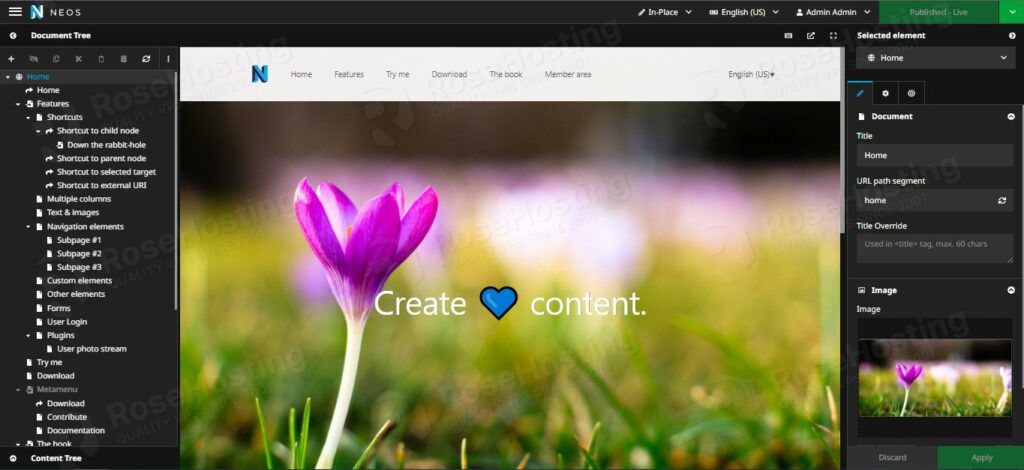
That’s it. You successfully installed and configured Neos CMS with LAMP stack on Ubuntu 22.04
If you find it difficult to install this CMS on your own, you can always contact our technical support. They are available 24/7 and will start work on your request immediately.
If you liked this post on installing Neos CMS on Ubuntu 22.04 OS, please share it with your friends on social networks or simply leave a reply below. Thanks.