In this blog post, we are going to show you how to install Django Web Framework on Ubuntu 22.04 OS.
Django is a free and open-source web framework written in Python that follows the MVT(Model-View-Template) architectural pattern. The framework is written for developers to make complex and database-driven websites using predefined administrative actions like create, update, delete, and read. In this tutorial, we are going to install Django Web Framework in an isolated and encapsulated environment called python virtual environment.
Installing Django Web Framework is a straightforward process that can take up to 15 minutes. Let’s get things working!
Table of Contents
Prerequisites
- A server with Ubuntu 22.04 as OS
- User privileges: root or non-root user with sudo privileges
Step 1. Update the System
We need to update the system packages to the latest versions available.
sudo apt-get update -y && sudo apt-get upgrade -y
Step 2. Install Python
Before we can install the latest python version, we need to install some python dependencies:
apt install software-properties-common -y

sudo add-apt-repository ppa:deadsnakes/ppa -y

apt update
Once the python dependencies are installed, we can install the latest python3.10 version with the command below:
sudo apt install python3.10 -y
Once installed, we can check the full python version:
python3 --version
You should receive the following output:
root@host:~# python3 --version
Python 3.10.4
Now, when the latest version of Python is installed, we can install the Python Virtual Environment required for Django Web Framework to run smoothly and isolated from other libraries on the server.
To install Python Virtual Environment execute the command below:
sudo apt install python3-pip python3.10-venv -y
Step 3. Install Django Web Framework
Now, we can create a python virtual environment and install the Django framework. To create and activate a virtual environment in some directory on your server, follow the steps below:
cd /opt

python3 -m venv django-venv

source django-venv/bin/activate
Once the virtual environment is created and activated, you should see the following output:
root@vps:/opt# python3 -m venv django-venv
root@vps:/opt# source django-venv/bin/activate
(django-venv) root@vps:/opt#
To install Django Admin in the virtual environment, execute the command below:
pip3 install django
To verify that the installation is successful and the Django admin version executes the following command:
django-admin --version
You should receive the following output:
(django-venv) root@vps:/opt# django-admin --version
4.0.5
Step 4. Create Django Project
Now, when the virtual environment is created, we can create a new project using the Django-admin with the start project command as described below:
django-admin startproject djangoproject .
Once the Django project is created, list the directory with the ls -al command, and you should see the following output:
(django-venv) root@vps:/opt# ls -al
total 20
drwxr-xr-x  4 root root 4096 Jun 18 13:02 .
drwxr-xr-x 19 root root 4096 Jun  5 11:14 ..
drwxr-xr-x  2 root root 4096 Jun 18 13:02 djangoproject
drwxr-xr-x  5 root root 4096 Jun 18 09:25 django-venv
-rwxr-xr-x  1 root root  669 Jun 18 13:02 manage.py
Step 5. Migrate Django Database
The next step is to migrate the Django database using the command below:
python3 manage.py migrate
After successful migration you should receive the following output:
(django-venv) root@vps:/opt# python3 manage.py migrate
Operations to perform:
  Apply all migrations: admin, auth, contenttypes, sessions
Running migrations:
  Applying contenttypes.0001_initial... OK
  Applying auth.0001_initial... OK
  Applying admin.0001_initial... OK
  Applying admin.0002_logentry_remove_auto_add... OK
  Applying admin.0003_logentry_add_action_flag_choices... OK
  Applying contenttypes.0002_remove_content_type_name... OK
  Applying auth.0002_alter_permission_name_max_length... OK
  Applying auth.0003_alter_user_email_max_length... OK
  Applying auth.0004_alter_user_username_opts... OK
  Applying auth.0005_alter_user_last_login_null... OK
  Applying auth.0006_require_contenttypes_0002... OK
  Applying auth.0007_alter_validators_add_error_messages... OK
  Applying auth.0008_alter_user_username_max_length... OK
  Applying auth.0009_alter_user_last_name_max_length... OK
  Applying auth.0010_alter_group_name_max_length... OK
  Applying auth.0011_update_proxy_permissions... OK
  Applying auth.0012_alter_user_first_name_max_length... OK
  Applying sessions.0001_initial... OK
Step 6. Create Django Superuser
To create a Django superuser for managing the Django Admin Dashboard execute the command below:
python3 manage.py createsuperuser
After executing the command above, the command prompt will ask you for your username, email, and password. Enter these credentials and you should receive the successful user creation message:
(django-venv) root@vps:/opt# python3 manage.py createsuperuser
Username (leave blank to use 'root'): admin
Email address: admin@yourdomain.com
Password:
Password (again):
Superuser created successfully.
Step 7. Start Django Project
Till now, we installed a virtual environment, installed Django admin and Django project with database migration, and we set the credentials for Django superuser. The final step is to start the Django project via command line on some port so we can access it in the browser.
Before we start the project, we need to open the settings.py file and put the server IP address in the ALLOWED HOSTS array.
nano djangoproject/settings.py
Paste the IP address in the Allowed Hosts array, save the file and close it.
ALLOWED_HOSTS = ['YourServerIPAddress']
To start the Django project on a port, for example 8000, execute the following command:
python3 manage.py runserver YOUR_SERVER_IP_ADDRESS:8000
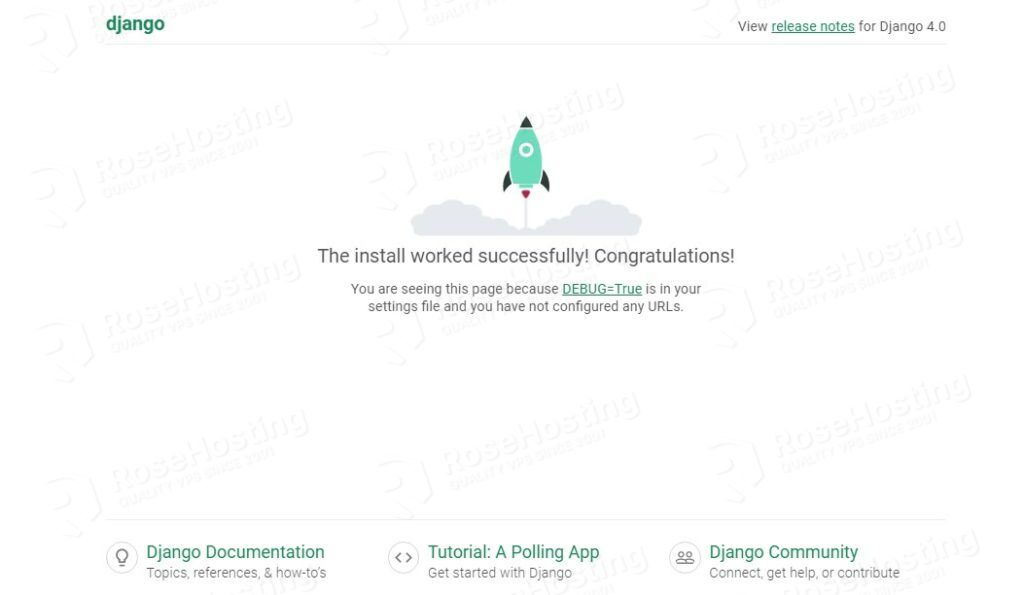
Access django project at YOUR_SERVER_IP_ADDRESS:8000
Access Admin dashboard at YOUR_SERVER_IP_ADDRESS:8000/admin/
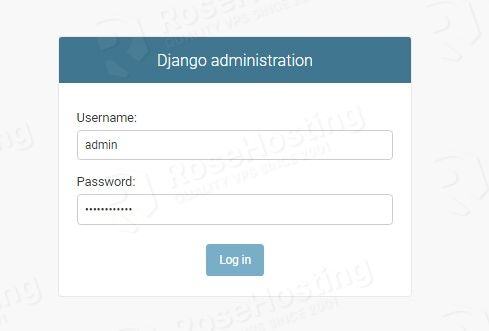
Login in to the admin dashboard. You should receive the following screen.
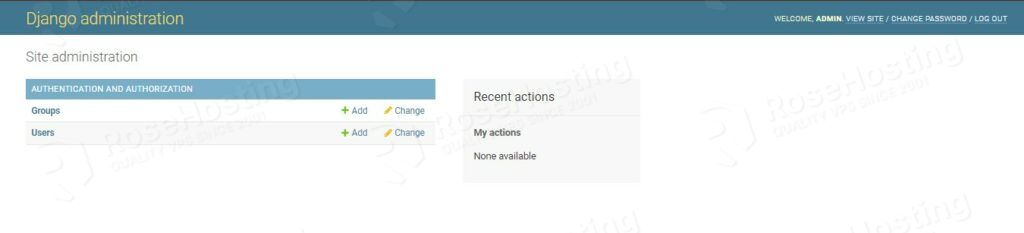
Congratulations, you successfully installed and started Django Web Framework on Ubuntu 22.04 OS
Of course, you do not have to install and configure this setup on your own. You can contact our technical support, and they will help you with installing Django Web Framework. We are available 24/7
If you liked this post on how to install Django Web Framework on Ubuntu 22.04, please share it with your friends on social networks or simply leave a reply below.