
Magento is a very well-known e-commerce platform and highly customizable application. It offers open-source and commercial versions to help developers build eCommerce websites. Magento Commerce, formerly known as the enterprise edition, offers more extensive out-of-the-box features and unlimited scaling. In this tutorial, we will show you how to install Magento Open Source (formerly known as community edition) on Debian 11.
Table of Contents
Prerequisites
- A Debian 11 VPS with 4GB of RAM or higher
- SSH access with sudo privileges, or root access
1. Update the System
First of all, we need to log in to our Debian 11 VPS through SSH:
ssh master@IP_Address -p Port_number
Replace “master” with a user with sudo privileges or root if necessary. Additionally, replace “IP_Address” and “Port_Number” with your server’s respective IP address and SSH port number. Next, let’s make sure that we’re on Debian 11. You can do that like this:
$ lsb_release -a
You should get an output like this:
Distributor ID: Debian
Description: Debian GNU/Linux 11 (bulleseye)
Release: 11
Codename: bullseye
Then, run the following command to make sure that all installed packages on the server are updated to their latest available versions:
$ sudo apt update && sudo apt upgrade
2. Install PHP
Magento 2.4.4 introduces support for PHP 8.1. All project libraries and dependencies have been updated for compatibility with PHP 8.1. Since the latest PHP version available in the default Debian 11 repository is version 7.4, we are going to install PHP 8.1 using Sury APT repository.
$ sudo apt install ca-certificates apt-transport-https software-properties-common gnupg2 unzip -y
$ echo "deb https://packages.sury.org/php/ $(lsb_release -sc) main" | sudo tee /etc/apt/sources.list.d/sury.list
We need to install the signing GPG key, let’s run this command:
$ wget -qO - https://packages.sury.org/php/apt.gpg | sudo apt-key add -
Next, let’s proceed with the PHP 8.1 installation, do not forget to update the package index.
$ sudo apt update
$ sudo apt install php8.1-{bcmath,common,curl,fpm,gd,intl,mbstring,mysql,soap,xml,xsl,zip,cli}
It is time to adjust some PHP variable values.
$ sudo sed -i "s/memory_limit = .*/memory_limit = 768M/" /etc/php/8.1/fpm/php.ini
$ sudo sed -i "s/upload_max_filesize = .*/upload_max_filesize = 128M/" /etc/php/8.1/fpm/php.ini
$ sudo sed -i "s/zlib.output_compression = .*/zlib.output_compression = on/" /etc/php/8.1/fpm/php.ini
$ sudo sed -i "s/max_execution_time = .*/max_execution_time = 18000/" /etc/php/8.1/fpm/php.ini
3. Install Nginx
Magento fully supports Nginx and Apache web servers. In this article, we are going to use Nginx as the webserver.
$ sudo apt install nginx -y
In Debian 11, nginx will automatically start upon installation. To verify this, you can invoke this command:
$ sudo systemctl status nginx
It should show you an output similar to this one:
master@debian11:~$ sudo systemctl status nginx
● nginx.service - A high performance web server and a reverse proxy server
Loaded: loaded (/lib/systemd/system/nginx.service; enabled; vendor preset: enabled)
Active: active (running) since Wed 2022-07-20 10:24:17 UTC; 1min 13s ago
Docs: man:nginx(8)
Process: 19522 ExecStartPre=/usr/sbin/nginx -t -q -g daemon on; master_process on; (code=exited, status=0/SUCCESS)
Process: 19523 ExecStart=/usr/sbin/nginx -g daemon on; master_process on; (code=exited, status=0/SUCCESS)
Main PID: 19603 (nginx)
Tasks: 2 (limit: 2276)
Memory: 2.5M
CPU: 32ms
CGroup: /system.slice/nginx.service
├─19603 nginx: master process /usr/sbin/nginx -g daemon on; master_process on;
└─19606 nginx: worker process

Jul 20 10:24:17 debian11 systemd[1]: Starting A high performance web server and a reverse proxy server...
Jul 20 10:24:17 debian11 systemd[1]: nginx.service: Failed to parse PID from file /run/nginx.pid: Invalid argument
Jul 20 10:24:17 debian11 systemd[1]: Started A high performance web server and a reverse proxy server.
It is time to create an nginx server block for our Magento website.
$ sudo nano /etc/nginx/sites-enabled/magento.conf
Insert the following into the file, make sure to modify the domain to match your own domain/subdomain.
upstream fastcgi_backend {
server unix:/run/php/php8.1-fpm.sock;
}

server {
server_name yourdomain.com;
listen 80;
set $MAGE_ROOT /opt/magento2;
set $MAGE_MODE developer; # or production

access_log /var/log/nginx/magento2-access.log;
error_log /var/log/nginx/magento2-error.log;

include /opt/magento2/nginx.conf.sample;
}
Save the file then exit from nano editor.
4. Install MySQL Server
Magento 2.4.4 requires MySQL 8, MySQL 5.7, and MariaDB-(10.2-10.4), but Debian 11 provide MariaDB 10.5 in the repository which is not supported at the moment. So, we are going to install MySQL 8 for this setup using MySQL APT repository.
Check their page at https://dev.mysql.com/downloads/repo/apt/ and download their latest release package, then install it.
$ wget https://dev.mysql.com/get/mysql-apt-config_0.8.22-1_all.deb
$ sudo dpkg -i mysql-apt-config_0.8.22-1_all.deb
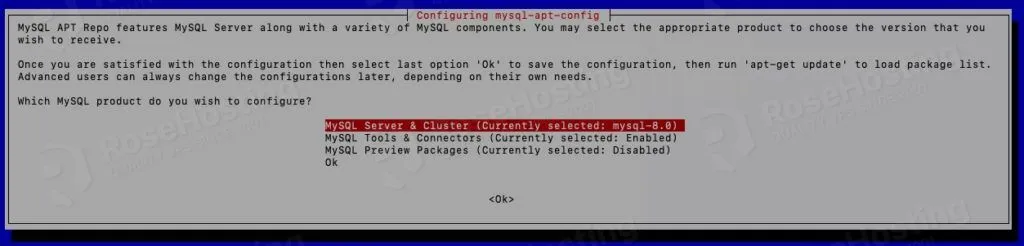
The installation will prompt you some options, choose MySQL 8 and Cluster then press TAB to choose OK and hit ENTER
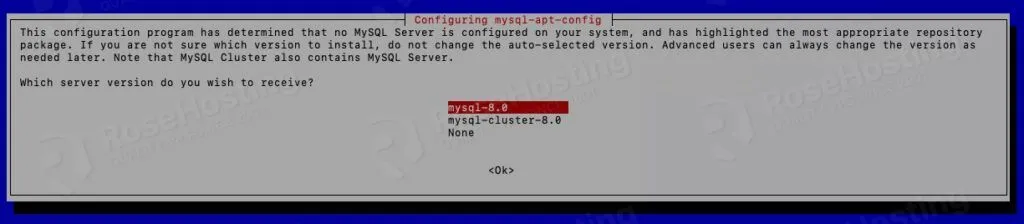
Then, choose MySQL 8 and OK
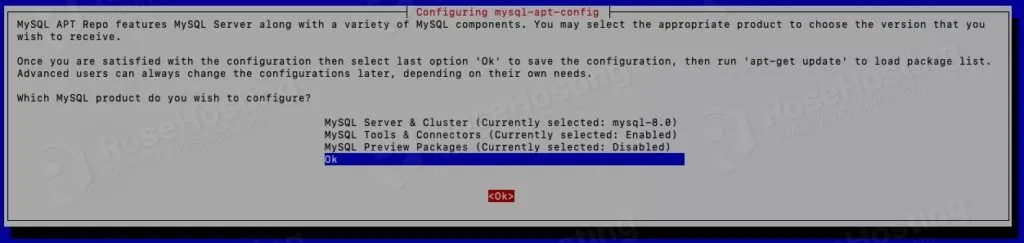
You will be brought to the initial window, this time choose OK and OK
We need to update the package index before we can install MySQL server.
$ sudo apt update
$ sudo apt install mysql-server
MySQL server will be automatically running, now we need to create a database.
$ sudo mysql
Run these MySQL commands, replace m0d1fyt15 with a stronger password:
mysql> CREATE DATABASE magentodb;
mysql> CREATE USER 'magento'@'localhost' IDENTIFIED BY 'm0d1fyth15';
mysql> GRANT ALL ON magentodb.* TO 'magento'@'localhost';
mysql> FLUSH PRIVILEGES;
mysql> \q
5. Install Elasticsearch
Elasticsearch is used as a search engine in a Magento website. Starting Magento 2.4, Elasticsearch is a required component hence we cannot perform Magento installation without Elasticsearch.
Let’s install the signing GPG Key and add Elastic repository into the source list
$ curl -fsSL https://artifacts.elastic.co/GPG-KEY-elasticsearch | sudo apt-key add -
$ sudo sh -c 'echo "deb https://artifacts.elastic.co/packages/7.x/apt stable main" > /etc/apt/sources.list.d/elastic-7.x.list'
Update the package list then install Elasticsearch with these commands
$ sudo apt update -y
$ sudo apt install elasticsearch -y
Elasticsearch has been installed but it’s not started yet. Let’s start it on boot and start it now.
$ sudo systemctl --now enable elasticsearch
To verify whether Elasticsearch service is running or not we can run this command:
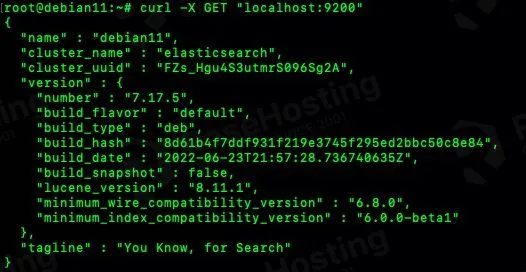
$ curl -X GET "localhost:9200"
You will see an output like this:
{
"name" : "debian11",
"cluster_name" : "elasticsearch",
"cluster_uuid" : "FZs_Hgu4S3utmrS096Sg2A",
"version" : {
"number" : "7.17.5",
"build_flavor" : "default",
"build_type" : "deb",
"build_hash" : "8d61b4f7ddf931f219e3745f295ed2bbc50c8e84",
"build_date" : "2022-06-23T21:57:28.736740635Z",
"build_snapshot" : false,
"lucene_version" : "8.11.1",
"minimum_wire_compatibility_version" : "6.8.0",
"minimum_index_compatibility_version" : "6.0.0-beta1"
},
"tagline" : "You Know, for Search"
}
6. Install Composer
To manage Magento components and its dependencies, we use Composer. In Debian 11, the latest version of Composer in the default repository is version 2.0.9. We are going to install Composer from getcomposer.org website to get the latest stable version.
$ curl -sS https://getcomposer.org/installer -o composer-setup.php
$ sudo php composer-setup.php --install-dir=/usr/local/bin --filename=composer
To check the Composer version you can run the following command:
$ composer -V
7. Install Magento
To install Magento 2 using composer, you need to have an account at https://marketplace.magento.com/. We would need to create an access key and use it to install Magento through the command line. In the link above, you can navigate to My profile > Marketplace > My products > Access Keys to see/create an access key.
$ sudo composer create-project --repository-url=https://repo.magento.com/ magento/project-community-edition=2.4.4 /opt/magento2
The command above will prompt you for a username and password. The username would be your public key, and the password is the private key you created earlier.
Magento core files are downloaded to /opt/magento2 directory, let’s go in to the directory then proceed with the installation.
$ cd /opt/magento2
We need to run the command below in the Magento directory, make sure the database details match with the credentials we created earlier. Also, create a stronger password than the one in the command.
sudo bin/magento setup:install \
--base-url=http://yourdomain.com \
--db-host=localhost \
--db-name=magentodb \
--db-user=magento \
--db-password=m0d1fyth15 \
--admin-firstname=admin \
--admin-lastname=admin \
--admin-email=admin@admin.com \
--admin-user=admin \
--admin-password=m0d1fyth15one \
--language=en_US \
--currency=USD \
--timezone=America/Chicago \
--use-rewrites=1
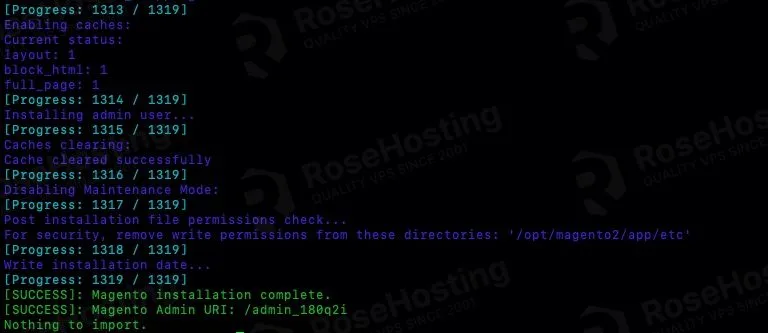
Wait for a few minutes until the installation is completed.
Then, let’s give the directory the correct permission.
chown -R www-data: /opt/magento2
In the previous step we created an nginx server block for our Magento website, it is time to check the configuration and restart nginx.
$ sudo nginx -t
$ sudo systemctl restart nginx
By default, two-factor authentication is enabled in the new Magento installation. If you want to disable it, you can run the command below.
$ sudo -u www-data bin/magento module:disable Magento_TwoFactorAuth
$ sudo -u www-data bin/magento cache:flush
8. Setup Cron jobs
Magento needs to run its cronjobs to automate its important system functions. Run the command below to create Magento cronjobs under user www-data.
$ sudo -u www-data bin/magento cron:install
9. Install an SSL Certificate
It is important to run a website in HTTPS mode. In this step, we will show you how to install an SSL certificate for your Magento website using the free one from Let’s Encrypt.
$ sudo apt install python3-certbot-nginx
$ certbot --nginx -d yourdomain.com
The command will prompt you for your email address and the agreement. Once the installation is completed, it will update your Magento nginx server block file to redirect all HTTP traffic to HTTPS.
root@debian11:/opt/magento2# certbot --nginx -d yourdomain.com

Saving debug log to /var/log/letsencrypt/letsencrypt.log
Plugins selected: Authenticator nginx, Installer nginx
Enter email address (used for urgent renewal and security notices)
(Enter 'c' to cancel): you@yourdomain.com

- - - - - - - - - - - - - - - - - - - - - - - - - - - - - - - - - - - - - - - -
Please read the Terms of Service at
https://letsencrypt.org/documents/LE-SA-v1.2-November-15-2017.pdf. You must
agree in order to register with the ACME server. Do you agree?
- - - - - - - - - - - - - - - - - - - - - - - - - - - - - - - - - - - - - - - -
(Y)es/(N)o: y

- - - - - - - - - - - - - - - - - - - - - - - - - - - - - - - - - - - - - - - -
Would you be willing, once your first certificate is successfully issued, to
share your email address with the Electronic Frontier Foundation, a founding
partner of the Let's Encrypt project and the non-profit organization that
develops Certbot? We'd like to send you email about our work encrypting the web,
EFF news, campaigns, and ways to support digital freedom.
- - - - - - - - - - - - - - - - - - - - - - - - - - - - - - - - - - - - - - - -
(Y)es/(N)o: n
Account registered.
Requesting a certificate for yourdomain.com
Performing the following challenges:
http-01 challenge for yourdomain.com
Waiting for verification...
Cleaning up challenges
Deploying Certificate to VirtualHost /etc/nginx/sites-enabled/magento.conf
Redirecting all traffic on port 80 to ssl in /etc/nginx/sites-enabled/magento.conf

- - - - - - - - - - - - - - - - - - - - - - - - - - - - - - - - - - - - - - - -
Congratulations! You have successfully enabled https://yourdomain.com
- - - - - - - - - - - - - - - - - - - - - - - - - - - - - - - - - - - - - - - -

IMPORTANT NOTES:
- Congratulations! Your certificate and chain have been saved at:
/etc/letsencrypt/live/yourdomain.com/fullchain.pem
Your key file has been saved at:
/etc/letsencrypt/live/yourdomain.com/privkey.pem
Your certificate will expire on 2022-10-18. To obtain a new or
tweaked version of this certificate in the future, simply run
certbot again with the "certonly" option. To non-interactively
renew *all* of your certificates, run "certbot renew"
- If you like Certbot, please consider supporting our work by:

Donating to ISRG / Let's Encrypt: https://letsencrypt.org/donate
Donating to EFF: https://eff.org/donate-le
Use the following Magento 2 CLI commands to update the Magento URL values in the database, replace yourdomain.com with your actual domain or subdomain name.
$ cd /opt/magento2/
$ sudo -u www-data bin/magento setup:store-config:set --base-url="https://yourdomain.com/"
$ sudo -u www-data bin/magento setup:store-config:set --base-url-secure="https://yourdomain.com/"
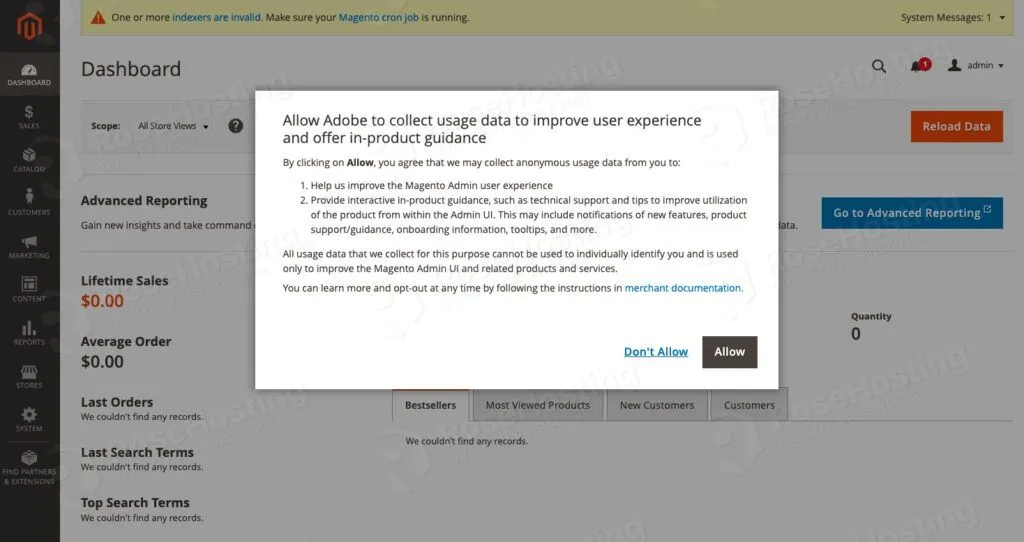
Congratulation! You can now access Magento backend at https://yourdomain.com/admin_180q2i/. Please remember that your Magento Admin URI is provided during the installation, or you can also check it in app/etc/env.php file.
If you are one of our web hosting clients and use our managed Debian Hosting, you don’t have to follow this tutorial and install Magento 2.4.4 on your Debian 11 server yourself, you can simply ask our expert Linux hosting admins to set all of this up for you, quickly and easily. We can also help you with the more complex setup, like adding Varnish and RabbitMQ. They are available 24×7 and will respond to your request immediately.
PS. If you liked this post, please share it with your friends on the social networks using the buttons below, or simply leave a comment down in the comments section. Thank you.
After The Magento Installation I can’t see any response in the browser i’ve opened the following URL with Provided Admin Link but it’s shows Error. Page cannot be displayed. Please contact your service provider for more details
You need to check the log files on your server for more information about this.
Thanks so much for such clear work