How to Install and Use Nessus Security Scanner on Rocky Linux
Nessus is an open-source network vulnerability scanner for vulnerability assessments, penetration testing, and ethical hacking. It uses the Common Vulnerabilities and Exposures (CVE) architecture and is one of the most comprehensive vulnerability scanners on the market. With Nessus, you can perform network vulnerability scanning, find misconfigurations and Denial of Service (Dos) vulnerabilities, and many more.
Nessus provides high-speed asset discovery, target profiling, configuration auditing, malware detection, sensitive data discovery and so much more. Also, it/s available in multiple types of versions, including the Nessus Essentials the free vulnerability scanner, and Nessus professional for professional pentester and ethical hackers.
This guide describes how to install Nessus Security Scanner on the Rocky Linux server. Also, this will helps you to set up the Nessus CLI that allows you to manage Nessus via the terminal command line. And lastly, this also describes how to scan the server with Nessus.
Prerequisites
To finish the following guide, you will have the following requirements:
- A Rocky Linux server - this example uses the Rocky Linux 8 with the hostname 'nessus-server'.
- A non-root user with sudo/root administration privileges.
- SELinux with the status mode 'permissive'.
Installing Nessus via .rpm File
Nessus is enterprise-grade security that can be installed on multiple operating systems, including Linux Distributions, BSD, Windows, and macOS. The complete list of the Nessus package can be found on the Nessus download page, which provides multiple packages for Linux distribution, including the .deb file for Debian-based or the .rpm file for RHEL-based distributions.
To install Nessus on Rocky Linux, you will download the Nessus package .rpm file and install it manually via the 'rpm' command.
Before you start, install curl using the dnf command below.
sudo dnf install curl
Then download Nessus .rpm file with the following curl command. At the time of writing this guide, the latest version is Nessus v10.4.
curl --request GET \
  --url 'https://www.tenable.com/downloads/api/v2/pages/nessus/files/Nessus-10.4.1-es8.x86_64.rpm' \
  --output 'Nessus-10.4.1-es8.x86_64.rpm'
After the download is finished, you will see the file 'Nessus-10.4.1-es8.x86_64.rpm' in the current working directory.

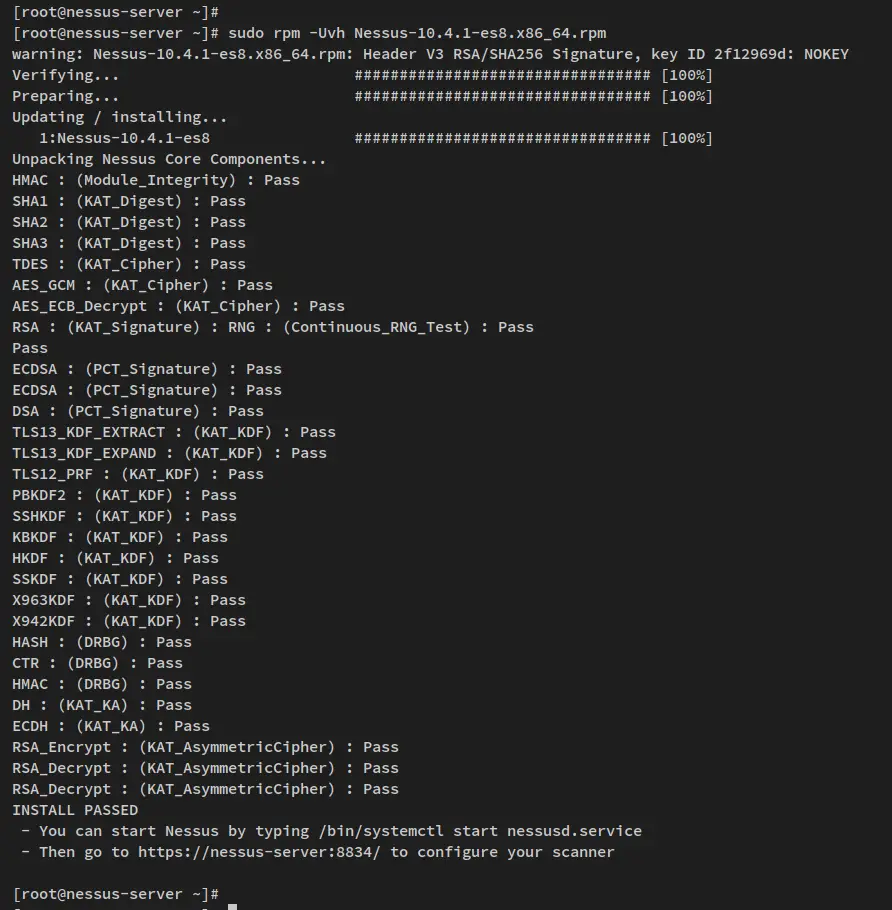
Now run the following rpm command to install the Nessus package 'Nessus-10.4.1-es8.x86_64.rpm'.
sudo rpm -Uvh Nessus-10.4.1-es8.x86_64.rpm
When the installation is finished, you should see the output like the following.
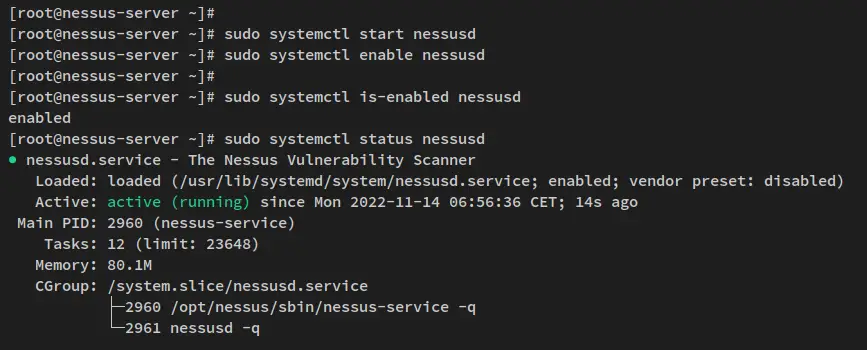
Next, run the following command to start and enable the Nessus service.
sudo systemctl start nessusd
sudo systemctl enable nessusd
After the Nessus service is running, run the following command to verify the Nessus service and make sure that the service is enabled and running.
sudo systemctl is-enabled nessusd
sudo systemctl status nessusd
You'll then get the following output the Nessus service is enabled and will start automatically upon the bootup. And the status of the Nessus service is running.
Setting up Firewalld
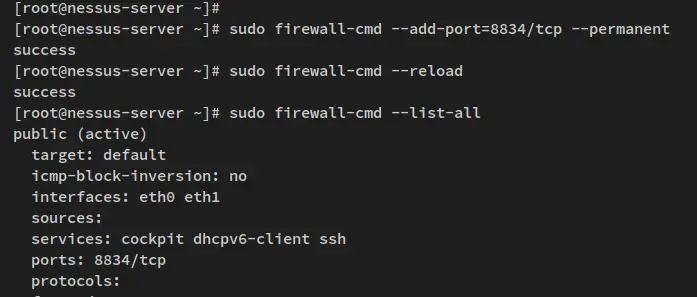
After you installed Nessus, you will next set up the Firewalld and open the Nessus port. Firewalld is running by default on the Rocky Linux system, you will add the TCP port 8834 for the Nessus administration dashboard.
Run the following firewall-cmd command to add port 8834/tcp to the firewalld.
sudo firewall-cmd --add-port=8834/tcp --permanent
Next, reload the firewalld to apply the new firewall rules.
sudo firewall-cmd --reload
Lastly, verify the list of open ports on the firewalld via the command below. You'll then see the port 8834/tcp added to the firewalld.
sudo firewall-cmd --list-all
With the Nessus installed and the firewalld configured, you can now access your Nessus installation from the web browser.
Nessus Basic Configuration
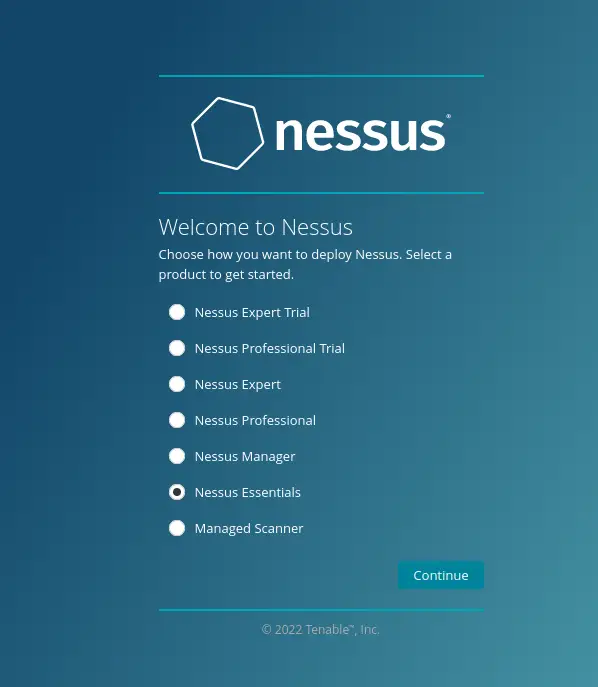
In this step, you will now set up and start the Nessus installation. You will install the 'Nessus Essentails' which is the free version, and before that, be sure that you have prepared an email address to get the Nessus activation code.
Open your web browser and visit the server IP address followed by port 8834 (i.e: https://192.168.5.100:8834/). You should see the installation page of Nessus.
In the first page, you should select the version of Nesses that you will install. For the Nessus free version, you should select 'Nessus Essentials' and click 'Continue'.
Now input your name and the email address to get the activation code and click 'Email'. Ensure to use the real email address to get the Nessus activation code.

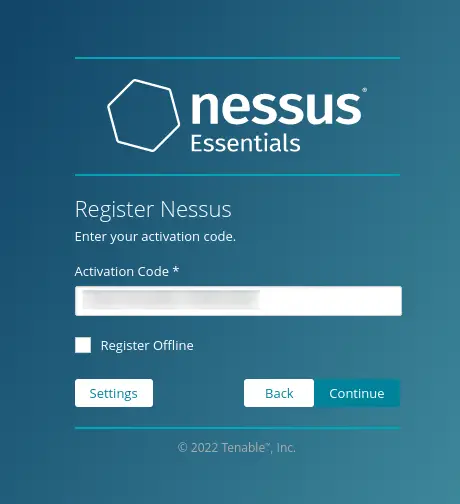
After you get the Nessus activation code, input the activation code on the page and click 'Continue'.
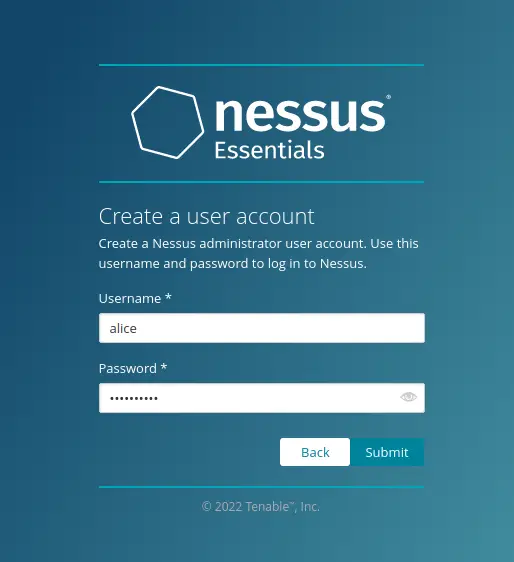
If the Nessus activation code is verified, you will now get the next page for creating an admin user for Nessus. Input the admin user and password, then click 'Submit' to confirm.
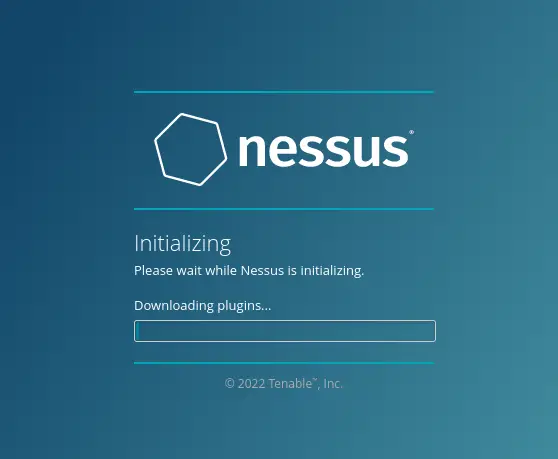
Now Nessus installation will begin. This process also will compile and install some Nessus plugins, and this will take a time to complete.
After the Nessus installation is finished, you will now get the Nessus dashboard and logged as your admin user.
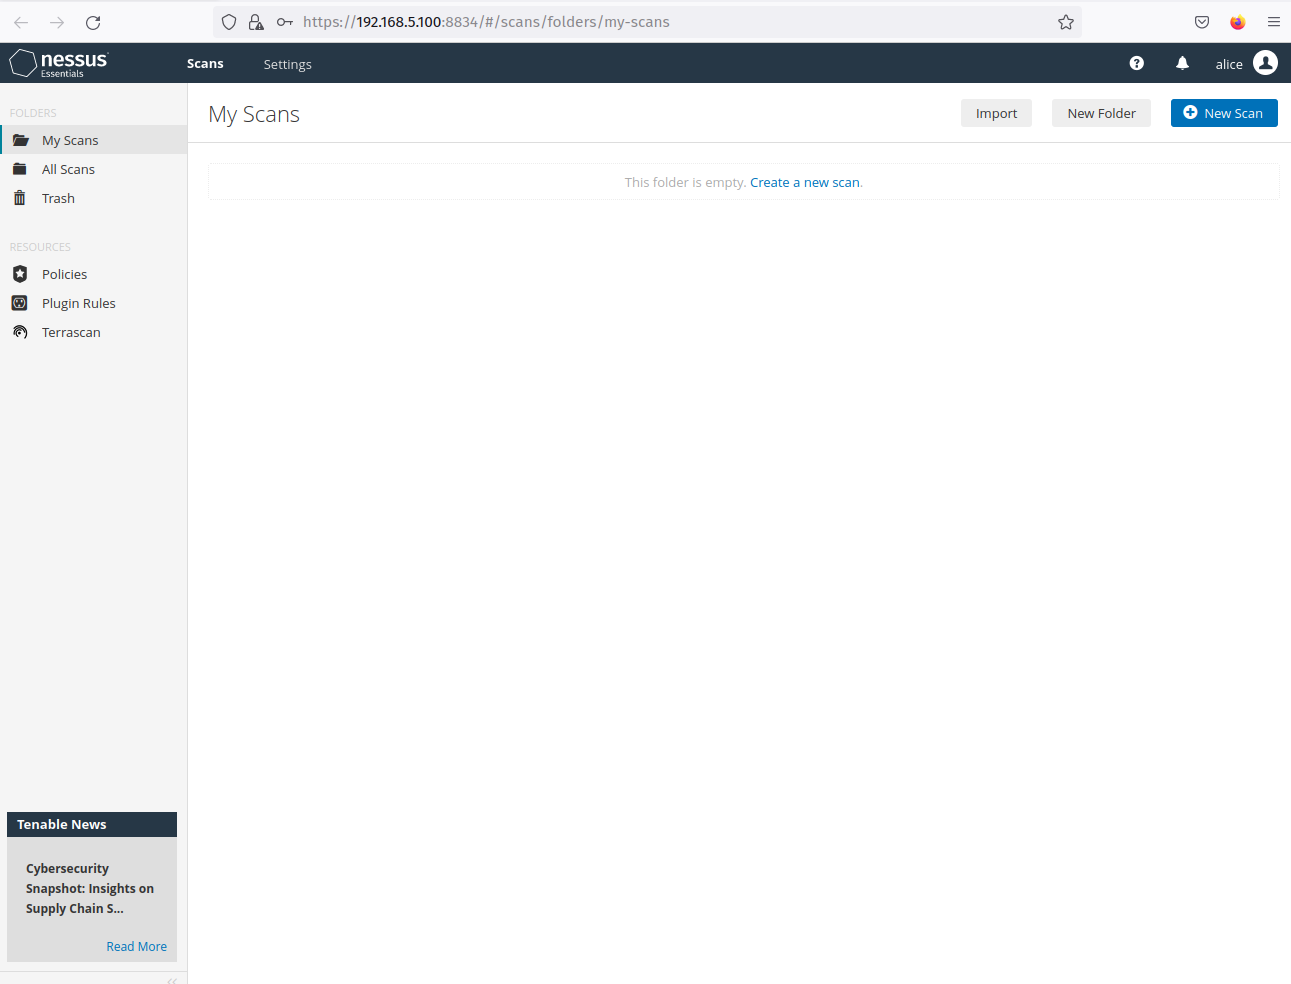
From this, you can scan your system or any remote machines from the Nessus dashboard.
Setting up Nessus CLI
By default, Nessus is installed in the '/opt/nessus' directory, which contains Nessus configuration files inside the '/opt/nessus/etc' directory and Nessus binary files on the '/opt/nessus/bin' and '/opt/nessus/sbin'.
To set up Nessus CLI, you must add both Nessus binary path '/opt/nessus/bin' and '/opt/nessus/sbin' to the system $PATH environment variable.
Before you start, you can verify the list of directories inside the Nessus installation directory '/opt/nessus'.
ls /opt/nessus
Now run the following command to add Nessus binary path directories to the system $PATH environment variable. The following command will add a new configuration to the ~/.bashrc file, which will be loaded every time user log in to the server.
echo 'export PATH="$PATH:/opt/nessus/bin:/opt/nessus/sbin"' >> ~/.bashrc
Next, reload the ~/.bashrc config file in the current session using the following command. Then, verify the system $PATH environment variable.
source ~/.bashrc
echo $PATH
You will then see Nessus binary path '/opt/nessus/bin' and /opt/nessus/sbin' added to the system $PATH.

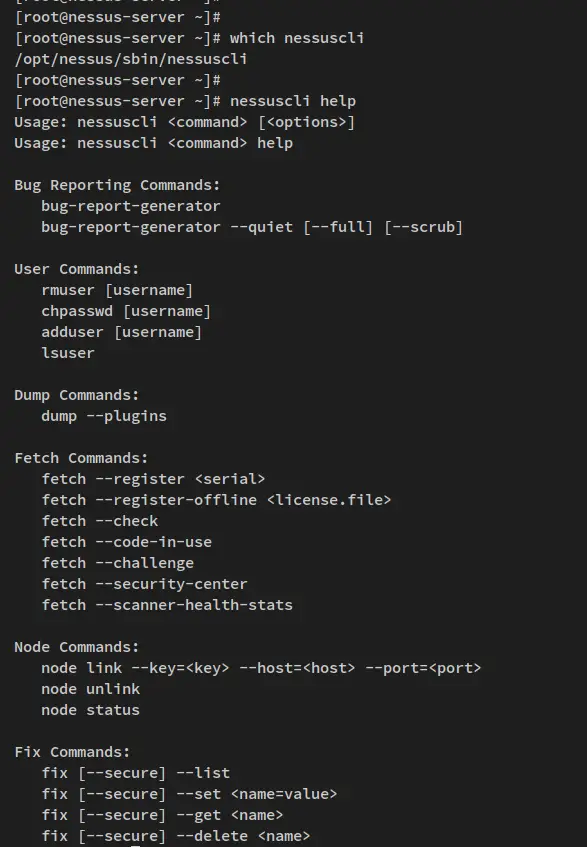
You can now run the Nessus CLI by typing the following command.
which nessuscli
nessuscli help
You should see the full path of the binary file 'nessuscli' and you also see the help page of the 'nessuscli' command.
Additionally, you can also run some other commands provided by Nessus such as 'nessusd' and 'nessus-service'.
Create First Scan with Nessus
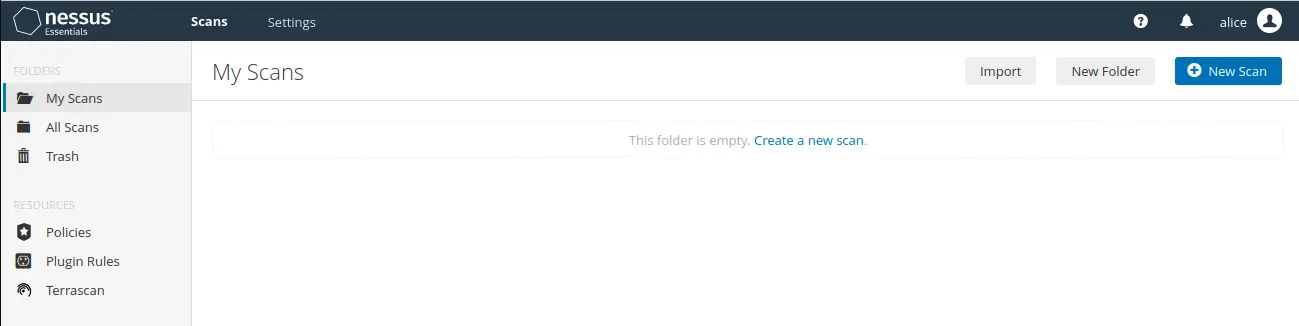
On the Nessus user dashboard, click the link 'Create a new scan'.
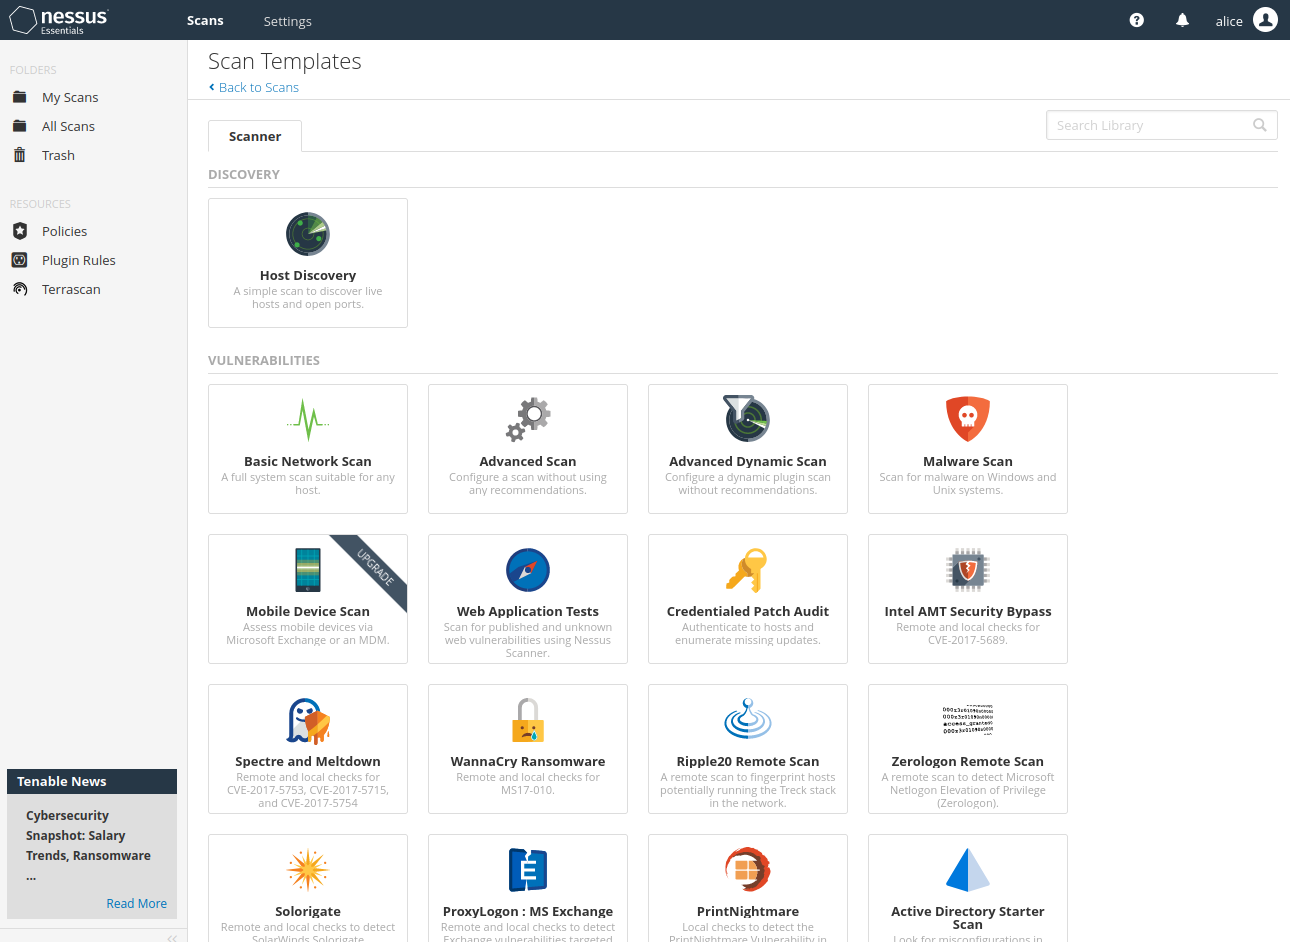
Now select the 'Scan templates' that you will use - In this example, you will use the template 'Basic network scan'.
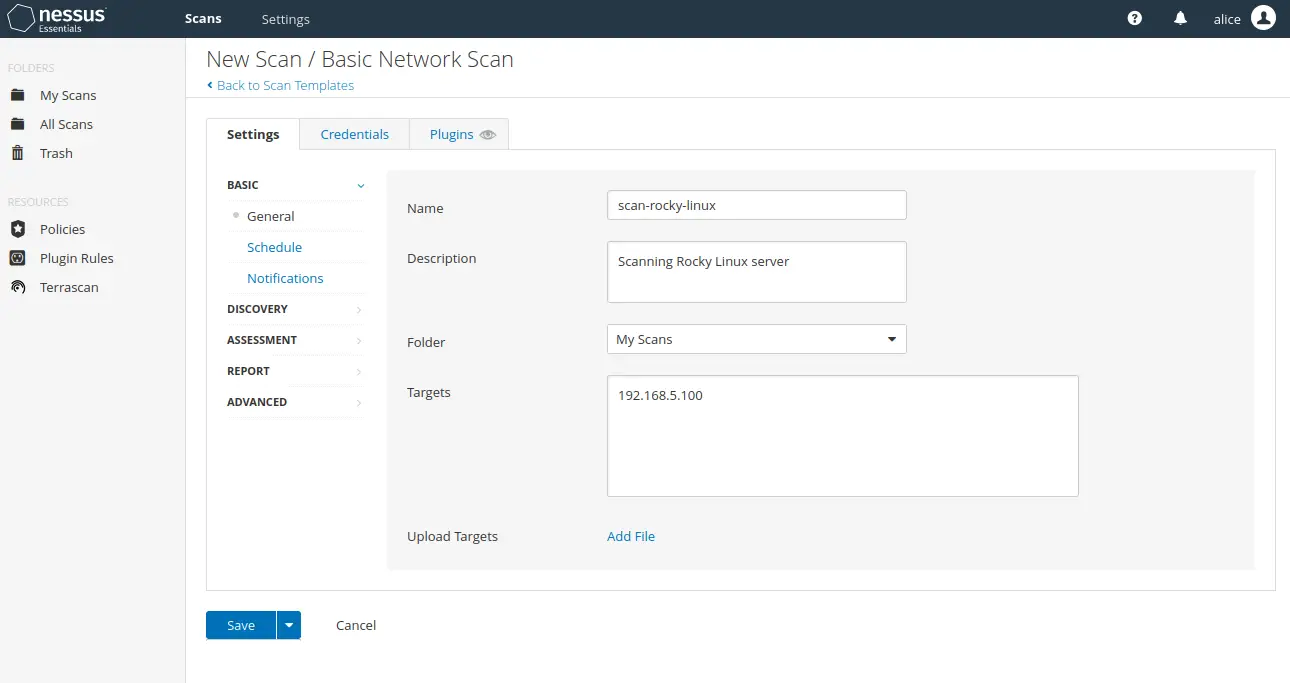
Input information about the new scan which includes name, description, folder to save, and the target host. Then click 'Save' to confirm and add the Nessus scan.
This example will create a new scan 'scan-rocky-linux' that will be stored in the 'My Scans' folder and the target server is '192.168.5.100'.
Next, click the 'My Scan' menu on the left and you can see the new 'scan-rocky-linux' is created. Click the play button to start the scan.

Now the 'scan-rocky-linux' is running.

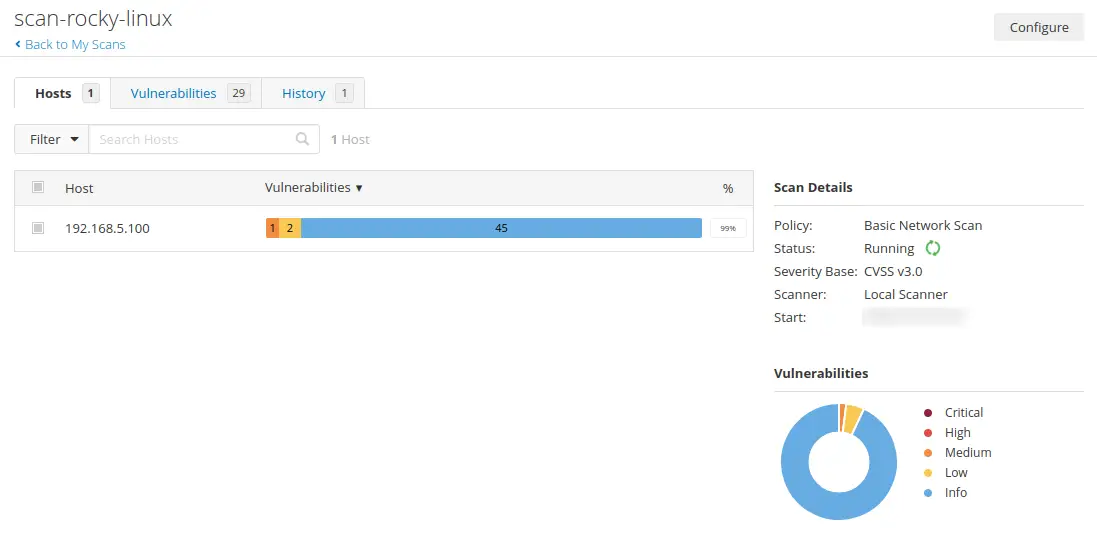
Click on the 'scan-rocky-linux' to get details results from your scan.
Below is a simple summary of the host scanned by Nessus.
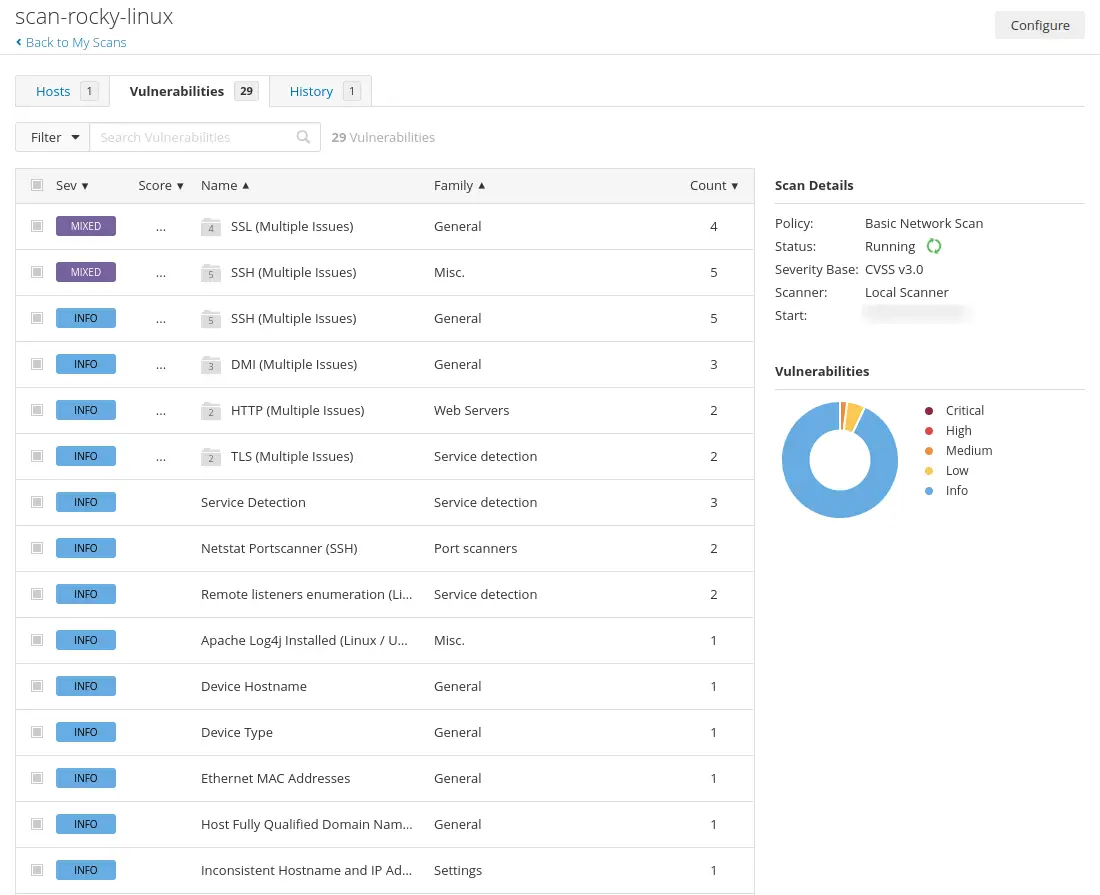
Now click on the 'Vulnerabilities' tab to get detailed information about vulnerabilities to detect by Nessus.
Conclusion
Congratulation! You have now successfully installed Nessus Security Scanner on the Rocky Linux server. You also have finished the Nessus installation and configured the nessuscli via the system $PATH environment variable. With the nessuscli, you can run a scan and manage your scan from your terminal server.
In the end, you also have learned how to create a scan on Nessus and scan the server to detect security vulnerabilities and get some security recommendations.

